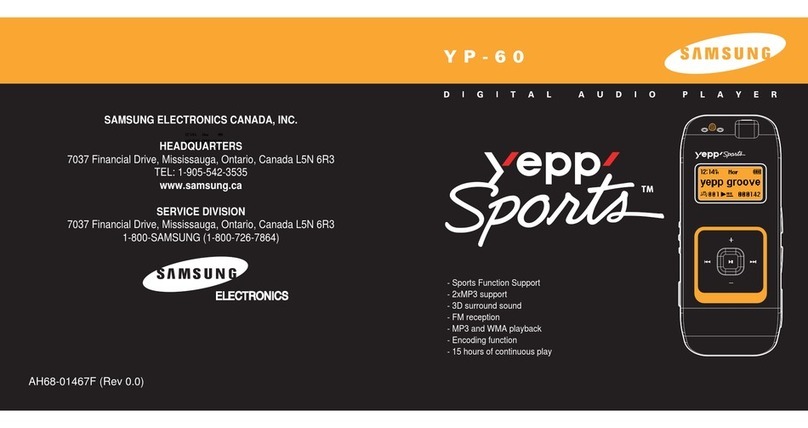
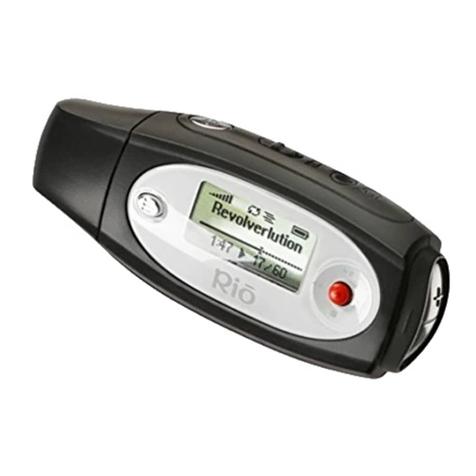
iLyn SF-403EX User manual

Operation manual
Welcome
Thank you very much for the purchase of mini-compact digital audio
player iLyn.
iLyn digital audio player is not only designed and manufactured to fit our
company's quality standard and International Specification standard, but
also is manufactured after conducting strict quality-test.
We are certain that SF-403EX digital audio player, after being
manufactured through such procedures, will bring you a high satisfaction.
We truly appreciate your purchase of iLyn and we hope that you will
have great life with SF-403EX.
Since Sodiff E&T Co., Ltd. have the ownership of copyright of this
product, the use of this product's operation manual, pictures, software,
and other related documents will require permission to use from Sodiff
E&T Co., Ltd. Authorization and Commercial use without permission will
end up in legal punishment.
• The content of the operation manual and function of the
product can vary depending on the circumstances.
Model: SF-403EX

Ⅰ. Getting ready
1. Welcome 2.Warning 3.Special features 4.Components check 5.Name of
the components
II. Connecting to your computer
1. Connecting to computer 2. Installing UMS driver to Windows 98
3. Using portable disk - file download, upload -disconnecting USB cable-
Formatting
4. Using LOGO CONVERT 5. Recharging the battery
III. The basic operations
1. Listening to the songs 2.Adjusting the volume 3.Hold setting 4.
Recording –Voice recording –external source recording - FM radio
recording 5. FM radio recording
IV. Additional Functions
1. Setting interval repeat 2. Mode change
3. Utilizing Navigation 4. Menu setting 5.Encoding setting
6. Play control setting
-EQ Setting (EQ select, SRS, True-bass, Wow, user EQ) -Speed
controlling -play mode setting 7.File delete/format 8.Timer setting
9. Display setting –LCD (contrast, Time) -File/TAG -(watch) setting
10.Memory capacity check 11.Language setting 12.User Logo setting
13. Firmware Upgrade/Font upgrade 14. Forced format
VI. Appendix
menu at glance

VII. Customer Service
It is not broken Product features Quality Certificate
□ Caution
Please be cautious with following circumstances in order to use your
player safely
1. Do not let it get shocked or impacted.
This player will not have any trouble during walking and running, but
being dropped or getting hit by heavy object will cause damage.
2. Do not let water get into your player.
When water or any liquid gets inside of your machine, it will damage
inner components of you player.
3. Storage environment
Avoid wet and humid, magnetic field forming, strong heat emitting
area.
4. Do not put heavy object on top of your player. Avoid chemical
products such as benzene, thinner.
5. Never try to open or reconstruct your player.
6. Try to not to listen with the volume set to the highest in order to
prevent hearing loss.

7. Keeping your rechargeable lithium ion battery should take the cautions
written below.
- Battery functioning temperature: -40C ~ +80C
- USB Recharging temperature: 0C ~ +45C
- Usable period: -20C ~ +35C (More than 6 months)
-20C ~ +45C (within a month)
※ When it is too hot or too cold the usable period of the battery will be
reduced, so please keep in under proper temperature (-20C ~ +35C).
8. When radio record setting is on, the battery consumption will be at
large, so when you are not using the program please keep the radio-
recording time setting to off.
□ Product features
-. Time set up
Year, Month, Day, Time can be displayed.
-. WMA Direct Encoding
Saves and Plays mp3 files and Microsoft's Window Media Audio file
-. FM Radio/Real time FM recording
Reserve the time of your desired Radio play then record
-. Removable disk function (play&plug)
Without specific installing CD, USB plug will auto-detect the driver.
-. Various equalizer (EQ) support and 3D surround system support (SRS)
EQ (Normal, Classic, Live, Pop, Rock, SRS) and user EQ setting can
be chosen for the user to make your listening environment more exciting.

-. Voice recording function
With high quality WMA format, users can record maximum of 18:40
hour (256M, with 32 Bit-Rate standard).
-. Various play modes
One, RPT One, DIR One, RPT DIR, DIR Random, ALL One, RPT ALL,
ALL Random RP, Intro, A-B section play
-. Folder creating function (Infinite folders can be created)
MP3, WMA, REC will be managed within folders; therefore, fast
search and save will be achieved.
-. Multi-Language Support
Korean, English, Simple Chinese/ Traditional Chinese and other more
languages and display of the song title and the lyrics in supported
languages.
-. Rechargeable Lithium ion Battery installed (420mAh)
No need to buy other battery; therefore the burden of replacing is
relieved and recharging can be simply done through USB connection.
-. Organic EL display
Bright and elegant display can be achieved by Organic EL display.
-. Play Speed Control
Various play speed (Slow:-80%, Normal: 0%, Fast: 100%) control will
help you studying foreign language by enabling clearer pronunciations
with attached FF/REW jog button.

-. Firmware Upgrade
By Utilizing Firmware download function, this functions can be
upgraded.
-. Resume function to the unit of second
When the power was turned off while playing, the song will
automatically start from where it ended, when power is turned on.
-. File Delete (Folder)
Each folder can be selected then deleted, also format function will
allow you to delete every file at once.
-. Alarm Function (sleep, record, power)
Certain time interval(0~180 minuites) can be selected for song play,
Voice record/play.
-. Memory Capacity Indicator
Displays available memory left.
-. NetSync support and auto-lyrics display function
By supporting NetSync EBS, foreign language study, contents use,
and auto-lyrics display can be supported.

□Components Check
USBCABLE MINIUSB OPERATIONMANUAL
Install CD Neckband Audio cable
<Earphone, case and armband are optional>
- Installed memory holding capacity can have a little difference
from the memory that you can actually use, as inner firmware need to
use some parts of them.
- You can buy or exchange your accessories that can be purchased
at the iLyn customer's center.
□ Names of each components

Recommended PC environment :
- USB 1.1 supportable port
- Over Pentium 133MHz
- OS : Win 98SE/ME/2000/XP/MAC 9.2, 10.2
□ Connecting to the computer
※ If you have Windows 98 you need to install USB driver separately.
Refer to "Installing UMS DRIVER to Windows 98" if you want more
detailed install process.
1. Connect USB Cable (bigger part) to USB port of the computer.
2. Connect USB Cable (smaller part) to MP3 Player.
3. If connected correct you
can see "USB Connect" on the
MP3 screen and if you open
explorer or my computer folder
on your computer, you can see
"Portable disk".
※ When you first connect MP3 Player to the computer, needed driver
installing screen will appear.

4. Ways to check connection of USB driver
- Windows 98/ME :
My computer(explorer) -> Control
panel -> System -> device manager
- Windows 2000 :
My computer(explorer) -> Control
panel -> System -> Hardware ->
device manager
- Windows XP :
My computer(explorer) -> Control
panel -> Performance and maintenance
management -> System -> Hardware -
> device manager
5. In case, portable disk doesn't appear refer to 'USB driver update'.
□ When you are not connectable to your computer
◎ USB driver update
1. Make sure to check USB device
(?), ?, ‘unknown device’ on
other device or Parallel Serial
Bus(Windows98, ME :
Universal)controller from
device manager.
2. Double click 'next'.
클릭

3. Choose driver tap and start driver
update
4. Choose list or specific location
install.
5. Click 'Next'
6. Including the area of search : Input
C:₩windows₩inf.
<* If you have Win 2000
C:₩winnt₩inf>
7. Searching
.
8. When everything completed, you can
check large capacity hold device, as it is
shown in the left picture.
클릭
클릭

□ Install UMS DRIVER to windows 98
-. In case you have Windows 2000/ME/XP your computer recognize
PLUG&PLAY function automatically.
-. In case you have Windows 98/98SE, it is usable only when UMS
driver is installed.
-. Install WIN98MASS software as following , which is included in the
install CD.
◈ When you don't have install CD, you can download
WIN98MASS.ZIP file from www.iLyn.co.kr archive.
1. From iLyn Explorer CD double-click the WIN98MASS folder and run
SETUP file.
- After you click OK button, the computer will be restarted and
Window 98 Drivers installation will be finished.


□ Portable Disk Usage
- File Download and Upload
1. Connect MP3 Player's USB
cable to the computer.
2. Open 'My Computer' or
'Windows Explorer'.
3. DRAG & DROP the file that
you want to download to the
portable disk.
4. It cannot restore the file if
you delete from the 'player', so
be careful.
♣ Caution : Do not disconnect the USB cable from the computer while it
is downloading or uploading the file. It may cause error.
- Disconnecting USB Cable
♣ If OS of your computer is ME/2000/XP, you must use the 'Hardware
Disconnect or Eject' before you disconnect your MP3 player from the
computer. There are two ways of disconnecting the hardware.
First Way)
1-1. Click on the left button of the
mouse at the top of "Hardware
Disconnection or Eject" icon, the "USB
large holding capacity system-
Drive(X) Stop" window will show up.

1-2. Click on the message and click the "OK" button and disconnect your
MP3 player from the computer.
Second Way)
Disconnect your MP3 player just as it is shown in the pictures below.
□ Logo Convert Usage
The image should be in 128x64 Pixel, 'Black and White
Bit-Map'(.bmp) file.
(In color image case, it automatically changes into black
and white, however, we recommend you to edit into black and white in
order to get the image that you aspire.)
1. LOGOCONV folder from the
CD -> run LOGOCONV.EXE file.
2. Load Image <User Logo Converting Tool Screen>

Click on the ILYNLOGO.BMP file that you created and click again on
the edited Bit-Map file. Then, the chosen image will show up in the
window. The display will show color file in color and black and white
file in black and white.
3. Change into black and white(Color, if it's in gray scale)
Change color into black and white. Change the THRESHOLD value in
the editor box and confirm the image sign that is shown on the screen
by clicking on the PREVIEW button. Repeat this again in order to get
the most suitable image.
THRESHOLD value is 0 to 255.
4. Format Change
Click on the convert button after changing the image the way you
want, in order to change the image which the MP3 player can encode.
The converted image which has the same image from the original will
be formed as "ALG" file.
5. Download
Download the converted image 'ILYNLOGO.ALG' file to the portable
disk.
• Be sure name the logo as 'ILNLOGO.ALG'
6. User Logo Setting
Consult the user logo option of 'Added function usage'
* Caution : If you FORMAT or DELETE ALL, it could also delete
image file. Therefore, before you format backup the image file.

□ Battery Charge
1. While the computer is on, connect the MP3 player to the USB plug.
2. While it is on charge, the blue LED on MP3 player will be turned on.
When it is finished the LED will automatically turns off.
- The charging time is three hours.
Ⅲ. Basic Operation
1. On/Play
Press the (▶/■
) button to turn on the player. Press it again to play.
2. Stop/Off
Press (▶/■) button while playing to stop the music. Press (▶/■) button again to
restart. Hold (▶/■) button for several seconds to turn off the power.
Inserting ENDING Screen
◀◀/▶▶ Short click:◀◀- Previous track▶▶- Next track
◀◀/▶▶Long click:◀◀- Fast Forward▶▶- Fast Reverse
- Slide Jog button left /right for a short period while playing to move you
to the forward (next) track. If the music has been played for more than
5sec it will play the same track from the start, however, if it was less
than 5sec it will play the previous track.

- While playing, press jog button left/right for long to fast forward/reverse.
If you moved to start or end of the track, the player will start the same
track from the first.
Adjusting volume
Press ╋ /━ button to adjust the volume
from 0 to 40 level.
Holding function
- Appears on the screen when hold is on
- When “Hold” is ON, the buttons on the player will
not function
- Utilizing Hold function while playing can be
convenient for certain occasion
* You can see this screen, while operation the
function
Recording
Recording Voice
※ When you change mode from voice mode to any other modes refer
to mode changing in additional function.

1. S
t
art recording : Press recording button ( ⊙ ) on Music mode or
Voice mode to record and the player will automatically change to
recording mode.
2. Pause recording : Press Play button (
▶▶ll
) for short to pause
recording.
3. Stop recording : Press recording button ( ⊙ ) for long to stop
recording and new Voice file will be created.
- It will be recorded as WMA file and saved as V001, V002 … in
sequential order.
- Recording quality will be recorded as bit rate that is determined by
MIC or exterior sound source.
- The maximum time of recording can be different by setting up bit
rate and the player will automatically stop recording when the
maximum time of recording become full.
(refer to page ..)
※ Press FM button for long to change mode and listen to music or
radio
-Recording from an external audio source
※
When you change mode from line in mode to any other modes
refer to mode changing in additional function.

Press FM button for long to change to Line
mode.
1. Connect the line in cable to the jack of
the player.
2. Connect the line out cable to the jack
of the external equipment (CDP, MD,
Walkman, audio and etc)
3. Press recording button ( ⊙ ) after playing external equipment to
start recording.
4. Listening recorded file : Press FM button to play.
- Ways of start recording, pausing and stopping are same with
voice recording.
- It will be recorded as WMA file and saved as V001, V002 … in
sequential order.
※ Caution
If Line-In cable gets unplugged while recording the recording will stop.
You should adjust your volume before recording for the case, in which
the volume of the external equipment is too low (high); the result
could end up in a poor quality with low volume.
※
When you want to change FM mode to any other modes, refer to
‘mode changing’ in additional function section.
4. Recording : Press record button ( ⊙ ) while listening FM radio to
record radio.
- Recording FM tuner.
Table of contents


