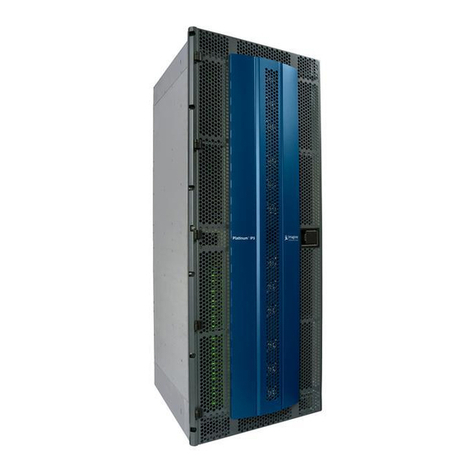
Imagine Platinum VX User manual

Platinum™ VX
Frame and Modules
Version 1.2
January 2016
Installation and Operation Manual

Platinum™ VX Frame and Modules Installation and Operation Manual
© 2016 Imagine Communications Corp. Proprietary and Confidential. Version 1.2 | Page 2
Publication Information
© 2016 Imagine Communications Corp.
Proprietary and Confidential.
Imagine Communications considers this document and its contents to be proprietary and confidential.
Except for making a reasonable number of copies for your own internal use, you may not reproduce this
publication, or any part thereof, in any form, by any method, for any purpose, or in any language other
than English without the written consent of Imagine Communications. All others uses are illegal.
This publication is designed to assist in the use of the product as it exists on the date of publication of
this manual, and may not reflect the product at the current time or an unknown time in the future. This
publication does not in any way warrant description accuracy or guarantee the use for the product to
which it refers. Imagine Communications reserves the right, without notice to make such changes in
equipment, design, specifications, components, or documentation as progress may warrant to improve
the performance of the product.
Trademarks
Platinum™, Platinum™ IP3, Magellan CCS Navigator™ are trademarks or trade names of Imagine
Communications or its subsidiaries.
Microsoft® and Windows® are registered trademarks of Microsoft Corporation. All other trademarks and
trade names are the property of their respective companies.
Contact Information
Imagine Communications has office locations around the world. For domestic and international location
and contact information, visit our Contact page
(http://www.imaginecommunications.com/company/contact-us.aspx).
Support Contact Information
For domestic and international support contact information see:
Support Contacts (http://www.imaginecommunications.com/how-buy/contact-us)
Worldwide Support e-mail (mailto: service@imaginecommunications.com)
Customer Community Portal (http://app.imaginecommunications.com/customercommunity)
Warranty & Contract Information (http://www.imaginecommunications.com/services/customer-
care)
Academy Training (http://www.imaginecommunicationsacademy.com)
Product Manuals (http://www.imaginecommunications.com/services/product-manuals)

Platinum™ VX
Installation and Operation Manual Contents
© 2016 Imagine Communications Corp. Proprietary and Confidential. Version 1.2 | Page 3
Contents
Preface................................................................................................................... 8
Manual Information .................................................................................................................................8
Purpose.................................................................................................................................................8
Audience...............................................................................................................................................8
Revision History....................................................................................................................................8
Writing Conventions...........................................................................................................................10
Obtaining Documents.........................................................................................................................10
Unpacking/Shipping Information ...........................................................................................................11
Unpacking a Product ..........................................................................................................................11
Product Servicing................................................................................................................................11
Returning a Product ...........................................................................................................................11
Safety......................................................................................................................................................11
Safety Terms and Symbols in this Manual .........................................................................................12
References..........................................................................................................................................12
Waste from Electrical and Electronic Equipment (WEEE) Compliance ..................................................13
Restriction on Hazardous Substances (RoHS) Compliance.....................................................................14
Platinum VX Overview ......................................................................................... 15
Platinum VX Features .............................................................................................................................16
Platinum VX CQS Features......................................................................................................................16
Platinum VX CQS Main Board Features..............................................................................................17
Platinum VX CQS Sub Board Features ................................................................................................ 17
Platinum VX Control Features ................................................................................................................17
Platinum VX Installation....................................................................................... 18
Electrical Requirements..........................................................................................................................18
Environmental Requirements.................................................................................................................18
Accessories Box ......................................................................................................................................18
Rack Mounting for 1/2 RU Frames .........................................................................................................19
Rack Mounting for 4/8 RU Frames .........................................................................................................20
Network Settings ....................................................................................................................................22
Setting IP and Subnet Mask Addresses ..............................................................................................23

Platinum™ VX
Installation and Operation Manual Contents
© 2016 Imagine Communications Corp. Proprietary and Confidential. Version 1.2 | Page 4
Platinum VX Frame .............................................................................................. 24
1 RU Frame (PV-16X16-FR-1)..................................................................................................................24
1 RU Frame (PV-CQ16-FR-1) with Clean and Quiet Switching................................................................25
2 RU Frame (PV-48X48-FR-2/PV-72X72-FR-2/PV-72SFP-FR-2)............................................................... 26
4 RU Frame (PV-FR-4).............................................................................................................................28
8 RU Frame (PV-FR-8).............................................................................................................................30
Platinum VX Modules........................................................................................... 32
Input/Output Modules ...........................................................................................................................33
HD-BNC I/O Module (PV-24C-IOG).....................................................................................................33
SFP I/O Module (PV-24O-IOG)............................................................................................................34
Back Module Extractor (1261Q).........................................................................................................35
Front Fan Module...................................................................................................................................37
Fan Status...........................................................................................................................................37
Servicing/Replacing Fan Modules in 1/2 RU Frames..........................................................................40
Servicing/Replacing Fan Modules in 4/8 RU Frames..........................................................................41
Fan Control Module................................................................................................................................42
Resource/Crosspoint Module (PV-144X144-3G4 or PV-288X288-3G8) .................................................43
Resource Module Redundancy ..........................................................................................................45
Adding a Second Resource Module into a Platinum VX Frame..........................................................46
Resource/Video Crosspoint Settings..................................................................................................46
Installing the Resource/Crosspoint Module into the Frame..............................................................47
Extracting the Resource/Crosspoint Module from the Frame...........................................................48
Resource/Crosspoint Status on the Frame ........................................................................................50
Communications Back Module...........................................................................................................51
Mid Plane Module ..................................................................................................................................55
Platinum VX Power Supplies...................................................................................................................58
Power Supplies in 4 and 8 RU frames.................................................................................................58
Power Supplies in 1 and 2 RU Frames................................................................................................61
Power Supply Status on the Frame ....................................................................................................63
Power Supply Status on the Dashboard.............................................................................................64
Power Supply Parameters ..................................................................................................................65
Clean and Quiet Switching ................................................................................... 66
Program and Preview Outputs ...............................................................................................................66
SFP Relay Bypass.....................................................................................................................................68
PV-CQ16-FR1 Genlock Specifications .....................................................................................................69
Platinum VX Specifications and Power................................................................. 70
Platinum VX Physical Specifications .......................................................................................................70

Platinum™ VX
Installation and Operation Manual Contents
© 2016 Imagine Communications Corp. Proprietary and Confidential. Version 1.2 | Page 5
Video Specifications................................................................................................................................71
Supported SFP Specifications .................................................................................................................71
Optical SFPs ........................................................................................................................................73
Electrical SFPs.....................................................................................................................................74
Analog Converters..............................................................................................................................75
HDMI Converters................................................................................................................................76
Platinum VX Power Consumption ..........................................................................................................78
Alarms and LEDs .................................................................................................. 79
System LEDs............................................................................................................................................79
Platinum VX Client Overview ............................................................................... 80
System and Network Requirements.......................................................................................................80
Platinum VX Web UI ...........................................................................................................................80
Platinum VX IP Address ......................................................................................................................80
Supported Network Protocols............................................................................................................80
Using Magellan CCS Navigator ...........................................................................................................80
Controlling your Platinum VX via a Hardware Control Panel.............................................................81
Telnetting into a Platinum VX.............................................................................................................88
Features..................................................................................................................................................89
Dashboard Overview ..............................................................................................................................89
Configuring the Platinum VX System......................................................................................................89
Accessing the Interface...........................................................................................................................89
Navigation............................................................................................................ 91
Platinum VX Dashboard..........................................................................................................................91
Parametric Control .................................................................................................................................93
Read-Only (Status Parameters)..........................................................................................................93
List Parameters...................................................................................................................................93
Range Parameters ..............................................................................................................................93
Table Parameters ...............................................................................................................................94
Frame Specific Details.............................................................................................................................95
Modules/Components in the Frame..................................................................................................97
Parameters ........................................................................................................ 105
Module Parameters..............................................................................................................................105
BNC Module Input Parameters ........................................................................................................105
BNC Module Output Parameters .....................................................................................................106
SFP Module Input Parameters..........................................................................................................107
SFP Module Output Parameters.......................................................................................................108

Platinum™ VX
Installation and Operation Manual Contents
© 2016 Imagine Communications Corp. Proprietary and Confidential. Version 1.2 | Page 6
CQS Parameters....................................................................................................................................113
CQS (1/2) Parameters.......................................................................................................................114
Reference Parameters......................................................................................................................114
Advanced Setting..............................................................................................................................115
Misc Parameters............................................................................................................................... 120
Frame Specific Parameters...................................................................................................................122
Frame Parameters............................................................................................................................122
Video Crosspoint and Control Parameters.......................................................................................123
Switch Point Parameters ..................................................................................................................124
Power Supplies Parameters .............................................................................................................125
Ethernet 1 Parameters .....................................................................................................................126
Ethernet 2 Parameters .....................................................................................................................127
Serial Port Parameters .....................................................................................................................128
Clock Parameters..............................................................................................................................129
Module Configuration........................................................................................ 131
CQS Module Configuration...................................................................................................................131
CQS Menu.........................................................................................................................................131
Reference Menu...............................................................................................................................132
Advanced Settings Menu..................................................................................................................132
Faults ................................................................................................................. 133
Module Faults.......................................................................................................................................133
Filtering Module Faults.....................................................................................................................134
Editing Module Fault Properties ......................................................................................................134
Module Fault Descriptions ...............................................................................................................134
Faults View ...........................................................................................................................................135
Fault Log ...............................................................................................................................................136
Fault Log Contents............................................................................................................................136
System Fault Descriptions ................................................................................................................137
System Configuration......................................................................................... 138
Manage Controller Settings..................................................................................................................139
Frame Control Mode ........................................................................................................................140
Database Foundry.................................................................................................................................141
Database Editor................................................................................................................................142
Restrict Editor...................................................................................................................................151
Categories and Index Editor .............................................................................................................154
Firmware Foundry ................................................................................................................................155
Upgrading the CQS Module..............................................................................................................157

Platinum™ VX
Installation and Operation Manual Contents
© 2016 Imagine Communications Corp. Proprietary and Confidential. Version 1.2 | Page 7
Upgrading to Version 1.2..................................................................................................................157
Note for 8 RU Frames: Upgrading from firmware version 1.0.1......................................................158
User Foundry ........................................................................................................................................159
Administrator Account .....................................................................................................................159
Operator Account.............................................................................................................................159
Changing the Administrator/Operator Password ............................................................................160

Platinum™ VX
Installation and Operation Manual Preface
© 2016 Imagine Communications Corp. Proprietary and Confidential. Version 1.2 | Page 8
Preface
Manual Information
Purpose
This manual details the features, installation, operation, maintenance, and specifications for the
Platinum VX.
Audience
This manual is written for engineers, technicians, and operators responsible for installation, setup,
maintenance, and/or operation of the Platinum VX.
Revision History
Version
Date
Comments
1.0
March 2015
First Release
1.0.1
April 2015
Minor corrections to content

Platinum™ VX
Installation and Operation Manual Preface
© 2016 Imagine Communications Corp. Proprietary and Confidential. Version 1.2 | Page 9
Version
Date
Comments
1.1
July 2015
Support for new Platinum VX SFP (PV-72SFP-FR-2)
Platinum VX SFP updates. The following sections were added/updated:
Updated Overview with reference to new 2 RU SFP frame
See Platinum VX Overview (on page 15).
Detailed info on new 2 RU frame
See 2 RU Frame (PV-48X48-FR-2/PV-72X72-FR-2/PV-72SFP-FR-2) (on page 26)
PV-72SFP main board
See PV-72SFP Modules (2 RU SFP frame) (on page 101)
Frame specific details.
See Frame Specific Details (on page 95)
Edits to Modules section
See Input/Output Modules (on page 33)
Power Consumption details for 2 RU Frame with SFPs
See Platinum VX Power Consumption (on page 78)
Parameters for supported SFPs
See SFP Module Input Parameters (on page 107) and SFP Module Output
Parameters (on page 108).
Support for new Platinum VX CQS (PV-CQ16-FR-1)
Platinum VX CQS updates. The following sections were added/updated:
Updated Overview with reference to new CQS module
See Platinum VX Overview (on page 15).
CQS Features
See Platinum VX CQS Features (on page 16)
Detailed info on new CQS frame.
See 1 RU (PV-CQ16-FR-1) Clean and Quiet Switching (see "1 RU Frame (PV-CQ16-
FR-1) with Clean and Quiet Switching" on page 25)
Clean and Quiet Switching Details
See Clean and Quiet Switching (on page 66)
Genlock Specifications for PV-CQ16-FR1
See PV-CQ16-FR1 Genlock Specifications (on page 69)
PV-32x32 main board
See PV-32x32 Modules (1 RU CQS frame) (see "PV-32x32 Modules (1 RU and 1 RU
CQS frames)" on page 102)
CQS Modules
See CQS Modules (see "PV-CQ16 Modules (CQS Modules)" on page 104)
CQS Parameters
See CQS Parameters (on page 113)
CQS Module configuration
See CQS Module Configuration (on page 131)
Other minor edits to:
System LEDs (on page 79)
Sync Ports (on page 54)

Platinum™ VX
Installation and Operation Manual Preface
© 2016 Imagine Communications Corp. Proprietary and Confidential. Version 1.2 | Page 10
Version
Date
Comments
1.2
January 2016
Support for System Mode operation. See System Mode (on page 140).
Support for Enhanced Salvos using Navigator. See Support for Salvos (on page 83).
Support for controlling Platinum VX using Legacy Control Panels. See Controlling
your Platinum VX via a Hardware Control Panel (on page 81)
X/Y Passthrough support via Telnet (and up to 32 connections). See Telnetting
into a Platinum VX (on page 87)
New Device Types - SD/HD Video and QL Video - when adding
sources/destinations in the Database Foundry. See Device Types (on page 148).
Redundancy and Front Fan Parameters are no longer present in the Frame
Parameters. See Frame Specific Parameters (on page 121)
Upgrading to version 1.2. See Upgrading to Version 1.2 (on page 157)
Upgrade information for 8 RU users on firmware version 1.0.1. See Note for 8 RU
Frames: Upgrading from firmware version 1.0.1 (on page 158)
Writing Conventions
This manual adheres to the following writing conventions.
Term or Convention
Description
Bold
Indicates dialog box, property sheet, field, button, check box,
list box, combo box, menu, submenu, window, list, and
selection names
Italics
Indicates email addresses, names of books and publications,
and first instances of new terms and specialized words that
need emphasis
CAPS
Indicates a specific key on the keyboard, such as ENTER, TAB,
CTRL, ALT, DELETE
Code
Indicates variables or command-line entries, such as a DOS
entry or something you type into a field.
>
Indicates the direction of navigation through a hierarchy of
menus and windows
hyperlink
Indicates a jump to another location within the electronic
document or elsewhere
Internet address
Indicates a jump to a Web site or URL
Obtaining Documents
Product support documents can be viewed or downloaded from our website. Alternatively, contact your
Customer Service representative to request a document.

Platinum™ VX
Installation and Operation Manual Preface
© 2016 Imagine Communications Corp. Proprietary and Confidential. Version 1.2 | Page 11
Unpacking/Shipping Information
Unpacking a Product
This product was carefully inspected, tested, and calibrated before shipment to ensure years of stable
and trouble-free service.
1. Check equipment for any visible damage that may have occurred during transit.
2. Confirm that you have received all items listed on the packing list.
3. Contact your dealer if any item on the packing list is missing.
4. Contact the carrier if any item is damaged.
5. Remove all packaging material from the product and its associated components before you install
the unit.
Keep at least one set of original packaging, in the event that you need to return a product for servicing.
Product Servicing
Except for firmware upgrades, modules are not designed for field servicing. All hardware upgrades,
modifications, or repairs require you to return the modules to the Customer Service center.
Returning a Product
In the unlikely event that your product fails to operate properly, please contact Customer Service to
obtain a Return Authorization (RA) number, and then send the unit back for servicing.
Keep at least one set of original packaging in the event that a product needs to be returned for service.
If the original package is not available, you can supply your own packaging as long as it meets the
following criteria:
The packaging must be able to withstand the product’s weight.
The product must be held rigid within the packaging.
There must be at least 2 in. (5 cm) of space between the product and the container.
The corners of the product must be protected.
Ship products back to us for servicing prepaid and, if possible, in the original packaging material. If the
product is still within the warranty period, we will return the product prepaid after servicing.
Safety
Carefully review all safety precautions to avoid injury and prevent damage to this product or any
products connected to it. If this product is rack-mountable, it should be mounted in an appropriate rack
using the rack-mounting positions and rear support guides provided. It is recommended that each frame
be connected to a separate electrical circuit for protection against circuit overloading. If this product

Platinum™ VX
Installation and Operation Manual Preface
© 2016 Imagine Communications Corp. Proprietary and Confidential. Version 1.2 | Page 12
relies on forced air cooling, it is recommended that all obstructions to the air flow be removed prior to
mounting the frame in the rack.
If this product has a provision for external earth grounding, it is recommended that the frame be
grounded to earth via the protective earth ground on the rear panel.
IMPORTANT! Only qualified personnel should perform service procedures.
Safety Terms and Symbols in this Manual
WARNING
Statements identifying conditions or practices that may result in
personal injury or loss of life. High voltage is present.
CAUTION
Statements identifying conditions or practices that can result in
damage to the equipment or other property.
References
Professional Video Standards
SMPTE 259M
SMPTE Standard for Television —10-Bit 4:2:2 Component and 4fsc Composite Digital Signals —
Serial Digital Interface
SMPTE 292M
SMPTE Standard for Television —Bit-Serial Digital Interface for High Definition Television Systems
SMPTE 424M
SMPTE Standard for Television —3G Signal/Data Serial Interface
SMPTE 344M
SMPTE Standard for Television —540 Mb/s Serial Digital Interface
DVB-ASI
Digital Video Broadcasting Interfaces for CATV/SMATV Headends and Similar Professional
Equipment
ITU-R BT601-4
For Serial Digital Video

Platinum™ VX
Installation and Operation Manual Preface
© 2016 Imagine Communications Corp. Proprietary and Confidential. Version 1.2 | Page 13
EMC Compliance
EN 55022-2010
Information technology equipment - Radio disturbance characteristics - Limits and methods of
measurement
EN 61000-3-2:2006 / A2:2009; EN61000-3-3:2008
EN55024:2010
Information technology equipment - Immunity characteristics - Limits and methods of measurement
CISPR 22:2008
CISPR 24:2010
Per the provision of the Electromagnetic Compatibility Directive 2004/108/EC of December 15, 2004.
FCC Part 15 Subpart B:2004
This device complies with Part 15 of the FCC Rules. Operation is subject to the following two conditions:
(1) this device may not cause harmful interference and (2) this device must accept any interference
received, including interference that may cause undesired operation.
ICES-003:2013
These devices do not exceed the Class “A” limits for radio noise emissions from digital apparatus as
set out in the interference standard entitled “Digital Apparatus”
Safety Standards
EN60950-1:2006 / A11:2009 / A1:2010 / A12:2011
Information technology equipment - Safety - Part 1: General requirements.
Waste from Electrical and Electronic
Equipment (WEEE) Compliance
The European Union (EU) Directive 2012/19/EU on Waste from Electrical and Electronic Equipment
(WEEE) deals with the collection, treatment, recovery, and recycling of electrical and electronic waste
products. The objective of the WEEE Directive is to assign the responsibility for the disposal of
associated hazardous waste to either the producers or users of these products. As of July 4, 2012, the
producers or users of these products were required to recycle electrical and electronic equipment at
end of its useful life, and may not dispose of the equipment in landfills or by using other unapproved
methods. (Some EU member states may have different deadlines.)

Platinum™ VX
Installation and Operation Manual Preface
© 2016 Imagine Communications Corp. Proprietary and Confidential. Version 1.2 | Page 14
In accordance with this EU Directive, companies selling electric or electronic devices in the EU will affix
labels indicating that such products must be properly recycled. (See our website for more information.)
Contact your local sales representative for information on returning these products for recycling.
Equipment that complies with the EU directive will be marked with a WEEE-compliant emblem.
Restriction on Hazardous Substances (RoHS)
Compliance
Directive 2011/65/EU—commonly known as the European Union (EU) Restriction on Hazardous
Substances (RoHS)—sets limits on the use of certain substances found in electrical and electronic
equipment. The intent of this legislation is to reduce the amount of hazardous chemicals that may leach
out of landfill sites or otherwise contaminate the environment during end-of-life recycling. The
Directive, which took effect on June 8, 2011, refers to the following hazardous substances:
Lead (Pb)
Mercury (Hg)
Cadmium (Cd)
Hexavalent Chromium (Cr-V1)
Polybrominated Biphenyls (PBB)
Polybrominated Diphenyl Ethers (PBDE)
According to this EU Directive, all products sold in the European Union will be fully RoHS-compliant and
“lead-free.” (See our website for more information.) Spare parts supplied for the repair and upgrade of
equipment sold before July 1, 2006 are exempt from the legislation. Equipment that complies with the
EU directive will be marked with a RoHS-compliant emblem.

Platinum™ VX
Installation and Operation Manual Platinum VX Overview
© 2016 Imagine Communications Corp. Proprietary and Confidential. Version 1.2 | Page 15
Platinum VX Overview
Imagine Communications' Platinum VX™ small to mid size router lineup is a dense and powerful series of
HD-SDI routers. It incorporates the latest equalization and reclocker technologies to deliver unparalleled
signal quality and reliability. The system supports both electrical and optical interfaces utilizing HD-BNC
and SFP (small form-factor pluggable) modules respectively providing unprecedented versatility in
system design and implementation. SFP modules currently support HDBNC-SDI, optical, A/D conversion,
and HDMI.
The Platinum VX supports video in matrix sizes from 16 x 16 up to 288 x 288 in four different frame
sizes:
Frame Size
Electrical
Inputs/Outputs
SFP
Inputs/Outputs
Total Inputs/Outputs
available
1 RU
16x16
16x16
32x32
1 RU CQS
18x18
12x12
30x30
2 RU
Config 1
48 x 48
-
48 x 48
Config 2
72 x 72
-
72 x 72
Config 3
48 x 48
24 x 24
72 x 72
4 RU
144 x 144
up to 144 x 144
8 RU
288 x 288
up to 288 x 288
The 1 RU variant of the Platinum VX offers 16 inputs and 16 outputs (HD-BNC) with the option to use
SFPs for an additional (optical or electrical) 16 inputs and 16 outputs. A 1 RU frame with a Clean and
Quiet module is also available. See 1 RU Frame (PV-16X16-FR-1) (on page 24) and 1 RU Frame (PV-CQ16-
FR-1) with Clean and Quiet Switching (on page 25).
The 2 RU variant can be ordered in a 48 x 48 HD-BNC configuration, or a 72 x 72 HD-BNC configuration,
or a 72 x 72 mixed configuration (24 x24 SFP and 48 x 48 HD-BNC). See 2 RU Frame (PV-48X48-FR-2/PV-
72X72-FR-2/PV-72SFP-FR-2) (on page 26).
4 and 8 RU variants of the Platinum VX offer Coax/Electrical (HD-BNC) and SFP back module variants,
with 24 inputs and 24 outputs per module. Redundant Video/Crosspoint Modules are available for the 4
and 8 RU variants. Redundant Power is available for all variants. See 4 RU Frame (PV-FR-4) (on page 28)
and 8 RU Frame (PV-FR-8) (on page 30).
With four different physical sizes the Platinum VX can be used for practically any application. The 1 RU
and 2 RU sizes are applicable for space restricted small matrix requirements. The 4 RU and 8 RU versions
are recommended when there is a requirement for a larger matrix, or scope for video matrix growth in
the future.

Platinum™ VX
Installation and Operation Manual Platinum VX Overview
© 2016 Imagine Communications Corp. Proprietary and Confidential. Version 1.2 | Page 16
Platinum VX Features
Density
Using HD-BNC and SFP connectivity, Platinum VX has the greatest density per rack unit of any SDI
video routing system on the market.
Wide Range of Supported Signal Types
SD-SDI & HD-SDI to 1080p (3 Gb/s)
ASI, SMPTE 310, SMPTE 305, etc.
Legacy analog video supported via conversion to/from SD-SDI on SFP I/O
Control Panels
The full line of Magellan™ control surfaces can be used with Platinum VX. Multiple panels can be
used on a single frame as needed for the individual routing needs of the customer. Magellan control
panels are ultra thin, less than 2 inches in depth. This allows them to be placed anywhere that is
convenient for the operational need of the router. They can be mounted in the rack with the
Platinum VX or placed in a remote location. Manual control of the Platinum VX router requires at
least one Magellan control surface.
Control System
Platinum VX has a web interface for configuration, similar to the Platinum IP3™ Controller software.
All setup, configuration, and database functions are accomplished through the web interface housed
within each of the four frames.
Automation Support
The Platinum VX supports XY serial control from automation systems, eliminating the need for new
drivers. Platinum VX also supports control using LRC and Virtual XY protocol over IP (Ethernet) which
has been implemented by many third-party manufacturers.
Versatility
With four frame sizes, Platinum VX installations can be tailored to the perfect size to support the
routing needs of today or expansion capability for the future. 1, 4, and 8 RU frames have the
capability to utilize SFP modules to enhance the performance characteristics of the frame. SFP cages
can be used for optical, additional HD-BNCs, analog conversion, and HDMI I/O.
Full Redundancy Capabilities
All four frame sizes of Platinum VX support redundant power capability. The 4 RU and 8 RU systems
also support optional redundancy for the Crosspoint/Controller within the frame.
Platinum VX CQS Features
Clean and Quiet Switcher in a 1 RU chassis
Frame sync or line sync operation
User-selectable transition modes and duration
Signal presence monitoring
Error monitoring (EDH and CRC)
Freeze and Black monitoring

Platinum™ VX
Installation and Operation Manual Platinum VX Overview
© 2016 Imagine Communications Corp. Proprietary and Confidential. Version 1.2 | Page 17
See Platinum VX CQS Main Board Features (on page 17) and Platinum VX CQS Sub Board Features (on
page 17).
Platinum VX CQS Main Board Features
16 HD-BNC SD/HD/3G SDI inputs
6 SFP cages for dual SFP inputs
2 SFP cages for SFP relay bypass inputs and outputs
One RS-232/422/485 Serial com port for legacy XY protocol over serial support
16 HD-BNC SD/HD/3G SDI outputs
6 SFP cages for dual SFP outputs
Platinum VX CQS Sub Board Features
Four auto-sensing SD/HD/3G SDI inputs with Auto ASI bypass
Signal presence monitoring
Error monitoring (EDH, CRC)
Freeze and Black monitoring
Two processed SD/HD/3G SDI outputs with processing bypass option for each output
Audio and Video Processing
Four video frame synchronizers with H-Phase, V-Phase and Frame delay controls
Four line synchronizers for minimum latency operation
Four configurable video mixers, with arbitrary transition timing of up to four seconds for the
following transition modes: Cut, X-Fade, V-Fade, Cut-Fade and Fade-Cut
Four independent simple test signal generators (TSG)
Four 16 channel audio de-embedders
64 channels of audio proc amp capability for Mute, Gain, Swap/Copy, Invert, and Sum
Four Audio Mixers, supporting the following transition modes with arbitrary transition timing (up to
4 seconds)
Cut
X-Fade
V-Fade
Cut-Fade
Fade-Cut
Four 16 channel audio embedders
Platinum VX Control Features
See Platinum VX Client Overview (on page 80)

Platinum™ VX
Installation and Operation Manual Platinum VX Installation
© 2016 Imagine Communications Corp. Proprietary and Confidential. Version 1.2 | Page 18
Platinum VX Installation
Prior to installing your system, ensure that certain environmental and electrical conditions are met.
Electrical Requirements
The Platinum VX power supplies have a universal input of 100-240 VAC at 47 to 63 Hz (nominal), 75 W.
There is no voltage selector switch. Each frame has space for two power supplies; however, a single
power supply can meet the requirements of a fully-loaded frame.
Environmental Requirements
Platinum VX units are cooled by forced air drawn in from the front, and exhausted through the rear.
There must be free passage for air flow at the front and back of each unit to allow for adequate
ventilation. Take care to select a dry, well-ventilated location with a minimum of dust.
Platinum VX units are designed for mounting in a standard 19-in. (48-cm) rack using front-mounting ears
and rear support brackets, occupying a vertical space of 1.75 in (1 RU), 3.5 in (2 RU), 7 in (4 RU), or 14 in
(8 RU).
When installing a Platinum VX in a rack, ensure that there is adequate space behind the mounting ears
and clearance for the rear connecting cables. Allow about 10 inches (25 cm) of slack in the rear
connecting cables for frame access and maintenance.
After unpacking the frame, and before installing into a console or rack, allow at least 30 minutes for
temperatures to equalize and to eliminate any condensation that may have developed. Platinum VX
frames require an ambient temperature of between 32°F and 104°F (0°C to 40°C) with relative humidity
of 10% to 90% non-condensing).
Accessories Box
Table 1: Accessories Box shipped with Platinum VX frames
1 RU Frame
2 RU Frame
4 RU Frame
8 RU Frame
Power Cords
Power Cords
Power Cords
Power Cords
Power Supplies
Power Supplies
Extractor Handle
Extractor Handle
Rack Mounting Kit
See Rack Mounting Kit for 1 and 2 RU
Frames (on page 19)
Rack Mounting Kit
See Rack Mounting Kit for 4 and 8 RU
Frames (on page 19)

Platinum™ VX
Installation and Operation Manual Platinum VX Installation
© 2016 Imagine Communications Corp. Proprietary and Confidential. Version 1.2 | Page 19
Table 2: Rack Mounting Kit for 1 and 2 RU Frames
Item
Part Number
Quantity
Tie bar screws
6-32X3/8 PH_Q
2 pcs
Rear support arms
164-000306Q00
2 pcs
Cable tie bar
164-000305Q00
1 pc
Table 3: Rack Mounting Kit for 4 and 8 RU Frames
Item
Part Number
Quantity
Bracket screws
4-40X1/4 PH_Q
2 pcs
Brackets
FR-905-M7
2 pcs
Rear Support Bar
164-100083Q00
2 pcs
Rack Mounting for 1/2 RU Frames
Although the pre-installed frame-mounting ears provide the main support for the Platinum VX within a
rack, you must install arms, brackets, and a cable relief bar at the rear of the unit to support the weight
of cabling and frame stacking.
Note: The frame mounting ears and the rack support brackets are reversible. You can install them with
the ears at the front and support brackets at the rear or with the ears at the rear and the support
brackets at the front.
The following procedure describes how to install the rack supports.
1. Locate the accessories box. Note that brackets are pre-attached to the frame, and these are what
the arms slide into.
Figure 1: Pre-installed brackets on frame

Platinum™ VX
Installation and Operation Manual Platinum VX Installation
© 2016 Imagine Communications Corp. Proprietary and Confidential. Version 1.2 | Page 20
2. Attach the cable tie bar between the two support arms using the screws that are provided. You can
secure the cable tie bar through any of the screw holes on the arm.
Figure 2: Attaching the Cable Tie Bar
3. Push the Platinum VX into the front of the rack, and attach the frame’s front-mounting ears to the
rack using the appropriate screws (not provided).
4. Slide the two arms into their slots from the back of the frame and attach the arms to the back of the
rack.
Figure 3: Installed Support Arms and Cable Tie Bar
Rack Mounting for 4/8 RU Frames
Although the front mounting ears provide the main support for the frame within a rack, you must install
additional brackets at the rear of the unit to support the weight of cabling and frame stacking. Attach
the brackets to the frame using only the screws that are provided.
Note: The frame mounting ears and the rack support brackets are reversible. You can install them with
the ears at the front and support brackets at the rear, or with the ears at the rear and the support
brackets at the front.
Table of contents
Other Imagine Network Router manuals
Popular Network Router manuals by other brands
EtherWAN
EtherWAN 5-Port and 8-Port Pocket Size Fast Ethernet... user guide
SONIQ
SONIQ CWR300ND-AU instruction manual
Asus
Asus RT-AC5300 quick start guide
WM Systems
WM Systems M2M PRO4 DCU user manual
Chroma
Chroma Magic Box EtherSwitch 7 user manual
D-Link
D-Link DXN-221 - HD MediaBridge Coax Network... user manual
