To Cook Soups and Stews:
•Select recipes that will cook in 1 hour or less. Use only meats and poultry that are cut into cubes
no larger than 1 ½ inches. It is not necessary to brown the meats before cooking.
•Combine meats, vegetables and liquids in the cooking bowl.
Note: Since most frozen vegetables cook very quickly, it is best to add them at the end of the
cooking time. Stir them into the soup or stew and allow the mixture to cook an additional 5 to 10
minutes.
Caution: Do not overfill cooking bowl.
•Stir with a wooden or plastic spoon until ingredients are blended well.
•Before placing the cooking bowl into the cooker, make sure the heating plate and outside
surface of the cooking bowl are clean and dry.
Note: Do not let loose food or particles fall into the cooker.
•Insert cooking bowl into the cooker.
•Cover unit with glass lid.
•Plug into a standard 120 Volt AC outlet. The orange indicator light comes on (WARM)
•Press down the ON switch. The red indicator light (COOK) comes on and cooking begins.
Caution: Steam comes out through the steam vent on the lid.
•Set your kitchen timer to the desired cooking time.
Note: The ON switch and red indicator light are not intended to be an indicator of cooking time.
Always use a kitchen timer and do not leave these foods unattended. Cooking time will vary
depending upon type and amount of food to be cooked.
•For best results, stir several times during the cooking process.
•Cover unit with glass lid when stirring is done.
•When cooking is complete, remove the lid, remove food and serve.
Caution: Do not keep cooked soups or stews in the warm cycle.
•Unplug the unit from wall outlet and allow appliance to cool completely.
Caution: The appliance has no ON/OFF button. Make sure you unplug the appliance when not in
use.
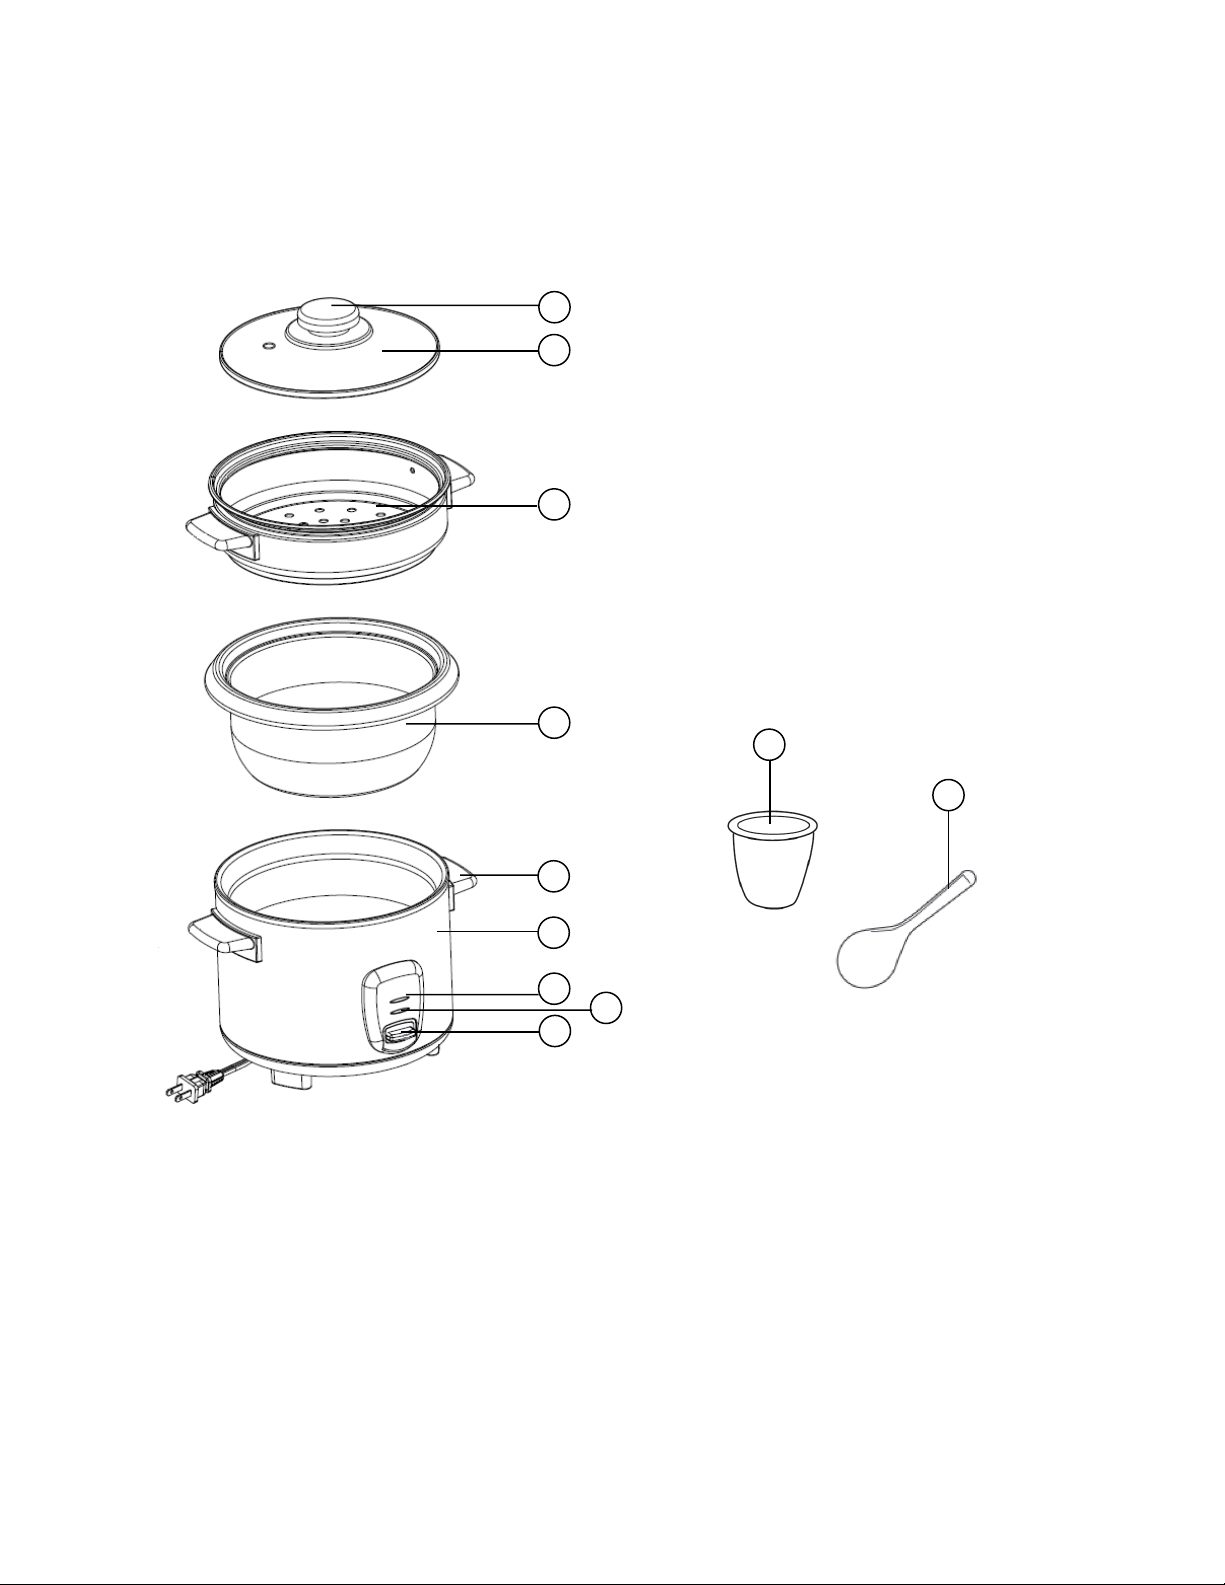
To Use Steam Basket (if applicable):
•Pour 2 cups of cold tap water into cooking bowl using measuring cup provided. Add seasoning, if
desired.
•Place vegetables or other food in the steam basket.
•Before placing the cooking bowl into the cooker, make sure the heating plate and outside
surface of the cooking bowl are clean and dry.
•Insert cooking bowl into the cooker.
•Place steam basket on top of cooking bowl.
•Cover unit with glass lid.
Caution: To avoid loss of steam and longer cooking times, do not open the lid at any point during
the cooking process.