manuals.online logo
Brands
  1. Home
  2. •
  3. Brands
  4. •
  5. Indesit
  6. •
  7. Washer
  8. •
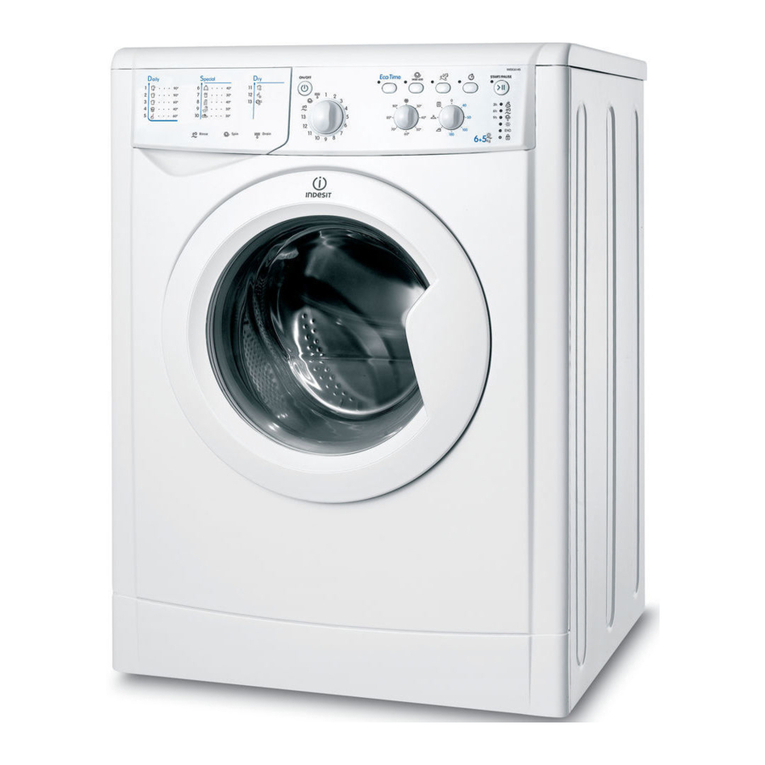
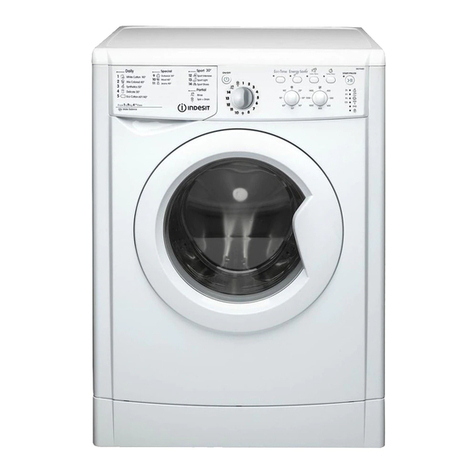
  9. Indesit WIE 127 User manual

Indesit WIE 127 User manual

1
GB
English, 1
Contents
Installation, 2-3-4-5
Unpacking and levelling, 2
Electric and water connections, 2-3
The first wash cycle, 4
Technical details, 5
Washing machine description, 6-7
Control panel, 6
isplay, 7
MEMO Programme, 7
tarting and Programmes, 8
Briefly: how to start a programme, 8
Programme table, 8
Personalisations, 9
Setting the spin cycle, 9
Setting the elay Timer, 9
Setting the temperature, 9
Functions, 9
Detergents and laundry, 10
etergent dispenser, 10
Bleach cycle, 10
Preparing your laundry, 10
Special items, 10
Woolmark, 10
Precautions and advice, 11
General safety, 11
isposal, 11
Saving energy and respecting the environment, 11
Care and maintenance, 12
Cutting off the water or electricity supply, 12
Cleaning your appliance, 12
Cleaning the detergent dispenser, 12
Caring for your appliance door and drum, 12
Cleaning the pump, 12
Checking the water inlet hose, 12
Troubleshooting, 13
ervice, 14
Before calling for Assistance, 14
WA HING MACHINE
WIE 127
Instructions for use
GB
2
GB
Installation
Keep this instruction manual in a safe place for
future reference. Should the appliance be sold,
transferred or moved, make sure the instruction
manual accompanies the washing machine to inform
the new owner as to its operation and features.
Read these instructions carefully: they contain vital
information on installation, use and safety.
Unpacking and levelling
Unpacking
1. Unpack the washing machine.
2. Check whether the washing machine has been
damaged during transport. If this is the case, do not
install it and contact your retailer.
3. Remove the 3
protective screws and
the rubber bush with the
respective spacer,
situated on the rear of
the appliance (see also
the installation leaflet).
NB:The plastic spacers
may fall down inside the
machine once the bolt
has been removed, and will not interfere with the
operation of the machine.
4. Seal the gaps using the plastic plugs provided.
5. Keep all the parts: you will need them again if the
washing machine needs to be moved to another
location.
Packaging materials are not children's toys.
Levelling
Your machine may make a considerable amount of noise
if the two front feet have not been adjusted correctly.
1. Install the washing machine on a flat sturdy floor,
without resting it up against walls, furniture cabinets
or other.
2. If the floor is not
perfectly level, compen-
sate for any unevenness
by tightening or
loosening the adjustable
front feet (see figure);
the angle of inclination,
measured according to
the worktop, must not
exceed 2°.
Levelling your appliance correctly will provide it with
stability and avoid any vibrations, noise and shifting
during operation. If it is placed on a fitted or loose
carpet, adjust the feet in such a way as to allow
enough room for ventilation beneath the washing
machine.
Electric and water connections
Connecting the water inlet hose
1. Insert seal A into the
end of the inlet hose
and screw the latter
onto a cold water tap
with a 3/4 gas threaded
mouth (see figure).
Before making the
connection, allow the
water to run freely until
it is perfectly clear.
2. Connect the other end
of the water inlet hose to
the washing machine,
screwing it onto the
appliance's cold water
inlet, situated on the top
right-hand side on the
rear of the appliance
(see figure).
3. Make sure there are no kinks or bends in the hose.
The water pressure at the tap must be within the
values indicated in the Technical details table
(on the next page).
If the water inlet hose is not long enough, contact
a specialist store or an authorised serviceman.
Ensure that the supply taps are allowing water
through. Old taps may seize in the closed position
and thus prevent water reaching the machine.
A
3
GB
erviceTroubleshootingPrecautions CareProgrammes DetergentsInstallation Description
Connecting the drain hose
Connect the drain hose,
without bending it, to a
draining duct or a wall
drain situated between
65 and 100 cm from
the floor;
The drain hose may be
connected to an
under-sink trap. Before
connecting the drain
hose from the machine
ensure that any blanks
or removable ends
have been taken off
the spigot.
If it is place over the
edge of a basin or sink
be sure the free end of
the hose should not be
underwater.
 We advise against the use of hose extensions; in
case of absolute need, the extension must have the
same diameter as the original hose and must not
exceed 150 cm in length.
Ensure that if the drain hose is pushed into a
standpipe, that the end does not go down more
than 15cms (6 inches). If the hose is pushed down
too far, this may cause the machine to self -syphon
ie. continuously empty as it is filling.
Electric connection
Before plugging the appliance into the mains
socket, make sure that:
 the socket is earthed and in compliance with the
applicable law;
 the socket is able to sustain the appliance's
maximum power load indicated in the Technical
details table (see page 5);
 the supply voltage is included within the values i
ndicated on the Technical details table
(see page 5);
 the socket is compatible with the washing
machine's plug. If this is not the case, replace
the socket or the plug.
Your appliance is now supplied with a 13 amp fused
plug it can be plugged into a 13 amp socket for
immediate use. Before using the appliance please
read the instructions below.
WARNING - THIS APPLIANCE MUST BE EARTHE .
THE FOLLOWING OPERATIONS SHOUL BE
CARRIE OUT BY A QUALIFIE ELECTRICIAN.
Replacing the fuse:
When replacing a faulty fuse, a 13 amp ASTA
approved fuse to BS 1362 should always be used,
and the fuse cover re-fitted. If the fuse cover is lost,
the plug must not be used until a replacement is
obtained.
Replacement fuse covers:
If a replacement fuse cover is fitted, it must be of the
correct colour as indicated by the coloured marking
or the colour that is embossed in words on the base
of the plug. Replacements can be obtained directly
from your nearest Service epot.
Removing the plug:
If your appliance has a non-rewireable moulded plug
and you should wish to re-route the mains cable
through partitions, units etc., please ensure that
either:
the plug is replaced by a fused 13 ampere re-
wearable plug bearing the BSI mark of approval.
or:
the mains cable is wired directly into a 13 amp cable
outlet, controlled by a switch, (in compliance with BS
5733) which is accessible without moving the
appliance.
Disposing of the plug:
Ensure that before disposing of the plug itself, you
make the pins unusable so that it cannot be
accidentally inserted into a socket.
Instructions for connecting cable to an alternative plug:
Important: the wires in the mains lead are coloured in
accordance with the following code:
Green & Yellow Earth
Blue Neutral
Brown Live
65 - 100 cm
Where it connects
to the waste water
pipe cut end off
spigot or remove the
blanking cap
Obsah je uzamčen
Dokončete, prosím, proces objednávky.
Následně budete mít přístup k celému dokumentu.
Proč je dokument uzamčen? Nahněvat Vás rozhodně nechceme. Jsou k tomu dva hlavní důvody:
1) Vytvořit a udržovat obsáhlou databázi návodů stojí nejen spoustu úsilí a času, ale i finanční prostředky.
Dělali byste to Vy zadarmo? Ne*. Zakoupením této služby obdržíte úplný návod a podpoříte provoz a
rozvoj našich stránek. Třeba se Vám to bude ještě někdy hodit.
*) Možná zpočátku ano. Ale vězte, že dotovat to dlouhodobě nelze. A rozhodně na tom nezbohatneme.
2) Pak jsou tady „roboti“, kteří se přiživují na naší práci a „vysávají“ výsledky našeho úsilí pro svůj
prospěch. Tímto krokem se jim to snažíme překazit.
A pokud nemáte zájem, respektujeme to. Urgujte svého prodejce. A když neuspějete, rádi Vás uvidíme!

Other manuals for WIE 127

1

Other Indesit Washer manuals

Indesit IWC 81252 User manual

Indesit

Indesit IWC 81252 User manual

Indesit XWA 61051 User manual

Indesit

Indesit XWA 61051 User manual

Indesit BWA 71052 User manual

Indesit

Indesit BWA 71052 User manual

Indesit WITP 1021 User manual

Indesit

Indesit WITP 1021 User manual

Indesit IWSND 61253 User manual

Indesit

Indesit IWSND 61253 User manual

Indesit BWE 71453 User manual

Indesit

Indesit BWE 71453 User manual

Indesit IWD 7145 K User manual

Indesit

Indesit IWD 7145 K User manual

Indesit SISL 126 S User manual

Indesit

Indesit SISL 126 S User manual

Indesit WIN 102 User manual

Indesit

Indesit WIN 102 User manual

Indesit IWTE 61281 User manual

Indesit

Indesit IWTE 61281 User manual

Indesit BWSA 61052 User manual

Indesit

Indesit BWSA 61052 User manual

Indesit SIXL 125 S User manual

Indesit

Indesit SIXL 125 S User manual

Indesit PWE 91272 S User manual

Indesit

Indesit PWE 91272 S User manual

Indesit IWE 7125 User manual

Indesit

Indesit IWE 7125 User manual

Indesit WIXXL106 User manual

Indesit

Indesit WIXXL106 User manual

Indesit XWSE 61052 User manual

Indesit

Indesit XWSE 61052 User manual

Indesit WITP 102 User manual

Indesit

Indesit WITP 102 User manual

Indesit IWD 7148 User manual

Indesit

Indesit IWD 7148 User manual

Indesit IWC 6125 S User manual

Indesit

Indesit IWC 6125 S User manual

Indesit IWE 7168 S User manual

Indesit

Indesit IWE 7168 S User manual

Indesit XWSE 61253 User manual

Indesit

Indesit XWSE 61253 User manual

Indesit WITXL 109 User manual

Indesit

Indesit WITXL 109 User manual

Indesit PWE 81472 W User manual

Indesit

Indesit PWE 81472 W User manual

Indesit E2SD 1160C User manual

Indesit

Indesit E2SD 1160C User manual

Popular Washer manuals by other brands

LG WT5680H A owner's manual

LG

LG WT5680H A owner's manual

LG F4V9RWP2E owner's manual

LG

LG F4V9RWP2E owner's manual

Hotpoint WMD 940 P Instructions for use

Hotpoint

Hotpoint WMD 940 P Instructions for use

Bosch WAU28460ID Instruction manual and installation instructions

Bosch

Bosch WAU28460ID Instruction manual and installation instructions

LAVAMAT 86850 Instruction booklet

LAVAMAT

LAVAMAT 86850 Instruction booklet

Daewoo DWF-160M Service manual

Daewoo

Daewoo DWF-160M Service manual

Bosch WAX32MH9GB User manual and installation instructiions

Bosch

Bosch WAX32MH9GB User manual and installation instructiions

Zanussi ZWF943A2DG user manual

Zanussi

Zanussi ZWF943A2DG user manual

Fisher & Paykel ecosmart 420182 use & care

Fisher & Paykel

Fisher & Paykel ecosmart 420182 use & care

Panasonic NA-140VS4 Operating instructions & installation instructions

Panasonic

Panasonic NA-140VS4 Operating instructions & installation instructions

Galanz XQG90-T514VE Service manual

Galanz

Galanz XQG90-T514VE Service manual

AEG LAVAMAT 60840 L user manual

AEG

AEG LAVAMAT 60840 L user manual

Grundig GWN37430W user manual

Grundig

Grundig GWN37430W user manual

LG WD-SR1212AC owner's manual

LG

LG WD-SR1212AC owner's manual

Siemens SIWAMAT XS 432 Instruction manual and installation instructions

Siemens

Siemens SIWAMAT XS 432 Instruction manual and installation instructions

AEG L8FEC962Q user manual

AEG

AEG L8FEC962Q user manual

Koncar VM 05 5 51 user manual

Koncar

Koncar VM 05 5 51 user manual

GE GE Energy Star WBVH5300KWW Dimensions and installation information

GE

GE GE Energy Star WBVH5300KWW Dimensions and installation information

manuals.online logo
manuals.online logoBrands
  • About & Mission
  • Contact us
  • Privacy Policy
  • Terms and Conditions

Copyright 2025 Manuals.Online. All Rights Reserved.