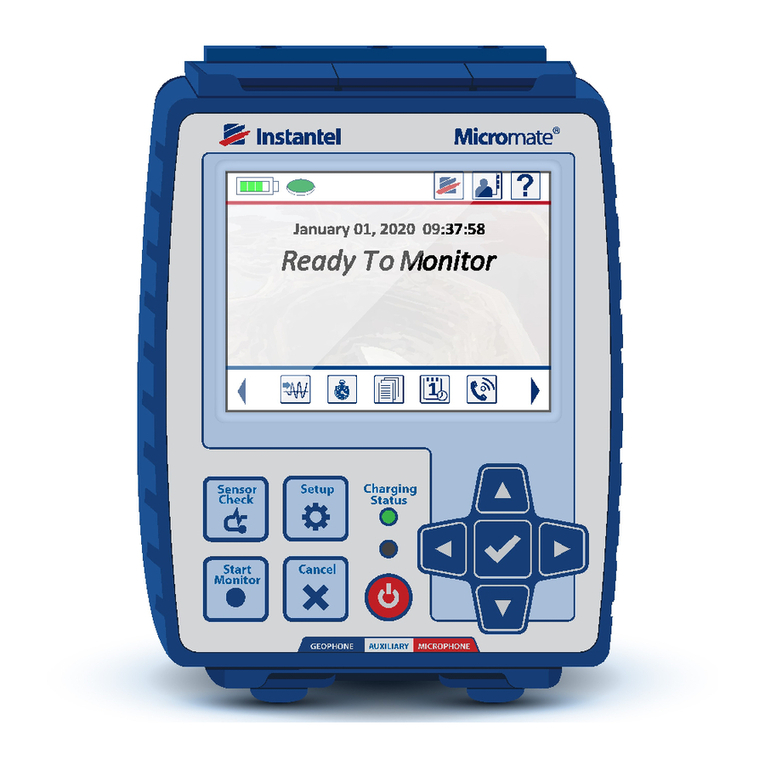
Instantel Minimate Pro Series User manual


®
International /
Canadian Customers:
U.S.A. Customers:
Instantel Inc.
309 Legget Drive
Ottawa, Ontario K2K 3A3
Canada
Instantel Inc.
808 Commerce Park Drive
Ogdensburg, NY 13669
U.S.A.
Telephone:
1-613-592-4642
Toll free:
1-800-267-9111
Facsimile:
1-613-592-4296
Website:
www.instantel.com
Customer Support:
Instantel is represented by a network of qualified dealers throughout the United States, Canada,
and Internationally. For further information, including product literature and the location of the
dealer nearest you, contact Instantel.
• Extensive dealer network. • In–depth user documentation.
• Comprehensive application support. • Technical support, 1–613–592–4642
Warranty:
All Instantel products come with a one-year warranty. Series IV monitors, Minimate Pro4 and
Minimate Pro6, and sensors will have the warranty extended for a second year if they are returned
to the Instantel factory for service and calibration within 30 days of the ‘Next Calibration’ date
printed on the calibration label located on the product.
If within a period of one year from the date of shipment to a customer the instrument fails to
perform in accordance with Instantel’s published specifications and the operator’s manual, due to
a defect in materials or workmanship, it will be repaired or replaced at Instantel’s option, free of
charge. This warranty is void if the equipment has been dismantled, altered or abused in any way.
This warranty is nontransferable.
The above warranty does not include any implied warranty of functionality for a particular purpose.
Instantel assumes no responsibility for damages of any description resulting from the operation or
use of its products. Since it is impossible to anticipate all of the conditions under which its products
will be used either by themselves or in conjunction with other products, Instantel cannot accept
responsibility for the results unless it has entered into a contract for services which clearly define
such an extension of responsibility and liability.
Any shipments returned directly to Instantel Inc. must have our prior approval and all packages
must display the Return of Material Authorization (RMA) Number issued by Instantel. Shipping
charges to Instantel’s plant will be paid by the customer and those for return to the customer will
be paid by Instantel.
To protect your warranty, you must complete and return a Warranty Registration Certificate, or
complete the online Warranty Registration Form, within ten days of purchase. Units will be
assumed out of warranty if there is no warranty card on file at Instantel. Retain this portion and the
proof of purchase for your records.
Warning:
This is an electronic instrument. Although it has been designed for field use, it contains sensitive
components which cannot be expected to withstand the same stress and shock as heavy
machinery. It contains a microcomputer and solid state memory, both of which may be made
inoperative by severe radio interference. The use of transmitting equipment in the immediate
vicinity of the unit should be avoided. Evidence of negligence in the care or handling of the
instrument may void the manufacturer's warranty. This product contains no serviceable parts. The
battery is not intended to be replaced by the operator. The unit should be returned to an authorized
Instantel service center for service. Any attempt to service this product will void any and all
warranties offered by Instantel. Service enquiries should be made via your dealer.
EC Warning:
This is a Class B product. If this product is not used as outlined within this manual, it may cause
radio interference.
© 2008-2014 Xmark Corporation. Instantel, the Instantel logo, Auto Call Home, Blastware, Histogram Combo, Minimate,
Minimate Pro4, and Minimate Pro6 are trademarks of The Stanley Works or its affiliates.
Microsoft and Windows are registered trademarks of Microsoft Corporation.
IBM is a registered trademark of International Business Machines, Inc.
eTrex is a registered trademark of Garmin Ltd.
U.S. Robotics is a registered trademark of U.S. Robotics Corporation.
Printed in Canada, October 2014. 720U2301 Rev 05

Minimate Pro Operator Manual i
Table of Contents
Customer Support:..................................................................................2
Warranty:..................................................................................................2
Warning:...................................................................................................2
Table of Contents......................................................................................i
1. Before You Begin.............................................................................1–1
1.1. Check the Package Contents..................................................................................1–1
1.2. Record the Minimate Pro Identification Numbers.................................................1–1
1.3. Complete and Return Your Registration Card.......................................................1–1
1.4. Check Your Local Electric Power Supply .............................................................1–1
1.5. Waste Electrical and Electronic Equipment Directive...........................................1–2
2. Battery and Memory Overview ....................................................... 2–1
2.1. Activating the Battery............................................................................................2–1
2.1.1. Minimate Pro Start Up.........................................................................2–1
2.2. Check the Memory and Battery Status ..................................................................2–3
2.3. Battery Instructions................................................................................................2–4
2.3.1. Charging...............................................................................................2–4
2.3.2. Battery Life..........................................................................................2–5
3. Handling Precautions......................................................................3–1
4. Unit Label Instructions.................................................................... 4–1
4.1. Condensed Instructions..........................................................................................4–1
4.2. Battery, Shipping and Warranty Instructions.........................................................4–1
5. Introduction......................................................................................5–1
5.1. Event Monitoring Example....................................................................................5–1
5.1.1. Suggested References ..........................................................................5–2
6. Minimate Pro4™and Minimate Pro6™Models ................................6–1
6.1. Minimate Pro4 and Minimate Pro6 Comparison ...................................................6–2
6.2. Minimate Pro Specifications..................................................................................6–4
6.3. Minimate Pro Physical Attributes..........................................................................6–6
6.3.1. Features and Benefits...........................................................................6–7
6.4. Unit and Accessory List.........................................................................................6–9
6.5. Unit Keypad and Menu Navigation Overview.....................................................6–12
6.5.1. Unit Keypad Overview ......................................................................6–12
6.5.2. Unit Menu Navigation Overview.......................................................6–13
7. Optional Features ............................................................................ 7–1
7.1. Wire Break/Make Trigger Cable [Optional]..........................................................7–1
7.2. Remote Alarm [Optional] ......................................................................................7–2
7.3. View Real Time Histogram Data [Optional] .........................................................7–3
7.4. Vibration Dose Value (VDV) [Optional]...............................................................7–3

ii Minimate Pro Operator Manual
7.5. GPS [Optional]...................................................................................................... 7–4
7.6. Series IV Sound Level Microphone [Optional] .................................................... 7–4
7.6.1. Installing the Sound Level Microphone .............................................. 7–5
7.6.2. Microphone Installation Procedure ..................................................... 7–5
7.6.3. Sound Level Microphone –Unit Compliance Setup........................... 7–6
7.6.4. Sound Level Microphone –Unit Advanced Setup.............................. 7–6
7.6.5. Using the Sound Level Microphone.................................................... 7–7
7.6.6. View Compliance Events.................................................................... 7–7
7.6.7. Technical Information for IEC 61672-1 Compliance.......................... 7–7
8. Basic Tutorial................................................................................... 8–1
9. Unit Menu Overview ........................................................................ 9–1
9.1. View Data Files..................................................................................................... 9–1
9.2. Select Setup File.................................................................................................... 9–3
9.3. Select Operator...................................................................................................... 9–3
9.4. View/Edit Setup File............................................................................................. 9–4
9.5. View/Edit Preferences......................................................................................... 9–28
9.6. Maintenance Menu.............................................................................................. 9–40
10. Sensors.....................................................................................10–1
10.1. Calibration Overview.......................................................................................... 10–1
10.1.1. Why Calibration is Important............................................................ 10–1
10.1.2. What the Calibration Certificate Means............................................ 10–1
10.1.3. Importance of Manufacturer Certified Calibration............................ 10–1
10.1.4. Minimate Pro Sensor Check Feature................................................. 10–1
10.2. References to Minimate Pro4 and Minimate Pro6 .............................................. 10–1
10.3. Series IV Sensor Specifications .......................................................................... 10–2
10.4. Installing an ISEE or DIN Geophone.................................................................. 10–2
10.4.1. Soft Surface Installations .................................................................. 10–3
10.4.2. Hard Surface Installations................................................................. 10–4
10.4.3. Geophone Theory of Operation......................................................... 10–7
10.5. Installing the ISEE Microphone.......................................................................... 10–9
10.5.2. Microphone Theory of Operation.....................................................10–10
11. Operator Maintenance.............................................................11–1
11.1. Operator Maintenance......................................................................................... 11–1
12. Technical Reference................................................................12–1
12.1. Anti-alias Filters.................................................................................................. 12–1
12.2. Data Analysis Techniques................................................................................... 12–1
12.2.1. Ground Vibrations............................................................................. 12–1
12.2.2. Sound Pressure.................................................................................. 12–4
12.2.3. Sinusoidal Waveforms ...................................................................... 12–4
12.2.4. Nearly Triangular Waveforms........................................................... 12–5
12.2.5. Compound Waveforms ..................................................................... 12–5
12.2.6. Irregular Waveforms ......................................................................... 12–6
Index......................................................................................................... 1

Minimate Pro Operator Manual 1–1
1. BEFORE YOU BEGIN
Before you begin using your new Series IV vibration and overpressure monitor, please complete
the following. It ensures your monitor is ready for operation and that you become part of
Instantel’s Product Support Program.
Install the Blastware software then read the important information in the ReadMe file. See the
Blastware Operator Manual for installation instructions. For most monitoring operations,
setting up and using the monitor is the same for both 4 - Channel and 6 - Channel models,
Minimate Pro4™and Minimate Pro6™. Where differences do occur, this manual specifies both
the four and six channel procedures.
1.1. Check the Package Contents
Please check that you received all the parts identified on your shipping invoice. Remember to keep
your shipping box because it was designed to safely ship your monitor back to Instantel for
calibration and service.
1.2. Record the Minimate Pro Identification Numbers
Record the following identification numbers for future reference:
IDENTIFICATION NUMBERS
Model Number
Monitor Serial Number
Monitor Software Version Number
ISEE Geophone Serial Number(s)
DIN Geophone Serial Number(s)
ISEE Linear Microphone Serial Number
Dealer Name
Date Purchased
1.3. Complete and Return Your Registration Card
Instantel offers the most comprehensive Product Support Program available. You receive a two
year warranty, product support, and product updates. Your monitor and sensors must be returned
to Instantel for annual calibration and servicing to maintain your second year warranty. You also
receive free software upgrades for your Minimate Pro monitor and the Blastware Compliance
software programs for the first year. All you have to do is complete the registration card included
with your Minimate Pro and return it to Instantel by mail or facsimile within thirty (30) days of
purchasing your new monitor. You may also register your product online at:
http://www.instantel.com/servicecalibration/warranty.aspx
1.4. Check Your Local Electric Power Supply
Every Minimate Pro comes with a 120 VAC, 60 Hz, 16W input AC adapter providing 12 VDC,
1.5A output. An optional 220 VAC adapter is available. Check with your local power utility to
ensure the supplied electric power may be used with the Minimate Pro. Ask your dealer for
information on an optional AC adapter to meet your local requirements.

1–2Minimate Pro Operator Manual
Note to our Customers in India and other Countries:
Due to large power fluctuations found in countries including India, please use a voltage stabilizer
and a 220 V AC Adapter to provide 10 - 14 VDC @ 1.5 A maximum to power the monitor.
1.5. Waste Electrical and Electronic Equipment Directive
For EU countries, this product must be collected and discarded separately from household waste.
In an effort to be as gentle as possible on the environment, Instantel has embraced the Waste
Electrical and Electronic Equipment Directive (WEEE). This product contains electrical or
electronic materials, including batteries. The presence of these materials will have adverse effects
on the environment and human health if not disposed of properly. The WEEE label on the product
means it should not be disposed of as unsorted waste and must be collected separately from
household waste, as per legislation under the WEEE Directive.Below is the WEEE image,
which appears on the Condensed Instructions label on each unit.
As a consumer, you are responsible for ensuring that this product is disposed of properly. To find
out how to properly dispose of this product, please contact the Instantel Technical Services
Department at 1-613-592-4642 or by e-mail, service@instantel.com.

Minimate Pro Operator Manual 2–1
2. BATTERY AND MEMORY OVERVIEW
WARNING: The batteries are not intended to be replaced by the operator, and must only be
replaced by an Authorized Instantel Repair Facility. The unit should be returned to an
authorized Instantel service center for service. Any attempt to service this product will void any
and all warranties offered by Instantel. Service enquiries should be made via your dealer.
The battery used in this device may present a fire or chemical burn hazard if mistreated. Do not
disassemble or heat above 100°C (212 °F) or incinerate.
2.1. Activating the Battery
If you have received your Minimate Pro directly from Instantel, or from an Authorized
Instantel Service and Calibration Facility, the battery will be deactivated for shipping safety
and battery life conservation. Turn the battery on for use or charging by simply plugging in the
provided AC Adapter to the unit and an electrical outlet, and pressing the On/Off key. If you are
in the field or have forgotten your AC Adapter at the office, turn on the unit by pressing the Up
Arrow and Enter keys simultaneously for approximately three seconds, and then press the
On/Off key while still holding the other two keys
NOTE: A Charging Status LED is located next to the Down Arrow key and indicates the
following:
1. The light is not on –The charger is not connected to a power outlet, or the
charger is malfunctioning.
2. The light is Yellow –The charger is connected to a power outlet and is
charging.
3. The light is Green –The batteries are fully charged.
4. The light is Flashing Red/Yellow –The power source is not sufficient (i.e.
battery, solar panel, or malfunctioning charger).
2.1.1. Minimate Pro Startup
When the Minimate Pro is turned on, several information screens are displayed, as shown below:

2–2Minimate Pro Operator Manual
(1) The Minimate Pro initially displays the Instantel logo, followed by the Minimate Pro
software version and date of release.
(2) The unit then displays the results of a File System Check diagnostic tool. This is the
same File System Check that is run in the Maintenance menu, Self Check (reference
Section 9.6.e) option.
The unit will prompt to repair any errors found during the File System Check. If this is
the case, accept the disclaimer notice and follow the prompts, or wait 30 seconds and the
unit will continue to load the software configuration without applying any changes.
The sample series of displays below indicates that there were no errors found, and the
unit automatically begins loading the software configuration.

Minimate Pro Operator Manual 2–3
(3) The next screen displayed shows the Battery Level and Available memory, followed by
the number of Events and how much disk space is being used in size and percentage.
The final screen indicates that the Minimate Pro is Ready to Monitor.
2.2. Check the Memory and Battery Status
Always check the Memory and Battery status levels prior to recording Events or locating the
monitor in the field. The Startup Window displays the amount of memory and the battery level.
Memory and Battery icons are also located at the lower part of the main display window, which
are visible once the unit has started.
The Memory icon displays increments of 25 percent of the total memory, with the black bar
increasing as the memory is used.
As well, the Battery icon displays the level of the battery in increments of 25 percent of total
capacity, with the black bar decreasing as the battery level is depleted.
For accurate text readouts of the Memory and Battery levels, follow the directions below to
access the About feature under the Maintenance menu:
BATTERY LEVEL
INDICATOR
MEMORY LEVEL
INDICATOR

2–4Minimate Pro Operator Manual
1. Select the Setup key on the unit to access the main setup selection menu. Use Down Arrow
key and highlight the Maintenance Menu item. Press the Enter key to select Maintenance
Menu.
2. Press the Up or Down Arrow keys on the unit to highlight Next/Prev Setup Maintenance
Menu options. Press the Right Arrow key to Action a Maintenance Menu option. At any
time, press the Cancel key to return to the previous screen.
a. About
The About command opens a new screen that displays the following information:
Model and Serial Number
Firmware Release Number and Date
Calibration Date
Free Memory
Battery Percent
(1) Press the Right Arrow key to select the About command
(2) Press the Enter key to return to the Maintenance menu.
2.3. Battery Instructions
2.3.1. Charging
The Minimate Pro internal battery requires regular and periodic charging.
To charge the battery, plug the supplied AC adapter into the connector labeled Power, located on
the right hand side of the unit. Plug the other end into an electrical outlet. The battery charging
indicator light turns on.
Instantel recommends using the 12V, 1.0A AC adapter supplied with each unit, with the
description of the maximum adapter as shown on the Power connector label:
When storing the instrument for long periods of time, ensure that you charge the battery for at
least 24 hours and then use the Disconnect Battery command within the Maintenance Menu.
NOTE: Use of AC adapters that exceed the maximum voltage and current specifications may
cause undue stress on the monitor‟s internal regulators. Like all electronic devices, exceeding

Minimate Pro Operator Manual 2–5
these specifications increases the risk of damage and possibly of an accidental fire. The Instantel
Warranty does not cover this type of damage.
2.3.2. Battery Life
The Minimate Pro battery life depends on current draw, aggregate sample rate, battery longevity,
and ambient temperature. Review the following information to determine an estimate for battery
life.
The nominal battery life for a Minimate Pro unit running in monitor mode is 10 days, at a sample
rate of 1024, when in an environment of 25° C (77° F). If the ambient temperature drops to -20° C
(-4° F) the battery capacity will also drop to approximately 80% or 8 days. At --40° C (-40° F) the
capacity is approximately 50%.
Record
Number of Recording Days at
Mode
25° C (77° F)
-20° C (-4° F)
-40° C (-40° F)
Waveform
10
8
5
Histogram
3.2
2.5
1.6
The nominal life expectancy of the battery (>70% of initial capacity) is >300 cycles. Li Ion
batteries do not experience a memory problem if left on charge all the time. The typical charge
retention (>80% of initial charge) is approximately 3 months over a temperature range -20° C (77°
F) to 45° C (113° F).
NOTE: Depending upon activity on the Ethernet connection the number of record days could be
reduced by 50%. We recommend connecting a unit to the supplied AC adapter or an external 12
VDC power supply for Histogram and Histogram Combo Record Modes.
LOW TEMPERATURE WARNING:
The internal batteries will not be charged if the ambient temperature is below 00C (320F) or above
450C (1130 F). However, the unit will continue to operate, drawing power from either the internal
battery or the external power source, whichever is higher. As a consequence of this, if the unit is
operated below 00C (320F) for an extended period of time, the batteries may eventually become
depleted, and the unit will be totally reliant on the external power source.

2–6Minimate Pro Operator Manual
Notes:

Minimate Pro Operator Manual 3–1
3. HANDLING PRECAUTIONS
Handle All Equipment and Accessories with Care
Damaged Equipment
Do not operate the equipment if it has been significantly dropped or the casing is damaged.
Immediately turn the instrument off and have an Authorized Instantel Repair Facility inspect it
for possible damage. Do not use the AC Adapter if it is damaged or not fully inserted into the
power outlet.
Use a proper AC Adapter
Use only the recommended Instantel AC Adapter. Use of alternate power sources not
recommended for this instrument may incorrectly set polarity, cause overheating and/or distortion,
fire, electrical shock, or other hazards.
Use a proper Electrical Outlet
Ensure that the AC Adapter is plugged into a properly rated power outlet. The plug of the AC
Adapter varies according to country or region.
Do not expose the Adapter or Connector to Foreign Objects
Do not allow metal objects or dirt to contact the AC Adapter terminal or the plug. Ensure that the
plug is clean prior to each use.
Keep the Minimate Pro On Charge
Always charge the battery when fewer than two graph bars appears in the display or immediately
when the Minimate Pro beeps. If possible, when not in use, keep the Minimate Pro on charge.
Instantel’s supplied charger protects the battery from overcharging.
Disconnect the Battery if Storing or Shipping the Minimate Pro
If storing for prolonged periods of time, or shipping for calibration or service, disconnect the
battery by using the Maintenance menu Disconnect Battery option –there is no requirement to
open the Minimate Pro.
Always Hold a Cable by its Connector
Do not hold the cord to pull on a connector when connecting or disconnecting it.
Never Force a Connector
Always align the connector to the port before inserting. Ensure you are attaching the Sensor or
Auxiliary to the proper connection.
Do Not Drop the Minimate Pro or Submerge it in Liquids
The Minimate Pro is rugged and designed to withstand normal wear and tear. The Minimate Pro
is water-resistant, designed to withstand temporary exposure to water immersion. Intentionally
immersing or installing the monitor in water for prolonged periods of time will damage the
monitor.
Keep Computer Disks Away from the Geophones
The geophones contain magnets that could erase the data stored on computer disks.

3–2Minimate Pro Operator Manual
Notes:

Minimate Pro Operator Manual 4–1
4. UNIT LABEL INSTRUCTIONS
4.1. Condensed Instructions
Follow the Condensed Instructions, as shown below, and also displayed on the unit:
1. Connect the Geophone and/or Microphone sensors to the unit. Position the unit and sensor(s) at the
desired locations.
2. Turn the unit on by pressing On/Off (Refer to Note A).
3. Check the Battery Status and Memory availability screen. Charge or use the supplied adaptor, as
required.
4. When the Ready to Monitor screen appears, ensure that your sensor(s) are properly displayed
(Refer to Note B).
5. To verify or edit Setups, press Setup. For additional setup information, refer to the Minimate
Operator Manual.
6. Press Start Monitor to enter Monitoring Mode.
Note A:
If you have just received the unit, as a new product or from an Authorized Instantel Service and
Calibration Facility, you must connect the battery by plugging in the Instantel AC adapter and pressing
the On/Off key. You can also connect the battery by simultaneously holding down the Up Arrow and
Enterkeys for 3 seconds. While still holding down these keys, press the On/Off key.
Note B:
If you change your sensors, it is important to update the system after they are connected by pressing
Sensor Check.
IMPORTANT:
7. Store the unit on charge when not in use for optimum battery performance.
8. Refer to Section 7, Basic Tutorial, for step-by-step instructions to easily begin monitoring with your
Minimate Pro.
4.2. Battery, Shipping and Warranty Instructions
Prior to shipping the unit to an Authorized Instantel Service and Calibration Facility, the battery must
be disconnected by deactivating it through the Minimate Pro software interface. This is done
through a series of key presses, and does not require that the unit be opened. Follow the steps below:
1. Press Setup.
2. Select the Maintenance Menu.
3. Select Disconnect Battery by pressing the Right Arrow key; the battery disconnects and the
unit turns off.
WARNING: Only use the recommended Instantel AC Adapter to maintain optimum battery
performance. This product contains no user-serviceable parts. The Operator is NOT to replace the
battery. For additional information, refer to this manual.

4–2Minimate Pro Operator Manual
Notes:

Minimate Pro Operator Manual 5–1
5. INTRODUCTION
The Minimate Pro™offers advanced monitoring technology with unequaled versatility and
flexibility to meet current needs and future requirements. As a smart device, your Minimate Pro
can be programmed for new features as they are released by Instantel® through the Blastware®
Compliance Module, the software companion provided with your monitor.
The Minimate Pro operates as a basic compliance monitor with intuitive functions and ease–of–
use to help the first time operator setup and record an Event quickly. The Minimate Pro also
offers advanced functions for specific applications requiring more information to be collected and
analyzed.
5.1. Event Monitoring Example

5–2Minimate Pro Operator Manual
5.1.1. Suggested References
1. ISEE, International Society of Explosives Engineers www.isee.org
2. EFEE, European Federation of Explosives Engineers members.efee-web.eu
3. FMGM, Field Measurement in GeoMechanics www.fmgm.no
4. Vibrations from Blasting, by David E. Siskind, Ph.D.,
published by ISEE, ISBN 1-892396-11-4
5. The Effects of Vibrations and Environmental Forces, by Lewis L. Oriard,
published by ISEE, ISBN 1-892396-10-6
6. Construction Vibrations, by Charles H. Dowding, published by Prentice Hall,
ISBN 0-13-299108-X
7. ISEE Blasters’ Handbook, 17th Edition. Formerly ETI and DuPont Blasters'
Handbook with 14 new chapters added. It can also be used as a study manual
or blasting certificate examinations. ISBN1892396009

Minimate Pro Operator Manual 6–1
6. MINIMATE PRO4™AND MINIMATE PRO6™MODELS
The Instantel® Series IV monitors include two models based on a specific number of recording
channels. The Minimate Pro4 model offers four recording channels and can be set up with one
Series IV Triaxial Geophone (ISEE or DIN) and an ISEE Linear Microphone. A second model,
the Minimate Pro6, offers six recording channels with your choice of two Geophones (ISEE or
DIN) or a Geophone (ISEE or DIN) and an ISEE Linear Microphone.
An example of each setup is shown below:

6–2Minimate Pro Operator Manual
6.1. Minimate Pro4 and Minimate Pro6 Comparison
Series IV Instrument
Minimate Pro4
Minimate Pro6
Standard Features:
Number of Channels
4 Channels (ISEE or
DIN Geophone, and an
ISEE Linear
Microphone)
6 Channels (ISEE or DIN
Geophone on both connectors,
or an ISEE or DIN Geophone
and an ISEE Linear
Microphone)
Recording Modes
Waveform Manual
√
√
Waveform
√
√
Histogram
√
√
Table of contents
Other Instantel Monitor manuals
