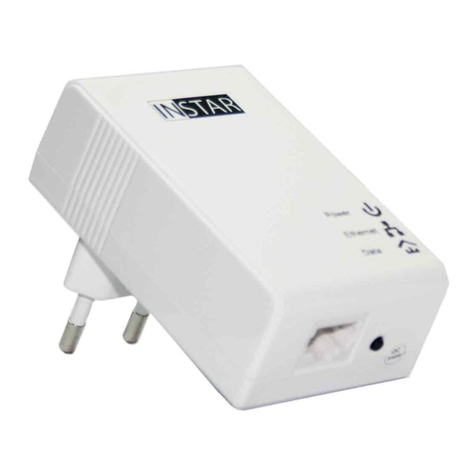
Instar IN-LAN 500p User manual

Android
iPhone
LINUX
Mac OS
Windows
LAN
500p
/ Supports up to 500 Mbps PHY rates over powerline
/ Effective data transfer rate 65Mbps(TCP) / 90Mbps (UDP)
/ 128-bit AES link encryption with key management
/ High performance and lower power Atheros QCA7420 chipset
/ Compatible with HomeplugAV Powerline devices (IEEE 1901 compliant)
IN-LAN 500p
Quick Installation Guide

LAN
500p

INSTAR
Quick-Installation Guide
IN-LAN®500p Mbps Network Adaptor
e following topics will be shortly explained in this Quick-Installation Guide:
1. SAFETY WARNINGS........................................................................2
2. INSTALLATION................................................................................3
3. BASIC SETUP....................................................................................5
4. BUILDING A PUBLIC NETWORK..................................................6
5. BUILDING A PRIVATE NETWORK................................................7
6. BANDWIDTH OPTIMIZATION.....................................................9
7. TECHNICAL DATA........................................................................10
8. WARRANTY AND DISPOSAL.......................................................11
More information can be found
in the PDF-User Manual that you can download from
www.instar.de
is Quick-Installation Guide
was made exclusively for INSTAR customers.
Your Manufacturer of Network and Security Equipment
1

Please read the following safety instructions carefully and keep them in a safe
place.
»Make sure the adaptor is not operated near any hot surfaces.
»is device shall not be used by people (including children) with limited
physical, sensory and mental capabilities. Only a trained person that knows
how to use the device carefully can use the device.
»Children should be supervised to make sure they don’t play with the device.
»If the adaptor casing is damaged, it can only be replaced by the manufacturer
or the customer service person or a similar qualied person to avoid any
damage to you and the device.
»Never do any repairs by yourself. By opening the device the warranty will auto-
matically expire. If any repair is needed, please contact your INSTAR Service
Center.
»When cleaning the adaptor, please never place the device in water.
»Make sure you only install the device in a suitable power socket (100-240V).
»is device is for indoor use only!
»Never install the device near explosive or ammable substances.
»Don’t use the device for any other purpose that it isn’t made for.
»INSTAR does not give any warranty if you use any third party rmware.
is device suites the basic requirements of the European regulations for electro-
magnetic compliance (2004/108/EC) and the low voltage regulations (2006/95/EC ).
CE-Conformity
2
Safety Warnings 1
l

3
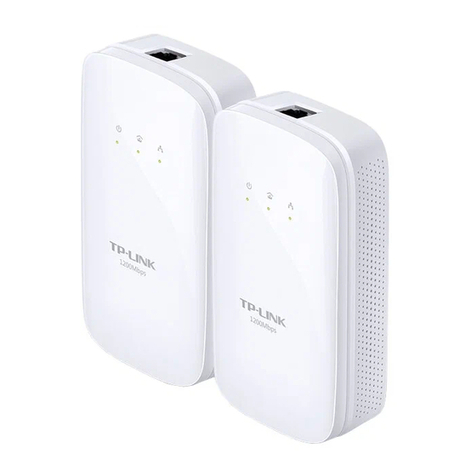
1 Data Indicator Indicates an established connection to
another IN-LAN adaptor / Flashes when
data is being transmitted
2 Ethernet Indicator Indicates an established Ethernet
connection / Flashes when data is being
transmitted
3 Power Indicator Steady when adaptor is ready for operation
/ Flashes when in stand-by mode
4Network Connector RJ45 connector for the provided LAN cable
5Pair Button Press to establish a connection between
IN-LAN®adaptors
6 Power Plug To connect your adaptor to your household
power grid / Passthrough power connector
2 INSTALLATION
l
12 3 46
5

What is IN-LAN®?
IN-LAN is an intelligent and secure technology that lets you set up a home network
easily via your household power grid - without the need of complex and expensive
dedicated cabling. IN-LAN communication now attains speeds you would expect
from other LAN technologies.
IN-LAN uses the household power grid to transfer data between computers
equipped with suitable adaptors and other network components. As a result, any
power outlet can be used as a network access point. State-of-the-art technology en-
sures that the power and data networks do not interfere with each other.
What does INSTAR IN-LAN® oer?
IN-LAN oers a PLC transfer rate of up to 500Mbps (eective rate 65Mbps TCP
/ 90 Mbps UDP) with a range of up to 150m which makes it ideal for applications
with high bandwidth requirements, such as IP cameras, HD video streaming, VoIP
and fast Internet access. Connecting your IN-LAN adaptor to an electrical outlet
transforms the home-based electrical system into a fast network with high data
throughput with maximum data security using the powerful 128-bit AES encryp-
tion. Simply press the Pair Button on the IN-LAN adaptor to establish an open
network or use the Atheros conguration wizard to set up custom encryption for
your network. Whether in the oce or at home - connect all your LAN devices
without the need of an additional LAN cable.
4

Simply plug one IN-LAN adaptor into a power socket next to your broadband rout-
er and connect the adaptor to your router via the supplied Ethernet cable. Plug the
second IN-LAN unit into an outlet - for example - close to your INSTAR camera
and connect the camera to your network using the camera’s Ethernet cable.
How to connect your IN-LAN® adaptor to the network ?
It is not recommended to plug the device into a power strip with surge protection or
into a UPS. Both sockets have to be a part of a single circuit - make sure that there
are no circuit breaker or electricity meter in between.
e IN-LAN® adapter features 3 control LEDs:
POWER - e Power Indicator lights up steadily once the adaptor is ready for opera-
tion. It ashes when it is in stand-by mode.
ETHERNET - e Ethernet Indicator lights up once an Ethernet connection to the
network is established and ashes when data is being transmitted.
DATA - e IN-LAN Indicator shows that the connection between the adaptors is es-
tablished and ashes when data is being transmitted.
5
3 Basic Setup
l

How to secure the network trac ?
I. Press the pairing button for 5 seconds until the signal lights ash once. e
Adapter is now ready to negotiate a pairing password with another adaptor.
II. Press the pair button for 1 second, and then release it. e power LED
should start to ash - signaling that it is waiting to be paired with another
adaptor. e pairing mode is active for 2 Minutes. Do the same to the other
IN-LAN device, press one second and release, and wait for the two devices to
pair successfully.
III. e pairing was successful when the power LED changes from ashing to
constant on, the data LED stays constant on.
To exclude one IN-LAN adaptor from an existing network, press its Pair But-
ton for more than 10 seconds. e device will be assigned with a new random
encryption key and will no longer be able to access the network. To integrate
the adaptor into a dierent IN-LAN adaptor network, follow the steps de-
scribed above.
6
Building a Public Network 4
l

How to manually set up your network encryption?
To manually setup your network under the Windows Operating System, you will
need to install the Qualcomm Atheros control soware PPU (Power Packet Utility)
that can be dowloaded from the INSTAR homepage:
http://www.instar.de/templates/IN-LAN.zip
Please make sure to install the Microso .NET Framework 1.1 or 2.0 before you
install the application:
http://www.microso.com/en-us/download/details.aspx?id=19
e PPU application also requires the installation of WinPcap Soware product
available from CACE Technologies. You can nd the newest version of WinPcap
under:
http://www.winpcap.org
Please read and accept the WinPcap License agreement. For later reference, the
WinPcap license agreement and its copyright notices can also be found on the PPU
application “about” menu. If the WinPcap soware has not been installed on the
workstation, the PPU installer will launch the WinPcap installer that is included
in the PPU installation CD. If the WinPcap installer detects that an old version of
WinPcap is installed on the workstation, the installer will request the removal the
old WinPcap version before installing the newer WinPcap soware.
7
5 Building a Private Network
l

Aer downloading the PPU soware from our homepage:
http://www.instar.de/templates/IN-LAN.zip
Double-click the Installer.bat le and follow the installation wizard through the in-
stallation process. On workstations running Microso Windows, the security con-
figuration settings require the user to have administrator privileges to install the
soware. If you are prompted for an administrator password or confirmation please
type the password or provide confirmation.
How to use the Power Packet Utility to build a private IN-LAN®?
To setup a personal network name for your IN-LAN please launch the PPU So-
ware:
e utility displays all your IN-LAN adaptors inside your existing IN-LAN network
as Homeplug AV devices under the Main tab. To setup a private network you have to
provide the device password using the “Enter Password” dialogue for all the devices
with which the local device (that is connected to your router) will form an IN-LAN
network. e password can be found on the sticker on the back of the device itself.
8

Now open the “Privacy” Tab and provide a private network name for your IN-LAN.
Click the button “Set All Devices” to reboot all devices in your IN-LAN network and
sychronize the new network name.
To re-open your network please click on the “Use Default(Public Network)” button
then click on the “Set All Devices” button to form a public network again.
To eliminate possible sources of interference, we recommend to follow the rules
below:
I. Avoid extension strips as they may impair the transmission of the IN-LAN
adaptor signals. Direct use of wall outlets is always preferable.
II. Positioning the adaptor close to your computer may interfere with the adaptor’s
operation.
III. Plug all devices into dierent outlets and avoid using the same power strip for
multiple adaptors.
9
6 Bandwidth Optimization
l

10
Communication
PLC Rate 500Mbps PHY
Protocol IEEE 1901 and HomePlug AV 1.0 compliant,
802.3 10/100 Ethernet, 802.3u Fast Ethernet
DataRate (TCP/UDP) 65Mbps(TCP) /90Mbps(UDP)
Encryption 128AES
ModulationSchemes 4096/1024/256/64/16/8 - QAM, QPSK,
BPSK and ROBO
Modulation Band 2 - 68 MHz
QoS Support contention-free access, 4-level
priority based, contention access, and
multi segment bursting, Support VLAN
Priority, Support ToS and CoS Packet
Classier
Work Mode TDMA and priority based CSMA/CA
Multicast Support Supported (IGMP managed multicast sessions)
IPv6 Supported
SNMPv2 or v3 Supported
Hardware
Chipset Atheros QCA7420 (HomeplugAV IEEE1901)
SDRAM 128Mbits
Serial Flash 16Mbits
Physical Dimensions L×W×H:53.2mm * 36.4mm * 103.5mm
Weight 122 g
Power Supply 100-240 VAC, 50/60 Hz
Power Consumption max. 2 W (0.5 W in Stand-by)
Operating Temperature 0°C to 45°C
Storage Temperature -20°C to 70°C
Operating Humidity 10% to 90% Non-condensing
Storage Humidity 5% to 90% Non-condensing
PC System Requirements
Supported Operating Systems
(Atheros Soware only for Windows!)
Windows XP / Vista / 7 / 8, Mac OS,
Linux, iOS, Android
Technical Data 7
l

11
8 Warranty & Disposal
l
WARRANTY
INSTAR oers a 2-year warranty on its products. During this time you can send
in your device for a free repair. is excludes devices with custom made rmware
or any other soware that has not been approved by INSTAR. e warranty is only
valid for the original hardware parts of the device.
If you are contacting our Service Team please keep the model and serial number
ready (you can nd it on the back of your device).
If you want to send in your device for repair, please use the RMA form that came
with the device. If you don’t have this form you can also download it from www.
instar.de or contact the INSTAR Service Team.
Disposal of old electrical appliances
e European Directive 2002/96/EC on Waste Electrical and Electronic Equipment
(WEEE), requires that old household electrical appliances must not be disposed of
in the normal unsorted municipal waste stream. Old appliances must be collected
separately in order to optimize the recovery and recycling of the ma-
terials they contain and reduce the impact on human health and the
environment. e crossed out “wheeled bin” symbols on the product
reminds you of your obligation, that when you dispose of the appliance
it must be separately collected. Consumers should contact their local
authority or retailer for information concerning the correct disposal of
their old appliance.
You can nd your INSTAR SERVICE CENTER at the following destination:
Company:
INSTAR Deutschland GmbH Hotline: +49 69 5960 6997
Auf der Hostert 17 (Mo-Fr, 12–18 o’clock GMT+1)
65510 Hünstetten Bechtheim Internet: www.instar.de
Germany Email: support@instar.de

INSTAR
...........................................................................................
...........................................................................................
...........................................................................................
...........................................................................................
...........................................................................................
...........................................................................................
...........................................................................................
...........................................................................................
...........................................................................................
...........................................................................................
...........................................................................................
Quick Notes
This manual suits for next models
1
Table of contents
Other Instar Adapter manuals
