Intellisystem IT-FHDCC21 Series User manual

IT-FHDCC21 Series
HD Color Video Camera
User Manual

1
Preface:
Thanks for using our HD color video conference camera.
This manual introduces the function installation and operation of the HD camera. Prior to
installation and usage, please read the manual thoroughly.
Warning
This product can be only used in specified range in order to avoid any damage or danger;
●Don’t expose the camera to rain or moisture place
●Don’t remove the cover to reduce the risk of electric shock. Refer servicing to qualified
personnel.
●Never operate the camera under unqualified temperature, humidity and power supply;
●Please use the soft cloth to clean the camera. Use neuter cleanser if bad smeared .Don’t use the
strong or cleanser avoiding scuffing.
Electric Safety
Installation and operation must accord with electric safety standard
Caution to transport
Avoid stress, vibration and soakage in transport, storage and installation.
Polarity of power supply
The power supply of the product is ±12V, polarity of the power supply drawing pic 0.1.
Pic 0.4.1 Power plug
Careful of installation
This series item must put on the smooth desk or platform, and it can not be installed slant ways;
Don’t apply in corrosive liquid, gas or solid environment to avoid the cover which is made up of
organic material.
Never power on before installation is completed.
Don’t disassemble discretionarily.
We are not responsible for any unauthorized modification or dismantling.
Attention
Electromagnetic filed under certain rate may affect camera image!

2
Content
1、Fast Installation ..............................................................................................................................4
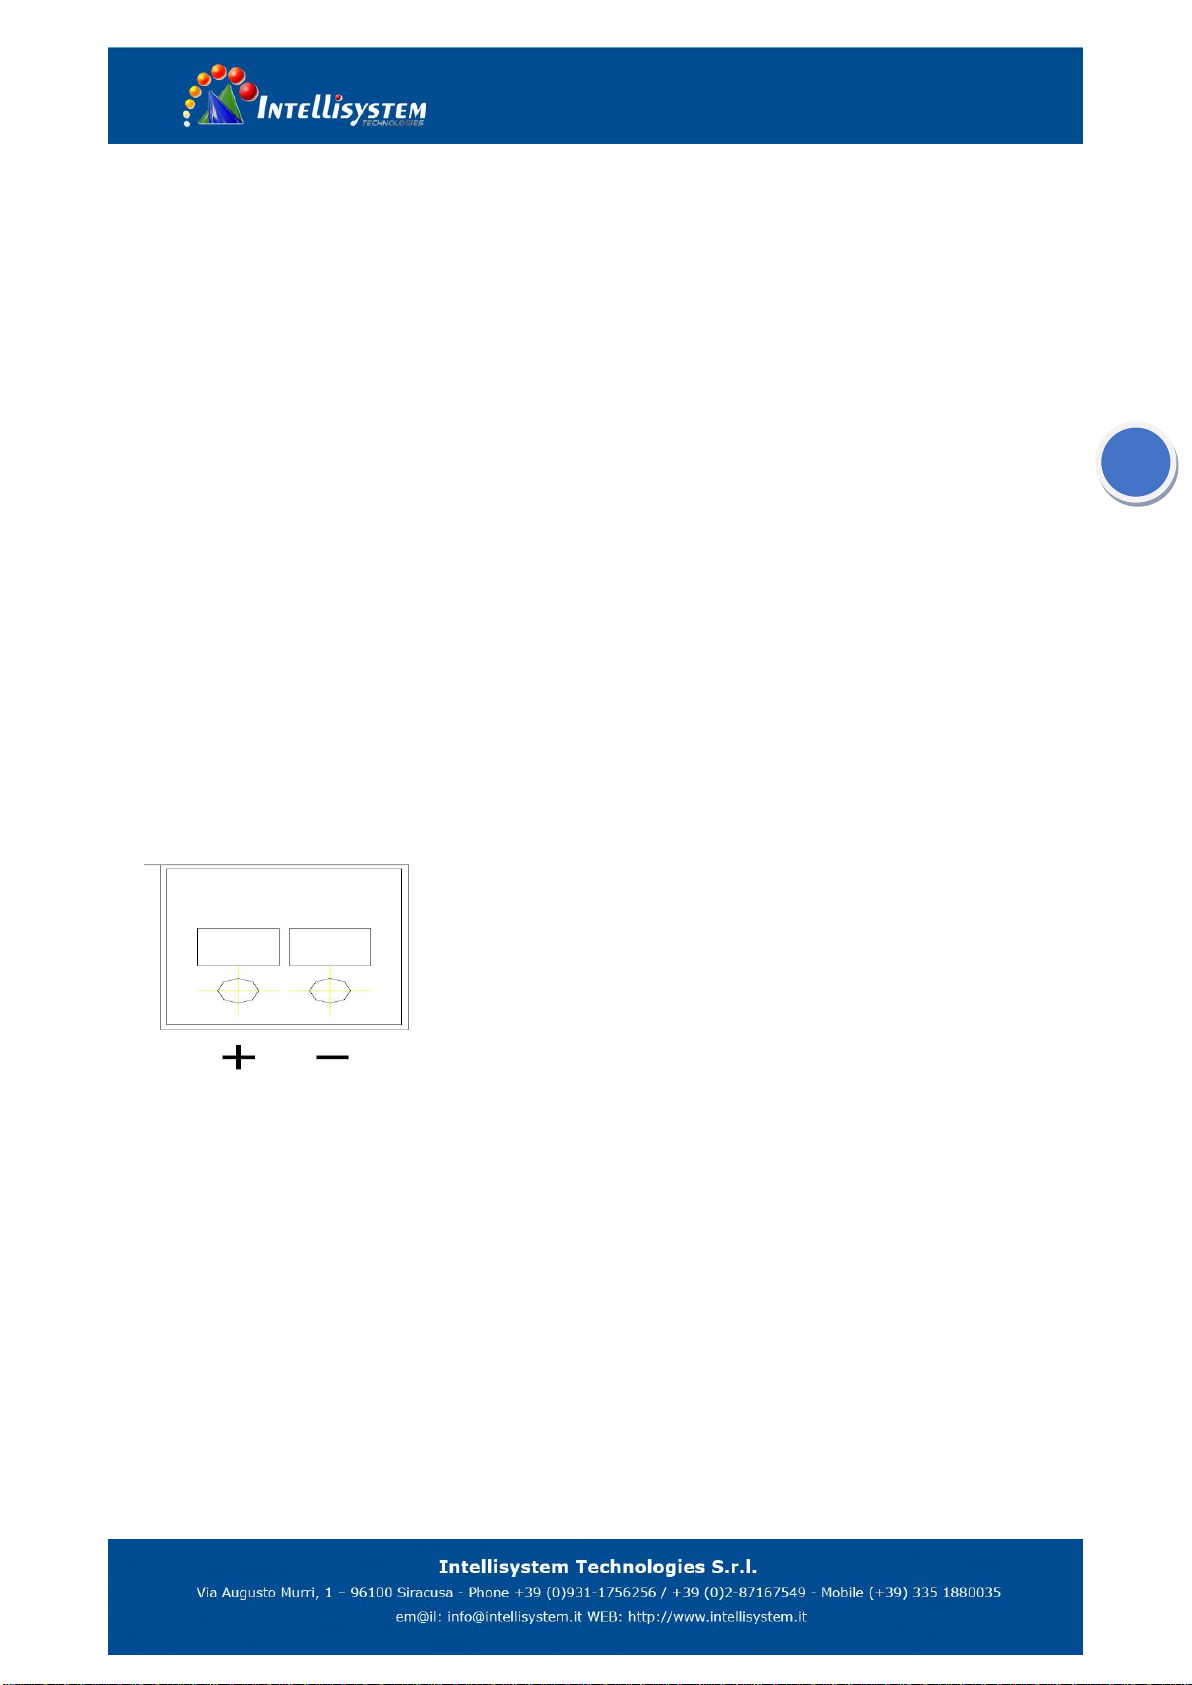
1.1、CAMERA INTERFACE EXPLANATION...................................................................................................................................4
1.2、POWER ON SELF-TEST ....................................................................................................................................................5
1.3、VIDEO OUTPUT.............................................................................................................................................................5
1.4、BRACKET MOUNTING ..............................................................................................................................................6
2、Product overview.............................................................................................................................7
2.1、PRODUCT INTRODUCTION...............................................................................................................................................7
2.1.1
、
Product model ..................................................................................................................................................7
2.1.2
、
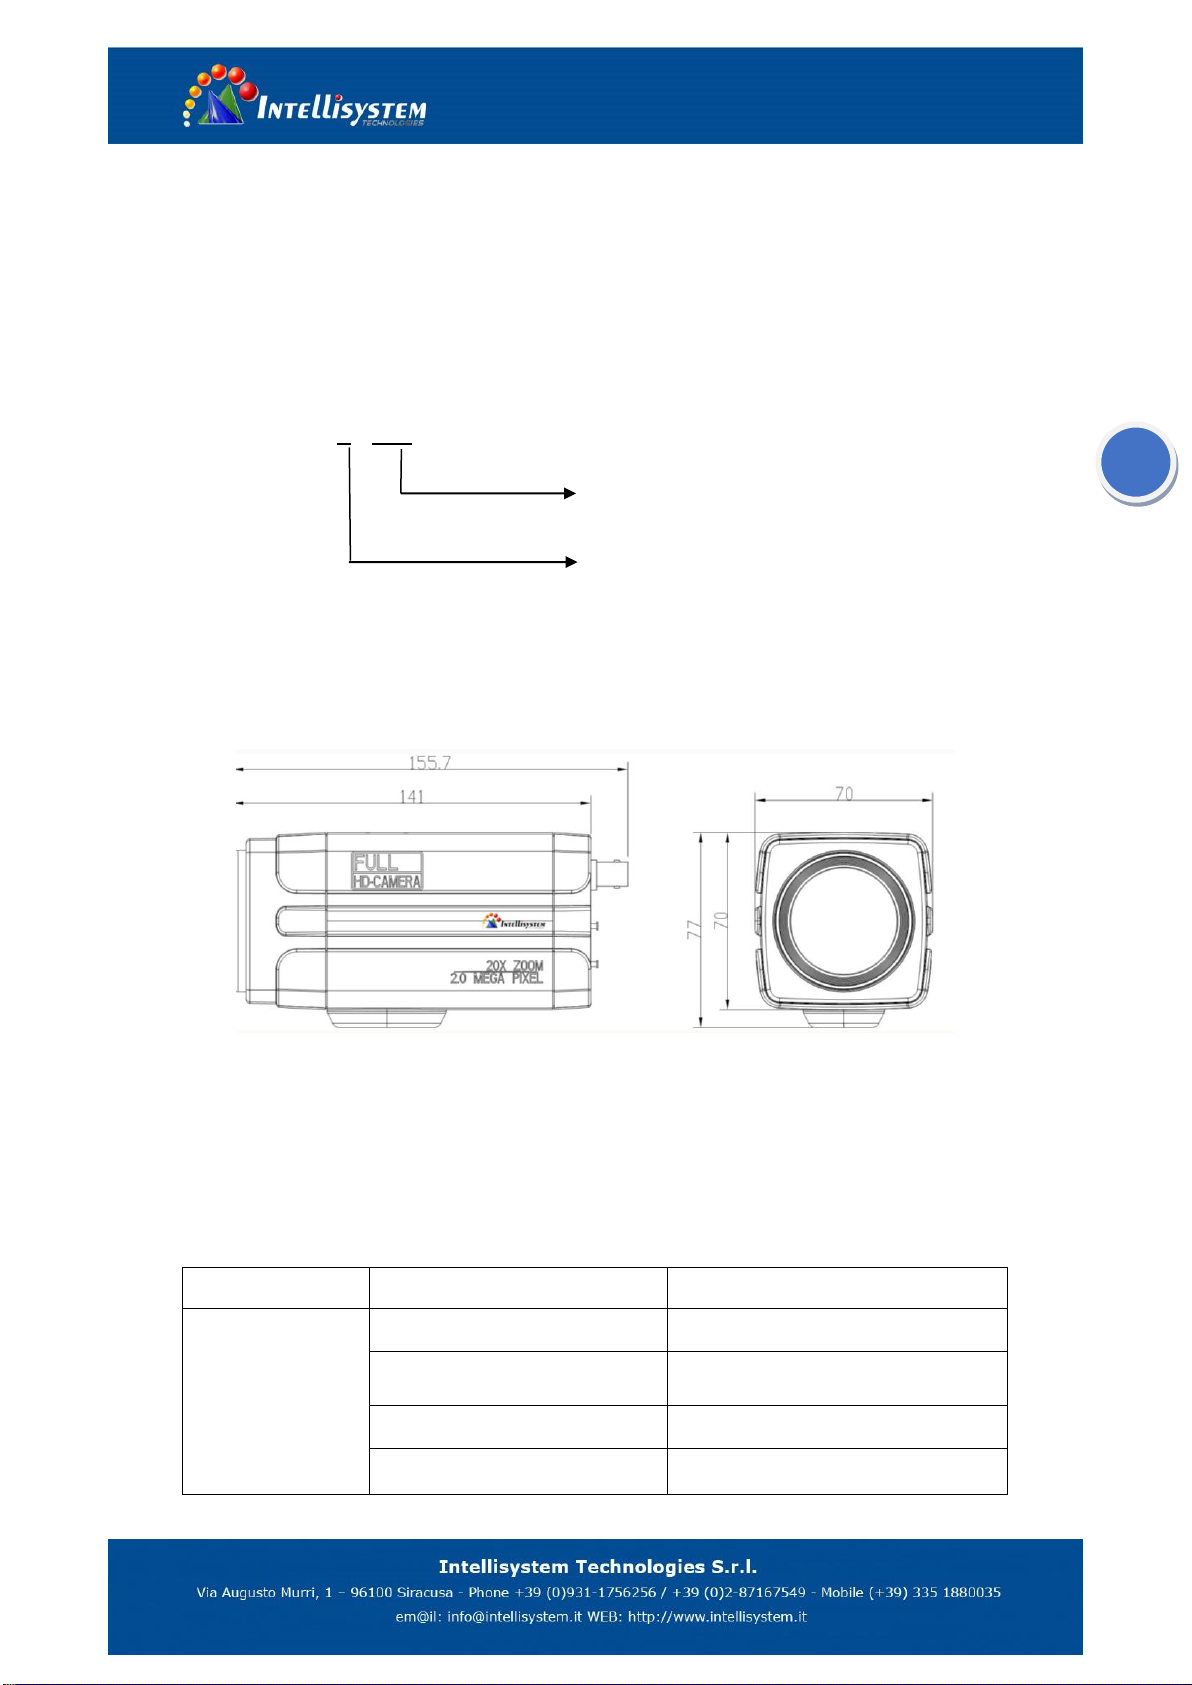
Dimension.........................................................................................................................................................7
2.1.3
、
Accessory ..........................................................................................................................................................7
2.2、MAIN FEATURES ...........................................................................................................................................................8
2.2.1
、
Camera performance........................................................................................................................................8
2.2.2
、
Network performance ......................................................................................................................................8
2.2.3
、
Technical specification......................................................................................................................................9
2.2.4
、
Keyboard Introduction....................................................................................................................................10
3、Application Instruction...................................................................................................................11
3.1、VIDEO OUTPUT .......................................................................................................................................................... 11
3.1.1
、
Power-On Initial Configuration ....................................................................................................................... 11
3.1.2
、
Video output................................................................................................................................................... 11
3.2、MENU SETTING......................................................................................................................................................12
3.2.1
、
Main menu .....................................................................................................................................................12
3.2.2
、
System setting ................................................................................................................................................13
3.2.2
、
Camera setting ...............................................................................................................................................14
3.2.3
、
ZOOM .............................................................................................................................................................17
3.2.4
、
Video Format..................................................................................................................................................18
3.2.5
、
VERSION..........................................................................................................................................................18
3.2.6
、
RESTORE DEFAULT ..........................................................................................................................................19
4、Network Connection......................................................................................................................20
4.1、CONNECTING MODE ...................................................................................................................................................20
4.2、IE LOG IN..................................................................................................................................................................23
4.2.1
、
Web client.......................................................................................................................................................23
4.2.2
、
Preview ...........................................................................................................................................................24
4.2.3
、
Playback .........................................................................................................................................................24
4.2.4
、
Configuration..................................................................................................................................................24
4.2.5
、
Video configuration ........................................................................................................................................25
4.2.6
、
Network configuration....................................................................................................................................27
4.2.7
、
System configuration ......................................................................................................................................28
4.2.8
、
Logout.............................................................................................................................................................28
5、Serial communication control........................................................................................................29
5.1、VISCA PROTOCOL LIST.................................................................................................................................................29
5.1.1、CAMERA RETURN COMMAND (CORRECT).....................................................................................................................29
5.1.2
、
Camera control command ..............................................................................................................................30

3
5.1.3
、
Inquiry command............................................................................................................................................33
5.2、PELCO-D PROTOCOL COMMAND LIST.............................................................................................................................35
5.3、PELCO-P PROTOCOL COMMAND LIS...............................................................................................................................36
6、Camera Maintenance and Troubleshooting ..................................................................................37
6.1、CAMERA MAINTENANCE ..............................................................................................................................................37
6.2、TROUBLESHOOTING.....................................................................................................................................................37

4
1、Fast Installation
1.1、Camera Interface Explanation
Pic 1.1 Back plate
1. HD-SDI interface
2. HDMI interface
3. LAN interface
4. RS485 interface, support VISCA, PELCO-D , PELCO-P protocol
4.1 RS485 D-
4.2 RS485 D+
4.3 RS485 GND
5. Power interface,DC+12V,notes for polarity
5.1 DC+12V negative
5.2 DC+12V positive
6. Power indicator
7. Keyboard
7.1 Zoom In/Right
7.2 Focus -/Down
7.3 Zoom Out/Left
7.4 Focus +/Up
7.5 Menu/Confirm

5
1.2、Power on self-test
1)Power on: connect DC12V power supply adapter, and the indicator light will be on.
2)Self-testing: Power on with power indicator light on, camera module will stretches. When the module finish stretches, the
self-testing is finished.
Note: If you set parking position, when Power on self-test is completed, the camera automatically go to the parking position.
1.3、Video output
1) video output from LAN:
a) Network cable connection port: :Model IT-FHDCC21-S20/T20
b) Web page Login: open your browser and enter 192.168.5.163 in the address bar (factory default); press Enter to enter
into the login page; click on the “player is not installed, please download and install!" and follow the installation steps
for installation. Then enter the user name admin and password admin (factory default); press Enter to enter into the
preview page, users can carry out PTZ control, video recording, playback, configuration and other operations.
c) If without image, refer to Chapter 6 Trouble Shooting
Pic 1.3.1 Web login page
2) 3G-SDI video output:
a) 3G-SDI video cable connection
b) Connect the camera and the monitor via 3G-SDI video cable; video output is available after camera self-test.
c)If without image, refer to Chapter 6 Trouble Shooting
3)HDMI video output :
a) HDMI video cable connection
b) Connect the camera and the monitor via HDMI video cable; video output is available after camera self-test
c) If without image, refer to Chapter 6 Trouble Shooting

6
1.4、BRACKET MOUNTING
Note: The materials of the wall must be follow board or concrete to mount the camera on the wall
or ceiling, while plasterboard is not usable.
1) Bracket installation steps
2)Accessories introduction
Note:Mounting brackets as shown, can be only installed and maintained by a qualified
technician. The product installation must strictly comply with all local electrical safety
standards and may not be installed beyond the limited temperature, humidity

7
2、Product overview
2.1、Product introduction
2.1.1、Product model
Model NO.X—XXX
T20---20x optical zoom len
S20---20x optical zoom len
S---1080P60↓ compatible
M---1080P30↓ compatible
2.1.2、Dimension
Pic 2.1.1 Camera dimension
2.1.3、Accessory
When you unpack, check that all the supplied accessories are included:
Model NO.
IT-FHDCC21-S20/T20
IT-FHDCC21-S20/T20
Accessory
Power adapter 1pcs
Power adapter 1pcs
Bracket 1pcs
Bracket 1pcs
User manual 1
User manual 1
Warranty card 1pcs
Warranty card 1pcs

8
2.2、Main Features
2.2.1、Camera performance
This series camera offers perfect functions, superior performance and rich interfaces. The features include advanced ISP processing
algorithms to provide vivid images with a strong sense of depth, high resolution and fantastic color rendition. It supports
H.264/H.264+ encoding which makes motion video fluent and clear even with less than ideal bandwidth conditions.
1.Superb high-definition image: It employs 1/2.8 inch high quality CMOS sensor. Resolution is up to 1920x1080 with frame rate up to
60 fps.
2.Various optical zoom lens: It has 20X optical zoom lens for options,3.3degree~54.7degree,2.9degree~55.4degree lens for option..
3. Leading Auto focus technology: Leading auto focus algorithm makes lens a fast, accurate and stable auto-focusing.
4. Low noise and High SNR: Low Noise CMOS effectively ensure high SNR of camera video.
Advanced 2D/3D noise reduction technology is also used to further reduce the noise, while ensuring image sharpness.
5.Multi-Format Video Outputs: support HDMI, 3G SDI, wired LAN, the 3G-SDI is available for 100m transmission at 1080p60 format.
6.Support Multiple Control Protocol: Support VISCA, PELCO-D, PELCO-P protocols which can also be automatically recognized.
Support VISCA control protocol through IP port.
7.Keyboard: There are up/down/left/right/confirm control key in the back part of the cameras
8.Control Interface: Support RS485, Wired LAN, convenient for remote control after installation
9.Support parking position preset: Camera will run to the parking position after power on(can choose on/off on menu)
10.Wide application: tele-education, lecture capture, Webcasting, Videoconferencing, Tele-training, Tele-medicine, Interrogation and
Emergency command systems.
2.2.2、Network performance
1. Multiple Video compression: Support H.264/H.264+ video compression; Support compression of resolution up to 1920x1080
with frame up to 60 fps.
2. Multiple network protocol: Support ONVIF,RTSP,RTMP protocols and RTMP push mode, easy to link streaming media server
(Wowza, FMS)

9
2.2.3、Technical specification
Model
IT-FHDCC21-S20
IT-FHDCC21-T20
Camera Parameter
Sensor
1/2.8 inch high quality HD CMOS sensor
Effective Pixels
2.07 million、16:9
Video Format
1080P60/50/30/25/59.94/29.97 1080I60/50/59.94 720P60/50/30/25
/59.94/29.97
Optical Zoom
20x Optical Zoom
f=5.5~110mm
20x Optical Zoom
f=4.7~94mm
View Angle
3.3°(tele)~54.7°(wide)
2.9°(tele)~55.4°(wide)
Aperture
F1.6 ~F3.5
F1.6 ~F3.5
Digital Zoom
X10
Minimum Illumination
0.5Lux(F1.8, AGC ON)
DNR
2D﹠3D DNR
White Balance
Auto / Manual/ One Push/ 3000K/ 4000K/5000K/6500K
Focus
Auto/Manual
Iris
Auto/Manual
Electronic Shutter
Auto/Manual
BLC
ON/OFF
WDR
OFF/ Dynamic level adjustment
Video Adjustment
Brightness, Color, Saturation, Contrast, Sharpness, B/W mode, Gamma curve
SNR
>55dB
Input / Output Interface
Video Interfaces
HDMI、3G-SDI
Image Code Stream
Dual stream output
Video Compression
Format
H.265、H.264
Control Protocol
VISCA/PELCO-D/PELCO-P;Baud Rate: 115200/9600/4800/2400bps
IP Interface
100M IP port (100BASE-TX); Support Visca protocol control through IP port.
Network Protocol
RTSP、RTMP、ONVIF、GB/T28181
Power Interface
(DC12V)
Other Parameter
Supply Adapter
Input AC110V-AC220V, output DC12V/1A
Input Voltage
DC12V±10%
Input Current
400mA(Max)
Consumption
4.8W(Max)
Store Temperature
-10℃~+60℃
Store Humidity
20%~95%
Working Temperature
-10℃~+50℃
Working Humidity
20%~80%
Dimension
155.7mm x 70mm x 70mm
Weight
0.7kg
Working Environment
Indoor
Remote Operation (IP)
Remote Upgrade, Reboot and Reset
Accessory
12V/1A power supply、manual, warranty card, installation bracket (option)

10
2.2.4、Keyboard Introduction
Menu
Menu、Confirm share the same key “menu/ok”;
when change the menu parameter, press menu/ok to confirm
Up
In the menu screen, when the cursor is on a particular sub-menu, the cursor will move up to
the selected menu when we press the "up “key.
When it is not on menu screen, it is used as Focus+
Down
In the menu screen, when the cursor is on a particular sub-menu, the cursor will move up to
the selected menu when we press the "down “key.
When it is not on menu screen, it is used as Focus-
Left
In the menu screen, when the cursor is on a particular sub-menu, we can go to the selected
menu by pressing the “left” key.
When it is not on menu screen, it is used as Zoom out.
Right
In the menu screen, when the cursor is on a particular sub-menu, we can go to the selected
menu by pressing the “Right” key.
When it is not on menu screen, it is used as Zoom In.

11
3、Application Instruction
3.1、Video Output
3.1.1、Power-On Initial Configuration
Connecting the power, camera will have initial configuration, lens will finish zoom in/out, the auto-testing is finished. If
the preset 0 is set, camera will go to the 0 preset position after initial configuration.
3.1.2、Video output
Connect to the video output cable: the user select the output mode according to the machine model.
1. network output: connect this product and your computer through network cable, then open the browser, enter
the camera IP address (factory default 192.168.5.163) in the address bar, then to the login page and input a user
name and password (factory default are “admin”) ,Finally enter the preview page, and the image comes out.
(Note: If you forget your user name, password, IP address, you can manually restore the default by the default
setting option in the menu.
2. 3G-SDI output or HDMI) output: Connect the monitor with the corresponding video output interface, then the
monitor output image.

12
3.2、MENU SETTING
3.2.1、Main menu
In normal working mode, press 【MENU】key to display the menu, using scroll arrow to point at or highlight the
selected items.
LANGUAGE: Language setting, Chinese / English
SETUP: System setting
CAMERA OPTION: Camera setting
LEN OPTION: Len setting
VERSON: camera version setting
Restore Default: Reset setting
[↑↓] Select: for selecting menu
[← →] Change value: for modify parameters
[MENU] OK: Press [MENU] to confirm
MENU
================
Language English
(Setup)
(Camera)
(Zoom)
(Video Format)
(Version)
(Restore Default)
(Return)
[↑↓]Select [←→]Change Value
[Menu]OK

13
3.2.2、System setting
Move the pointer to the (Setup) in the Main Menu, click the【MENU】key and enter into the (System Setting) as shown below,
PROTOCOL: VISCA/PELCO-P/PELCO-D/Auto
Visca ADDR: VISCA=1~7 PELCO-P=1~16(1~16) /PELCO-D = 0~15(0~15)
Baud rate: 2400/4800/9600/115200
RETURN: Return to the former menu (if it is main menu, means close menu)
[↑↓] Select: for selecting menu
[← →] Change value: for modify parameters
[MENU] OK: Press [MENU] to confirm
SETUP
================
Protocol Auto
Visca Address 1
Visca Address Fix OFF
PELCO-PAddress 1
PELCO-D Address 0
Baudrate 9600
Return
[↑↓]Select [←→]Change Value
[Menu]OK

14
3.2.2、Camera setting
Move the pointer to the (CAMERA) in the Main Menu, click the【MENU】key and enter the (CAMERA) as follow,
EXPOSURE: Enter into Exposure setting
COLOR: Enter into color setting
Image: Enter into image setting
Focus: Enter into focus setting
Noise Reduction: Enter into noise reduction
RETURN: Return to the former menu (if it is main menu, means close menu)
[↑↓] Select: for selecting menu
[← →] Change value: for modify parameters
[MENU] OK: Press [MENU] to confirm
1) EXPOSURE SETTING
Move the pointer to the (EXPOSURE) in the Main Menu, click the【MENU】and enter the (EXPOSURE SET) as follow,
MODE: Auto, Manual, Shutter priority, Iris priority and Brightness priority.
EV: On/Off (only available in auto mode)
Compensation level: -7~7 (only available in auto mode when EV is ON)
EXPOSURE
================
Mode Auto
EV OFF
BLC OFF
Flicker 50Hz
G.Limit 3
WDR 5
Return
[↑↓]Select [←→]Change Value
[Menu]OK
CAMERA
================
(Exposure)
(Color)
(Image)
(Focus)
(Noise Reduction)
Return
[↑↓]Select [←→]Change Value
[Menu]OK

15
BLC: ON/OFF for options (only available in auto mode)
Anti-Flicker: OFF/50Hz/60Hz for options (only available in Auto/Iris priority/Brightness priority modes)
Gain limit: 0~15(only available in Auto/ Iris priority /Brightness priority mode)
WDR: Off, 1~8
Shutter priority:1/25,1/30,1/50,1/60,1/90,1/100,1/120,1/180,1/250,1/350,1/500,1/1000,1/2000,1/3000,1/4000,1/6000, 1/10000(only
available in Manual and Shutter priority mode)
IRIS priority:OFF,F11.0,F9.6,F8.0,F6.8,F5.6,F4.8,F4.0,F3.4,F2.8,F2.4,F2.0,F1.8(only available in Manual and Iris priority mode)
BRIGHTNESS: 0~23 (only available in Brightness priority mode)
RETURN: Return to the former menu (if it is main menu, means close menu)
[↑↓] Select: for selecting menu
[← →] Change value: for modify parameters
[MENU] OK: Press [MENU] to confirm
2) COLOR SETTING
Move the pointer to the (COLOR) in the Main Menu, click the【MENU】and enter the (COLOR SET) as follow,
WB MODE:Auto,3000K,4000K,5000K,6500K,Manual,One Push
RED GAIN: 0~255(only available in Manual mode)
BLUE GAIN: 0~255(only available in Manual mode)
SATURATION: 60%, 70%, 80%, 90%, 100%, 110%, 120%, 130%
Hue: 0~14
AWB Sensitivity: high/middle/low
Color Style: Default, style1~4.
Color temp: high/middle/low
RETURN: Return to the former menu (if it is main menu, means close menu)
[↑↓] Select: for selecting menu
[← →] Change value: for modify parameters
[MENU] OK: Press [MENU] to confirm
COLOR
===============
WB Mode Auto
Saturation 80%
Hue 7
AWB Sensitivity High
Color style Default
Color temp Low
Return
[↑↓]Select [←→]Change Value
[Menu]OK

16
3) IMAGE
Move the pointer to the (IMAGE) in the Menu, click the【HOME】and enter the (IMAGE) as follow,
Brightness: 0~14
Contrast: 0~14
Sharpness: 0~15
Flip-H: On/Off
Flip-V: On/Off
B&W mode: color, black/white
Gamma: default, 0.47, 0.50, 0.52, 0.55
DZoom: digital zoom options: On/Off
DCI: Dynamic Contrast: Off, 1~8
RETURN: Return to the former menu (if it is main menu, means close menu)
[↑↓] Select: for selecting menu
[← →] Change value: for modify parameters
[MENU] OK: Press [MENU] to confirm
4) FOCUS
Move the pointer to the (FOCUS) in the Menu, click the【MENU】and enter the (FOCUS) as follow,
Focus mode Auto, manual
AF-Zone: Up, middle, down
AF-Sensitivity: High, middle, low
FOCUS
================
Focus Mode Auto
AF-Zone Center
AF-Sensitivity Low
Return
[↑↓]Select [←→]Change Value
[Menu]OK
IMAGE
================
Brightness 6
Contrast 8
Sharpness 2
Flip-H OFF
Flip-V OFF
B&W-Mode Color
Gamma Default
DZoom OFF
DCI Close
Return
[↑↓]Select [←→]Change Value
[Menu]OK

17
RETURN: Return to the former menu (if it is main menu, means close menu)
[↑↓] Select: for selecting menu
[← →] Change value: for modify parameters
[MENU] OK: Press [MENU] to confirm
5) NOISE REDUCTION
Move the pointer to the (NOISE REDUCTION) in the Menu, click the【MENU】and enter the (NOISE REDUCTION) as follow,
2D NOISE REDUCTION: Auto, close,1~7
3D NOISE REDUCTION: Close, 1~8
Dynamic Hot Pixel: Close,1~5
RETURN: Return to the former menu (if it is main menu, means close menu)
[↑↓] Select: for selecting menu
[← →] Change value: for modify parameters
[MENU] OK: Press [MENU] to confirm
3.2.3、ZOOM
Move the pointer to the (ZOOM) in the Main Menu, click the【MENU】and enter the (ZOOM) as follow,
Zoom speed: Set the zoom speed for remote controller, 1~8
Park Set: ON/OFF
Saving Park: YES/NO
RETURN: Return to the former menu (if it is main menu, means close menu)
[↑↓] Select: for selecting menu
[← →] Change value: for modify parameters
[MENU] OK: Press [MENU] to confirm
Zoom
================
Zoom speed 8
Park Set ON
Saving Park?NO
Return
[↑↓]Select [←→]Change Value
[Menu]OK
NOISE REDUCTION
================
NR-2D Auto
NR-3D 5
Dynamic Hot Pixel OFF
Return
[↑↓]Select [←→]Change Value
[Menu]OK

18
3.2.4、Video Format
Move the pointer to the (Video Format) in the Menu, click the【MENU】and enter the (Video Format) as follow,
Note: Only in the model IT-FHDCC21-S20/T20, the video format is displayed in the menu item.(M version does not support
format above 30fps)
3.2.5、VERSION
Move the pointer to the (VERSION) in the Main Menu, click the【MENU】and enter the (VERSION) as follow,
MCU Version: Display MCU version information
Camera Version: Display camera version information
AF Version: Display the focus version information
RETURN: Return to the former menu (if it is main menu, means close menu)
[↑↓] Select: for selecting menu
[← →] Change value: for modify parameters
[MENU] OK: Press [MENU] to confirm
VIDEO FORMAT
================
1080P60 1080P50
1080I60 1080I50
1080P30 1080P25
720P60 720P50
720P30 720P25
1080P59.94
1080I59.94
1080P29.97
720P59.94
720P29.97
Return
[↑↓]Select
[Menu] OK
VERSION
================
MCU Version 2.0.0.0 2015-12-18
Camera Version 2.0.0.15 2015-12-18
AF Version 2.0.0.6 2015-12-11
Return
[Menu]OK

19
3.2.6、RESTORE DEFAULT
Move the pointer to the (RESTORE DEFAULT) in the Main Menu, click the【MENU】and enter the (RESTORE DEFAULT) as follow,
Restore default: Options: yes/no
RETURN: Return to the former menu (if it is main menu, means close menu)
[↑↓] Select: for selecting menu
[← →] Change value: for modify parameters
[MENU] OK: Press [MENU] to confirm
RESTORE DEFAULT
================
Restore Default? NO
Return
[↑↓]Select [←→]Change Value
[Menu]OK
Table of contents
Other Intellisystem Camcorder manuals