Gradient Lens Luxxor LXC User manual

V1.0
User Guide
Luxxor®
LXC
Video Camera
2
Getting Started
The Luxxor® LXC may be configured to display images through a
computer running Windows 10 or 7 via a USB 3.0 connection, or
through an external monitor via an HDMI connection.
Configuration Switches:
There are four configuration switches located on the bottom of the
Luxxor® LXC. The factory default setting for switches 1 to 4 is
DOWN, UP, UP, DOWN, as shown below.
Switch functions:
Switch 1: Up – HDMI Output
Down – USB Output
Switch 2: Up – LED and shutter speed auto exposure
Down – Shutter speed only auto exposure
Switch 3: Up – Normal Auto Exposure Setpoint
Down – Lower Auto Exposure Setpoint
Switch 4: Up – Fixed Integration Time (shutter speed)
Down – Auto Exposure On

3
The factory default switch configuration is set to:
USB output
LED Based Auto Exposure
(used with optional LXC-LED)
Normal Auto Exposure Setpoint
Auto Exposure On
Note: Switch settings are implemented when the LXC is powered
on. Any changes to switch settings made while powered on
require the LXC to be powered off and on again to take effect.
Power is cycled by disconnecting the USB cable from the
computer or the stand-alone power supply, waiting 5 seconds or
so, and reconnecting the USB cable.
Using the Luxxor® LXC with a computer:
To use the LXC with a computer, software must be installed on
the computer.
The LXC must be connected to a USB 3.0 port on the computer
before installing the software. It will not work on a USB 2.0 port.
Connect the camera end of
the USB cable …
to the USB 3.0 socket on the camera.
Thread in the locking screws until
snug – do not over-tighten.
4
Connect the other end to a USB 3.0 port on the computer.
Download the Video ToolBox Pro software at this link:
www.zarbeco.us/fas/download/luxxor.exe
Run the saved .exe file and follow the on-screen prompts.
You will need to input the Registration Code that is printed on the
label on the front of this document.
(Note: On some computers, when starting Video ToolBox Pro for
the first time, no camera image may be visible. If this happens,
close Video ToolBox Pro, power cycle the LXC and restart Video
ToolBox Pro.)
Operating instructions may be viewed by clicking on the Help
button in the menu bar at the top of the screen.

5
Using the Luxxor® LXC with an HDMI monitor:
Set configuration switch 1 UP to enable HDMI output.
Connect the USB cable to the camera as described above.
Then connect the camera end
of the HDMI cable to the HDMI
socket on the camera.
Thread in the locking screw
until snug – do not over-
tighten.
Connect the other end of
the HDMI cable to the monitor.
When used in HDMI mode, the
LXC may be powered either by
connecting its USB cable to a USB
3.0 port on a computer, or to the
USB socket on the included AC
adapter power supply.
6
Using the Luxxor
®
LXC with a borescope:
To use the LXC with a borescope, a coupler lens must first be
attached to the camera.
The optional VC-25 coupler lens threads onto the C-mount
threads of the LXC.
Connect the camera to your
borescope. Pull back the
grooved ring on the VC-25 and
insert the borescope’s eyecup
into the coupler lens as far as it
will go. Then release the
grooved ring.
Pull Back
Insert

7
Using the Luxxor® LXC with the LXC-LED:
To use the optional LXC-LED light source
with a Hawkeye® borescope:
(It may fit other borescopes with similar light
stubs.)
Thread the LXC-LED onto the light stub
of your borescope.
Plug the LXC-LED cable into the power jack on the bottom of the
LXC.
8
Switch Settings and Exposure Control:
Switch 2:
When using the LXC-LED, configuration switch 2 should be set in
the UP position. This enables the LXC to adjust both the LED
brightness and shutter speed for autoexposure control.
When using any other light source, switch 2 should be set in the
DOWN position. The LXC will then provide autoexposure control
without adjusting the light source.
Switch 3:
When looking at images of highly reflective surfaces, it may help
to reduce unwanted glare by setting switch 3 DOWN, which will
darken the autoexposure setpoint somewhat.
Switch 4:
Switch 4 in the DOWN position enables autoexposure, as
configured by switches 2 and 3.
Switch 4 in the UP position disables autoexposure and puts the
LXC in a fixed shutter speed mode (16msec integration time).
Exposure is then controlled by varying the light source intensity.
(The LXC-LED light source will not vary its brightness in this
mode.)

9
Luxxor® LXC Specifications
Sensor ……………..…..1/2.9”, 1.4mp with IMX6 Image Processor
Effective Pixels ………..…………………………….…..1280 x 1084
Frame Rate ………………..…………………………………… 30fps
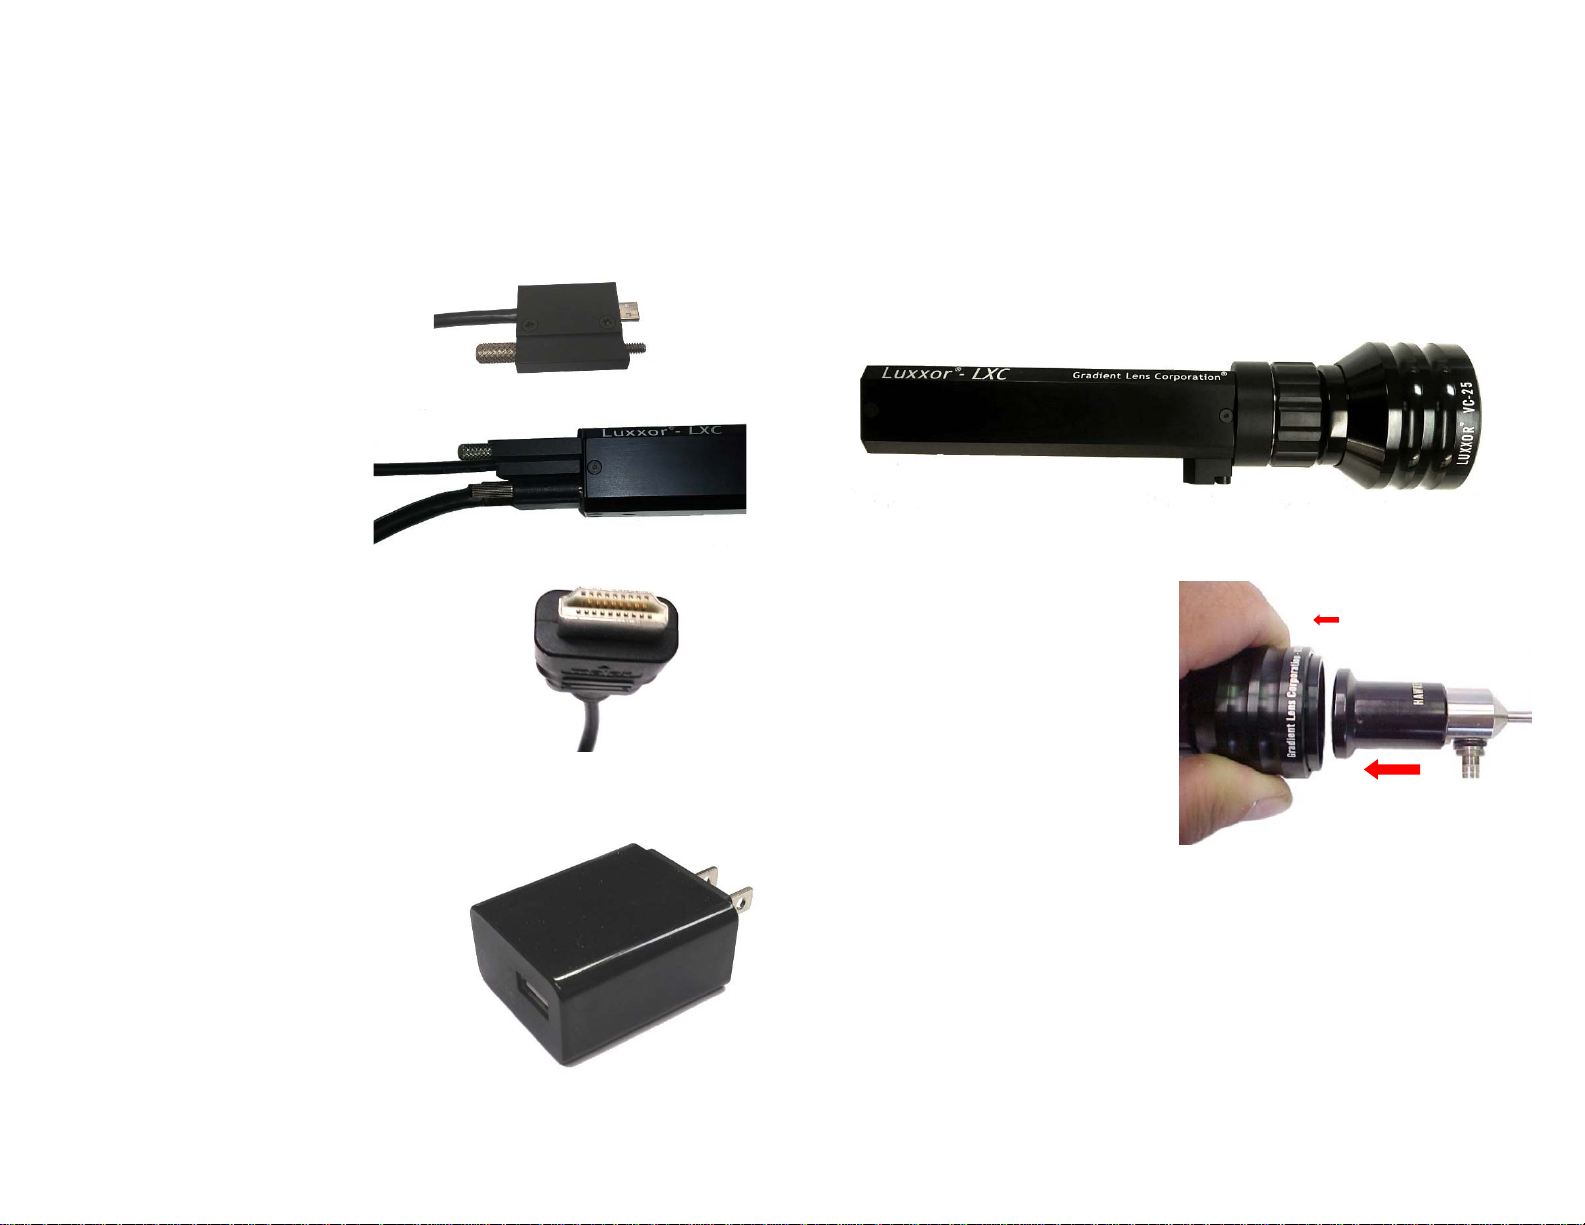
Video Output …………………..…………….… USB 3.0 and HDMI
Lens Mount ………………………..………………….……..C-Mount
AGC ……………………………………..……..……. Auto or Manual
Operating Temperature ………………….. 32 to 104°F (0 to 40°C)
Storage Temperature ………...……. -22 to +140°F (-30 to +60°C)
Dimensions …………….. 25 x 28 x 110mm (without coupler lens)
Mount ………………………………………….. ¼-20 Tripod Thread
LED …………….. Integrated LED light source with auto exposure
Software ……. Video Toolbox (Image & video capture & labeling)
10
Customer Service:
Should service of the equipment be required: Call Gradient Lens
Corporation to obtain a return material authorization (RMA) number and
shipping directions.
Telephone: 585.235.2620
Fax: 585.235.6645
E-mail: service@gradientlens.com
Toll Free: 800.536.0790 (in USA only)
Warranty
Gradient Lens Corporation warrants the Luxxor
®
LXC camera and LXC-
LED light source to be free of defects in material and workmanship and
to perform in accordance with the manufacturer’s specifications when
subject to normal use and service for a period of one year from the date
of purchase. Gradient Lens Corporation will either repair or replace
components found to be defective or at variance from the manufacturer’s
specifications within this time frame at no cost to the customer. It shall
be the purchaser’s responsibility to return the instrument to the
authorized service center.
This warranty does not cover breakage or failure due to tampering,
misuse, neglect, accidents, improper installation, modification, shipping,
or to improper maintenance, service and cleaning procedures. This
warranty is also void if the instrument is not used in accordance with the
manufacturer’s recommendations, or if required service is performed by
anyone other than a Gradient Lens Corporation authorized agent. No
other express or implied warranty is given.

11
This device complies with part 15 of the FCC Rules.
Operation is subject to the following two conditions: (1)
This device may not cause harmful interference, and (2) this
device must accept any interference received, including
interference that may cause undesired operation.
V1.0
207 Tremont Street, Rochester, New York 14608
800.536.0790
Fax: 585.235.6645
Table of contents
Other Gradient Lens Camcorder manuals