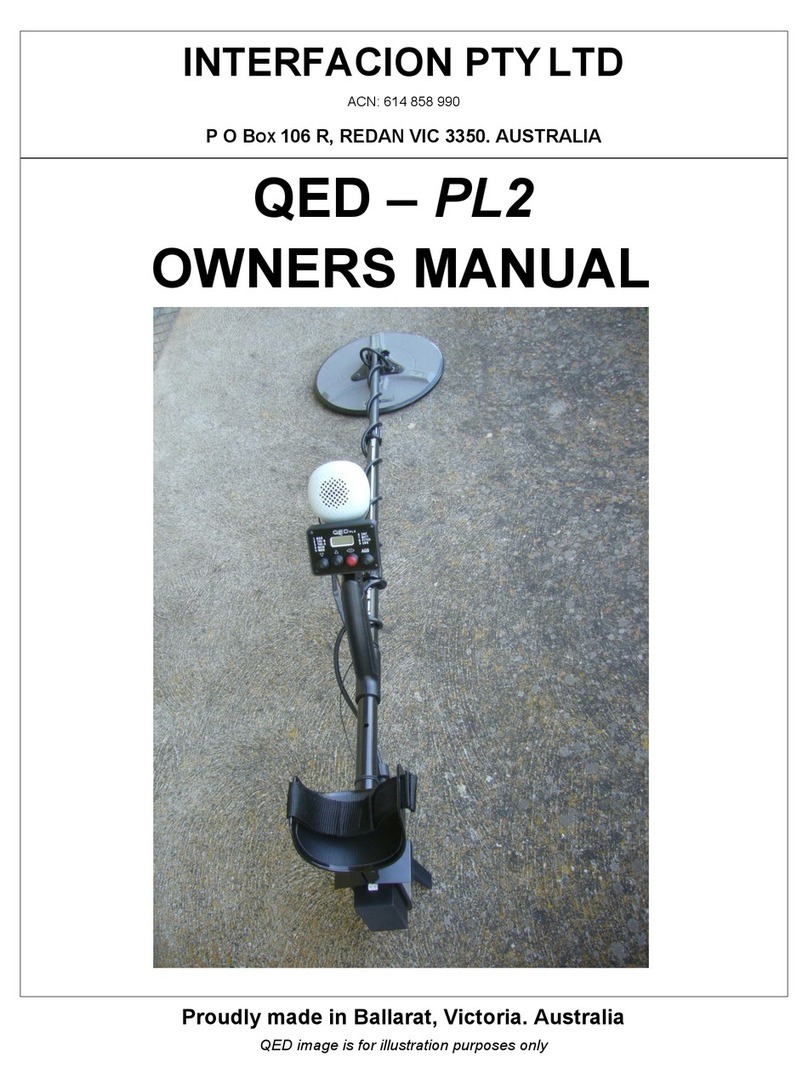
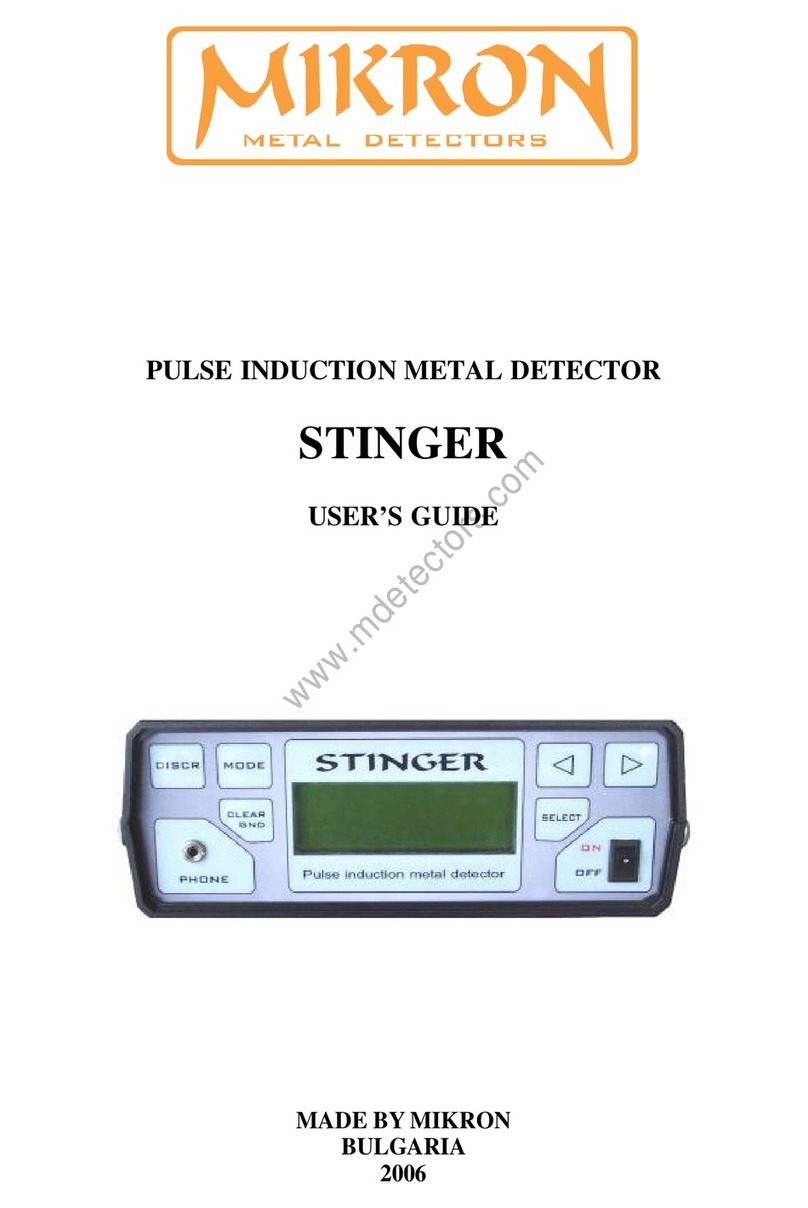
Interfacion QED-PL2 User manual

INTERFACION PTY LTD
ACN: 614 858 990
P O BOX 106 R, REDAN VIC 3350. AUSTRALIA
QED –PL2 OWNERS
MANUAL
Proudly made in Ballarat, Victoria, Australia
QED image is for illustration purposes only

2
QED–PL2 INTRODUCTION
Congratulations on your purchase of the QED-PL2 Pulse Induction metal
detector. The QED has been engineered specifically to make your
prospecting experience more rewarding.
Whenever you purchase any new technology, there is no point in just
looking at it, or putting it away in the wardrobe. You need to explore
all the new functions and settings to maximize your understanding and
the potential of the device.
If you are an experienced operator, you may find the settings to be
different to anything you have previously used. Whether you are a first
timer or an experienced operator, your confidence will develop as you
master the QED.
Read these instructions carefully to master the QED’s full potential. Be
confident to alter and adjust your settings over known targets until you
have a working understanding of the detector’s potential and character.
This detector has an expansive range of possible settings, and as you
become familiar with all the functions you will maximize your potential
to find gold or relics in even the harshest ground.
Happy hunting

3
CHANGE CONTROL
Date Revised
Version
Nov 2018
QED –PL2 OWNERS MANUAL V 2.0
Dec 2018
QED –PL2 OWNERS MANUAL V 3.0
Dec 2018
QED –PL2 OWNERS MANUAL V 4.0
Jan 2019
QED –PL2 OWNERS MANUAL V 5.0
Jan 2019
QED –PL2 OWNERS MANUAL V 6.0
TABLE OF CONTENTS
QED–PL2 INTRODUCTION ............................................................................ 2
CHANGE CONTROL ................................................................................................. 3
TABLE OF CONTENTS .............................................................................................. 3
NAVIGATING THE CONTROL INTERFACE ................................................................ 6
START UP ................................................................................................................ 7
MENU OPTIONS...................................................................................................... 8
FACTORY DEFAULTS................................................................................................ 8
QUICK START GUIDE............................................................................................... 9
CONTROL COMMANDS......................................................................................... 10
MENU CONTROLS................................................................................................. 11
1: MANUAL GND BAL (MGB) ........................................................................... 11
Description ................................................................................................... 11
YouTube Reference.................................................................................. 12
Unable to Ground Balance........................................................................... 12
Rechecking Ground Balance whilst detecting............................................. 12
YouTube Reference.................................................................................. 12
Notes ............................................................................................................ 12
ADVANCED GND BAL (MGB) TECHNIQUE ....................................................... 13
Description ................................................................................................... 13
Notes ............................................................................................................ 13
AUTO GND BAL (AGB)...................................................................................... 14
Description ................................................................................................... 14

4
YouTube Reference...................................................................................... 14
Notes ............................................................................................................ 14
2. THRESHOLD B –(THS-B) (BIAS).................................................................... 15
Description ................................................................................................... 15
Navigating to Threshold B ........................................................................... 16
YouTube Reference.................................................................................. 16
Threshold B Neutral Position....................................................................... 16
YouTube Reference.................................................................................. 16
Small Search Coils ........................................................................................ 17
Medium Search Coils ................................................................................... 17
Large Search Coils ........................................................................................ 17
Notes ............................................................................................................ 18
3: THRESHOLD A –(THS-A) (VOLUME) ............................................................ 19
Description ................................................................................................... 19
Adjusting ...................................................................................................... 19
Threshold A .................................................................................................. 19
YouTube Reference...................................................................................... 19
Notes ............................................................................................................ 19
4: GAIN ............................................................................................................. 20
Description ................................................................................................... 20
Adjusting Gain.............................................................................................. 20
YouTube Reference...................................................................................... 20
Notes ............................................................................................................ 20
5: MODE ........................................................................................................... 21
Description ................................................................................................... 21
Beach Mode ................................................................................................. 21
Adjusting Mode............................................................................................ 22
Youtube Reference ...................................................................................... 22
Notes ............................................................................................................ 22
6: SMF (STATIC MAGNETIC FIELDS) ................................................................. 23
Description ................................................................................................... 23
Adjusting SMF .............................................................................................. 23
YouTube Reference...................................................................................... 23
Notes ............................................................................................................ 23
7: BATTERY ....................................................................................................... 24
Description ................................................................................................... 24

5
Lithium (li ion) Battery Care ........................................................................ 24
Notes ............................................................................................................ 24
8: PITCH ............................................................................................................ 25
Description ................................................................................................... 25
Adjusting Pitch ............................................................................................. 25
YouTube Reference...................................................................................... 25
Notes ............................................................................................................ 25
9: SMR (SYNCHRONOUS MAINS REJECTION).................................................. 26
Description ................................................................................................... 26
YouTube Reference...................................................................................... 26
Notes ............................................................................................................ 26
FERRITE EMI SUPPRESSORS.................................................................................. 27
SEARCH COIL TYPES .............................................................................................. 27
ADVANCED SETUP GUIDE..................................................................................... 28
HOW TO SEARCH THE GROUND........................................................................... 29
FINE TUNING EXERCISE......................................................................................... 30
ADDITIONAL INSTRUCTIONAL VIDEOS ................................................................. 31
Effects of adjusting Gain, Threshold A and Threshold B ................................ 31
Effects of adjusting Threshold B for selected target size ............................... 31
TECHNICAL SPECIFICATIONS................................................................................. 32
MANUFACTURER’S WARRANTY ........................................................................... 33
NOTES................................................................................................................... 34

6
NAVIGATING THE CONTROL INTERFACE
The button Triangle image on the control box is the TURN ON BUTTON and INCREASE
ADJUSTMENT button.
The button Triangle image on the control box is the DECREASE ADJUSTMENT button.
Use the button to TOGGLE between menu Item Select and Menu Item Adjustment.
Press and hold the button to TURN OFF the detector.
Click on this YouTube link to view an explanation of the QED Control Panel functions.
The display is an all
lighting conditions
3-digit LED backlit
LCD display.

7
START UP
Note: As the QED is marketed in various configurations, these steps are indicative only.
Step 1
Connect a suitable coil.
Step 2
Insert Batteries or connect Battery Pack
Step 3
Turn Detector ON by pressing the BUTTON.
Turn ON the remote SPEAKER pressing the button at side of the speaker housing.
Step 4
Scroll through adjustment menu item numbers by pressing either buttons.
When on the required adjustment menu item number press the button
Step 5
INCREASE variable using or DECREASE using
Step 6
To return to variable menu press the button.
Step 7
To turn detector OFF, press and hold the button and current adjustment settings will be
saved.
Step 8
To reload Factory Default Settings, turn the detector OFF, then PRESS and HOLD
the button while pressing the button.

8
MENU OPTIONS
1: Manual Ground Balance
2: Threshold B (Bias)
3: Threshold A (Volume)
4: Gain
5: Mode
6: Static Magnetic Fields (SMF)
7: Battery
8: Pitch
9: Synchronous Mains Rejection (SMR)
FACTORY DEFAULTS
Setting
Range
Factory
Default
Manual Ground Balance
1 - 200
100
Threshold B (Bias)
1 –99
50
Threshold A (Volume)
1 –90
30
Gain
1 –10
1
Mode
Gold Detecting in
Mineralised Ground
1 –15
3
Beach Mode
16
3
Static Magnetic Fields (SMF)
1 –100
50
Battery
Displays:
~5.98v –9.99v
Pitch
1 –50
25
Synchronous Mains Rejection (SMR)
1 –200
107

9
QUICK START GUIDE
For people new to the QED, use the following Quick Start Guide to start detecting as quickly
as possible without having to understand all of the available settings and when/why to use
them.
When you feel confident in using the QED and wish to adjust the various QED settings
based on coil size, ground conditions, and target type (small; all; large) to name a few, then
refer to the Advanced Setup Guide.
Step
Description
Turn the detector ON by performing a Factory
Reset
Mode
Factory Default (3)
Ground Balance
•MGB, or
•AGB
THS B
Factory Default (50)
THS A
Start at Factory Default (30) and increase until
a (slight) threshold is heard
GAIN
Start at Factory Default (1) and increase GAIN
as high as prevailing EMI conditions and
Ground Type will allow.
Re-Ground Balance
•MGB, or
•AGB
Notes
Tip:
Once you have adjusted the detector to suit, leave the detector in the MGB adjustment
setting so that you can quickly adjust the GB whilst you are detecting.

10
CONTROL COMMANDS
TURN THE DETECTOR ON
Ensure the battery power lead is connected to the lead socket on
the control box
PRESS the once to turn the detector on.
Click on this YouTube link to see how to turn the QED on.
Note: The detector serial Number appears on the screen for a fraction of
a second after switch on
CYCLE THROUGH MAIN
MENU OPTIONS
PRESS either the Button or the button to toggle through the
Main Menu options (1-9)
TOGGLE BETWEEN A MENU
ITEM NUMBER OR ADJUST
VARIABLE
Pressing the button toggles between displaying the menu
item number or a variable adjustment.
Note:
•A single digit is the menu item number
•Three digits indicates variable adjust mode
Click on this YouTube link to view an explanation of the QED
Control Panel functions.
INCREASE OR DECREASE A
VARIABLE (e.g. GRD BAL)
Press the button to increase a variable number
Press the button to decrease a variable number
TURN THE DETECTOR OFF
PRESS and HOLD the button for three seconds
Click on this YouTube link to see how to turn the QED off.
FACTORY RESET
Note: The factory reset can only be performed with the detector switched
OFF
PRESS and HOLD the button, then press the button for 2
seconds, then release the button.
Click on this YouTube link to see how to perform a Factory reset
Tip:
Before doing a Factory Default
Reset (FDR) set the MGB to
anything but 100 before the
detector is turned off.
Once the detector has been
reset, if MGB is 100 then the
FDR has been done correctly.
Tip:
To quickly get back to the MGB
adjustment screen from any
setting, push the AGB button
momentarily.

11
MENU CONTROLS
1: MANUAL GND BAL (MGB)
Setting range 1-200
Factory preset at 100
Description
The detector will respond to the natural mineralization of the soil and
provide the operator with false signals. It is necessary to Ground
Balance the detector to only register the signals generated by metal
targets.
The Manual Ground Balance procedure is as follows:
•Turn ON the detector
MGB Prerequisites:
✓Before trying to MGB, swing the coil over the ground to make
sure there are no metal targets under the coil, and
✓Wait until the audio settles/recovers before lowering the coil to
the ground.
•Press the button and select Menu Item # 1 to open the
MGB setting
•Very slowly RAISE and LOWER the search coil up and down from
the ground surface –approximately 6 inches down to 1 inch
above the ground and repeat
•Take note of what the audio does as the coil is in the
DOWNWARD motion:
oIf the audio on the downward motion is a LOW tone/pitch,
then increase the MGB by pressing the button.
oIf the audio on the downward motion is a HIGH tone/pitch,
then decrease the MGB by pressing the button.
•When the tone has faded to a minimum, the detector will be
ground balanced.
Note: Do not hit the search coil with the ground surface as this can produce
unexpected results when trying to ground balance the detector.
Tip:
The or buttons
can either be:
•Held in if there is a
large difference
between the ground
and the current
ground balance
setting, or
•incrementally
adjusted to achieve
the MGB.

12
MENU CONTROLS
1: MANUAL GND BAL (MGB)
Setting range 1-200
Factory preset at 100
YouTube Reference
Click on this YouTube link to see how to Manually Ground Balance (MGB)
the QED.
Unable to Ground Balance
If the Ground Balance (GB) is too difficult to achieve or after setting the
Ground Balance the detector becomes noisy for no apparent reason:
•Try to GB by adjusting the MODE to between 6 –15 as this will
help reduce the feedback from hot mineralization pockets of
ground
•Furthermore, keeping the search coil 1 inch off the ground when
detecting can help stabilize the detector at the cost of losing some
sensitivity on some targets
Note: Higher Mode settings can reduce the audio response on very small
targets
Rechecking Ground Balance
whilst detecting
To recheck the ground balance, tilt/lift the coil at the end of each
left/right swing as you are detecting and take note of the audio
response:
•If there is no response, then continue detecting as the detector is
Ground Balanced.
•If there is a RISING response, use the button to increase the
MGB a couple of clicks (at a time) until the audio response is
reduced to a minimum.
•If there is a DIPPING response, use the button to decrease
the MGB a couple of clicks (at a time) until the audio response is
reduced to a minimum.
YouTube Reference
Click on this YouTube link to see how to Recheck the Ground Balance
whilst detecting.
Notes

13
ADVANCED GND BAL (MGB) TECHNIQUE
Description
When detecting extremely variable ground there is a method to prevent
wasting time digging “ground noises”.
•While swinging the coil take note of the response to determine
either rising or falling pitch.
•If the pitch rises, toggle the MGB DOWN 4 counts (or UP 4
counts if the pitch falls) then swing over the patch again.
If the signal has diminished or has disappeared then don’t bother
digging, it’s a ground noise. Restore MGB to previous value and
continue detecting.
Notes
Tip:
A (real) Target will not be
‘balanced’ out by the +- 4
method, even if going +-8
(or more) to determine the
status of a target
response.

14
AUTO GND BAL (AGB)
Setting range 1-200
Factory preset at 100
Description
The Auto Ground Balance (AGB) procedure is as follows:
Note: This procedure is required if the current GB setting is far different from
the current ground.
•Hold the coil about 15" off the ground, press and hold the AGB
button while lowering the coil
•The AGB Button MUST be released when the coil is about 3"
from the ground.
•Take note of which direction (up or down) the Ground Balance
number changed.
oIf a minor manual precision adjustment is required, use
the MGB procedure aided by the above step.
•For minor GB adjustments press and hold the AGB button and
bob the coil up and down to the ground.
•When the tone has faded to a minimum, the detector will be
ground balanced.
Note: Do not hit the search coil with the ground surface as this can produce
unexpected results when trying to ground balance the detector.
YouTube Reference
Click on this YouTube link to see how to Auto Ground Balance the
QED.
Notes
Tip:
The AGB is less
effective at low
Threshold B settings
(less than the neutral
position), so when using
these settings use MGB
instead

15
2. THRESHOLD B –(THS-B) (BIAS)
Setting range 1-99
Factory preset at 50
Description
A small target will produce a rising pitch signal and a large target will
produce a falling pitch signal.
THS-B can be used to provide selective ("BIASED") enhancement for
either small (rising pitch) or large (falling pitch) targets.
THS-B (Bias) is used to set a ‘hair trigger’, such that less signal
strength is needed to produce a good audible signal.
Note: THS-A (All) does the same thing but affects both large and small (falling
& rising pitch) targets equally.
Lowering THRESHOLD B will accentuate rising pitch targets
(generally a small target).
•When prospecting for fine gold, fit a small coil and adjust
THRESHOLD B accordingly to suit the coil using a known
specimen target.
Raising THRESHOLD B will accentuate falling pitch targets (usually
large targets).
•When prospecting for larger specimens fit your selected coil and
adjust THRESHOLD B to suit your selected coil.
Note: BIAS can change slightly overtime depending on temperature.
Note: When the detector is Ground Balanced the audio volume will be very
low.
Threshold Definition
Threshold is the
audible audio floor
that is set just above
‘silent’, so that the
operator can hear a
threshold just above
the prevailing
external conditions
(wind noise, ground
conditions, etc)
[Cite your source here.]

16
2. THRESHOLD B –(THS-B) (BIAS)
Setting range 1-99
Factory preset at 50
Navigating to Threshold B
Select Menu Option #2, then press the button to open the
Threshold B setting.
YouTube Reference
•Click on this YouTube link to see how to set Threshold B.
Threshold B Neutral Position
When looking for both rising and falling pitch targets it's best to put
THRESHOLD B in the neutral position (around 50) and raise
THRESHOLD A to create your desired threshold level.
Locating the “Neutral Position” is determined by raising and lowering
Threshold B and taking note of the numbers as per the following
procedure:
•Start by raising THRESHOLD B with the button until the
THRESHOLD B starts to get to a tolerable volume level (e.g.
58).
•Then lower THRESHOLD B with the button until you get
the same volume level e.g. 44.
oThe above example range is 58 less 44 = 14.
oHalve the 14, which becomes 7.
oAdd 7 to 44 = 51.
•51 is then the THRESHOLD B neutral Position in this example.
YouTube Reference
•Click on this YouTube link to see how to set Threshold B to
Neutral

17
2. THRESHOLD B –(THS-B) (BIAS)
Setting range 1-99
Factory preset at 50
Small Search Coils
When using small coils for finding small (tiny) targets, set the THS-B
(Bias) to an acceptable audio level below the neutral position.
From the neutral position, decrease THRESHOLD B with the
button until an acceptable threshold volume is created (i.e. not too
noisy)
This will boost target responses for smaller targets in the ground.
Process:
If a small coil is fitted test the THS-B out with a small target.
Swinging the coil over it will produce a rising pitch response.
Lower the THS-B by one count at a time and note the
improvement in detection distance.
Keep lowering THS-B until the background audio is at an
acceptable level.
Note: If THS-A is high then just a change of 1 or 2 on the BIAS will make the
QED too sensitive/unstable.
Medium Search Coils
Once the neutral position has been located, leave THRESHOLD B at
the neutral position to achieve a good even target response on both
smaller and larger targets in the ground.
Raise THS-A (Menu Item #3) to create desired audio threshold volume.
Large Search Coils
Once the neutral position has been located, increase THRESHOLD B
with the button until the desired threshold volume is created.
This will boost target responses for larger targets in the ground.
Tip:
Use a test target of say
0.2g. If the 0.2g is louder
and more noticeable
after lowering THS-B,
then BIAS has been
achieved for better
detection on smaller
targets
Tip:
Use test target of approx.
0.2g.
If the 0.2g is faint or
undetectable, then BIAS
has been achieved for
better detection on larger
targets.
Tip:
When searching for
small targets: use a
small coil, a volume of
~30 or less, a gain of ~4,
with the THS-B set
below neutral until a
slight threshold is
created.

18
2. THRESHOLD B –(THS-B) (BIAS)
Setting range 1-99
Factory preset at 50
Notes

19
3: THRESHOLD A –(THS-A) (VOLUME)
Setting range is 1-90
Factory preset at 50
Description
Threshold A (VOLUME) control in conjunction with the Threshold B
(BIAS) controls the detector’s audio signal.
THS-A increases the audible threshold for all targets (both
rising and falling pitch).
Best results can be achieved by using a selected coil and MODE to suit
either large or small targets by either:
•Setting Threshold A low and using an appropriate Threshold B to
set the audio threshold, or
•Setting Threshold B to neutral and use Threshold A to create
desired threshold
Note: As Threshold A is increased, the usable Threshold B range will
decrease.
Note: If using headphones then you can keep THS-A low and listen to the
pitch change as it starts to work at a lower target signal level than
volume change.
The pitch change is unaffected by any setting of THS-A.
Adjusting
Threshold A
Select Menu Option #3, then press the button to open the
Threshold A setting, then either:
•Increase the VOLUME number with the button.
•Decrease the VOLUME number with the button
YouTube Reference
Click on this YouTube link to see how to set Threshold A.
Notes
Tip:
The more Threshold B
can be adjusted below
neutral, then better small
target detection will be
achieved, therefore a low
Threshold A is advisable
when hunting for small
targets

20
4: GAIN
Setting range is 1-10
Factory pre-set at 1
Description
GAIN amplifies target response, ground & mineral noises and EMI.
GAIN only marginally improves detection depth. For better depth
penetration use a larger search coil.
Set GAIN as high as possible. If ground becomes noisy or impossible
to detect or recognize a target in audio, check ground balance or
reduce GAIN until stable.
Note: Ensure that GAIN is re-checked often, usually after a Ground Balance
as mineralized ground may allow a higher GAIN setting depending on
the prevailing ground conditions.
Adjusting Gain
Select Menu Option #4, then press the button to open the GAIN
setting, then either:
•Increase the GAIN number with the button, or.
•Decrease the GAIN number with the button.
YouTube Reference
Click on this YouTube link to see how to set the Gain.
Notes
Other manuals for QED-PL2
1
Table of contents
Other Interfacion Metal Detector manuals
Popular Metal Detector manuals by other brands
Whites
Whites TM 808 instruction manual
Whites
Whites GOLDMASTER Series owner's guide
Whites
Whites Surf P.I. Pro instruction manual

sunjoe
sunjoe 24V-MDTCR1-LTW Operator's manual
Fisher Research Labs
Fisher Research Labs Gold Bug Pro owner's manual

First Texas Products
First Texas Products VLF 2.1 user manual
