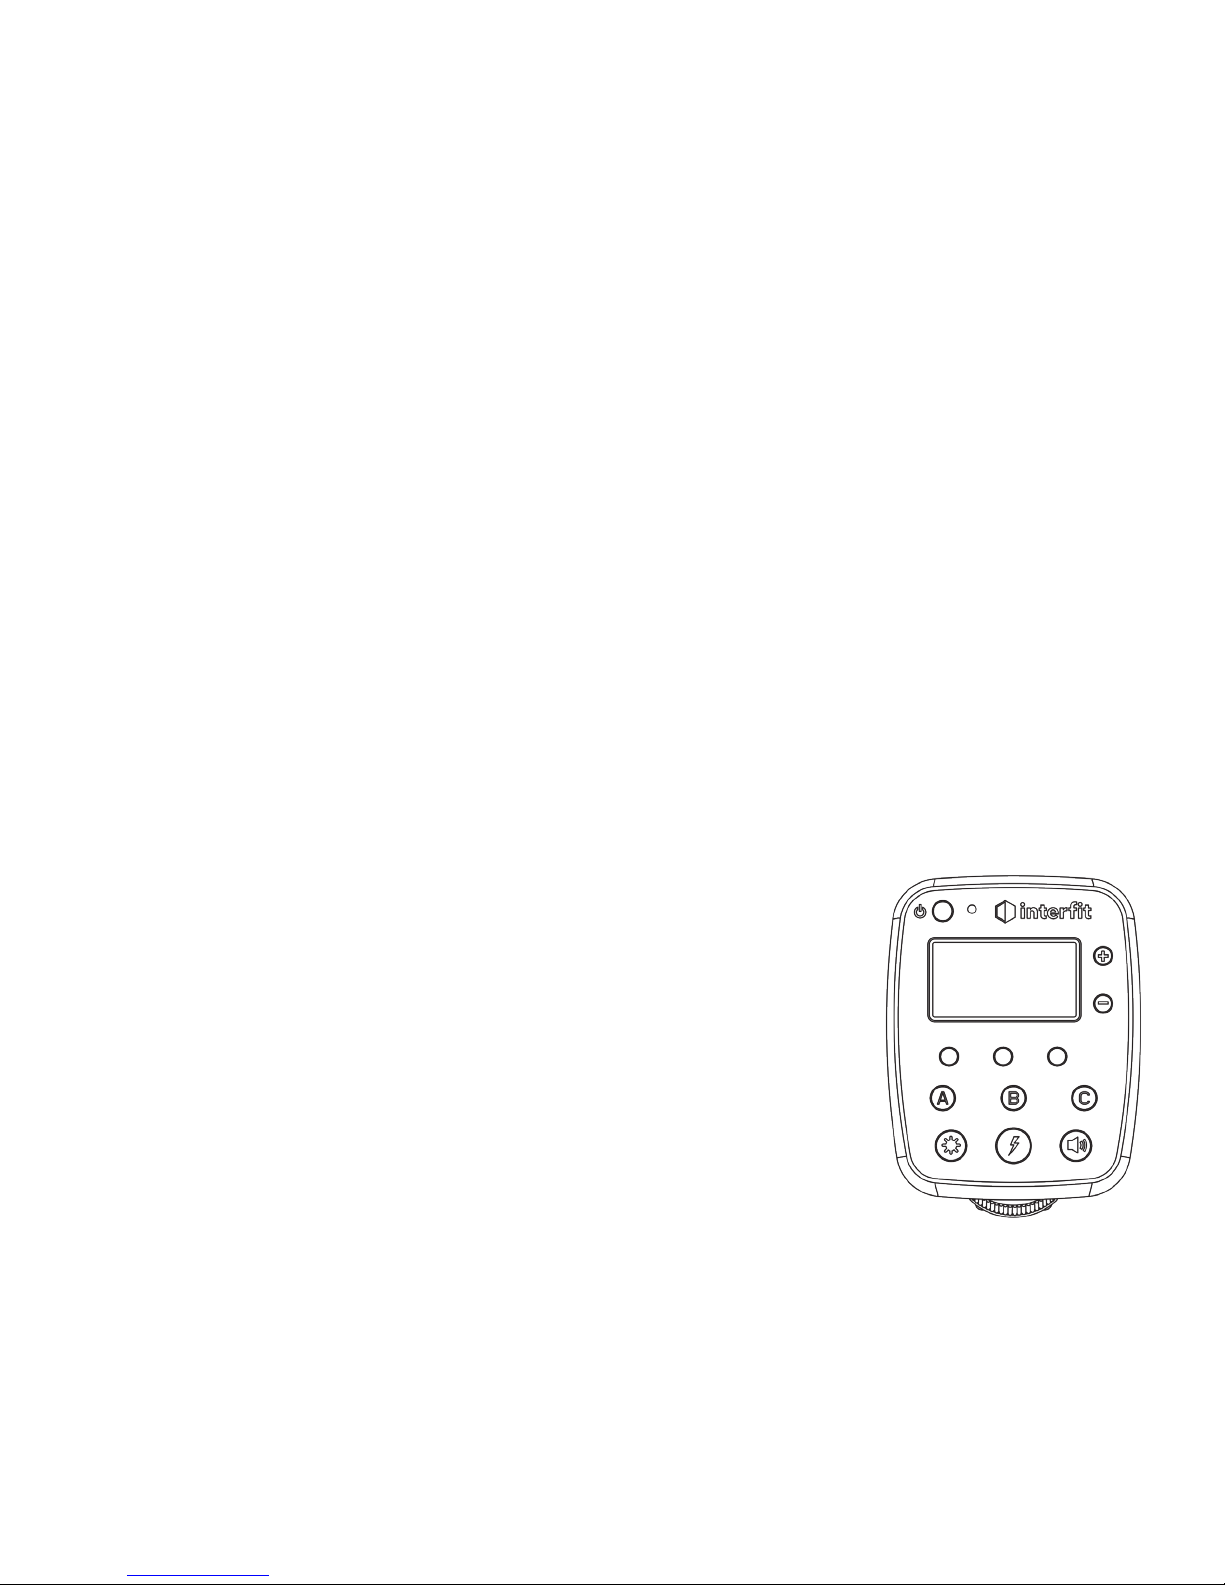
Using TTL (Through-The-Lens Metering)
TTL (Through-The-Lens Metering) is an automatic ash exposure that is predetermined by your camera’s
settings and internal light meter. TTL is most useful in rapidly changing lighting environments.
When the TTL shooting mode is selected with the Intert TTL remote, power adjustment on the remote will
change to a +/
-
display. The light output will be automatically set by the camera but can be ne-tuned using
exposure compensation. Exposure compensation can be set using the +/
-
power buttons on the remote.
Adjustments can be made in 1/10th stop increments up to +3 or
-
3 stops.
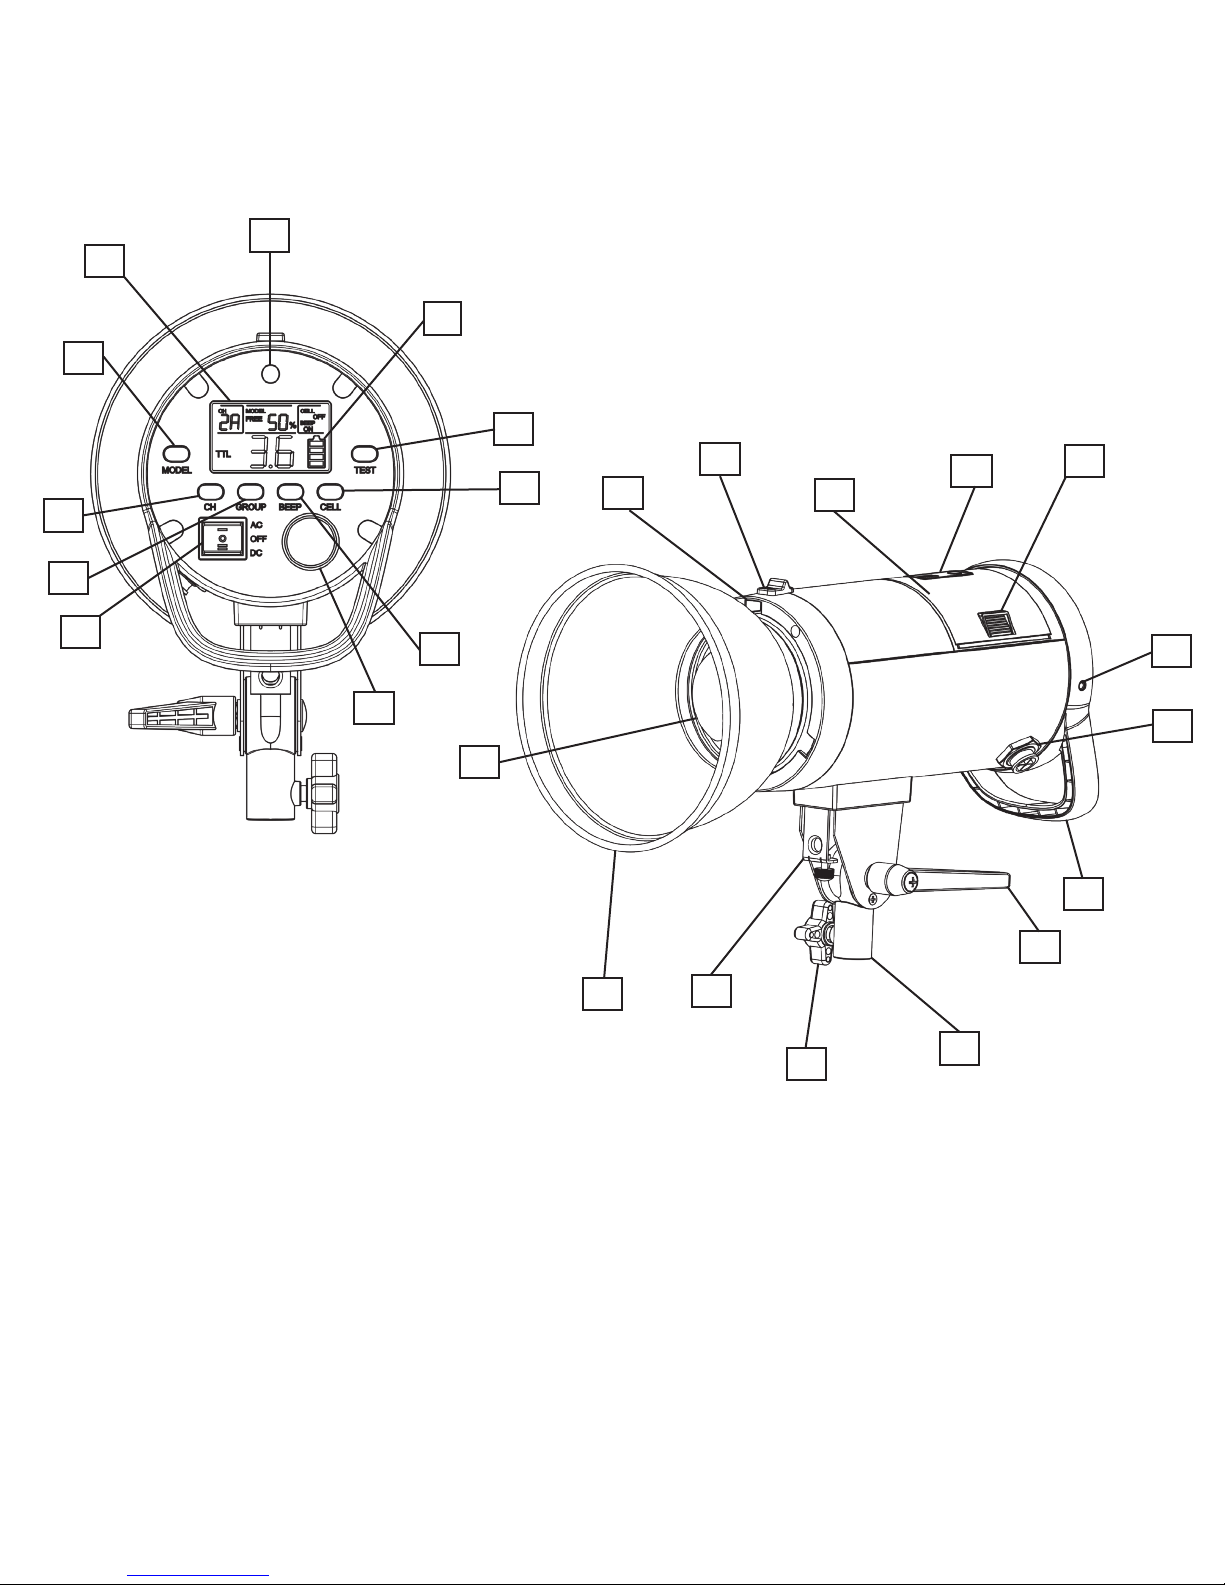
Charging the Battery
To check the amount of charge left on the battery, either press and hold the button on the battery indicator
on top of the battery, or turn the light to DC power mode with the battery inserted to view the LCD battery
indicator on the Intert S1’s LCD screen.
To charge the battery, remove it from the light by pressing together the tabs on both sides of the battery
and lifting straight up. Plug the included battery charger into the battery, then plug the charger into a wall
outlet to charge. There will be no indicator on the battery while charging, but the light on the AC converter/
charger will light up red while charging and green when completed. A full charge will take about 3 hours.
NOTE: Only use the included battery charger with your Intert S1 battery. Using other brand chargers could
damage the battery and will void its warranty.
Mounting to a Light Stand
Your S1 will mount to most standard light stands with a 5/8” stud. Unscrew the Stand Mount Knob until the
mount ts onto the light stand. Make sure to turn the Stand Mount Knob until tight.
Use the Ratcheting Tilt-Lock to adjust the angle of the light on the stand. Once loosened, simply push
the light in the direction you want to tilt and it will click into place in increments. The resistance of the
Ratcheting Tilt-Lock provides extra security when using large, heavy modiers.
Replacing the Flash Tube and Frosted Glass Dome
Both the ash tube and frosted glass dome are user-replaceable*. Replacement parts can be purchased
through the Intert website or a certied Intert dealer.
*The oil from your ngers will damage ash tubes. Be sure to handle new ash tubes with gloves or clean cloth. Always
use caution when handling broken glass.
Firmware Updates
To ensure proper communication between the S1, the TTL remote, and your camera, make sure the rmware
on both your light AND remote are updated to the most recent version. The newest rmware updates are
available in the support section of the Intert website.
To check the rmware version on your light, power the light off, press and hold the “TEST” button, and
power the light back on. A number (1.5, 2.0, etc.) will appear on the LCD readout that corresponds to
the rmware version. To see which version of rmware your remote is using: power the remote on and
press and hold the “mode” button. A letter and number (b 01, b 02) will appear on the LCD readout that
corresponds to the rmware version.
www.intertphotographic.com 8