Welcome
Thank you for purchasing a GENERATIONSERIES
overhead video monitor with built-in DVD
player. Before operating this system, read this
manual thoroughly and retain it for future
reference.
Import nt Notice
It is unlawful in most jurisdictions for a person
to drive a motor vehicle which is equipped
with a television viewer or screen that is
located in the motor vehicle at any point
forward of the back of the driver's seat, or that
is visible, directly or indirectly, to the driver
while operating the vehicle. In the interest of
safety, the G9 &G10 should never be installed
where it will be visible, directly or indirectly, by
the operator of the motor vehicle
S fety Prec ution
or safety reasons, when changing video disc,
it is recommended that the vehicle not be in
motion, and that you do not allow children to
unfasten seatbelts to change disc or make any
adjustments to the system. System adjustments
can be accomplished using the remote control
unit, while seatbelts remain fastened. Enjoy
your entertainment system but remember,
safety of all passengers remains the number
one priority.
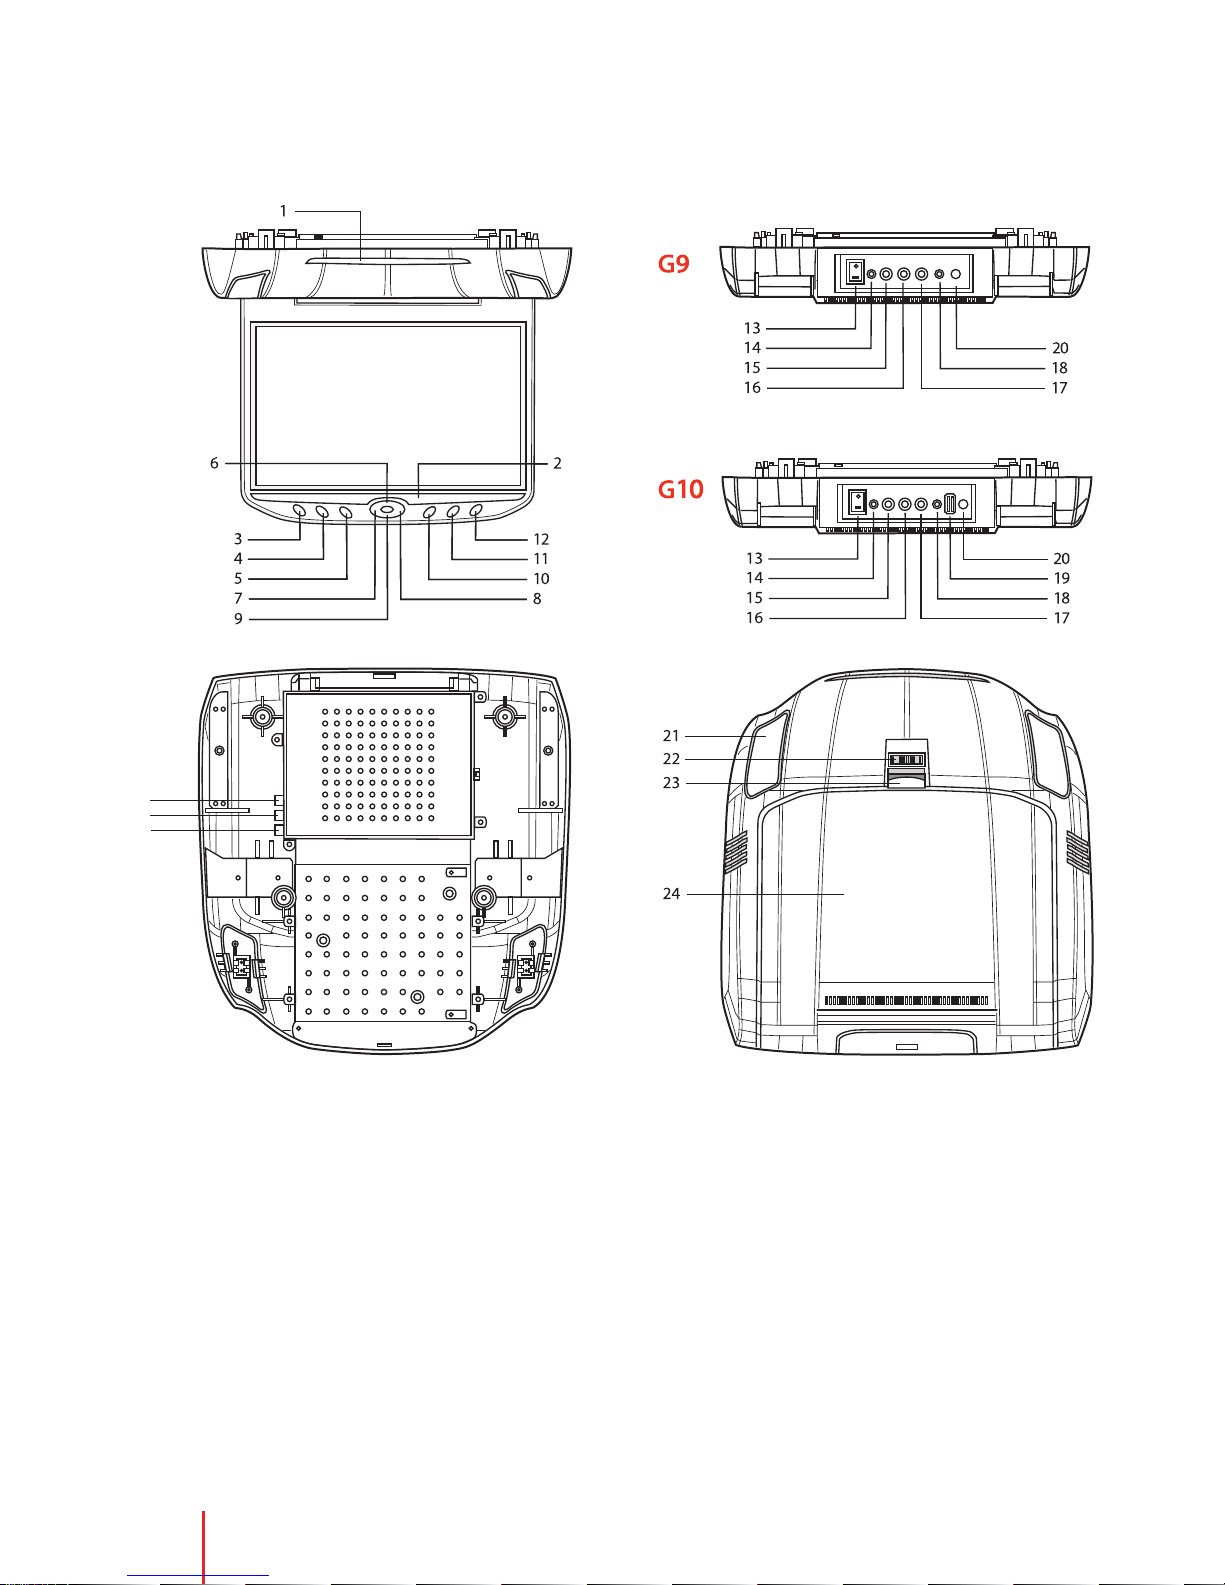
Product Fe tures
•G9 - 9 in T T (Thin ilmTransistor) Active
Matrix LCD ( Liquid Crystal Display ) Monitor
•G10 - 10.2 in T T (Thin ilmTransistor) Active
Matrix LCD ( Liquid Crystal Display ) Monitor
• Slot-load DVD Player
• OSD ( On Screen Display) for Control
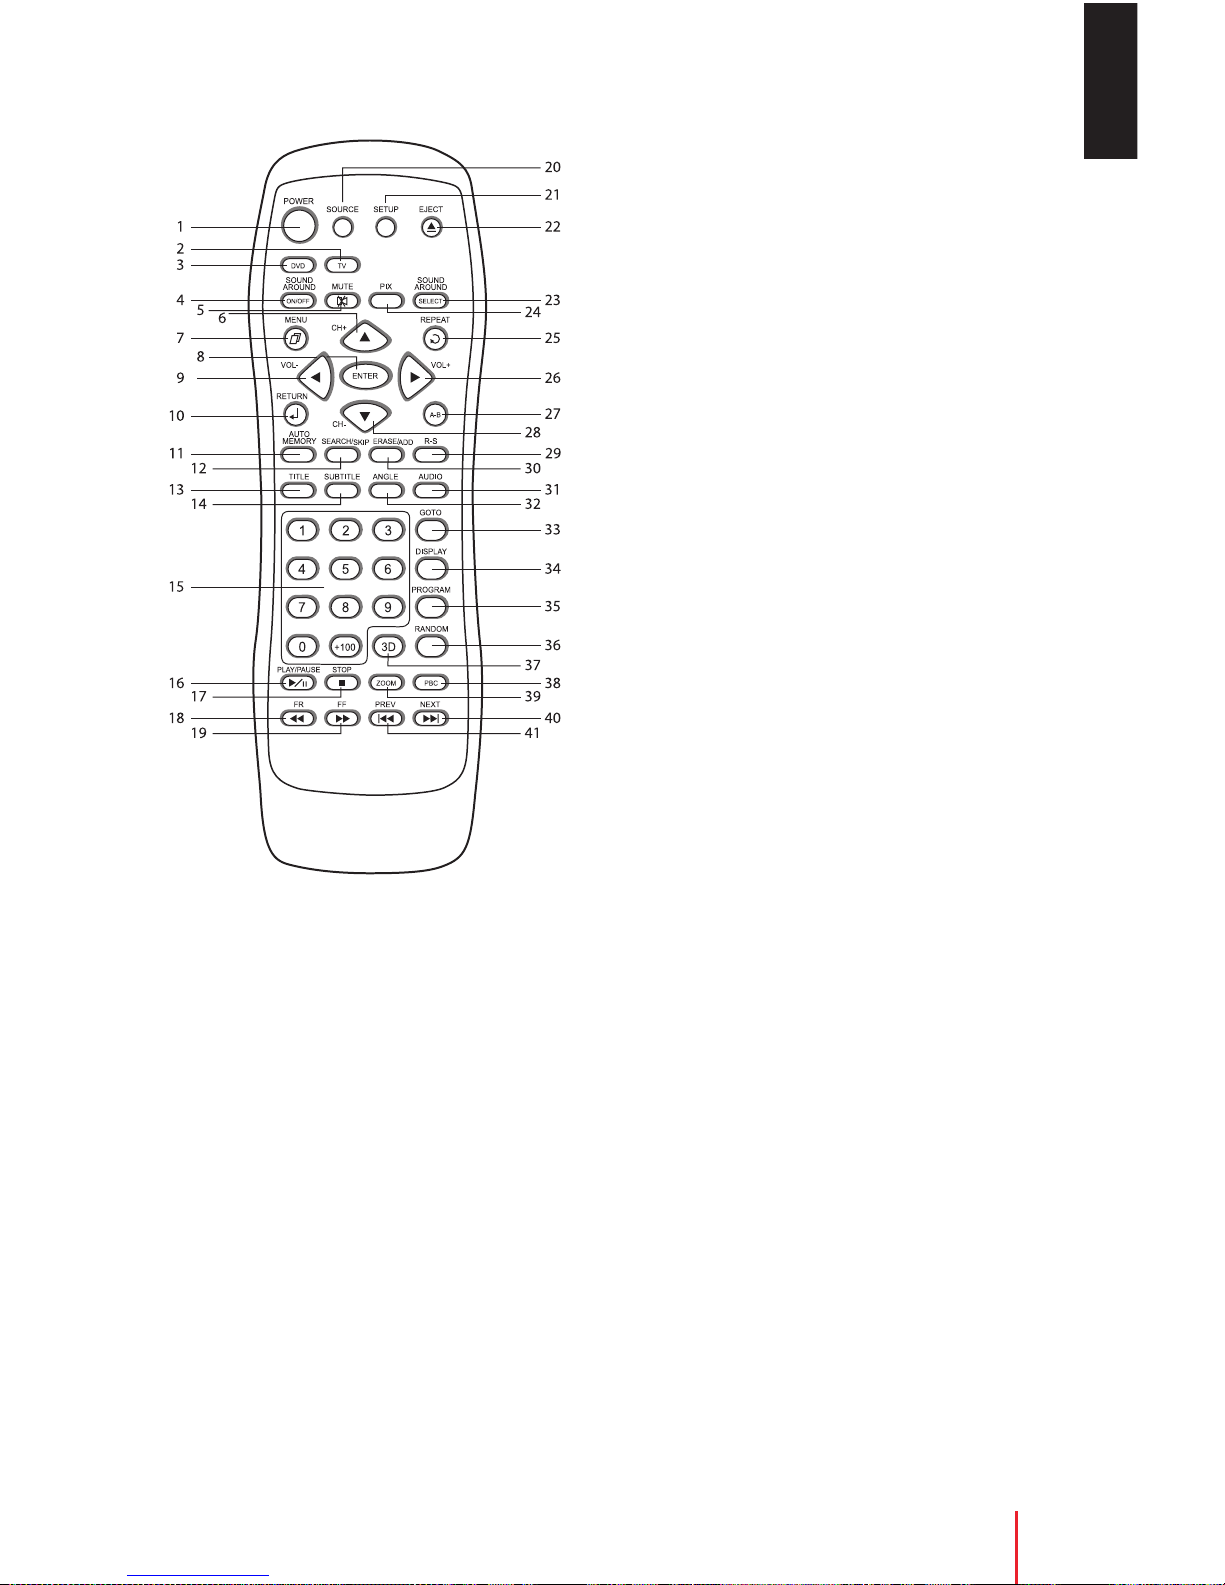
• ull unction Remote Control
• Infrared Transmitter for IR Wireless
Headphones
• Two Audio / Video Sources (Inputs)
• Headphone Amplifier
• 2 Headphone Jacks (DVD /TV /Monitor)
• orward Remote Sensor
• Dome light with Switch
• USB 1.1 port (G10 only)
8Welcome