iSymphony M110 User manual

Micro Music System
M110
User manual
Manuel d’utilisation
Manual de usuario
English : page 1
Français : page 42
Español
: página 83

CAUTION
TO PREVENT FIRE OR SHOCK HAZARD, DO NOT USE THIS PLUG WITH AN EXTENSION CORD,
RECEPTACLE OR OTHER OUTLET UNLESS THE BLADES CAN BE FULLY INSERTED TO PREVENT
BLADE EXPOSURE. TO PREVENT FIRE OR SHOCK HAZARD, DO NOT EXPOSE THIS APPLIANCE
TO RAIN OR MOISTURE.
The exclamation point within an
equilateral triangle is in- tended to
alert the user to the presence of
important operating and
maintenance (servicing) instructions
in the literature accompanying the
appliance.
CAUTION
RISK OF ELECTRIC SHOCK
DO NOT OPEN
The lightning flash with arrow- head
symbol, within an equilateral triangle
is intended to alert the user to the
presence of uninsulated ‘dangerous
voltage’ within the product’s enclosure
that may be of sufficient magnitude to
constitute a risk of electric shock to
persons.
WARNING: TO REDUCE THE RISK OF
ELECTRIC SHOCK DO NOT REMOVE
COVER (OR BACK), NO USER
SERVICEABLE PARTS INSIDE REFER
SERVICING TO QUALIFIED SERVICE
PERSONNEL.
1.
2.
3.
4.
5.
6.
7.
8.
9.
10.
11.
12.
13.
14.
15.
16.
17.
18.
Read these instructions.
Keep these instructions.
Heed all warnings.
Follow all instructions.
Do not use this apparatus near water.
Clean only with a dry cloth.
Do not block any ventilation openings. Install in accordance with the manufacturer’s
instructions.
Do not install near any heat sources such as radiators, heat registers, stoves, or other
apparatus (including amplifiers) that produce heat.
Do not defeat the safety purpose of the polarized or grounding-type plug. A polarized plug
has two blades with one wider than the other. A grounding type plug has two blades and a
third grounding prong. The wide blade or the third prong is provided for your safety. If the
provided plug does not fit into your outlet, consult an electrician for replacement of the
obsolete outlet.
Protect the power cord from being walked on or pinched particularly at plugs, convenience
receptacles, and the point where they exit from the apparatus.
Only use attachments / accessories specified by the manufacturer.
Unplug this apparatus during lightning storms or when unused for long periods of time.
Refer all servicing to qualified service personnel. Servicing is required when the apparatus
has been damaged in any way, such as power-supply cord or plug is damaged, liquid has
been spilled or objects have fallen into the apparatus, the apparatus has been exposed to
rain or moisture, does not operate normally, or has been dropped.
This appliance shall not be exposed to dripping or splashing water and no object filled with
liquids such as vases shall be placed on the apparatus.
Do not overload wall outlet. Use only power source as indicated.
Use replacement parts as specified by the manufacturer.
The product may be mounted to a wall only if recommended by the manufacturer.
Upon completion of any service or repairs to this product, ask the service technician to
perform safety checks.
TABLE OF CONTENTS
Introduction
Important Notes
Compatible Storage Devices
Compatible Audio Formats
Preparation for Use
Connection
Location of Controls & Indicators
Remote Control
Operating instructions
Radio Operation
CD Operation
Playing MP3 & WMA CDs
Memory Card Operation
USB Operation
iPod Operation
Other Functions
Recording
Care & Maintenance
iSymphony Limited Warranty
Technical Specification
3
4
5
6
7
8
13
14
15
18
21
26
30
31
32
35
37
39
40
41
1 2

Thank you for purchasing the iSymphony M110 Micro Music System with Built-in Universal Dock for
iPod. The M110 is the world's first compact hi-fi audio system with such a versatile array of features.
The Universal Dock for iPod allows you to effortlessly access tracks on your iPod and an SD/MMC
card slot and convenient USB port on the front panel let you playback MP3 and WMA files from flash
media. The oversize speakers feature polypropylene cone woofers and dome tweeters ensuring the
richest bass notes and clearest highs. The true 50W x 2 power output means you'll never be lacking
for volume. The CD player can play back audio CDs as well as your own compilations of MP3 or
WMA files and the encoding feature allows you to record from CD and FM radio to flash media. For
added convenience, you can connect the M110 to your computer and exchange songs with your
iPod, and your iPod will charge while it's docked.
Please be sure to read this manual carefully and completely to make sure you understand all of the
exciting features and functions included of your new system. iSymphony has taken great care to
make sure that this system was in perfect working order when it left our factory. If you experience
any problem with the set-up or operation of this system please refer to the back of this manual for
instructions on obtaining customer service.
Serial Number: _______________________________
Please also take a moment to register your product online at
www.myisymphony.com/register
The serial number of your system is located on a label on the back panel. Please take a moment
now to locate the serial number and to write it in the space provided below for future reference. You
may be asked to provide this number if you call for customer service.
INTRODUCTION
3
IMPORTANT NOTES
Avoid installing this unit in places exposed to
direct sunlight or close to heat radiating
appliances such as electric heaters, on top of
other stereo equipment that radiates too much
heat, places lacking ventilation or dusty areas,
places subject to constant vibration and/or humid
or moist areas.
Do not attempt to clean this unit with chemical
solvents as this might damage the finish. Use a
clean dry cloth.
Operate controls and switches as described
in the manual.
Before turning ‘On’ the power, make certain
that power cord is properly installed.
Store your CDs, Memory Cards in a cool
area to avoid damage from heat.
When moving the set, be sure to first
disconnect the power cord.
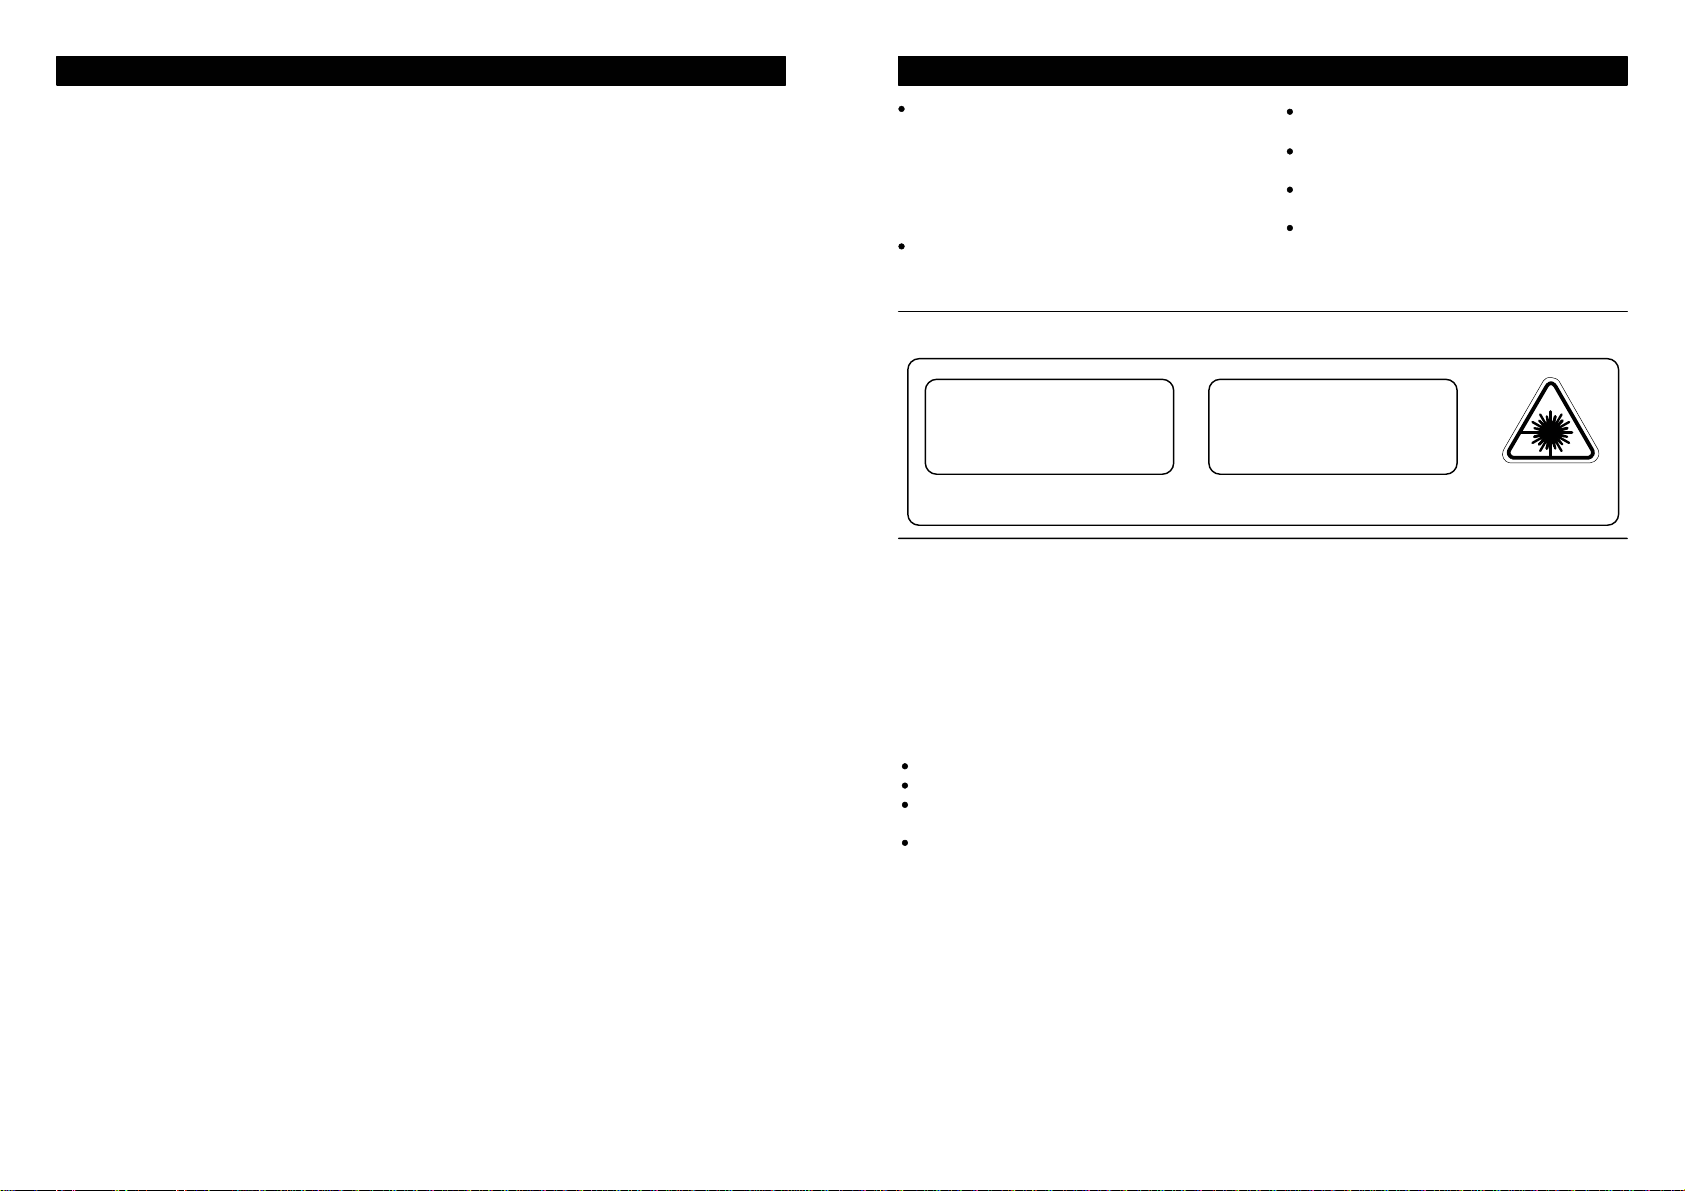
CLASS 1 LASER PODUCT
CLASS 1 LASER PRODUCT
APPAREIL LASER DE CLASSE 1
PRODUCTO LASER DE CLASE 1
CAUTION
INVISIBLE LASER RADIATION
WHEN OPENAND INTERLOCKS
DEFEATED. AVOID EXPOSURE TO
BEAM
This product contain a low power Laser Device.
This equipment has been tested and found to comply with the limits for a Class B digital device,
pursuant to Part 15 of the FCC Rules. These limits are designed to provide reasonable protection
against harmful interference in a residential installation. This equipment generates, uses, and can
radiate radio frequency energy and, if not installed and used in accordance with the instructions, may
cause harmful interference to radio communications. However, there is no guarantee that interference
will not occur in a particular installation. If this equipment does cause harmful interference to radio or
television reception, which can be determined by turning the equipment off and on, the user is
encouraged to try to correct the interference by one or more of the following measures:
Reorient or relocate the receiving antenna.
Increase the separation between the equipment and receiver.
Connect the equipment into an outlet on a circuit different from that to which the receiver is
connected.
Consult the dealer or an experienced radio/TV technician for help.
FCC INFORMATION
This device complies with Part 15 of the FCC Rules. Operation is subject to the following two
conditions:
(1) This device may not cause harmful interference, and
(2) This device must accept any interference received, including interference that may cause
undesired operation.
Changes or modification not expressly approved by the party responsible for compliance could avoid
the user’s authority to operate the equipment.
Á
4

56
COMPATIBLE STORAGE DEVICES
CD USB SD MMC
This system supports playback of music from CD discs as well as USB and flash memory card devices.
IMPORTANT:
This player can play normal (pre-recorded) CD discs plus CD Recordable and CD Rewriteable
discs. The ability of this unit to play certain recordable discs may depend on the quality or
physical condition of the disc, the quality of the recording, or characteristics of the recording
device or software application. Playback cannot be guaranteed in all situations. This is not an
indication of any problems with your player.
This player is designed to play media from SD/MMC card devices and from USB flash memory
devices that comply with the USB mass storage standard. Playback of media from USB
connected devices such as MP3 players that generally require drivers for interaction with a PC
is not supported. Playback from all physically compatible flash devices cannot be guaranteed in
all situations. This is not an indication of any problem with your player.
Supported CD Types
CD Audio
CD-R
CD-RW
Secure Digital™ (SD)
miniSD™ (with adapter only)
microSD™ (with adapter only)
Multimedia Card (MMC)
!
Supported Memory Card Formats
Where “with adapter only” is mentioned, you must use the adapter to convert from the
small format to full-size card format. Attempting to use these formats without the proper
adapter may cause damage to the memory card or the unit. Do not attempt to insert these
cards without the proper adapter.
This unit does not support the following card formats. Attempted use of these unsupported
formats may cause damage to the memory card or the unit. Do not attempt to insert these
unsupported cards:
Compact Flash® (Type I and Type II)
MicroDrive™
Smart Media™
Memory Stick™
Memory Stick Duo™
xD Picture Card™
Discs with non-standard shapes (e.g. heart, square, star) cannot be played in this unit.
Attempting to do so may damage the unit.
COMPATIBLE AUDIO FORMATS
This system supports playback of songs in CD-audio (pre-recorded CDs), MP3 and Windows Media
formatted Audio (WMA). This system does not support Digital Rights Management (DRM). This
system cannot play songs purchased from iTunes or other songs in AAC format, songs in ATRAC
format or songs purchased from some online music retailers. It may be possible to convert your
music to one of the playable compressed formats, or burn it to an audio CD, depending on the DRM
restrictions.
This system is compatible with MPEG1 Audio Layer 3 (MP3) 32, 44.1 or 48kHz formats. The
recording format should be in accordance with ISO9660 CD-ROM file system. MP3 file name requires
MP3 or mp3 as an extension. Chinese characters cannot be displayed, although files featuring them
can be played. VBR (Variable Bit Rate) files can be played, but playing time may not be shown
correctly. Up to 99 folders and 999 tracks can be accessed.

PREPARATION FOR USE
This carton contains the main unit, two speakers with removable front panels, and the remote
control handset.
Carefully remove all the components from the carton and remove all packing materials form the
components. Make sure nothing is accidentally discarded with the packing materials.
Save the carton and packing materials, if possible, in the unlikely event that this unit ever needs to
be returned for service. Using the original carton and packing material is the only way to properly
protect the unit from shipping damage.
Remove any descriptive stickers or labels from the front panel of the main unit. Do not remove any
labels or stickers that may be affixed to the back panel of the main unit or the speakers.
Unwind the AC power cord on the back of the main unit and extend it to its full length.
Unwind the FM lead wire antenna on the back of the main unit and extend it to its full length.
Unwind the speaker cables and connect the ends to the terminals on the the speakers and on the
main unit.
Unpacking and Set Up
78
Power Source
This system is designed to operate on 120V AC 60Hz house current only. Connecting this system to
any other power source may cause damage to the system and such damage is not covered by your
warranty.
NOTE: The system has polarized AC plug with one wide blade and one narrow blade. The plug will
only fit into matching polarized AC outlet.
This is a safety feature to reduce the possibility of electric
shock. If the plug will not fit in your AC outlets, your
probably have outdated non-polarized outlet. You should
have your outdated outlet changed by a qualified, licensed
electrician. Do not file the wide blade on the plug, or use an
adapter to make the plug fit into your outlet. This defeats the
safety feature and could expose you to electric shock.
AC Plug AC Outlet
CONNECTION
Note: Always connect the speakers before switching the power ‘On’, and never
operate the system without the speakers properly connected.
The speaker cables and the speaker terminals are color-coded.
To make the connection, completely depress the plastic levers to open the terminals, insert the bare
end of speaker wire into the terminal openings, and release the plastic levers to lock the wires in place.
Connect one end of the wires to the main unit, the other to the speakers.
120V AC, 60 Hz
Connect the Gold wires to the Red terminals.
Connect the Silver wires to the Black terminals. If the wires are connected incorrectly the sound
will the “muddy” or distorted.
Connect the AC cord to the back of the unit
GOLD
SILVER

910
Placement Of The System
The system should be placed on a stable, level surface such as a table, shelf, or stand, convenient to
a 120V 60Hz AC outlet, out of direct sunlight, and away from sources of excess heat, dust, moisture
or vibration.
The speakers may be separated from the main as far the wires allow for maximum stereo separation,
or the may be placed to the immediate left and right of the main unit.
Install Batteries into Remote
Insert two AAA batteries into the remote control
while observing the correct (+) and (-) polarities
as shown below.
Protect Your Furniture
This model is equipped with non-skid rubber feet to prevent the product from moving when you
operate the controls. These feet are made from non-migrating rubber material specially formulated to
avoid leaving any marks or stains on your furniture. However certain types of oil based furniture
polishes, wood preservatives, or cleaning sprays may cause the rubber feet to soften, and leave
marks or a rubber residue on the furniture. To prevent any damage to your furniture we strongly
recommend that you purchase small self-adhesive felt pads, available at hardware stores and home
improvement centers everywhere, and apply these pads to the bottom of the rubber feet before you
place the product on fine wooden furniture.
CONNECTING EXTERNAL DEVICES
Connect the external audio equipment to the AUX IN jack on
the front panel or the LINE IN jacks on the rear of the system
as shown below.
This system includes two auxiliary inputs, one on the front labeled "AUX IN" and other at the back
labeled "LINE-IN". These inputs allow you to connect external audio sources and play the audio
through the speakers of the system. You may find it convenient to connect equipment you use
regularly (such as a turntable) to the rear line inputs and equipment you use occasionally (such as
iPod shuffle or another MP3 player) to the front input. If devices are connected at the same time to
both inputs, the front input is automatically selected as the audio source. To listen to the audio from the
rear input you must disconnect the front input.
Auxiliary Input Jacks
To listen to the external audio source:
OR
Select the "AUX" mode using the FUNCTION button. Audio plays through the system's speakers.
LINE
OUT
LINE
IN
Cable (not included)
Plug x2 Plug x2
EXTERNAL DEVICE
Cable (not included)
Plug x2 Plug x1
LINE
OUT
LINE
IN
EXTERNAL DEVICE
This appliance is designed to meet California Energy Commission (CEC) energy consumption
requirements. In order to meet these requirements, a low power-consumption "ECO" mode is
included, and this function is by default enabled in all products leaving the iSymphony factory. With
the ECO function enabled, this unit will not display clock time while in standby mode. THIS IS NOT
AN INDICATION OF ANY PROBLEM WITH YOUR UNIT. If you wish the unit to show an illuminated
clock while in standby, please refer to page 17 of the user manual for instructions on disabling the
ECO function.
Important notice Regarding Compliance with California Energy Regulations
External audio source
Cable (not included)
AUX IN

11 12
This system includes a subwoofer output jack on the rear panel labeled “SUBWOOFER OUT”. You
may connect an external, powered subwoofer using a single RCA-type cable as shown below.
This system includes a pair of LINE OUT (R/L) jacks for the connection to external equipment.
LINE OUT
LINE IN
Cable (not included)
Plug x2 Plug x2
To LINE-IN Jacks of
external equipment
Line Output Jacks
Connect as shown below.
Connecting a Subwoofer Video Connections
This system includes two video output jacks on the rear panel:
Composite video output labeled “VIDEO OUT”
S-VIDEO output labeled “S-VIDEO OUT”.
These connectors allow you to send the video signal (still images or movies) only from a capable iPod
to a connected TV. Other video output is not supported. Connections are made as below using either
RCA-type or S-VIDEO type cables, not included.
This system includes a stereo PHONES jack on the front panel of the main unit. You may connect a
set of stereo headphones, not included, to this jack for private listening without disturbing others.
The main speakers are automatically shut off when headphones are connected to the PHONES jack.
Make sure that the plug from your headphones is fully inserted into the headphone jack. If the plug is
not fully inserted the sound may be intermittent, or you may only hear sound from one side of the
headphones.
IMPORTANT: To prevent hearing damage always set the volume control to a low level before you
connect the headphones. Then connect the headphones, put them on, and very gradually increase
the volume to a comfortable listening level. Remember that CDs may contain both very soft and very
loud passages. Adjust the volume to a comfortable level using a louder passage, so that you always
know what the maximum level will be.
Connecting Stereo Headphones
Powered Subwoofer
Cable (not included)
SUBWOOFER
OUT
To S-VIDEO input of TV
TV
Cable (not included)
OR
TV
To composite video
input of TV
Cable (not included)
S-VIDEO OUT
VIDEO OUT

16. AUX IN Jack
17. PHONES Jack
18. FLASH USB Slot
19. FLASH MEMORY CARD Slot
20. AM AERIAL Socket
21. FM AERIAL Socket
22. iPod USB Sync. Connector
23. AC Power Socket
24. SPEAKER terminals
25. LINE IN RCA Jacks
26. LINE OUT RCA Jacks
27. SUBWOOFER OUT Jack
28. S-VIDEO OUT Jack
29. VIDEO OUT Jack
30. Universal Dock for iPod
1. Remote Sensor
2. STANDBY LED
3. STANDBY/ON Button
4. FUNCTION Button
5. STOP Button
6. PLAY/PAUSE Button
7. SKIP/TUNING UP Button
8. - PRESET/ALBUM + Button
9. PRG/CLK Button
10. VFD Display
11. EQ Button
12. VOLUME Control
13. DBBS Button
14. OPEN/CLOSE Button
15. RECORD Button
LOCATION OF CONTROLS
1
2
3
5
8
4
6
7
9
20
11
12
13
14
15
16
17
18
19
21
22
23 24
25
26
27
28
29
30
10
13 14
REMOTE CONTROL
1. STANDBY/ON Button
2. EQ Button
3. REPEAT Button
4. PRESET/ALBUM/MENU +/- Button
5. SKIP Button
6. STOP/BAND Button
7. MUTE Button
8. OPEN/CLOSE Button
9. TIMER Button
10. ST/MONO Button
11. SLEEP/ECO Button
12. DBBS Button
13. PROG/CLK Button
14. RANDOM Button
15. MENU/INTRO Button
16. SKIP Button
17. SELECT ID3 / BIT RATE Button
18. REC Button
19. PLAY/PAUSE Button
20. VOLUME + Button
21. VOLUME - Button
22. FUNCTION Button
10
9
1
2
3
4
5
6
7
8
11 12
13 14
15
16 17
18 19
20 21
22

OPERATING INSTRUCTIONS
Make sure that you have fully extended the FM antenna wire.
Make sure that you have installed batteries in the remote control handset.
Make sure that the system is connected to an AC outlet that is always “live”.
Do not connect the system to an AC outlet controlled by a wall switch.
Most of the main functions of this system can be operated by the controls on the front panel of the
main unit, or by the buttons on the remote control handset. If a specific function can only be
operated by the remote handset, or by the front panel controls, this will be clearly indicated in the
instructions.
General Controls
The effective operating range of the remote control is approximately 15 feet. Please note that bright
sunlight or room lighting may interfere with the remote control operation. If the remote is not operating
properly try reducing the brightness of the room or moving closer to the main unit. If this does not
solve the problem, it may be time to change the remote control battery.
When operating this system with the remote control handset make sure that the IR (Infrared)
transmitter on the front of the remote handset is pointed at the remote sensor on the front panel of
the main unit.
15 16
Volume Controls
The preset equalizer allows you to adjust the sound characteristic for the most popular types of music.
Press the DBBS button to increase the bass response “BBS-ON” appears briefly on the display
and “X-BASS” remains in the lower left of the display.
Press again to cancel the Bass Boost function.
Press the MUTE button on the remote control to shut off the
speakers temporarily.
The sound stops and the “MUTE” indicator flash in the display.
Press the MUTE button again to cancel the mute function and
restore the sound. The “MUTE” indicator disappears.
The mute function will also be canceled automatically by pressing
the VOLUME + or VOLUME – buttons.
To increase or decrease the system volume
EQ (Electronic Preset Equalizer)
When the power is switched off automatically returns to the same level when the power is switched
on again.
DBBS (Dynamic Bass Boost) Control
Press the EQ button to cycle through the following equalizer settings:
FLAT, CLASSIC, ROCK, POP, JAZZ.
MUTE Button (On Remote Control Only)
The appropriate EQ indicator briefly appears on the display to confirm
your selection, and your selection is shown at the bottom of the display.
The system remembers the EQ setting when the power is switched off
and returns to the same setting when the power is switched on again.
Press the VOLUME + or VOLUME – buttons on the remote control
or turn the VOLUME Control on the front panel.
The Volume Level Indicator will appear on the display when you
change the volume level. The level indicator ranges from VOL MIN
to VOL MAX.
Note : If VOLUME setting is over 26 when the unit is turned off,
it will revert to 26 when the unit is turned on again.

17 18
When the AC power is connected, “AM 12:00” will appear on the display.
The clock can only be set while the unit is off.
Setting the Clock
Note: This unit uses 12 hour time format only.
Press the PROG/CLK button to confirm.
Press the PROG/CLK button, the “AM” and hour digits begin to flash.
Press the SKIP/TUNING or buttons to adjust the hour.
Press the PROG/CLK button to confirm. The minute digits begin to flash.
Press the SKIP/TUNING or buttons to adjust the minute.
ECO Function
You can select whether or not the clock is displayed while the unit is in standby mode. Selecting
ECO mode means the unit will use less electrical power while in standby mode.
To turn the clock display off:
Hold the SLEEP/ECO button for 3 seconds while the unit is in standby
mode. Display shows “ECO ON” and clock display disappears.
To turn the clock display on:
Hold the SLEEP/ECO button for 3 seconds while the unit is in stand
by mode. Display shows “ECO OFF” and clock display appears.
RADIO OPERATION
Press the FUNCTION button repeatedly until the main display shows “TUNER”.
AM or FM frequency will appear on the display.
Tune to the desired station as follows:
Manual Tuning
Repeatedly press the SKIP/TUNING or buttons until the display shows the exact
frequency of the desired station. Use the Manual Tuning method to tune to weak or distant
stations that are not strong enough to be recognized by the Automatic Tuning system.
Automatic Tuning
Depress and hold the SKIP/TUNING or buttons until the display begins to move, then
release the buttons. The Tuner will search up or down the band for the next strong signal and
stop on that station. Repeat this procedure until the tuner stops on your desired station.
FM Stereo signal is indicated by the “ST” indicator.
Press the STOP/BAND button to switch between the AM and FM bands.
Press the ST/MONO button on the remote control to select FM
Mono mode.
If the FM Stereo reception is noisy or weak:

19 20
Hints For Better Reception
FM: The FM lead wire antenna on the back panel should be extended to its full length. You may
also have to vary the direction of this antenna until you find the position that provides the best
reception.
AM: Insert the socket of loop aerial into the AM antenna socket on the unit. Adjust the position of the
loop aerial until you find the position that provides the best reception for your favorite AM
stations.
FM 75 Antenna
AM
2.
Presetting Stations In The Tuner Memory
You can store up to 45 of your favorite stations (30 FM / 15 AM) in the tuner memory for easy recall
at any time.
Using either the manual or automatic tuning method described on page 18, tune to the first
station you wish to memorize. Example: FM 103.5 MHz
Press the PROG/CLK button on the remote control.
The display shows “PRG” and the channel number
“1” indicator flashes.
3. Press the PRESET/ALBUM/MENU + or -buttons to
select the preset memory location.
Example “3”.
Press the PROG/CLK button again, the “3” stops
flashing confirming that the station has been stored
in preset channel location “3”.
5. Tune to the next station you wish to store,
repeat steps 1-4 until you have stored up to 30
stations on the FM band.
1.
4.
Press the STOP/BAND button to switch to the AM
band and follow the same procedure to enter up to
15 AM stations in the tuner memory.
6.

21 22
CD OPERATION
Normal Playback
Press the FUNCTION button to select “CD” function.
Press the OPEN/CLOSE button on front panel to open the CD tray.
Load a disc into the player with the printed label facing out.
NOTE: The reading time may be longer if you are using CD-R or CD-RW discs. This is normal
and not an indication of any problem with your unit.
Press the OPEN/CLOSE button to close the CD tray.
The display will show flashing “READ” as the player
reads the Table Of Contents on the disc.
In stop mode, press the PLAY/PAUSE button to begin
playback.
Playback will continue until all tracks on the disc have been
played, then the player stops and the display shows the total
tracks number and playing time on the disc.
To stop playback at any time, press the STOP/BAND button.
Pause Control
Skip Track and High Speed Music Search
During playback, repeatedly press the SKIP/TUNING or buttons to skip to higher or
lower numbered tracks. Playback will begin on the selected track.
During playback, depress and hold the SKIP/TUNING or buttons to search within a
track at high speed to locate a specific musical passage.
Release the SKIP/TUNING or buttons when you hear the desired passage.
Normal speed playback will resume at that point.
To pause temporarily during CD playback
The sound stops and the elapsed time flashes in the display,
but the disc continues spinning.
Press the PLAY/PAUSE button once more to cancel Pause
mode and resume playback at the same point. The elapsed time
stops flashing.
Press the PLAY/PAUSE button.

2423
Repeat Playback (On Remote Control Only)
The Repeat function in this system allows you to continuously repeat a single track, or the entire disc.
The Repeat function can be activated during playback or while the player is stopped.
One Track Repeat
Select the track to be repeated and begin playback.
Press the REPEAT button on remote control once.
The indicator appears in the display and the selected
track will be repeated continuously.
All Tracks Repeat
Load the disc in the player and begin playback.
Press the REPEAT button on the remote control twice.
Random Playback (On Remote Control Only)
The Random playback feature allows you play all the tracks on the disc in random order. You can
select random playback while the disc is playing or when the player is stopped.
Load a CD in the player as usual and then press the RANDOM button on the remote control
handset.
The “RNDM” indicator appears in the display.
The player will randomly select a track from the disc and begin
playback. Random playback will continue until all tracks have
played once, then the player stops.
To stop Random playback, press the RANDOM button on the remote control again.
The “RNDM” indicator disappears and normal playback will resume from that point.
The ALL indicator appears in the display. All tracks on
the disc will be repeated continuously.
To cancel Repeat playback mode press the REPEAT button until the ALL indicators
disappear from the display.
Repeat mode can also be canceled by opening the CD tray, switching to the TUNER or AUX
mode, or pressing the STANDBY / button to return the system to the Standby (Off) mode.
INTRO Scan Play back (On Remote Control Only)
This feature allows you to play just the first 10 seconds of each track on the disc. This may be useful
when you are trying to locate a specific song but you do not remember the track number.
Load the disc as usual and wait until the display shows the total playing time and number of tracks.
Press the MENU/INTRO button on the remote control.
The player will play the first 10 seconds of each track
automatically. When the first 10 seconds of the last track has
played the player stops and the display again shows the total
playing time and number of tracks on the disc.
The “INTRO” indicator will appear in the display.
To cancel the Intro mode press the MENU/INTRO button once more until the “INTRO” indicator
disappears.
Programmed Playback
The Programmed Playback feature allows you to program a total of up to 64 tracks in any desired
order. You may program the same track to play several times within a program sequence if desired.
Note: You cannot program tracks during playback. If a disc is playing press the STOP/BAND
button first to stop playback before beginning the programming steps below .
1. Load the disc in the player and wait until the player has read
the Table of Contents of the disc.
2. Press the PROG/CLK button.
The “PRG” indicator, Program Memory “P- 01” and Track
“001” will appear in the display .
3. Then press the SKIP/TUNING or buttons to
select the first track on the disc to be programmed.
Example: Track 07
4. Press the PROG/CLK button again to enter Track 07 in
program memory #1. The program memory number
advances to “P- 02”.
5. Repeat steps 3 and 4 selecting the desired Track number each time until you have entered up to
64 tracks in the CD program memory.

2625
6. Press the PLAY/PAUSE button to begin programmed playback .
The “PRG” indicator remains on display.
The player will play all the tracks that you programmed in the
desired sequence. After the last programmed track has
played the player stops, but the programmed sequence
remains in the memory.
To play the programmed sequence again, press the PLAY/PAUSE button again.
To cancel the programmed sequence from the memory press the STOP/BAND button at
programming mode.
Programmed Repeat Playback
You can use the Programmed and Repeat Play back functions together to continuously repeat a
programmed sequence.
Program up to 64 tracks as described above.
Press the REPEAT button on the remote control twice.
Press the PLAY/PAUSE button to begin Programmed
Repeat Playback. The programmed sequence will be repeated
continuously.
PLAYING MP3 & WMA CDS
You may see the flashing “READ” indicator for a minute
or more before playback begins. This is normal
and not an indication of any problem with your player.
Most of the normal CD operations described in this manual also apply to MP3/WMA CDs. However
there are a few differences in MP3/WMA CD playback functions, and these are described on the
following pages.
MP3/WMA CD Reading Time and Display Information
After you load an MP3/WMA CD the player will read each of the directories or albums on the disc,
one at a time, and display the Directory Number and the cumulative number of tracks in the
directories that have already been read.
Because MP3/WMA CDs contain so much more information than normal CDs this CD player will take
longer to read the table of contents information on an MP3/WMA disc.
Press the PRESET/ALBUM/MENU + button repeatedly to
select album “03”. The track will show “48”
Press the SKIP/TUNING button five times the
display shows Track “53”.
MP3/WMA CD Playback
To skip quickly from a track in one directory to a track in another directory:
The PLAY/PAUSE, SKIP/TUNING , SKIP/TUNING and STOP/BAND controls have
the same functions for MP3/WMA CDs as they do for normal CDs.
Load an MP3/WMA CD into the player. Wait until the reading process is completed.
Example: Let’s assume that you want to skip to Directory # 03/Track # 005.
After reading the disc, the player will play automatically.

2827
Press the PLAY/PAUSE button to start playback.
MP3/WMA CD Repeat Playback (On Remote Control Only)
There are 3 Repeat Playback options with MP3/WMA CDs. In addition to the Repeat 1 Track and
Repeat All Tracks options which are the same for normal CDs, you may also select Directory Repeat
Mode to repeat all the tracks contained in a single Directory.
To repeat a single track on an MP3/WMA CD
Select the track to be repeated and start playback as usual.
Press the REPEAT button on the remote control once.
The indicator appears and the selected track
will be repeated continuously.
To repeat all the tracks on an MP3/WMA CD
Begin playback as usual.
Press the REPEAT button twice.
The ALL indicators appear on the display and all the tracks
on the disc will be repeated continuously.
To repeat all the tracks in a single Directory (or Album)
Select the directory to be repeat playback as usual.
Press the REPEAT button 3 times.
Both the “ALBUM” and indicators appear in the display
and all the tracks in the directory will be repeated continuously.
Press the REPEAT button until the “ALBUM ALL” indicators disappear.
To cancel Repeat Playback
Press and hold the SELECT ID3/BIT RATE button to scroll through the “ID3 text” information. If
the information was properly inserted when the files were created, the display will show the song
“TITLE”, “ARTIST” name, and “ALBUM” name. If the album was not properly named, the
display will show “UNKNOWN”
Press the SELECT ID3/BIT RATE button again to return to Track and Play-time display.
MP3/WMA CD Intro Scan and Random Playback Modes (On Remote Control
Only)
These functions operate the same way for MP3/WMA CDs as they do for normal CDs.
Intro Scan Playback
Load an MP3/WMA CD in the player. Wait until the reading
process is completed.
Press the MENU INTRO button, the “INTRO” indicator
appears in the display and begins Intro Scan playback. The
player will play the first 10 seconds of each track on the disc.
Random Playback
Load an MP3/WMA CD in the player. Wait until the reading
process is completed.
Press the RANDOM button the “RNDM” indicator appears in
the display. The player will play all the tracks on the disc in
Random order.
ID3 Track Information Display
When you create a CD on your computer containing MP3/WMA audio files the software you use to
create the disc will normally allow you to input the name of the artist, the name of the album, and the
titles of the individual songs.
To display ID3 Track Information

3029
1. Press the PROG/CLK button.
MP3/WMA CD Programmed Playback
When programming the tracks on an MP3/WMA CD you must also select the Directory Number of
the tracks being programmed.
You can program up to 64 tracks on an MP3/WMA CD, same as for a normal CD.
Programming can only be done while the player is in the Stop mode. If the MP3/WMA disc is
playing, first press the STOP/BAND button to stop playback, then follow the programming
steps below.
The display shows Album “01”.
Track “001”, Program Number “P – 01” and “PRG”
indicator appear.
2. Press the PRESET/ALBUM/MENU + button repeatedly
to select Album #05.
(The display shows Track #102, it means the first track
of Album #05 is #102.)
4. Press the PROG/CLK button again to enter Track 107
in program memory P- 01.
The program memory number advances to “P- 02”.
In this example the MP3/WMA CD contains a total of 09 Directories (Albums) and 193 Tracks (Files).
Let’s assume that the first track we want to program is Track #03 in Album #05.
3. Press the SKIP/TUNING button repeatedly
to select track # 05 of Album #05 (#107).
After you have entered up to 64 tracks in the Program Memory, press the PLAY/PAUSE button to
begin programmed playback.
5. Repeat Steps 2 through 4 to enter up to 64 tracks in the
program memory.
Note: The memory card slot on this system enables playback of songs only in MP3 and WMA
formats (without DRM). It cannot play songs purchased from iTunes or other songs in AAC format,
songs in ATRAC format or songs purchased from some online music retailers. It may be possible to
convert your music to one of the playable compressed formats, or burn it to an audio CD, depending
on the DRM restrictions.
MEMORY CARD OPERATION
Playing MP3/WMA Audio Files Stored On SD/MMC Memory Cards
Press the FUNCTION button repeatedly until the main display shows
"CARD".
Insert the SD or MMC flash memory card containing MP3/ WMA
audio files into the card slot by gently pressing into position until it
locks in place. Cards can only be inserted one way.
Press the PLAY/PAUSE button to pause playback.
Press SKIP TUNING or buttons to skip tracks.
Press PRESET/ALBUM/MENU + or –buttons to skip albums.
Press SELECT ID3/BIT RATE button to display title, album and artist information.
Playback will continue until the last track has played and then the display will again show the total
number of tracks, albums on the card.
Press STOP/BAND button to stop playback at any time,
the display will show the total number of files tracks and
directories albums on the card. For example “08” albums,
“49” tracks.
After reading the card, the player will play automatically.

3231
USB OPERATION
Playing MP3/WMA Audio Files On Portable USB Storage Device
Note: The USB port on this system enables playback of songs only in MP3 and WMA formats
(without DRM). It cannot play songs purchased from iTunes or other songs in AAC format, songs in
ATRAC format or songs purchased from ome online music retailers. It may be possible to convert
your music to one of the playable compressed formats, or burn it to an audio CD, depending on the
DRM restrictions. If you wish to play back songs that you have purchased from iTunes directly from
your iPod shuffle, please follow the instruction on page 10 for connecting the shuffle’s headphone
output jack to the system’s AUX IN inputs.
After reading the USB, the player will play automatically.
Press the FUNCTION button repeatedly until the main display
shows "USB".
Insert the USB flash containing MP3/ WMA audio files into the
USB port by gently pressing into position until it locks in place.
USB devices can only be inserted one way.
Press the PLAY/PAUSE button to pause playback.
Press SKIP TUNING or buttons to skip tracks.
Press PRESET/ALBUM/MENU + or –buttons to skip albums.
Press SELECT ID3/BIT RATE button to display title, album and artist information.
Playback will continue until the last track has played and then the display will again show the total
number of tracks, albums on the usb.
Press STOP/BAND button to stop playback at any time,
the display will show the total number of files (tracks) and
directories albums on the card. For example “02” albums,
“64” tracks.
iPod OPERATION
iPod Dock Adapter
NOTE: The adapter for iPod nano is already installed in the dock in the top of the system
This unit comes with 4 removable dock adapters to ensure the iPod fits properly in the dock on the
top of the system.
To place a dock adapter:
Refer to the compatibility table below and select the correct dock
adapter for the iPod. Using the correct adapter ensures the proper
fit for your iPod and helps to reduce the stress on the connector
when operating the iPod.
1.
2.
3.
Carefully align and then gently insert the iPod into the dock. (The
iPod must not be in a case or “skin”).
To remove/replace an dock adapter, first remove the iPod, then
grip the insert and pull gently upwards. Please refer to page 33.
Choosing the Correct Adapter
This unit supports playback of video from video-capable iPod models. You can view images and
video stored on your iPod on a TV using the iSymphony M110.
To play video from iPod:
3. Make sure the unit and TV are connected using an S-VIDEO or composite video connection.
4. Make sure the iPod is securely docked into the unit using the correct dock adapter.
5. Select iPod mode using FUNCTION button.
6. Play video on your iPod or start a slideshow. Video will play on your TV and audio through the
unit's speakers.
1. Refer to your iPod documentation to be sure it is video capable.
2. Ensure the video output on your iPod is turned on.
Video Settings TV out On
When connecting an iPod to this iPod Dock, please ensure that the correct adapter plate
is used. FAILURE TO DO SO MAY RESULT IN DAMAGE TO THE iPod.
!
Playing Video From iPod

33 34
Dock Adapter Compatibility
ABCD
5G with Video
1GB
2GB
4GB
photo 20GB
30GB
40GB
60GB
4G 20GB
40GB
mini 4GB
6GB
3G 10GB
15GB
20GB
30GB
40GB
X
X
X
X
X
X
X
X
X
X
X
X
X
X
X
X
X
X
80GB X
30GB
60GB
(1st generation)
(2nd generation)
nano 2GB
4GB
8GB
X
X
X
nano
Note: Please make sure you are using the correct insert for your iPod and that it is properly docked
into this unit. FAILURE TO DO SO MAY DAMAGE THE iPod .
Charging your iPod
When an iPod is inserted into the dock, it will go to standby mode then turn off. Whilst the iPod is
docked in the system, it will recharge (until fully charged).
Listening to your iPod
Insert the iPod as described above.
With the unit turned on, press the function button repeatedly
until "iPod " is shown in the display.
Press the PLAY/PAUSE, Stop button on the Micro System to
commence, control playback and stop.
1.
2.
3.
NOTE: The volume control on the iPod only adjusts the
volume of any headphones connected. To increase volume
when connected, use the volume controls on the front panel or
remote control.
PC Connection
A docked iPod can be connected to a PC using the “iPod USB Sync” socket on the rear of the
system. To set up the connection, insert the iPod connector end of the iPod PC cable (supplied with
iPod) to the socket on the rear of the system and connect to the PC USB port. Files can then be
uploaded to the iPod using iTunes.
30 PIN
CONNECTOR
USB CONNECTOR
Main Menu
IMPORTANT: To prevent distortion during iPod playback you should go to the Main Menu of your
iPod, select the Settings Menu page, select the EQ Setting, and make sure that the EQ function is
set to “Off”.
Settings Menu EQ Setting Select “Off”

35 36
Setting the Wake Time and current mode (On Remote Control Only)
This system includes a timer to allow you to wake up to your iPod, CD, radio or MP3/WMA music.
The wake timer can only be set while unit is off. Please ensure the clock is set to the correct time
before setting the wake timer.
Press the TIMER button on remote control, and “ON” appears on the
display.
Press the FUNCTION button to select “CD”, “USB”, “CARD”, “iPod”
or “TUNER”.
Press TIMER to confirm. The VOLUME level appears flashing on the
display.
Press the VOLUME +/- buttons to adjust the volume output level.
Press SKIP/TUNING or to set the on time hour.
Press TIMER to confirm. Display shows OFF and hour digits begin to flash.
Press SKIP/TUNING or to set the off time hour.
Press TIMER to confirm. Hour digits begin to flash.
Press TIMER to confirm. Minute digits begin to flash.
Press SKIP/TUNING or to set the on time minute.
Press TIMER to confirm. The display reverts to the current time and
remains on the display.
To cancel the timer setting, press TIMER once more, disappears from
the display.
Press TIMER to confirm. Minute digits begin to flash.
Press SKIP/TUNING or to set the off time minute.
OTHER FUNCTIONS Sleep Timer (On Remote Control Only)
Turn the system on and operate as usual.
Press the SLEEP button on the remote control.
The display will show “SLEEP 90” indicating that the sleep
timer will shut the power off after 90 minutes.
Press the SLEEP button to decrease the amount of sleep timer
operation. Each time you press the SLEEP button you subtract
10 minutes from the sleep timer. The minimum sleep timer
operation is 10 minutes.
After a few seconds the Sleep Time display disappears and the
normal display returns. The small SLEEP indicator remains
flashing in the display.
Note:
You can shut the unit off manually before the Sleep Timer counts down to “00” by pressing the
STANDBY/ button at any time.
If you are falling asleep to CD, the system will only operate until the CD ends. If you set the Sleep
Timer for 90 minutes but your CD is only 45 minutes long, the music will stop after 45 minutes.
This system includes a programmable Sleep Timer that allows you to fall asleep to between 10 and 90
minutes of music and then shuts the power ‘off’ automatically.
To operate the sleep timer :

37 38
RECORDING
M110 allows you to record music and audio content to the USB or SD/MMC card device in WMA
format. Files are stored on the flash device in a specially created folder named “AUDIO” and
sequentially named FILE000.WMA, FILE001.WMA etc.
Insert a USB device or SD/MMC card into the slot on the side of the main unit. If you attempt to
record without any media connected, display will show “NO MEDIA.”
Getting Started
Press the FUNCTION button to select TUNER mode.
Press the SELECT ID3/BIT RATE button on remote control.
Press the SKIP/TUNING buttons to select the rate you prefer. Options are:
Ensure that the device has spare capacity for recording.
Choose a recording bit rate. Bit rate or recording quality can be selected according to your
preference. Selecting a lower bit rate will create small recording files, therefore longer recording
time, at the expense of audio quality. Selecting a higher bit rate will create larger files with better
audio quality.
32KBPS
48KBPS
64KBPS
96KBPS
128KBPS
Press the SELECT ID3/BIT RATE button to confirm.
Insert a disc.
Press the FUNCTION button to select “CD” mode.
Select the track on the CD you wish to record.
Press the REC button once.
Recording from CD
Press REC again “CHECKING” will show on display. The unit checks
for sufficient space for the recording.
When track playback is complete, recording will stop and recording file is
created.
If sufficient space is available, “REC” and “USB” or “CARD” shows
flashing on the display and recording begins.
Press STOP/BAND or REC to cancel recording.
“USB”, “CARD” or both appear on the display.
If you have multiple media connected, use and to select
the media.
Recording from Tuner (FM Stereo only)
Press the FUNCTION to select “TUNER” mode.
Select your desired FM Stereo station.
Press the REC button once.
“USB”, “CARD” or both appear on the display.
If you have multiple media connected, use and to select
the media.
Press REC again.
“REC” and “USB” or “CARD” shows flashing on the display.
Recording begins.
Press the STOP/BAND button or REC to end recording.
Press the FUNCTION button to select iPod mode.
Start music playback on the iPod
Press the REC button once.
Recording from iPod
“USB”, “CARD” or both appear on the display.
If you have multiple media connected, use and to select
the media.
Press REC again.
“REC” and “USB” or “CARD” shows flashing on the display.
Recording begins.
Press the STOP/BAND button or REC to end recording.
Table of contents
Languages:
Other iSymphony Micro Music System manuals