iSymphony M26 User manual

User manual
Manuel d'utilisateur
Manual de usuario
English
Français
Español
: page 2~13
: page 14~25
: página 26~37
M 2 6
PROG RAM
REPE AT
INTRO
REMO TE CONT ROL SYS TEMS
STOP

2
TO PREVENT FIRE OR SHOCK HAZARD, DO NOT USE THIS PLUG WITH AN
EXTENSION CORD, RECEPTACLE OR OTHER OUTLET UNLESS THE BLADES
CAN BE FULLY INSERTED TO PREVENT BLADE EXPOSURE. TO PREVENT FIRE
OR SHOCK HAZARD, DO NOT EXPOSE THIS APPLIANCE TO RAIN OR MOISTURE.
1. Read these instructions.
2. Keep these instructions.
3. Heed all warnings.
4. Follow all instructions.
5. Do not use this apparatus near water.
6. Clean only with a dry cloth.
7. Do not block any ventilation openings. Install in accordance with the manufacturer’s
instructions.
8. Do not install near any heat sources such as radiators, heat registers, stoves, or other
apparatus (including amplifiers) that produce heat.
9. Do not defeat the safety purpose of the polarized or grounding-type plug. A polarized plug has
two blades with one wider than the other. A grounding type plug has two blades and a third
grounding prong. The wide blade or the third prong is provided for your safety. If the provided
plug does not fit into your outlet, consult an electrician for replacement of the obsolete outlet.
10. Protect the power cord from being walked on or pinched particularly at plugs, convenience
receptacles, and the point where they exit from the apparatus.
11.Only use attachments / accessories specified by the manufacturer.
12.Unplug this apparatus during lightning storms or when unused for long periods of time.
13.Refer all servicing to qualified service personnel. Servicing is required when the apparatus
has been damaged in any way, such as power-supply cord or plug is damaged, liquid has
been spilled or objects have fallen into the apparatus, the apparatus has been exposed to rain
or moisture, does not operate normally, or has been dropped.
14.This appliance shall not be exposed to dripping or splashing water and no object filled with
liquids such as vases shall be placed on the apparatus.
15.Do not overload wall outlet. Use only power source as indicated.
16.Use replacement parts as specified by the manufacturer.
17.The product may be mounted to a wall only if recommended by the manufacturer.
18.Upon completion of any service or repairs to this product, ask the service technician to
perform safety checks.
!
CAUTION
RISK OF ELECTRIC SHOCK
DO NOT OPEN
The lightning flash with arrow-
head symbol, within an equi-
lateral triangle is intended to
alert the user to the presence
of uninsulated‘dangerousvoltage’
within the product’s enclosure
that may be of sufficient
magnitude to constitute a risk
of electric shock to persons.
The exclamation point within
an equilateral triangle is in-
tended to alert the user to
the presence of important
operating and maintenance
(servicing) instructions in
the literature accompany-
ing the appliance.
WARNING: TO REDUCE THE
RISK OF ELECTRIC SHOCK
DO NOT REMOVE COVER
( O R B A C K ) , N O U S E R
SERVICEABLE PARTS INSIDE
R E F E R S E R V I C I N G T O
Q U A L I F I E D S E R V I C E
PERSONNEL.

3
TO PREVENT FIRE OR SHOCK HAZARD, DO NOT USE THIS PLUG WITH AN
EXTENSION CORD, RECEPTACLE OR OTHER OUTLET UNLESS THE BLADES
CAN BE FULLY INSERTED TO PREVENT BLADE EXPOSURE. TO PREVENT FIRE
OR SHOCK HAZARD, DO NOT EXPOSE THIS APPLIANCE TO RAIN OR MOISTURE.
1. Read these instructions.
2. Keep these instructions.
3. Heed all warnings.
4. Follow all instructions.
5. Do not use this apparatus near water.
6. Clean only with a dry cloth.
7. Do not block any ventilation openings. Install in accordance with the manufacturer’s
instructions.
8. Do not install near any heat sources such as radiators, heat registers, stoves, or other
apparatus (including amplifiers) that produce heat.
9. Do not defeat the safety purpose of the polarized or grounding-type plug. A polarized plug has
two blades with one wider than the other. A grounding type plug has two blades and a third
grounding prong. The wide blade or the third prong is provided for your safety. If the provided
plug does not fit into your outlet, consult an electrician for replacement of the obsolete outlet.
10. Protect the power cord from being walked on or pinched particularly at plugs, convenience
receptacles, and the point where they exit from the apparatus.
11.Only use attachments / accessories specified by the manufacturer.
12.Unplug this apparatus during lightning storms or when unused for long periods of time.
13.Refer all servicing to qualified service personnel. Servicing is required when the apparatus
has been damaged in any way, such as power-supply cord or plug is damaged, liquid has
been spilled or objects have fallen into the apparatus, the apparatus has been exposed to rain
or moisture, does not operate normally, or has been dropped.
14.This appliance shall not be exposed to dripping or splashing water and no object filled with
liquids such as vases shall be placed on the apparatus.
15.Do not overload wall outlet. Use only power source as indicated.
16.Use replacement parts as specified by the manufacturer.
17.The product may be mounted to a wall only if recommended by the manufacturer.
18.Upon completion of any service or repairs to this product, ask the service technician to
perform safety checks.
!
CAUTION
RISK OF ELECTRIC SHOCK
DO NOT OPEN
The lightning flash with arrow-
head symbol, within an equi-
lateral triangle is intended to
alert the user to the presence
of uninsulated‘dangerousvoltage’
within the product’s enclosure
that may be of sufficient
magnitude to constitute a risk
of electric shock to persons.
The exclamation point within
an equilateral triangle is in-
tended to alert the user to
the presence of important
operating and maintenance
(servicing) instructions in
the literature accompany-
ing the appliance.
WARNING: TO REDUCE THE
RISK OF ELECTRIC SHOCK
DO NOT REMOVE COVER
( O R B A C K ) , N O U S E R
SERVICEABLE PARTS INSIDE
R E F E R S E R V I C I N G T O
Q U A L I F I E D S E R V I C E
PERSONNEL.
INTRODUCTION
Thank you for purchasing the iSymphony M26 Micro Music System. Please be sure to read
this manual carefully and completely to make sure you understand all of the exciting features
and functions included in your new system. iSymphony has taken great care to make sure
that this system was in perfect working order when it left the factory. If you experience any
problem with the set-up or operation of this system please refer to the back of this manual for
instructions on obtaining customer service.
The serial number of your system is located on a label on the back panel. Please take a
moment now to locate the serial number and to write it in the space provided below for
future reference. You may be asked to provide this number if you call for customer service.
Serial Number: ______________________________
Please also take a moment to register your product online at
www.myisymphony.com/register

4
• Operate controls and switches as
described in the manual.
• Before turning ‘On’ the power, make
certain that power cord is properly
installed.
• Store your CDs, Memory Cards in a cool
area to avoid damage from heat.
• When moving the set, be sure to first
disconnect the power cord.
• Avoid installing this unit in places
exposed to direct sunlight or close to
heat radiating appliances such as
electric heaters, on top of other stereo
equipment that radiates too much heat,
places lacking ventilation or dusty areas,
places subject to constant vibration and/
or humid or moist areas.
• Do not attempt to clean this unit with
chemical solvents as this might damage
the finish. Use a clean dry cloth.
CLASS 1 LASER PRODUCT
APPAREIL Á LASER DE CLASSE 1
PRODUCTO LASER DE CLASE 1
CAUTION
INVISIBLE LASER RADIATION
WHEN OPEN AND INTERLOCKS
DEFEATED.
AVOID EXPOSURE TO BEAM
This product contains a low power Laser Device.
FCC INFORMATION
This equipment has been tested and found to comply with the limits for a Class B digital
device, pursuant to Part 15 of the FCC Rules. These limits are designed to provide
reasonable protection against harmful interference in a residential installation. This
equipment generates, uses, and can radiate radio frequency energy and, if not installed
and used in accordance with the instructions, may cause harmful interference to radio
communications. However, there is no guarantee that interference will not occur in a
particular installation. If this equipment does cause harmful interference to radio or television
reception, which can be determined by turning the equipment off and on, the user is
encouraged to try to correct the interference by one or more of the following measures:
• Reorient or relocate the receiving antenna.
• Increase the separation between the equipment and receiver.
• Connect the equipment into an outlet on a circuit different from that to which the receiver
is connected.
• Consult the dealer or an experienced radio/TV technician for help.
This device complies with Part 15 of the FCC Rules. Operation is subject to the following
two conditions:
(1) This device may not cause harmful interference, and
(2) This device must accept any interference received, including interference that
may cause undesired operation.
IMPORTANT NOTES
Changes or modification not expressly approved by the party responsible for
compliance could avoid the user’s authority to operate the equipment.

5

6
1
PRO GRAM
REP EAT
INT RO
REM OTE CON TROL SYS TEMS
STOP
11
12
22
13
6
14
18
1 2
3
4
5
6
7
8
9
10
11
12
13
14
15
16
17
7
POWER SUPPLY
Back Panel (See 1 )
1. FUNCTION SELECTOR
- selects source of sound CD, OFF or
AM,FM.
2. SKIP / , /
CD: - skips track backwards or forward.
3. DIAL POINTER WINDOW
- shows the AM/FM dial frequency.
4. TUNING CONTROL
- selects FM/AM stations.
5. DISPLAY
- shows the CD functions.
6. PRESS TO PLAY/PAUSE
- starts or pauses CD play.
7. VOLUME
- adjusts volume level.
8. CD DOOR
- Press here to open / close the CD door.
9. FM STEREO INDICATOR
- shows the FM stereo indication.
10.STEREO HEADPHONE JACK
- 3.5mm stereo headphone jack.
11.PROGRAM
CD :- programs and reviews programmed
track numbers.
12.REPEAT
- repeats a track / CD / program.
13.STOP
- stops CD playback; erases a CD program.
14.INTRO
- continuous plays every CD tracks 10 seconds.
15.REMOTE CONTROL SENSORE
- receive the signal from the remote control.
16.DBBS (Dynamic Bass Boost)
- enhances bass response.
17.FM ANTENNA
- to improve FM reception.
18.SPEAKER L/R SOCKET
- for insert speaker L/R jack.
CONTROLS
2 Connect the power cord to the AC MAINS inlet
and the wall outlet. The power supply is now
connected and ready for use.
3 To switch off completely, unplug the power cord
from the wall outlet.
• Unplug the power cord from the wall outlet to
protect your set during heavy thunderstorms.
• If the electric cable is damaged, it must be
replaced by the manufacturer, or by the
qualification persons, in order to avoid a
danger.
Power Supply
Using AC Power
1 Check if the power voltage, as shown on the
type plate located on the bottom of the set,
corresponds to your local AC power supply.
if it does not,consult your dealer or service
centre.
Top and front panels (See 1)

Switching power on/off: Save energy
Whether you are using mains or battery supply, to
avoid unnecessary energy consumption always adjust
the source selector to off.
BASIC FUNCTIONS RADIO
8
General operation
1 To select your sound source adjust the source
selector to CD/OFF/AM/FM
.
2 Adjust the sound with the VOLUME and DBBS
(Dynamic Bass Boost) controls.
3 To switch off the set, adjust the source selector to
off position.
Radio
Radio reception
– For FM, extend the pigtail antenna.
– For AM the set is provided with a built-in antenna
Direct the antenna by turning the whole set.
1. Slide the FUNCTION selector to a desired setting
- FM, AM.
2. Rotate the TUNING control to find the desired
stations.
NOTE: If the FUNCTION selector is set to the FM
position and you have tuned to an FM
stereo station, the FM stereo LCD indicator
will light.
3. When you have finished listening, slide the
FUNCTION selector to the OFF position to shut
the power off.

X
910
Programming track numbers
You may store up to 20 tracks in the
desired sequence. If you like, store
any track more than once.
1 In the PROG mode, press or
for your desired track.
2 When your chosen track number
appears, press PROG MODE once
to store the track.
The display shows prog briefly
followed by your selected
track number.
3 Repeat steps 1 to 2 to select and
store all desired tracks in this way.
4 To play your program, press“PLAY/
PAUSE”
Reviewing your set program
After playing at least one programmed
track.
Press or ,the display will show
your stored track numbers.
Erasing a program
You can erase the contents of the
memory by:
– opening the CD door;
– selecting RADIO source;
– pressing“STOP” (twice during
playback or in the stop position)
Notice for CDR/CDRW MP3 users:
This player can play normal (pre-
recorded) CD discs plus CD
Recordable and CD Rewriteable
discs. The ability of this unit to
play certain recordable discs may
depend on the quality or physical
condition of the disc, the quality
of the recording, or characteristics
of the recording device or software
application. Playback cannot be
guaranteed in all situations. This
is not an indication of any problems
with your player.
.
Precautions & General Maintenance
•Place the set on a hard and flat surface so
that the S ystem does not tilt.
•Do not expose the set, batteries or CDs to
h umidity, rain, sand or excessive heat caused by
heating equipment or direct sunlight.
•Do not cover the set. Adequate ventilation with a
minimum gap of 6 inches between the ventilation
holes and surrounding surfaces is necessary to
prevent heat build-up.
•The mechanical parts of the set contain self-
l ubricating bearings and must not be oiled or
lubricated.
•To clean the set, use a soft dry cloth. Do not use
a ny cleaning agents containing alcohol, ammonia,
benzene or abrasives as these may harm the
h ousing.
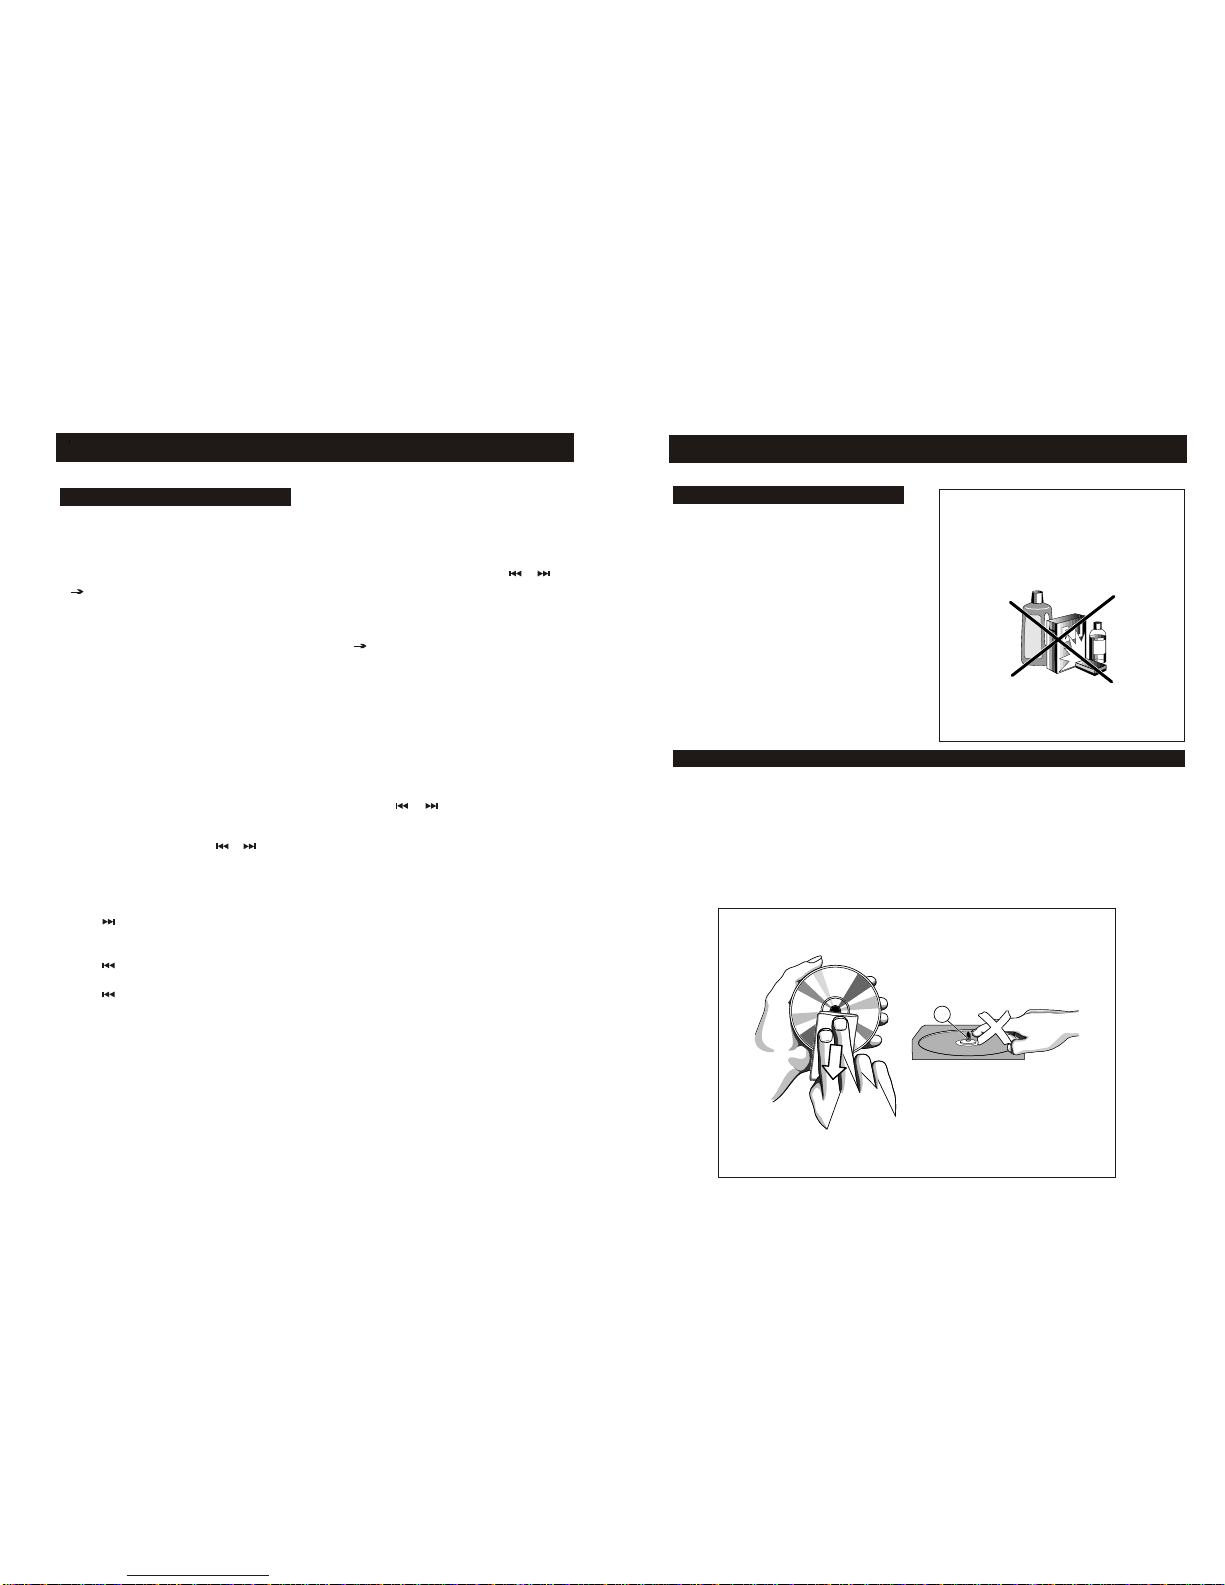
CD player and CD handling
•The lens of the CD player should never be touched!
•Sudden changes in the surrounding temperature can cause condensation to form and the lens of
your CD player to c loud over. Playing a CD is then not possible. Do not attempt to clean the lens
but leave the set in a warm environment until the moisture evaporates.
•Always close the CD door to keep the CD compartment dust-free. To clean, dust the compartment
with a soft dry cloth.
•To clean the CD, wipe in a straight line from the centre towards the edge using a soft, lint-free cloth.
Do not use cleaning a gents as they may damage the disc.
•Never write on a CD or attach any stickers to it.
MAINTENANCE & SAFETY
CD Player
Playing a CD
This CD-player can play Audio Discs, CD-R, and
CD Rewritables. Do not try to play CD-ROM, Cdi,
VCD, DVD or computer CD.
1 Adjust the source selector to CD.
Display: shows “CD” Briefly.
2To open the CD door, press downwards on the
area marked CLOSE/OPEN until you hear a
click and then lift the door upwards
3 Insert a CD, CD-R or CD-RW with the printed side
Facing up and press the CD door gently close.
4 Press “PLAY/PAUSE” on the set to start playback.
5 To pause playback press “PLAY/PAUSE”
To resume, press “PLAY/PAUSE” again.
6 To stop CD playback, press
“ STOP”
.
Note: CD play will also stop when:
– you open the CD compartment;
– you select RADIO sound source;
– the CD has reached to the end.
Selecting a different track
During playback you can use or to select a
particular track.
• If you have selected a track number in the stop or
pause position, press“PLAY/PAUSE” to start
• Press once briefly for the next track, or press
repeatedly until the desired track number appears
in the display.
• Press once briefly to return to the beginning of
a current track.
• Press more than once briefly for a previous
track.
Different play modes: Repeat
REPEAT – plays the current track continuously
REPEAT ALL –plays the entire CD continuously
CD PLAYER
playback.

–Problem
• Solution
No sound /power
–Volume not adjusted
• Adjust the VOLUME
–Power cord not securely connected
• Connect the AC power cord properly
–Batteries dead/ incorrectly inserted
• Insert (fresh) batteries correctly
Display does not function properly /
No reaction to operation of any of
the controls
–Electrostatic discharge
• Switch off and unplug the set. Reconnect
after a few seconds
No disc indication
–No CD inserted
• Insert a CD, CD-R or CD-RW
–CD badly scratched or dirty
• Replace/ clean CD, see Maintenance
–Laser lens steamed up
• Wait until lens has cleared
–CD-R is blank or the disc is not finalized
• Use a finalized CD-R
CD playback does not work
–CD badly scratched/ dirty
• Replace/ clean CD (see maintenance)
–Laser lens steamed up
• Wait until lens has adjusted to room
temperature
The CD skips tracks
–CD damaged or dirty
• Replace or clean CD
–Program is active
• Quit Program mode(s)
Troubleshooting
If a fault occurs, first check the points listed below before taking the set for repair.
Do not open the set as there is a risk of electric shock.
If you are unable to remedy a problem by following these hints, consult your dealer or service
center.
WARNING:
Under no circumstances should you try to repair the set yourself, as this
will invalidate the warranty.
TROUBLESHOOTING SPECIFICATION
11 12
Specifications :
Power supply
Power consumption
Dimensions of unit
Frequency range
Antenna
CD Section
CD Size
Speaker System
Phones Jack
: AC 230 V, 50 Hz
: 17 Watts
: 446(W) X 228 (H) X 196 (D) mm.
: AM 540 - 1600 KHz.
: FM 88 - 108 MHz.
: FM - PIG TAIL ANTENNA.
: AM - FERRITE BAR ANTENNA.
: TOP LOADING CD PLAYER.
: 5” & 3” COMPATIBLE.
: 3 WAY 2 SPEAKERS SYSTEM
: 3.5 mm.

13
iSymphony Model No: M1
iSYMPHONY LIMITED WARRANTY
This product is warranted by iSymphony to the original purchaser against manufacturing defects in
materials and workmanship encountered in the normal noncommercial use of this product for a limited
warranty period of:
Ninety (90) Days Labor, One (1) year Parts
This limited warranty begins on the original date of purchase, and is valid only on products purchased
and used in the United States.
1. LABOR: During the ninety days labor limited warranty period, iSymphony will, at its option,
repair the defective product at no cost to you, or replace the defective product with a
new or remanufactured functionally equivalent product of equal value.
2. PARTS: During the ninety days parts limited warranty period, iSymphony will supply new or
rebuilt replacements for defective parts as may be deemed necessary by iSymphony.
3. This Warranty DOES NOT APPLY to products that have been damaged due to abuse,
misuse, accident, alteration, modification, negligence, and tampering or products that
have been serviced by any unauthorized service center or third party. This Warranty
DOES NOT APPLY to batteries, connecting cables, AC adaptors, or other accessories
packaged with the unit.
What you must do for warranty service:
Unit must be shipped, freight prepaid and properly packaged with the original dated bill of
sale as proof of purchase to iSymphony Service Center. Please call 1-800-710-7740 to obtain the
shipping instructions.
iSymphony Customer Service
1-800-710-7740
iSymphony will pay for the return shipping charges for products that are under warranty and
Please register your product online at www.myisymphony.com/register/
received in this manner.
EXCEPT TO THE EXTENTPROHIBITED BY APPLICABLE LAW, ALL IMPLIED WARRANTIE S MADE
BY iSYMPHONY IN CONNECTION WITH THE PRODUCT, INCLUDING WARRANTY OF MERCHANTABILITY,
ARE LIMITED TO THE DURATION OF THE EXPRESS WARRANTY HEREIN, AND NO WARRANTIES,
EXPRESS OR IMPLIED INCLUDING SAID WARRANT Y OF MERCHANTABILITY, SHALL APPLY TO
THIS PRODUCT AFTER SAID PERIOD. SHOULD THIS PRODUCT PROVE TO BE DEFECTIVE IN
WORKMANSHIP OR MATERIAL, THE CONSUMER’S SOLE REMEDY SHALL BE SUCH REPAIR OR
REPLACEMENT AS IN HEREIN ABOVE EXPRESSLY PROVIDED, AND UNDER NO CIRCUMSTANCES
SHALL iSYMPHONY BE LIABLE FOE ANY LOSS OR DAMAGE, DIRECT OR CONSEQUENTIAL,
ARISING OUT OF THE USE, MISUSE, OR INABILITY TO USE THIS PRODUCT. THIS WARRANTY IS
NONTRANSFERRABLE.
Some states do not allow the exclusion and limitation of incidental or consequential damage,
or allow limitations on how long an implied warranty lasts, so the above limitations or
exclusions or inclusions may not apply to you. This warranty gives you specific legal right and
you may also have other rights, which vary from state to state.

14
AVERTISSEMENT
INSTRUCTION DE SÉCURITÉ IMPORTANTES
AVERTISSEMENT
RISQUE DE CHOC ÉLECTRIQUE
N’OUVREZ PAS
POUR ÉVITER LE RISQUE D’INCENDIE OU DE CHOCS ÉLECTRIQUES, N’UTILISEZ PAS
CETTE PRISE AVEC UNE RALLONGE, UNE PRISE DE COURANT OU UNE AUTRE SORTIE
DE COURANT À MOINS QUE LES LAMES NE PUISSENT ÊTRE INSÉRÉES À FOND POUR
EMPÊCHER L’EXPOSITION DES LAMES. POUR RÉDUIRE LES RISQUES D'INCENDIE OU
DE CHOC ÉLECTRIQUE, NE PAS EXPOSER CET APPAREIL À LA PLUIE OU À L'HUMIDITÉ.
1. Lisez ces instructions
2. Gardez ces instructions
3. Respectez tous les avertissements
4. Suivez toutes les instructions
5. N’utilisez pas cet appareil à proximité d’une source d’eau
6. Nettoyez uniquement avec un chiffon sec
7. N’obstruez aucun orifice de ventilation. Installez l’appareil selon les instructions du fabricant.
8. N’installez pas l’appareil près d’une source de chaleur comme des radiateurs, des bouches de chaleur,
des cuisinières, ou d’autres appareils (même des amplificateurs) dégageant de la chaleur.
9. Ne détruisez pas la sécurité incorporée dans la prise de terre ou prise polarisée. Une prise polarisée
est dotée de deux lames dont une plus large que l’autre. Une prise de terre a deux lames et une
troisième broche de mise à la terre. La lame plus large ou la broche de mise à la terre sont là pour
assurer votre sécurité. Si la prise fournie ne convient pas à la prise murale dont vous disposez,
consultez un électricien pour remplacer la prise murale désuète.
10. Protégez le cordon d’alimentation pour éviter de marcher dessus ou de la pincer particulièrement aux
endroits des prises, mâles ou femelles, et au point de raccordement sur l'appareil lui-même.
11. Utilisez seulement des accessoires et des options recommandés par le fabricant.
12. Débranchez l’appareil pendant les orages ou s’il n’est pas utilisé pendant une période de temps
prolongée.
13. Pour toute réparation, faites appel à un personnel qualifié. Une réparation sera nécessaire si
l’appareil a subi des dommages tels que détérioration du cordon d’alimentation ou de la prise, liquide
renversé sur l’appareil, ou si un objet est tombé dedans, si l’appareil a été exposé à la pluie ou à
l’humidité, s’il ne fonctionne pas normalement, ou s’il a tombé.
14. Cet appareil ne devrait pas être exposé au ruissellement d’eau ou aux éclaboussures et aucun objet
rempli d’eau, tel qu’une vase, ne devrait être placé sur l’appareil.
15. Ne surchargez pas la prise murale. Utilisez seulement la source de courant qui a été indiquée.
16. Utilisez les pièces de rechange tel que recommandé par le fabricant.
17. Ce produit peut être monté sur un mur seulement si c’est recommandé par le fabricant.
18. Après la réparation ou l'entretien de l'appareil demandez au technicien de service d'effectuer des tests
de sécurité.
Ce symbole d’éclair avec une flèche
à l’intérieur d’un triangle équilatéral
est conçu pour alerter l’utilisateur de
la présence de tension dangereuse
non isolée à l'intérieur de l'appareil
qui peut être suffisamment forte
pour constituer un risque de choc
électrique aux personnes.
AVERTISSEMENT : POUR RÉDUIRE
LE RISQUE DE CHOC ÉLECTRIQUE,
N’ENLEVEZ PAS DE COUVERCLE (OU
DE PANNEAU ARRIÈRE), LES PIÈCES
À L’INTÉRIEUR N’ONT PAS ÉTÉ
CONÇUES POUR ÊTRE
ENTRETENUES PAR L’UTILISATEUR,
CONFIEZ LA RÉPARATION AU
PERSONNEL QUALIFIÉ
Ce symbole de point d’exclamation
à l’intérieur d’un triangle équilatéral
est conçu pour alerter l’utilisateur de
la présence d’importantes
instructions sur l’utilisation et
l’entretien dans les documents qui
accompagnent l’appareil.
!

15
AVERTISSEMENT
INSTRUCTION DE SÉCURITÉ IMPORTANTES
AVERTISSEMENT
RISQUE DE CHOC ÉLECTRIQUE
N’OUVREZ PAS
POUR ÉVITER LE RISQUE D’INCENDIE OU DE CHOCS ÉLECTRIQUES, N’UTILISEZ PAS
CETTE PRISE AVEC UNE RALLONGE, UNE PRISE DE COURANT OU UNE AUTRE SORTIE
DE COURANT À MOINS QUE LES LAMES NE PUISSENT ÊTRE INSÉRÉES À FOND POUR
EMPÊCHER L’EXPOSITION DES LAMES. POUR RÉDUIRE LES RISQUES D'INCENDIE OU
DE CHOC ÉLECTRIQUE, NE PAS EXPOSER CET APPAREIL À LA PLUIE OU À L'HUMIDITÉ.
1. Lisez ces instructions
2. Gardez ces instructions
3. Respectez tous les avertissements
4. Suivez toutes les instructions
5. N’utilisez pas cet appareil à proximité d’une source d’eau
6. Nettoyez uniquement avec un chiffon sec
7. N’obstruez aucun orifice de ventilation. Installez l’appareil selon les instructions du fabricant.
8. N’installez pas l’appareil près d’une source de chaleur comme des radiateurs, des bouches de chaleur,
des cuisinières, ou d’autres appareils (même des amplificateurs) dégageant de la chaleur.
9. Ne détruisez pas la sécurité incorporée dans la prise de terre ou prise polarisée. Une prise polarisée
est dotée de deux lames dont une plus large que l’autre. Une prise de terre a deux lames et une
troisième broche de mise à la terre. La lame plus large ou la broche de mise à la terre sont là pour
assurer votre sécurité. Si la prise fournie ne convient pas à la prise murale dont vous disposez,
consultez un électricien pour remplacer la prise murale désuète.
10. Protégez le cordon d’alimentation pour éviter de marcher dessus ou de la pincer particulièrement aux
endroits des prises, mâles ou femelles, et au point de raccordement sur l'appareil lui-même.
11. Utilisez seulement des accessoires et des options recommandés par le fabricant.
12. Débranchez l’appareil pendant les orages ou s’il n’est pas utilisé pendant une période de temps
prolongée.
13. Pour toute réparation, faites appel à un personnel qualifié. Une réparation sera nécessaire si
l’appareil a subi des dommages tels que détérioration du cordon d’alimentation ou de la prise, liquide
renversé sur l’appareil, ou si un objet est tombé dedans, si l’appareil a été exposé à la pluie ou à
l’humidité, s’il ne fonctionne pas normalement, ou s’il a tombé.
14. Cet appareil ne devrait pas être exposé au ruissellement d’eau ou aux éclaboussures et aucun objet
rempli d’eau, tel qu’une vase, ne devrait être placé sur l’appareil.
15. Ne surchargez pas la prise murale. Utilisez seulement la source de courant qui a été indiquée.
16. Utilisez les pièces de rechange tel que recommandé par le fabricant.
17. Ce produit peut être monté sur un mur seulement si c’est recommandé par le fabricant.
18. Après la réparation ou l'entretien de l'appareil demandez au technicien de service d'effectuer des tests
de sécurité.
Ce symbole d’éclair avec une flèche
à l’intérieur d’un triangle équilatéral
est conçu pour alerter l’utilisateur de
la présence de tension dangereuse
non isolée à l'intérieur de l'appareil
qui peut être suffisamment forte
pour constituer un risque de choc
électrique aux personnes.
AVERTISSEMENT : POUR RÉDUIRE
LE RISQUE DE CHOC ÉLECTRIQUE,
N’ENLEVEZ PAS DE COUVERCLE (OU
DE PANNEAU ARRIÈRE), LES PIÈCES
À L’INTÉRIEUR N’ONT PAS ÉTÉ
CONÇUES POUR ÊTRE
ENTRETENUES PAR L’UTILISATEUR,
CONFIEZ LA RÉPARATION AU
PERSONNEL QUALIFIÉ
Ce symbole de point d’exclamation
à l’intérieur d’un triangle équilatéral
est conçu pour alerter l’utilisateur de
la présence d’importantes
instructions sur l’utilisation et
l’entretien dans les documents qui
accompagnent l’appareil.
!
INTRODUCTION
Merci pour votre achat du Système de son iSymphony M26 Micro Music. Veuillez lire attentivement et
en entier ce manuel pour apprendre à utiliser correctement et vous familiariser avec les fonctions de
votre nouvel appareil. Cet appareil a été testé et déclaré en parfait état de marche avant de quitter notre
usine. Si vous rencontrez des problèmes pendant l’installation ou l’utilisation de cet appareil, veuillez se
référer à la fin de ce manuel pour des instructions sur obtenir le service à la clientèle.
Le numéro de série de cet appareil est sur une étiquette située sur le panneau arrière. Veuillez trouver
ce numéro de série et l'écrire ci-dessous dans l'espace fourni en cas de besoin au futur. Vous aurez
besoin de donner ce numéro si vous appelez notre service clientèle.
Numéro de série : _____________________________
Veuillez aussi prendre quelques instants pour enregistrer votre produit en ligne :
www.myisymphony.com/register

16
REMARQUES IMPORTANTES
CLASS 1 LASER PRODUCT
Ce produit contient un dispositif laser de faible intensité.
CLASS 1 LASER PRODUCT
APPAREIL Á LASER DE CLASSE1
PRODUCTO LASER DE CLASE1
ATTENTION
RAYONNEMENT LASER INVISIBLE
EN CAS D’OUVERTURE ET LORSQUE
LA SÉCURITÉ EST
NEUTRALISÉE.
ÉVITEZ L’EXPOSITION AU FAISCEAU
• Évitez d’installer cette unité dans des
places exposées directement aux
rayons de soleil ou proche des appareils
qui dégagent de la chaleur tels que les
radiateurs, sur d'autre équipement
stéréo qui dégage trop de chaleur, dans
des endroits mal ventilés ou pous-
siéreux et des endroits soumis aux
vibrations constantes.
• N’essayez pas de nettoyer ce produit
avec des solvants chimiques qui
pourraient endommager la finition.
Utilisez un morceau d’étoffe propre et
sec
INFORMATION FCC
Cet équipement a été testé et a été certifié conforme aux limites imposées pour un appareil
numérique de Classe B, conformément à la partie 15 des règlements FCC. Ces limites sont
définies aux fins d'assurer une protection raisonnable contre les interférences nuisibles dans une
installation résidentielle. Cet équipement génère, utilise et émet des fréquences radio qui, en cas
d'une mauvaise installation ou d'une utilisation non-conforme aux instructions de ce manuel
d'utilisation peuvent causer des interférences nuisibles aux communications radio. Il n'y a
toutefois aucune garantie que des interférences nuisibles ne se produiront pas dans une
installation donnée. Si cet équipement cause des interférences nuisibles avec votre poste radio
ou de télévision, ce que vous pouvez déterminer en éteignant et en rallumant votre équipement il
est conseillé à l'utilisateur d'essayer de pallier à ces interférences nuisibles en prenant l'une ou
l'autre des mesures suivantes:
•Changez la position de l'antenne de réception
•Augmentez la distance entre l'équipement et le récepteur
•Branchez l'équipement sur une source d'alimentation différente de celle sur laquelle le récepteur
est branché
•Consultez votre distributeur ou un technicien qualifié en la matière pour assistance
Ce dispositif est conforme à la partie 15 des règlements FCC. L’utilisation est assujettie aux deux
conditions suivantes :
(1) Ce dispositif ne peut pas générer d’interférences nuisibles, et
(2) Ce dispositif doit accepter toutes les interférences reçues, y compris les interférences qui
pourraient causer des actions non désirées.
Toutes modifications ou tous changements effectués sans l'accord exprès de la partie responsable
de la conformité aux normes pourraient contraindre l'utilisateur à ne plus utiliser son équipement.
• Utilisez les contrôles et les commandes
selon les instructions du manuel.
• Avant d'allumer l’appareil, soyez sûr
que le cordon d’alimentation est
branché correctement.
• Entreposez vos CD et vos cartes
mémoire dans des endroits frais pour
éviter des dommages dus à la chaleur.
• Lorsque vous déplacez le système,
assurez vous de débrancher d’abord le
cordon d’alimentation.

17
Déballage et l’installation
PRÉPARATION À L’UTILISATION
• Ce carton contient l’unité principale, deux haut-parleurs avec des panneaux avant
détachables, et la télécommande.
• Enlevez prudemment tous les composants du carton d’emballage et retirez tous les
matériaux d’emballage des composants. Assurez vous de ne rien jeter par accident
avec les matériaux d’emballage.
• Gardez le carton et les matériaux d’emballage, si possible, au cas improbable ou
cette unité devrait être retournée pour l’entretien ou la réparation. L’utilisation du
carton et des matériaux d’emballage originaux est le seul moyen de bien protéger
l'unité contre des dommages de transport.
• Enlevez tous les collants et toutes les étiquettes descriptives du panneau avant de
l’unité principale. N’enlevez pas les collants et les étiquettes qui peuvent être collés
sur le panneau arrière de l'unité principale ou sur les haut-parleurs.
• Déroulez le cordon d’alimentation CA en arrière de l’unité principale et étendez-le
sur toute sa longueur.
• Déroulez l’antenne en fil de plomb en arrière de l’unité principale et étendez-la sur
toute sa longueur.
• Déroulez les câbles de haut-parleurs et connectez les bouts aux haut-parleurs et à
l'unité principale.

Si le câble d'alimentation est endommagé, il
doit être remplacé par le fabricant, son
Service Après Vente ou des personnes de
qualification similaire, afin d'éviter un danger.
1
PRO GRAM
REP EAT
INT RO
REM OTE CON TROL SYS TEMS
STOP
11
12
22
13
6
14
18
1 2
3
4
5
6
7
8
9
10
11
12
13
14
15
16
17
18
Boutons
de
commande
Panneau supérieur et frontal (voir 1)
1. Sélecteur de fonctions
Sélectionne la fonction , CD, K7, Am et FM
2. Saut / , /
CD : permet de sauter une piste (avant ou arrière)
3. Fenêtre d’indication de la fréquence
Affiche la fréquence AM ou FM
4. Fenêtre de sélection de fréquence
Sélection de la station AM ou FM
5. Affichage
Affiche les fonctions du CD
6. Lecture/Pause
Pour lancer ou arrêter la lecture
7. Volume
Pour régler le volume sonore
8. Porte du compartiment CD
Appuyer pour ouvrir ou fermer le compartiment
9. Indicateur stéréo FM
Affiche les indications stéréo FM
10. Jack stéréo FM
Jack pour écouteur stéréo 3,5mm
11. Programme
CD : Programmation et revue des numéros de
piste programmés.
12. Répétition
Répétition d’une piste/d’un CD/ d’une
programmation
13. Stop
Pour arrêter de la lecture d’un Cd/effacer un
programme CD
14. Intro
Lecture des 10 premières secondes de chaque
piste sur un CD
15. Capteur télécommande
Reçoit les signaux de la télécommande.
16. DBBS (booster de basses dynamique)
Améliore la réponse des basses
Panneau arrière (voir 1)
17. Antenne FM
Pour améliorer la réception FM
18. prise HP D/G
Pour insérer le jack haut parleur droit/gauche.
Utilisation d’alimentation CA
1. Branchez votre cordon électrique
sur la prise secteur. L’appareil est prêt
à fonctionner sur alimentation CA.
2. Pour arrêter complètement l’unité,
débranchez la prise de la prise
secteur.
•Débranchez la prise de la prise
secteur en cas de gros orage.
•Si le cordon électrique est
endommagé, il doit être
remplacé par le fabricant ou par
une personne qualifiée pour
éviter tout risque.
19
Alimentation :
Alimentation

Fonctions de base
Bouton marche /arrêt : économie d’énergie.
Que vous utilisiez une alimentation CA ou des
piles, évitez toute consommation inutile en
positionnant le sélecteur de source d’alimentation
sur arrêt.
Fonctionnement général
1. Pour sélectionner votre source son,
réglez la sélectrice de source sur
CD/arrêt/AM/FM.
2. Réglez le son avec les boutons Volume
et DBBS (Dynamic Bass Boost).
3. Pour arrêter l’appareil, positionnez le
sélecteur de source sur Arrêt.
Radio
Réception radio
1. Faites glisser le sélecteur de fonction sur
AM ou FM.
2. Faites pivoter le bouton de réglage de la
syntonisation sur les stations désirées.
REMARQUE : Si le sélecteur de fonctions est
positionné sur FM et que le réglage est sur
une station FM stéréo, le LED s’allume.
3. Quand vous avez fini d’écouter, faites
glisser le sélecteur de fonctions sur
Arrêt.
RADIO
FM : déployez l’antenne
AM : l’appareil comporte une antenne
intégrée, l’antenne télescopique n’est donc
pas nécessaire. Pour diriger l’antenne,
faites pivoter l’appareil.
20

X
21
Programmation des numéros de piste :
Vous pouvez programmer jusqu’à 20
numéros de pistes dans l’ordre de lecture
désiré. Si vous le souhaitez, vous pouvez
programmer la même piste plusieurs fois.
1. En mode PROG, appuyez brièvement
une fois sur ou sur pour
atteindre le numéro de piste désiré.
2. Une fois que le n° de piste s’affiche,
appuyez sur mode PROG une fois pour
programmer ce n° de piste.
3. Répétez les étapes 1 et 2 pour
programmer toutes les pistes que vous
désirez.
4. Pour écouter les pistes programmées,
appuyez sur LEC/Pause.
Voir les pistes programmées :
Après la lecture de pistes, vous pouvez
appuyez sur ou sur pour
afficher les pistes en mémoire.
Effacer une programmation :
Vous pouvez effacer la programmation, en
-Ouvrant la porte du compartiment CD.
-En poussant le sélecteur de fonctions
sur la position TAPE (Arrêt).
-En mode STOP, appuyez sur PROG
puis sur STOP.
Remarque à l’attention des utilisateurs de
CDR/CRRW et MP3 :
Suivant le type de graveur de CD, de la
marque du disque, de la vitesse de gravure
et du niveau de compression , des
problèmes de lecture peuvent survenir.
MAINTENANCE ET SECURITE
Fonctions et maintenance générale
•Placez l’appareil sur une surface rigide de façon à
ce que l’appareil ne soit pas incliné.
•N’exposez pas l’appareil, les piles ou les CDs à
l’humidité, à la pluie, au sable, à une chaleur
excessive due à la proximité d’éléments de
chauffage, ou encore en plein soleil.
•Ne couvrez cet appareil en aucun cas. Une
ventilation adéquate avec une distance min.de 15 cm
op entre les trous d’aération et toute surface est
nécessaire pour prévenir une éventuelle
surchauffe.
•Les pièces mécaniques contenues dans cet
appareil s’auto lubrifient et ne doivent en aucun cas
être huilées ou lubrifiées.
•Pour nettoyer cet appareil, utilisez un chiffon doux
sec. N’utilisez aucun agent nettoyant contenant de
l’alcool, de l’ammoniaque, du benzène ou des
produits abrasifs qui endommageraient la surface
de votre unité.
Lecteur CD et manipulation de CD
•Ne touchez jamais au système de lecture optique du CD.
•Un changement de température brusque peut entrainer la formation de condensation qui brouille
la lentille de votre lecteur CD. Vous ne pouvez alors plus utiliser votre lecteur de CD. N’essayez
pas de nettoyer la lentille et placez l’appareil dans un environnement chaud pour que la
condensation s’évapore.
•Fermez toujours la porte de votre compartiment à CD pour empêcher la poussière d’y pénétrer.
Nettoyez le compartiment avec un chiffon sec et doux.
•Pour nettoyer un CD, frottez du centre vers l’extérieur avec un chiffon doux qui ne peluche pas.
L’utilisation de tout agent nettoyant endommagera vos CDs.
•N’écrivez jamais sur un CD et n’y collez pas d’étiquettes.
22
Remarque : le CD s’arrête également si :
-Vous ouvrez le compartiment
-Vous sélectionnez la source sonore Radio
-le CD est terminé.
Sélection d’une autre piste Vous pouvez utiliser
sur l’appareil pour sélectionner une piste
particulière.
• Si vous avez sélectionné un numéro de piste en
position Stop ou Pause, appuyez sur
LEC/Pause pour lancer la lecture.
• Appuyez brièvement une fois sur pour
passer à la piste suivante ou appuyez plusieurs
fois de suite sur pour atteindre le numéro
de piste desire
• Appuyez brièvement une fois sur pour
revenir au début de la piste.
• Appuyez plusieurs fois de suite sur pour
atteindre le numéro de piste désiré. Modes
de lecture : Répétitions REPETER : lecture en
boucle de la piste en cours de lecture TOUT
REPETER : Lecture en boucle du CD entier
Lecteur CD
Lecteur CD
Lecture d’un CD
Ce lecteur de CD effectue la lecture des CD Audio,
CD-R et CD-RW. N’utilisez pas de CD-ROM, de
Cdi/CD/DVD ou disque informatique.
1. Réglez le sélecteur de source sur CD Æbref
affichage
2. Pour ouvrir le compartiment à CD, soulevez le
coin du compartiment marqué
OUVRIR/FERMER.
3. Insérez un CD, CD-R ou CD-RW côté imprimé
tourné vers le haut et appuyez légèrement sur la
porte du compartiment pour la fermer.
4. Appuyez sur LEC/Pause pour lancer la lecture.
5. Pour interrompre la lecture, appuyez sur Pause.
Pour revenir à la lecture, appuyez à nouveau sur
la touche.
6. Pour arrêter le CD, appuyez sur Stop.

GUIDE DES PANNES
Guide des pannes
En cas de panne, vérifiez les points indiqués dans la liste ci-dessous avant de porter votre appareil
chez un réparateur.
N’ouvrez pas l’appareil car vous vous exposeriez à un choc électrique.
Si vous ne pouvez pas corriger le problème en suivant les conseils ci-dessous, contactez votre
revendeur ou un centre de réparations.
AVERTISSEMENT : N’essayez en aucun cas de procéder vous-même aux réparations, la garantie
serait automatiquement annulée.
- Problème
- Solution
Pas de son
Volume mal réglé
•Réglez le volume
Cordon électrique mal connecté
•Branchez correctement le cordon CA
Piles usées/mal insérées
•Insérez des piles (neuves) correctement
Pas d’affichage ou aucune réaction côté
fonctions
Décharge électrostatique
Arrêtez l’appareil et débranchez-le.
Rebranchez le quelques secondes plus tard.
Pas d’indication de présence de disque
Aucun CD inséré
•Insérez un MP3/CD, CD-R ou CD-RW
CD rayé ou sale
•Remplacez/nettoyez le CD (voir
maintenance)
Lentille laser embuée
•Attendez que la condensation s’évapore
CD-R vide ou non finalisé
Utilisez un CD-R finalisé
Le CD ne fonctionne pas
CD rayé ou sale
•Remplacez/nettoyez le CD (voir
maintenance)
Lentille laser embuée
•Attendez que la condensation s’évapore
Les pistes du CD sautent
CD/MP3 endommagé ou sale
•Remplacez ou nettoyez le CD
Programmation activée
•Quittez le(s) mode(s) de programmation
SPECIFICATIONS
Spécifications
Alimentation : CA 120 V, 60 Hz
Consommation d’énergie : 14Watts
Dimensions de l’unité : 446 x 228 x196 mm
Bande de fréquence : AM 530 -1710 KHz
FM88-108MHz
Antenne : FM – Antenne fibre
AM – antenne en ferrite
Section CD Lecteur de CD chargeable sur le côté supérieur
Taille CD : COMPATIBLE 12 cm et 8 cm
Système HP : Système 2 haut parleurs 2voies
23 24

25
Numéro du modèle de iSymphony : M1
Garantie limitée iSymphony
Quoi faire pour obtenir du service en vertu de cette garantie :
Service à la clientèle iSymphony
1-800-710-7740
Ce produit est garanti par iSymphony au propriétaire d’origine contre des défectuosités
attribuables à des défauts de fabrication et de main-d’œuvre résultant d’utilisation normale et
non-commerciale de ce produit pour la période de garantie limitée de:
Quatre-vingt-dix (90) jours pour la main-d’œuvre, Une (1) année pour les pièces
Cette garantie limitée entre en vigueur à la date d’achat et est seulement valide pour les produits
achetés et utilisés aux États-Unis, au Canada et au Mexique.
1. MAIN D’ŒUVRE : Pendant la période de quatre-vingt-dix jours de la garantie limitée sur la main
d’œuvre, iSymphony réparera le produit défectueux sans frais ou, à sa discrétion, remplacera le
produit défectueux par un produit neuf ou réusiné équivalent de valeur égal.
2. PIÈCES DE RECHANGE : Pendant la période de quatre-vingt-dix jours de la garantie limitée sur les
pièces, iSymphony fournira des pièces de rechange neuves ou réusinées pour les éléments défectueux
selon ce qui sera jugé nécessaire par iSymphony.
3. Cette Garantie NE S’APPLIQUE PAS aux produits qui ont été endommagés à cause d’usage abusif,
mauvaise utilisation, accident, altération, modification, négligence, transformation ou aux produits
dont l’entretien a été confié à un centre de service ou une tierce partie non autorisés. Cette Garantie
NE S’APPLIQUE PAS aux piles, câbles de raccordement, adaptateurs CA ou d’autres accessoires
expédiés avec ce produit.
Le produit doit être expédié au Centre de Service iSymphony, fret acquitté au préalable, bien emballé et
accompagné de contrat de vente original avec la date comme preuve d'achat. Veuillez appeler au
1-800-710-7740 pour des instructions concernant l’expédition.
Veuillez enregistrer votre produit en ligne sur www.myisymphony.com/register/
iSymphony acquittera les frais de transport de retour pour les produits couverts par la garantie qui ont
été envoyés de cette manière.
Certaines juridictions interdisent l’exclusion ou la limitation des dommages indirects ou consécutifs, ou la limitation
de la durée de la garantie implicite, il se peut alors que certaines limitations ne s’appliquent pas à vous. Cette
garantie vous accorde des droits spécifiques, vous pouvez aussi avoir d’autres droits variant d’un État ou d’une
province à l’autre.
SAUF DANS LA MESURE OÙ LA LOI APPLICABLE L’INTERDIT, TOUTES LES GARANTIES IMPLICITES
OFFERTES PAR iSYMPHONY RELATIF À CE PRODUIT, Y COMPRIS LA GARANTIE D’ADAPTATION À LA
COMMERCIALISATION, SE LIMITENT À LA DURÉE DE LA GARANTIE EXPRESSE PRÉSENTE, ET AUCUNE
AUTRE GARANTIE, EXPRESSE OU IMPLICITE Y COMPRIS LA GARANTIE D'ADAPTATION À LA
COMMERCIALISATION MENTIONNÉE CI-DESSUS NE S'APPLIQUERA PAS À CE PRODUIT APRÈS CETTE
PÉRIODE. SI CE PRODUIT EST JUGÉ DÉFECTUEUX EN RAISON D’UN DÉFAUT DE MATÉRIAU OU DE
MAIN-D’ŒUVRE, LE SEUL DÉDOMMAGEMENT DU CLIENT SERA UNE RÉPARATION OU UN
REMPLACEMENT TEL QUE STIPULÉ EXPRESSÉMENT CI-DESSUS. iSYMPHONY NE SERA PAS
RESPONSABLE DANS AUCUN CAS POUR DES DOMMAGES OU PERTES DIRECTES OU CONSÉCUTIFS
RÉSULTANT DE L'UTILISATION, MAUVAISE UTILISATION OU INCAPACITÉ À UTILISER CE PRODUIT. CETTE
GARANTIE NE PEUT PAS ÊTRE TRANSFÉRÉE.

26
PRECAUCION
IMPORTANTES INSTRUCCIONES DE SEGURIDAD
PRECAUCION
Riesgo de choques
electri-Cos. No abrir.
PARA PREVENIR RIESGOS DE FUEGO O CHOQUES ELECTRICOS NO LO UTILICE CON
EXTENSIONES, RECEPTACULOS U OTRO ENCHUFE A MENOS QUE LOS RECEPTACULOS
DE LA CLAVIJA EMBONEN PERFECTAMENTE PARA EVITAR EXPONERSE A RIESGOS DE
FUEGO O A CHOQUES ELÉCTRICOS . NO EXPONGA ESTE APARATO A LA LLUVIA O A LA
HUMEDAD.
1. Favor de leer estas instrucciones
2. Guarde estas instrucciones para futuras referencias
3. Guarde todas las precauciones.
4. Siga todas las instrucciones.
5. No utilice este aparato cerca de algun recipiente con agua
6. Limpie solamente con un paño seco
7. No bloquee ninguna de las aberturas de ventilación. Instale el aparato, siguiento todas las
instrucciones del fabricante.
8. No instale cerca de fuentes de color, tal como: radiadores, registros de calor, estufas u otros
aparatos (incluyendo amplificadores), que produzcan calor
9. No elimine el aditamento de seguridad de clavija polarizada o con polo a tierra. Una clavija
polarizada tiene dos hojas, una de ellas es mas ancha que la otra. La clavija con polo a tierra
tiene dos hojas y una tercera redonda para tierra. Todo ello para su seguridad. Si la clavija no
se enchufa en el tomacorrientes, consulte a un electrico para que lo reemplace.
10. Proteja el cable de aparato evitando pisarlo o pincharlo sobre todo en la clavija, utilice los
tomacorriente apropiados, tambien evite dañarlo en la parte en que sale del aparato.
11. Utilice solamente los accesorios especificados por el fabricante
12. Desconecte el aparato durante las tormentas electricas o cuando no se utilice por mucho
tiempo.
13. Acuda siempre al personal calificado de servicio, el cual sera necesario cuando el aparato sufra
cualquier daño, tanto en el cable como en la clavija, se haya vertido algun liquido o que algun
objeto haya caido dentro del aparato o que este haya sido expuesto a la lluvia o humedad, no
funcione de forma normal o que haya sufrido alguna caida.
14. Este aparato no debe ser expuesto a goteos o salpicaduras de agua tampoco coloque algun
objeto lleno con liquidos (tal como vasos o copas), sobre el aparato.
15. No se sobrecargue el tomacorrientes, utilice solamente la corriente indicada.
16. Utilice solamente partes de repuesto especificadas por el fabricante.
17. El producto puede ser montado a la pared, solo si es recomendado por el fabricante.
18. Si se requiere de algun servicio o reparación del producto consulte a un servicio técnico para
que lo verifique.
El Símbolo del rayo con cabeza de
Flecha dentro de un triangulo equi-
latero se coloca para alertar al
usuario de la presencia de voltaje
sin protección con una magnitud
suficiente que constituye un gran
riesgo de choques eléctricos a las
personas
PRECAUCION PARA REDUCIR EL
RIESGO DE CHOQUES ELECTRI-
COS NO REMUEVA LA CUBIERTA
NO EXISTEN PARTES REUTILIZA-
BLES EN EL APARATO. SI SE RE-
QUIERE DE ALGUN SERVICIO
ACUDA CON EL PERSONAL CA-
LIFICADO Y AUTORIZADO.
El símbolo de exclamación dentro
de un ttriangulo equilátero es para
alertar al usuario de la presencia de
operación y de mantenimiento
(servicio), especi-ficado en el
instructivo del aparato QUIERE DE
ALGUN SERVICIO ACUDA CON
EL PERSONAL CA-LIFICADO Y
AUTORIZADO.
!
Table of contents
Languages:
Other iSymphony Micro Music System manuals