8
1. GETTING STARTED
Please read this section carefully before using your
Rincon Glasses for the rst time.
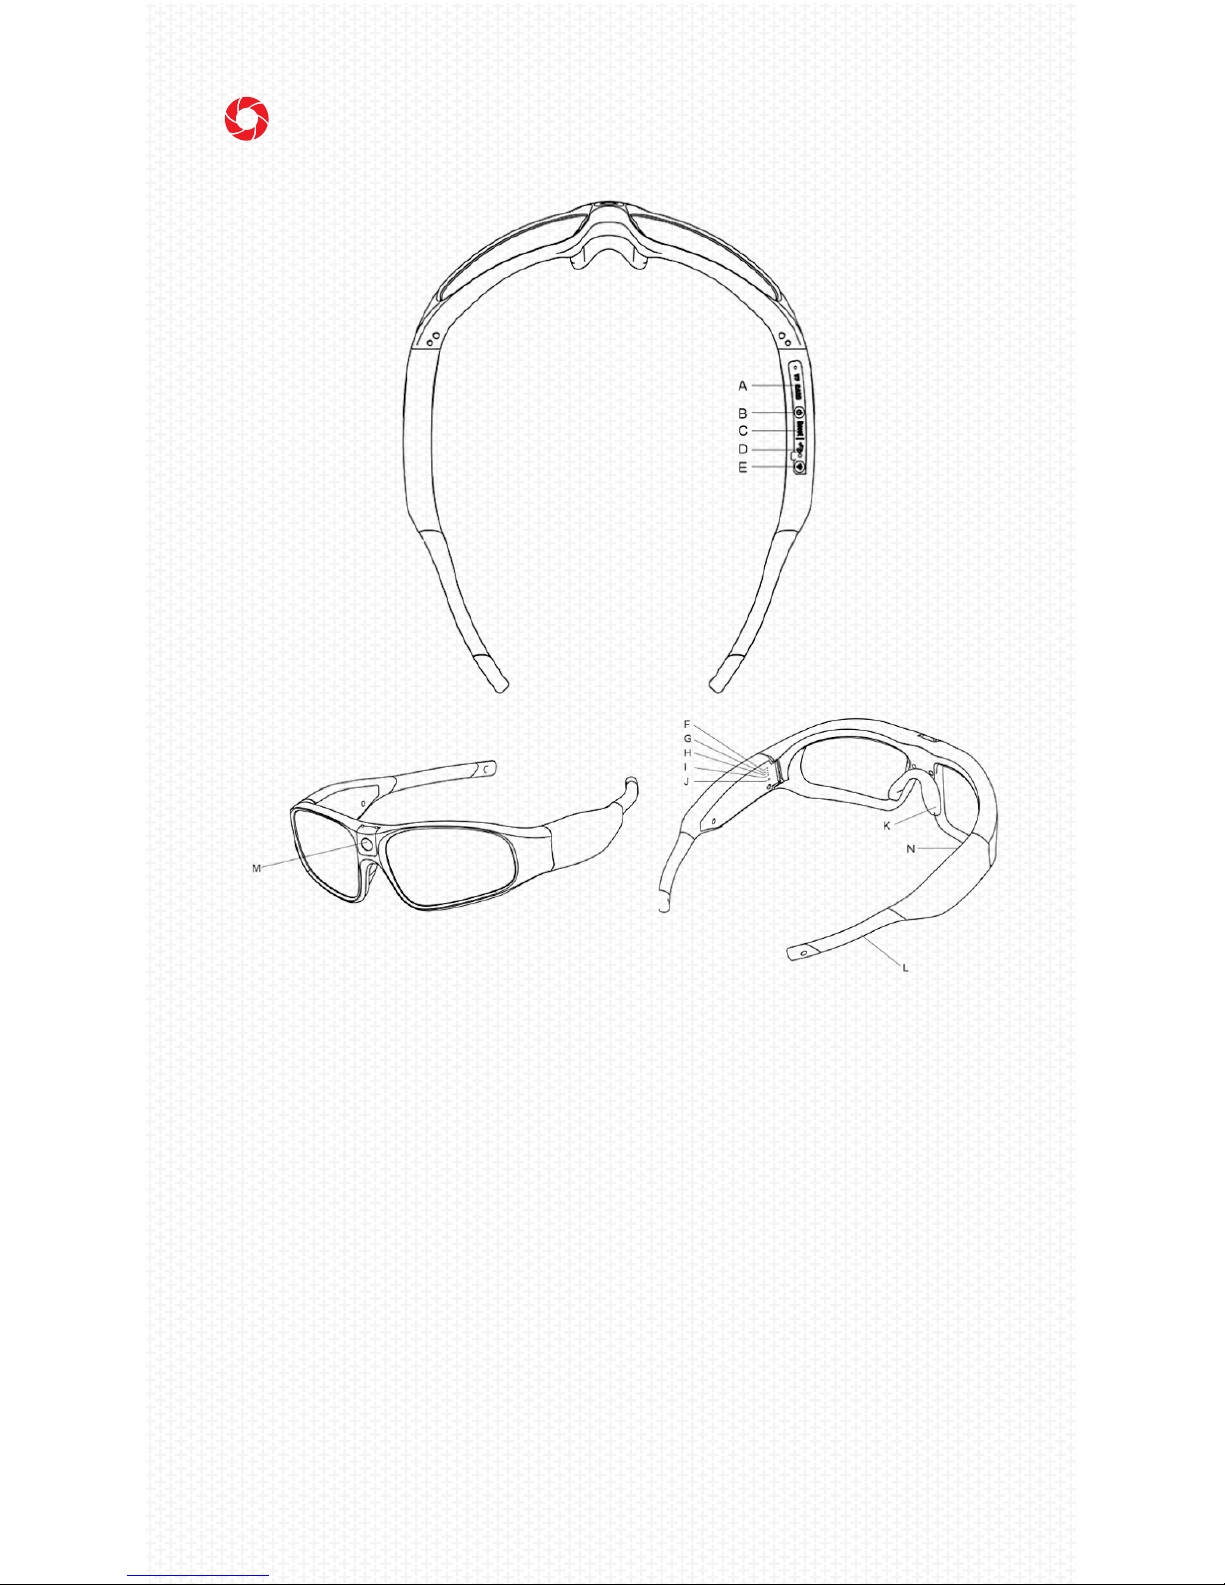
A. INDICATOR LIGHTS
The Rincon uses indicator lights to help you know
when you’re recording, what mode you are in, etc.
The indicator lights are found on the left inner arm of
the Rincon near the temple.
Indicator Lights:
1. Standby: Solid blue (1080P) or green (720P)
2. Power o: No light
3. 1080P video recording: Blue ashing, ashes fast
when low battery
4. 720P video recording: Green ashing, ashes fast
when low battery
5. Memory full: Blue and green ashing fast
6. Low Battery: Blue and green ashing fast
7. Charging: Solid red
8. Battery fully charged: Red turns o
9. USB storage mode: Blue ashing (connected your
computer)
10. WiFi on: Orange ashing
11. WiFi connected: Solid orange
B. CHARGING
The Rincon does not come fully charged and we
suggest you charge it for 4-6 hours when before you
use it for the rst time. A full charge is typically 4-6
hours. For best results: Insure the Rincon is powered
o during charging. To access the charging port, lift
the rubber cover on the left arm of the glasses.