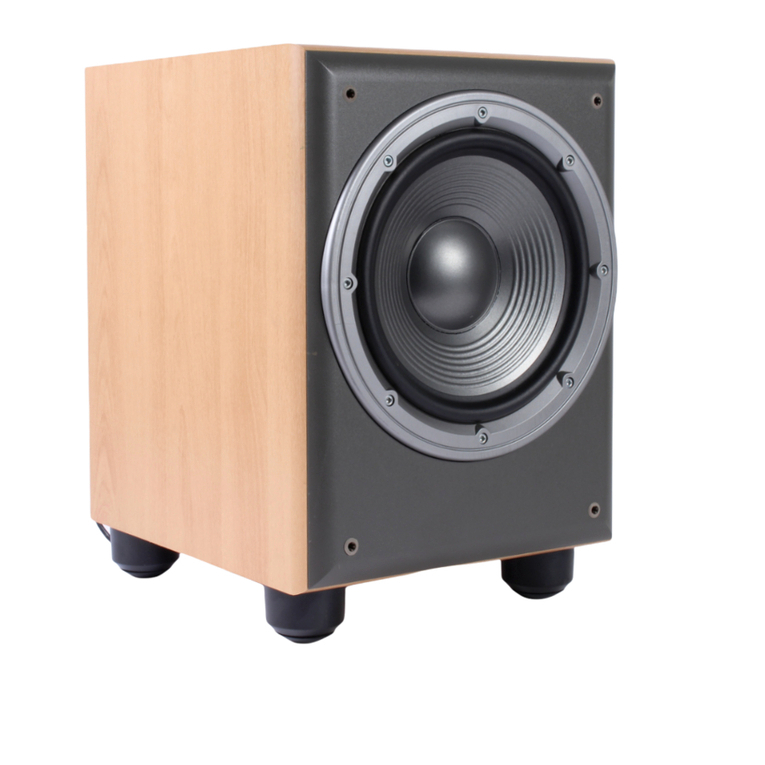
JBL ES150PW User manual

ES Series
ES150PW
Wireless Powered Subwoofer
Service Manual
JBL Consumer Products
250 Crossways Park Dr.
Woodbury, New York 11797
Released 2008 Rev1 3/2009
Discontinued XXXX

- CONTENTS -
BASIC SPECIFICATIONS …………….……..…………..1
DETAILED SPECIFICATIONS ……….……..…………..2
PACKAGING……..………………..………….….….….....5
CONTROLS/CONNECTIONS………………..…...…..…6
OPERATION ……..………………….……...…….….…...8
SUBWOOFER EXPLODED VIEW/PARTS LIST……....9
TRANSMITTER EXPLODED VIEW/PARTS LIST…....10
TEST SET-UP AND PROCEDURE…..….……………..11
BLOCK DIAGRAMS…………………………….……..…13
SUBWOOFER AMP TROUBLESHOOTING……. ……17
TRANSMITTER TROUBLESHOOTING……. …………18
RECEIVER PCB TROUBLESHOOTING…….….. ……19
P.C.B. DRAWINGS….…………………………………….20
ELECTRICAL PARTS LIST ..……….……….……….…27
IC/TRANSISTOR PINOUTS..……..….…….….….….….33
SCHEMATICS…………………………………………….47
ES150PW SPECIFICATIONS
Amplifier Power (RMS): 300 Watts
Peak Dynamic Power *: 500 Watts
Driver: 10" (250mm) PolyPlas™
Inputs: Line Level or LFE
Low-Pass Frequency: Variable from 50Hz to 150Hz (24dB/octave)
Frequency Response: 27Hz – 150Hz
Operating Range Up to 75' (22m), depending upon conditions
RF Operating Frequency 2.4GHz
Subwoofer Dimensions (H x W x D): 18" x 13-1/4" x 16-1/8" (457mm x 337mm x 409mm)
Transmitter Dimensions (H x W x D): 3-3/4" x 4-7/8" x 3-15/16" (95mm x 124mm x 100mm)
Weight: 39 lb/17.7kg
JBL continually strives to update and improve existing products, as well as create new ones. The specifications
and details in this and related JBL publications are therefore subject to change without notice.
* The Peak Dynamic Power is measured by recording the highest center-to-peak voltage measured across the output of a resistive load equal to
minimum impedance of the transducer, using a 50Hz sine wave burst, 3 cycles on, 17 cycles off.
ES150PW
1

ES150PW 200W Powered Sub Amp
LINE VOLTAGE Yes/No Hi/Lo Line Nom. Unit Notes
US 120vac/60Hz Yes 108-132 120 Vrms Normal Operation
EU 230vac/50-60Hz Yes 207-253 230 Vrms Normal operation, MOMS required
Parameter Specification Unit QA Test
Limits Conditions Notes
Amp Section
Type (Class AB, D, other) D n/a n/a
Load Impedance (speaker) 4 Ohms n/a Nominal
AVG System impedance 5.18 Ohms n/a AP Computed BW from 20 to
500Hz
Min System impedance 3.769 Ohms n/a @ 100Hz
Rated Output Power (120VAC) 200 Watts 190 Domestic version only 120 VAC-60 Hz
AVG RMS Dynamic Power 311 Watts Reference 200mV driven into LFE input
Average RMS power, 3/20 Cycles 50
Hz, Driven 6dB above its input
sensitivity , average of the RMS value
for the first 4 consecutive peaks
THD @ Rated Power 0.5 % 1 22K filter
THD @ 1 Watt 0.2 % 0.3 22K filter
DC Offset 10 mV-DC 30 @ Speaker Outputs
Damping factor >50 DF 20 Measured at amplifier board 90%
of full power Measured at the speaker cable. 180
Watts @ THD < 0.1 % @ 50 Hz
Input Sensitivity
Input Frequency 50 Hz 50 Nominal Freq.
L or R 13 mVrms ±1dB To 1 Watt Single input driven
LFE input 7 mVrms ±1dB To 1 Watt Single input driven, LFE switch ON
System Gain (L or R inputs) 43.7 dB Reference Single input driven L or R inputs (Local
inputs)
System Gain (LFE input) 49.1 dB Reference Single input driven LFE Mode local
Signal to Noise
SNR-A-Weighted 80 dBA 75 relative to 1W A-Weighting filter
SNR-unweighted 65 dBr 60 relative to 1W 22K filter
Residual Noise Floor <1.5 mVrms(max) 2.5 Volume @max, w/ A/P Swept
Bandpass Measurement (Line
freq.+ harmonics) (BW=20 KHz)
Line level inputs must be terminated
using 1KOHM
Input Impedance
Line Input (L, R,LFE) 10K ohms n/a Nominal
Filters
LP filter Variable (Normal mode) 50-150 Hz ± 10 4th Order variable-24 db/Octave
Subsonic filter (HPF) 2nd Order Fixed -- --
Friend circuit Fixed -- --
LFE Low pass 200>LP<500 Hz LFE input driven only
Limiter
THD at Max. Output Power 5 % Functional
Drive unit 6dB above the required
level to obtain full power
Approximately 800mV single input
driven, L or R input
Maximum THD as a result of limiting.
Features --
Volume pot Taper (lin/log) LOG -- Functional A Taper
Variable Crossover control YES -- Functional Refer to Filter section
Phase switch 0-180 deg Functional
LP Filter defeat switch YES Functional Disables LP filter, Wireless mode only,
it has no effect when using local inputs
Wireless ready YES Functional Refer to Wireless section below
Wireless channels 4 n/a Functional
System is provided with 4 wireless
channels, which can be selected via a
rear panel switch, channel should
match ID at Tx side
LED Indicator YES Functional RED-Standby, GRN-Active, ORG-
Wireless link and subwoofer are active.
Input Configuration
Line in (L,R) & LFE YES -- Functional 3 RCA Jacks, RED, WHT (Left and Right)
and Purple for LFE
ES150PW
2

Parameter Specification Unit QA Test
Limits Conditions Notes
Signal Sensing (ATO)
Auto-Turn-On (yes/no) YES Functional
ATO Input test frequency 50 Hz Functional
ATO Line level input 1.5 mV Functional Maximum acceptable level.
ATO Turn-on time 5 ms Functional Amp connected and AC on, then
input signal applied
Auto Mute/ Turn-OFF Time 5-15 minutes 5-15 T before muting, after signal is
removed Auto turn of time (T) must be 5 > T <
15 Minutes
Power on Delay time 3 sec. 4 AC Power Applied
Transients/Pops
ATO Transient 0.5 V-peak 0.5V @ Speaker Output Amplifier activated by signal presence
at the Line input
Turn-on Transient 0.5 V-peak 0.8V @ Speaker Output AC Line cycled from OFF to ON
Turn-off Transient 0.5 V-peak 0.8V @ Speaker Output AC Line cycled from ON to OFF
Efficiency
Efficiency 65 % 60 Test conducted at rated power
200W Nominal Line voltage
Efficiency at 1/8 of rated power 48 % 45 Test conducted at 25 WRMS Nominal Line voltage-Rated impedance
4 Ohms
Standby Input power 15 Watts 16 Nominal Line voltage RED LED
Idle input power 14 Watts 16 @ nom. line voltage
Maximum allowable input power under
nominal Input voltage and frequency,
HOT or COLD operation. LED GREEN
no signal applied
Power Cons. @ rated power 303 Watts 331 @ nom. line voltage 200 Watts @ 4 Ohms nominal line
voltage
Protections
Short Circuit Protection YES Functional Direct short at output Amplifier should resume operation after
short circuit condition removal
Thermal Protection YES Functional @1/8 max unclipped Power at 1.06
times the input voltage
Temperature rise in accessible metal
parts should not exceed 35K rise for
domestic version or 30K rise for
European versions (refer to
requirements sheet).
DC Offset Protection YES - DC present at Speaker Out leads
Design must insure no Offset/DC
Voltage at the speaker output under
any operating condition including
abnormal operation
Line Fuse Rating
USA-Domestic 3.15 Amps 3.15 Type-T or Slo Blo-250 V Internal fuse with UL/SEMKO rated
holder
EU 2 Amps 2 Type-T or Slo Blo-250 V, Low
Breaking capacity Internal fuse with UL/SEMKO rated
holder
Mechanical
System weight 39 Lbs Reference Subwoofer
Dimensions (H x W x D) 8 x 13-1/4 x 15-3/
8
inches Reference Depth includes antenna but no grill
SYSTEM PERFORMANCE USING WIRELESS Tx
THD @ 1 Watt 0.43 % 0.5 22K filter
Tx Input Impedance
Line Input (LFE) 7.3K ohms n/a Nominal @ 1KHz
System Sensitivity Using Tx
Input Frequency 50 Hz 50 Nominal Freq. System level, using Tx
LFE Input 6.4 mVrms ±1dB To 1 Watt System level, using Tx
System gain 50 dB ±1dB To 1 Watt System level, using Tx
System Signal to Noise Using Tx
SNR-A-Weighted 75 dBA 70 relative to 1W A-Weighting filter
SNR-unweighted 57 dBr 55 relative to 1W 22K filter
Filters
System filter None Hz Should not have any effect on the
FR of the system
ES150PW
3

Parameter Specification Unit QA Test
Limits Conditions Notes
Tx Input Limiter dynamic range
Maximum input voltage Tx line
input can take without exceeding
1% of THD at the output of the
sub amp
5.7 Vrms Functional Max input voltage Tx front end can
handle without exceeding 1% THD
Tx-Signal Sensing (ATO)
Auto-Turn-On (yes/no) YES Functional
ATO Input test frequency 50 Hz Functional
ATO Level LFE Input 2 mV Functional
Auto Mute/ Turn-OFF Time 5-15 minutes 5-15 T before muting, after signal is
removed Auto turn of time (T) must be 5 > T <
15 Minutes
Tx Features --
LFE Input YES -- Functional Single RCA Connector
Channel ID switch YES Functional 4 Position switch, to select wireless
channels
External power supply
requirements 18 VDC Functional Tx external supply model GPE-152,
delivering 18VDC @ 400mA
Power consumption
Tx Standby Input Power 1 Watts Reference 120VAC line voltage RED LED
Tx Standby input current 0.019 Amperes Reference 120VAC line voltage RED LED
Tx Idle Power 2.34 Watts Reference 120VAC line voltage Unit in operation Locked to Rx section
Solid GRN
Tx Idle Power 1.64 Watts Reference 120VAC line voltage Unit in operation NOT locked to Rx
section
Power supply adapter
Manufacturer / model Reference GOLDEN PROFIT ELECTRONICS
LTD. GPE-152-180040W
Output Voltage 18 VDC Reference @ Nom. line voltage
Max output current 0.4 ADC Reference
Rating 7.2 VA Reference
AC input voltage range 100-240 VAC Reference Universal type power supply
AC input frequency 50-60 Hz Reference
Power supply weight 0.246 Lbs Reference 112 grams
AC power cord type n/a Functional Detachable, interchangeable via a 2
Pole IEC receptacle EN 60320 C7
230V model will include SCHUKO and
UK cords, 120V includes 120V US cord
only
Power supply certification YES -- Reference Power supply should be certified
under the applicable standards for
its end use EN/IEC 60065:2002 TUV/PSE
Other Parameters/Notes:
Volume control should be at the input buffer stage in order to lessen the possibility of clipping the input section with highly dynamic audio material.
ALL SPECS SHOULD BE MEASURED AT NOMINAL LINE VOLTAGE.
ES150PW
4

ITEM # PART NUMBER DESCRIPTION QTY
1 ES150PWCH ES150PW (Cherry) 1
ES150PWBE ES150PW (Beech) 1
ES150PWBK ES150PW (Black) 1
2 Serial Number 1
3 Date Label 1
4 431-000-06706-E Bottom Foam 1
5 431-000-06705-E Top Foam 1
6 Visit www.jbl.com ES150PW Owner’s Manual 1
7 405-000-05181-E Warranty Card 1
8 Dessicant 1
400-000-08387-E Outer Carton ES150PW (Cherry) 1
400-000-08392-E Outer Carton ES150PW (Beech) 1
9
400-000-08388-E Outer Carton ES150PW (Black) 1
10 Carton Label 1
11 244-100-05276-1BAE Grille w/ logo, packaged 1
12 Accessory box consisting of: 1
a Carton 1
b 015-7600-00037-E Transmitter 1
c Power Supply, transmitter 1
d 151-OGPE15200-E 120v AC cord for Power Supply 1
e 152-U60201A06-E 120v AC cord for ES150PW 1
f 165-02000101-E 6 ft. Audio cable RCA-RCA 1
g 165-045801100-E 15 ft. Audio cable RCA-RCA 1
h 376-000-01092-E Wall Mount Bracket, transmitter 1
j 373-000-05067-E Adhesive feet, round, (set 4) 1
ES150PW
5

Sub In
ID
CODE
DC18V
1234
4
¡Power Switch
™Line-Level Inputs
£LFE Input
¢Low-Pass Selector
(Wireless Input Only)
∞ID-Code Selector
§Crossover Adjustment Control
¶Subwoofer-Level (Volume) Control
•Phase Switch
ªWireless Antenna
Transmitter
‚Transmitter Antenna
⁄Transmitter Power-Supply Input
BTransmitter ID-Code Selector
‹Transmitter Sub Input
CONTROLS AND CONNECTIONS
Rear Panel
Power
On
Off
AC 120V~60Hz
2A
Antenna
Crossover
[Hz]
Phase
Level
Sub In
Wireless
LFE
LR
ffOnO
Low-Pass
ID Code
‚⁄B‹
¡
™£
¢
∞§
¶
•
ª
JBLP2706_ES150-250PW-120om 5/20/08 4:15 PM Page 4
ES150PW
6

5
SYSTEM CONNECTIONS
Choose either Wireless or Wired connection, then follow the appropriate instructions.
If your receiver/processor does not contain a Dolby Digital or DTS processor
but has subwoofer outputs:
Line InSub In
LFE
LR
Crossover
[Hz]
Level
Wireless
ID Code
ffOnO
Low-Pass
Crossover
[Hz]
Level
Line InSub In
LFE
LR
ffOnO
Low-Pass
Wireless
ID Code
ffOnO
Low-Pass
WIRED
Connecting the Subwoofer for Wired Applications
If you have a Dolby®Digital or DTS®receiver/processor with a low-frequency
effects (LFE) or subwoofer output:
NOTE: If your receiver/processor has only one sub out, you may use
either the L or R input.
WIRELESS
Connecting the Subwoofer for Wireless Applications
1. Connect a subwoofer cable from the subwoofer or LFE output of your receiver
to the Sub In Con the transmitter.
2. Plug the transmitter module’s power supply into the wall outlet, and connect
the included power cord to the transmitter A. Make sure the Transmitter
Antenna ‚is extended upward.
3. Set the ID code on the transmitter and subwoofer (Band ∞) to the
same position, as described on page 6. When connected properly, the LED
on the top of the subwoofer will be orange.
4. Set the Low-Pass Selector ¢to the “Off” position.
NOTES:
You may also connect a variable full-range output from an A/V receiver or
processor, such as a preamp output or second-room output. In this case,
set the Low-Pass Selector ¢to the “On” position and set the crossover
adjustment as described on page 6.
Some receivers have two subwoofer outputs. In that case, use either connector.
Sub In
ID
CODE
DC18V
1234
JBLP2706_ES150-250PW-120om 5/20/08 4:15 PM Page 5
ES150PW
7

6
OPERATION
Power On
Connect your signal source (such as an A/V receiver or preamplifier) to the
transmitter (if using a wireless connection) or to the subwoofer (if using a wired
connection). Two single-RCA cords are provided. While you would ordinarily
use the short cable to connect to the transmitter or the long one to connect
to the subwoofer, either cable can be used, depending on proximity to the
signal source. There is no need or benefit gained from connecting the same
source to both the transmitter and the subwoofer. However, you could connect
two separate sources to the subwoofer by utilizing both its wired and wireless
connections. Both signals will essentially be mixed and outputted by the
subwoofer. Plug your transmitter’s (if using a wireless connection) and subwoofer’s
AC cord into a wall outlet. Do not use the outlets on the back of the receiver
for the subwoofer. Initially set the Subwoofer-Level Control ¶to the “Min”
position. Turn on your sub by pressing the Power Switch ¡on the rear panel.
Turn on your entire audio system and start a CD or movie soundtrack at a
moderate level.
Auto On/Standby
Transmitter (Wireless Connection Only): The Status LED (not shown) will be
lit in red when the unit is in Standby. When the transmitter receives an audio
signal from the source, it will immediately turn on and the LED will turn to
blinking green or solid green:
RED = STANDBY (No signal detected, transmitter off)
GREEN (BLINKING) = Transmitter is on but has not established a link
with the wireless sub
GREEN (SOLID) = Transmitter is on and has already established a link
with the wireless sub
The transmitter will automatically enter Standby mode after approximately
10 minutes when no signal is detected from your system.
Subwoofer: With the Power Switch ¡in the “On”position, the Status LED on
the back panel will remain lit to indicate the On/Standby mode of the subwoofer.
RED = STANDBY (No signal detected, amp off)
GREEN = SUB ON (Wired signal detected, amp on)
ORANGE = SUB ON (Wireless link with transmitter active)
The subwoofer will automatically enter Standby mode after approximately
10 minutes when no signal is detected from your system. The subwoofer will then
power on instantly when a signal is detected. During periods of normal use,
the Power Switch ¡can be left on. You may turn off the Power Switch ¡
for extended periods of nonoperation (e.g., when you are away on vacation).
Getting Started
Confirm that the Status LED on the transmitter is on (red or green), the
Status LED on the subwoofer is on (red, orange or green) and an RCA cable is
connected from a source unit to either the LFE Input of the subwoofer £or
transmitter ‹or L and R inputs ™on the subwoofer. Play a CD or video. Use
a selection that has ample bass information. If using a wireless connection, the
Status LED on the transmitter should be lit in solid green, and the Status LED
on the subwoofer should turn orange if connected wirelessly. If the LED on the
transmitter is blinking in green and the LED on the subwoofer is in red or green,
a wireless link has not been established between the transmitter and the
subwoofer. If connecting directly to the subwoofer without using the wireless
link, the Status LED on the subwoofer should be lit green. If the LED on the
subwoofer remains red, check that the RCA cable from the source to subwoofer
(wired connection) or transmitter (wireless connection) is functioning properly
and that it is fully inserted at both ends, or that the Transmitter ID-Code
Selector Band the Subwoofer ID-Code Selector ∞are set to the same
channel. Once you have a green or orange LED on the subwoofer, turn your
Subwoofer-Level Control ¶up halfway so that the knob indicator points up.
You should now be hearing bass information coming from the subwoofer.
Adjust Level
Set the overall volume control of the preamplifier or stereo to a comfortable
level. Adjust the Subwoofer-Level Control ¶until you obtain a pleasing blend
of bass. Bass response should not overpower the room but rather be adjusted
so there is a harmonious blend across the entire musical range. Many users
have a tendency to set the subwoofer volume too loud, adhering to the belief
that a subwoofer is there to produce lots of bass. This is not entirely true.
A subwoofer is there to enhance bass, extending the response of the entire
system so the bass can be felt as well as heard. However, overall balance
must be maintained or the music will not sound natural. An experienced listener
will set the volume of the subwoofer so its impact on bass response is always
there but is never obtrusive.
Phase Control
The Phase Switch •determines whether the subwoofer driver’s piston like
action moves in and out with the main speakers, 0˚, or opposite the main speakers,
180˚. Proper phase adjustment depends on several variables such as room size,
subwoofer placement and listener position. Adjust the Phase Switch •to
maximize bass output at the listening position.
Crossover Adjustment
The Crossover Adjustment Control §determines the highest frequency
at which the subwoofer reproduces sounds. If your main speakers can
comfortably reproduce some low-frequency sounds, set this control to a
lower frequency setting, between 50Hz and 100Hz. This will concentrate the
subwoofer’s efforts on the ultradeep bass sounds required by today’s films
and music. If you are using smaller bookshelf speakers that do not extend
to the lower bass frequencies, set the Crossover Adjustment Control §to
a higher setting, between 120Hz and 150Hz.
NOTE: This control will have no effect if the LFE Input £is used (wired
connection) or if the Low-Pass Selector ¢is in the “OFF” position (wireless
connection). If you have a Dolby Digital or DTS processor/receiver, the low-pass
frequency is set by the processor/receiver. Consult your owner’s manual to learn
how to view or change this setting.
ID Codes
In the unlikely event that you experience interference when operating the system,
or if you have more than one set of subwoofer transmitters and receivers in
operation, you may change the channel in which the system operates. On
the transmitter module and the subwoofer, there is a four-position ID-Code
Selector (Band ∞). Simply set the selectors to one of the other positions.
The transmitter and subwoofer (Band ∞) selectors must be set to the same
position for the system to function correctly. You can also set up a maximum of
two subwoofers to be receiving from the same transmitter by setting the channel
selector on the transmitter and both of the subwoofers to the same channel.
A Word About Wireless Products
The JBL ES150PW and ES250PW wireless subwoofers utilize advanced wireless
transceivers operating in the 2.4GHz frequency band. This is the same frequency
band that is used for wireless home networks and high-quality cordless phones.
It also allows for the transmission of high-performance, full-spectrum sound to
remote locations, wirelessly.
Like all wireless devices, the JBL wireless subwoofer’s operating range may
vary, depending upon variables such as building construction methods and
materials, atmospheric conditions and other sources of interference. Please
consult your JBL dealer or distributor, or visit www.jbl.com, for further
information or assistance.
Wall-Mounting the Transmitter Module
NOTE: The customer is responsible for the correct selection and use of
mounting hardware (available through hardware stores) that will ensure the
proper and safe wall-mounting of the transmitter.
1. Insert the two M3 x 4 machine
screws through the wall bracket
and into the rear of the transmitter
module, as shown.
2. Attach the transmitter module
with wall bracket to the wall,
using suitable hardware and,
if necessary, wall anchors.
JBLP2706_ES150-250PW-120om 5/20/08 4:15 PM Page 6
ES150PW
8

ITEM # PART NUMBER DESCRIPTION QTY
1 Not for Sale ES150PW Cabinet BK,CH,BE 1
2 327-010-00622-E Grille Cup, BLK 4
3 Not for Sale Port Tube 1
4 315-HPS-05097-0AAE LED Plate 1
5 361-NYL-05101-0BAE LED Socket 1
6 316-HPS-05236-0AAE JBL Logo 1
7 352-KM03520D1148-E Screw, LED Plate 4
8 25PR12FZX-DW04-E 10” Woofer DCR= 3.4Ω1
9 213-100-05156-0AAE 10” Trim Ring 1
10 352-KM04020D1149-E Screw, Trim Ring 8
11 321-ABS-00008-E Foot, Plastic, main body 4
12 321-RUB-00009-E Foot, rubber glide 4
13 352-HM04030D500-E Screw, Foot 4
14 Not for Sale ES150PW Amplifier (120v) 1
15 352-AM04020D880-E Screw, Amplifier 10
16 015-7600-00037-E Transmitter, complete (120v) 1
ES150PW
9

ES150PW
10

ES150PW Test Set Up and Procedure
Equipment needed:
•Function/signal generator/sweep generator
•Integrated Amplifier
•Multimeter
•Speaker cables
•ES150PW Transmitter, power supply
General Unit Function + Transmitter (UUT = Unit Under Test)
1) From a mono output signal generator, OFF at this time, connect an RCA cable to the “Sub in” jack on the
ES150PW Transmitter. Assure the power supply has been plugged in and a Red or blinking Green LED is
now showing on the transmitter. Default “ID Code” switch position is 1.
2) Position and plug in the ES150PW Subwoofer nearby (less than 75’ away), power switch should be OFF.
3) CROSSOVER, PHASE switch position does not matter. Low Pass switch should be OFF. “ID Code”
switch position should be 1.
4) Turn the LEVEL control on the UUT to completely counterclockwise (MIN).
5) Turn on signal generator; adjust to 100V, 50 Hz. LED on Transmitter should now be steady Green.
6) Turn the power switch ON. LED on top of Subwoofer should be momentarily Green, then Orange.
7) Turn LEVEL control full clockwise (MAX); immediate and vigorous bass response should be heard and felt
from port tube opening on the bottom.
8) Turn off generator, turn LEVEL control full counterclockwise (MIN), and disconnect RCA cable.
General Unit Function (Direct connection - No Transmitter)
9) From a mono output signal generator, OFF at this time, connect an RCA cable to the L/R jacks on the
ES150PW Subwoofer.; Use a Y-cable to connect to both inputs; power switch should be OFF.
10)PHASE switch position does not matter. CROSSOVER control should be set at “120Hz”. Low Pass switch
position does not matter.
11)Turn the LEVEL control on the UUT to completely counterclockwise (MIN).
12)Turn on signal generator; adjust to 100mV, 50 Hz.
13)Turn the power switch ON. LED on top of Subwoofer should be momentarily Red, then Green.
14)Turn LEVEL control full clockwise (MAX); immediate and vigorous bass response should be heard and felt
from port tube opening on the bottom.
15)Turn off generator, turn LEVEL control full counterclockwise (MIN), and disconnect RCA cable.
ES150PW
11

Sweep Function
1) Follow steps 9-14 above, using a sweep generator as a signal source.
2) Sweep generator from 20Hz to 300Hz. Listen to the cabinet and drivers for any rattles, clicks, buzzes or
any other noises. If any unusual noises are heard, remove woofer and test.
Driver Function
1) Remove woofer from cabinet; detach + and - wire clips.
2) Check DC resistance of woofer; it should be 3.4 ohms ±10%
3) Connect a pair of speaker cables to driver terminals. Cables should be connected to an integrated amplifier
fed by a signal generator. Turn on generator and adjust so that speaker level output is 5.0V.
4) Sweep generator from 20Hz to 1kHz. Listen to driver for any rubbing, buzzing, or other unusual noises.
ES150PW
12

ES150PW
13

ES150PW
14

ES150PW
15

ES150PW
16

ES150PW Testing Flow Chart
yes
no
no yes
yes
no
yes
no
yes
no
yes
no
yes no
yes
no
no
yes
yes
no
Start
Dc voltage check
±Vcc,±15V
OK Check transformer
C168,C169,D123,
D124,C170
Power on check
LED red &green
OK
Check vol module
& connector
cable& ±15V.etc
Check THD output
power, noise
OK
Check pre board
& power board ,
±Vcc,±15V ect
Test frequency
Response
OK
Check U102,uR133,
C121,R135,C122.ect
Test input sensitivity
OK Check U101,R117,
R112,R114 etc
Test protection
OK Check U107.R237
±15Vcc etc
Test limiter circuit
OK Check U106.Q107ect
Auto off Function
Hi pot test
OK
Check U103.Q101.
Q102.C131.R142;Ac
cord, Transformer.
OK
Listening test
OK
The Amp ass’y ok
END
Test frequency
Response
Check U105
C137C137CC143ect
ES150PW
17

Transmitter
Troubleshooting Flow Chart
no
yes
yes
yes no
yes
yes
no
yes
red
LED light green yes
no
yes yes
no
yes
AMP no signal out
check +VD
(
17VDC
)
Check+VA(15VDC)
Check+12VDC +3.6VDC
Check,D1,L01,D05,Q04,D0
3,Q03,Q01,Q02 etc
OK, END
Check MD01WH4924
Check Q06,Q05 etc
Check,Q07,D08 .U01,D10,U02etc
LED light green or red
Check,U05,U06,U08,Q11
,Q12,U03,U04 etc
Check LAUNCHER signal
Check MD01AINL,AINR signal CheckU07,U05,U06 etc
ES150PW
18

Wireless Receiver board
TroubleshootingFlowChart
no
yes
yes yes
no
yes yes
no
yes
AMP no signal out
Check 3.7VDC
Check,R505,U501,D501,L5
01,L502,U01, etc
OK, END
Check MD01 RX-11G
Check LAUNCHER signal
Check MD01 LRCK signal Check U04,U02,U03,etc
ES150PW
19
Other manuals for ES150PW
2
Table of contents
Other JBL Subwoofer manuals

JBL
JBL STADIUM 1024 User manual

JBL
JBL Grand Touring GTO1014 User manual

JBL
JBL P1040 User manual

JBL
JBL TS600 User manual

JBL
JBL HTPS-400 User manual

JBL
JBL Decade DS105 User manual

JBL
JBL E150P User manual

JBL
JBL PSW-D112 User manual

JBL
JBL EON PowerSub G2 User manual

JBL
JBL simply cinema SUB350 User manual