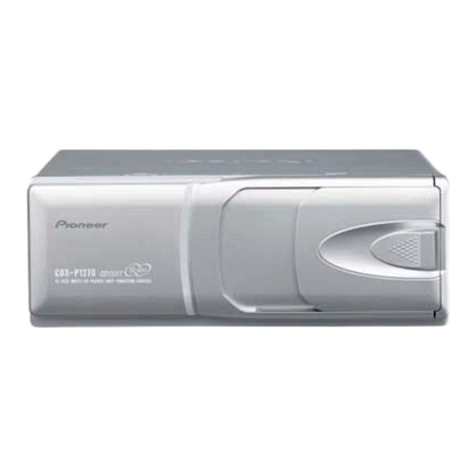
Jedia J6CD-10 User manual

WWW.JEDIA.COM
6CD CHANGER
J6CD-10

AUTION AVIS
IMPORTANT NOTICE (중요사항)
SAFETY INSTRUCTIONS
C
1
1
1
4~5
RONT PANEL CONTROLS
F
2
NSTALLATIONS
I
OW TO USE THE COMPACT DISC MAGAZIN (콤팩트 디스크 매거진 사용방법)
H
3
EATURES (특징)
F
4
RROR DISPLAY (에러발생시 대응법)
E
7
LOCK DIAGRAM
B
9
PECIFICATIONS
S
8
EAR PANEL CONTROLS
R
6
6
5
4
3
2
1
J6CD-10
6CD CHANGER
MAIN POWER
LEVEL
OFF
ON
0
10
CD-POWER
ON/OFF
RESET
REPEAT RANDOM SCAN PLAY/
PAUSE STOP DOWN UP DOWN UP
POWER
EJECT
SENSOR
DISCTRACK
RDM
RPT
DISC
SCAN
S3S3
S2S2
S1S1
S4S4
S3S3
S1S1
S2S2
S4S4
DISC TRACK
123456

SAFETY INSTRUCTIONS
Read all safety instruction before operating the J6CD-10.
1. Install equipment as follow conditions.
The apparatus shall not be exposed to dripping or splashing and
no object filled with liquids, such as vases, shall be place on the
apparatus.
Install at the place, not bending curved.
Do not install this apparatus in a confined space such as a book
case or similar unit.
Locate this apparatus away from heat source, such as radiators
or other device that produce heat.
Do not drop objects or spill liquids into the inside of the apparatus.
2. Keep in mind the following when connecting the apparatus.
Connect the apparatus after reading of O/P manuals.
Connect each connection of amplifier perfectly, if not, it maybe
Caused hum, damage, electric shock in case of mis-connecting.
To prevent electric shock, do not open top cover.
Connect the power cord with safety after check of AC power.
This apparatus should be serviced by qualified service person.
안 전 사 항
디스크를 사용시 주의사항
제품을 운용하기전에 모든 안전사항을 읽어 보십시오.
1. 이런 장소에 설치하여 주십시오.
사용하시기 전에 연주면에 이물질이나 먼지, 지문 등은 부드러운 헝겊으로 안쪽
중심에서 바깥쪽 직각 방향으로 닦아 주십시오.
진동이나 경사가 심하지 않고 바닥이 평평한 장소.
통풍이 잘되고 물기나 습기가 많지 않은 장소.
직사광선을 받지 않는 장소 또는 난방기구(발열체)에서 멀리 떨어진
장소.
인화성 물질(화학약품)이 없는 장소.
2. 설치시 이런점을 주의하십시오.
사용설명서 시스템 연결방법을 완전히 읽으신 후에 연결해 주십시오.
각종 연결선을 완전하게 연결해 주십시오.
(주전원 코드를 뽑은 상태에서 연결.)
불완전한 연결은 잡음, 제품의 손상 또는 안전사고의 원인이 됩니다.
전기적 충격 또는 감전사고의 위험이 있으므로 뚜껑을 열지 말아주십
시오.
주 교류 전원 플러그를 연결하기 전에 사용전압을 확인하신 후 안전
하게 연결하십시오.
제품을 수리시는 규정된 부품과 자격이 있는 사람이 수리를 하여야 함.
직사광선이 들어오는 곳이나 난방기구 등 열이 나는 곳을 피해주십시오.
디스크를 구부리게 하면 잡음의 원인이 됩니다.
새로운 디스크를 구입후 사용하기 전에 외각을 볼펜으로 한번 긁어 주십시오.
디스크가 손상될 염려가 있으므로 디스크의 중앙 구멍을 키우지 마십시오.
라벨면(인쇄면)에 볼펜, 연필등으로 낙서를 하지 마십시오.
옥외 등의 아주 추운 장소에서 갑자기 더운 장소로 옮기면 표면에 물방울이 생겨
연주가 되지 않는 일이 있습니다. 이 때에는 부드러운 헝겊으로 닦아주시고, 물방
울을 헤어드라이기로 말리는 것은 디스크가 손상되므로 절대로 사용하지 마십시오.
벤젠, 신나, 물, 아나로그 레코드 음반용 클리너를 사용하지 마십시오.
정전기 방지제 등도 디스크를 손상시킬 수 있으므로 사용을 피해 주십시오.
1
SAFETY PRECAUTIONS(DISC)
Only use compact discs which have this mark:
Do not use cracked, bent or scratched discs.
If Disc becomes dirty. gently wipe the surface with a soft lint-free cloth.
Do not use sprays or cleaners designed for records.
Do not expose the disc to direct sunlight. Excessive heat will warp the disc.
Do not leave a disc unprotected.
Always store it in its case right away from sunlight.
Compact discs may not always be recorded at the same volume level
or with the same quality.
This may result in different volume levels between disc and radio.
CAUTION
USE OF CONTROLS OR ADJUSTMENTS OF PERFORMANCE OR
PROCEDURES OTHER THAN THOSE SPECIFIED MAY RESULT IN
HAZARDOUS RADIATION EXPOSURE.
DO NOT REMOVE THE CHANGER/PLAYER COVER.
THERE ARE NO USER SERVICEABLE PARTS INSIDE.
REFER TO QUALIFIED SERVICE PERSONNEL ONLY.
IMPORTANT NOTICE
This Compact Disc Changer/Player has been tested and found to comply
with the limits for a class B digital device in accordance with the specifications
in Subpart J of Part 15 of FCC Rules. This equipment generates and uses
radio frequency energy, and it must be installed and used properly in
accordance with the manufacturer's instructions.

2
INSTALLATION (설치)
CR2023
RELEASE
STORAGE DISC
Be sure to keep discs away from CD changer during long-time not use.
Be sure to keep in the case.
Do not place or store disc in the following place.
1. Locations exposed to direct sunlight.
2. Locations directly exposed to a heat vent or heating appliance.
3. Humid locations.
USE OF BATTERIES
디스크 보관에 대하여
장시간 본 기기를 사용치 않을 에는 필히 디스크를 본 기기로부터 빼주십시오.
보관하실 때에는 반드시 케이스에 넣어 보관하십시오.
다음과 같은 장소에는 디스크 보관을 피해 주십시오.
1. 직사광선이 장시간 들어오는 장소.
2. 난방기구 등 열이 많이 나는 장소.
3. 습기가 많은 장소.
이동용 나사
이동용 나사(SCREW)의 제거
제품을 설치하기 전에 이동용 나사를 풀어서 빼내십시오.
나중에 다시 본체를 이동할 때 빼낸 나사가 필요하므로 잘 보관하여 주십시오.
이동용 나사(SCREW)의 재설치
본체를 옮기기 전에 아래의 순서대로 이동용 나사를 재 제결해야 합니다.
재 체결이 정확하지 못하거나 이동용 나사를 제대로 사용치 않으면, 본체가 손상
될 우려가 있습니다.
1. 본체를 재 체결할 때는 디스크를 처음 위치 또는 정지 상태로 해야 합니다.
2. 그때에 매거진을 제거합니다.
3. 처음 빼냈던 이동용 나사를 다시 체결하고, 이동용 나사를 접착력있는 테이프
로 고정시켜 주십시오.
리모콘 밧데리 사용방법
밧데리 사용시 주의사항
1. 밧데리는 수은 전지이므로 취급을 잘해야 합니다.
2. 어린이 인체에 치명적인 해를주므로 입 또는 손으로 함부로 만지지 말것.
밧데리 구입방법
1. 문구점이나 전자계산기 취급 점포에서 구입하여 사용하십시오.
2. 수은전지 3V용 크기는 그림과 같은 것을 사용하십시오.
3. 밧데리 커버에 삽입할 때는 +, -극성을 잘 확인하고 사용하여 주십시오.
MOVABLE SCREW
REMOVAL OF MOVABLE SCREW
Before install the set, unscrew and remove movable screw.
Keep well the detached the screw for the future.
INSTALL OF MOVABLE SCREW
Before transfer the set, assemble the movable screw, following way.
If there is not assemble the movable screw correctly there is quity a possibility
that the set may damage.
1. When assemble the sey, be sure to make start/stop mode.
2. At this time, remove the magazine.
3. Assemble the detached movable screw and fasten it with adhesive tape.
1
243
ATTENTION POINTS
The battery should be cautious beause it is mercury cell.
1. The battery is lethal when it used by children. Do not touch hands or mouth.
2. Mercury cell for 3V size and use same as the figure.
3. Check polarity(+,-) and use.

3
Inserting discs into the suppled magazine.
Up to 6 discs may be inserted into the magazine.
The discs are numbered from 1(bottom tray) to 6(top tray).
※Note : Do not touch the recorded side of a disc while inserting or
removing it.
INSERTING DISC
1. CD 매거진에 표시된 측변 방향으로 디스크를 삽입하십시오.(fig.1)
2. a. 디스크를 매거진에 삽입할 때 PUSH LEVER가 밀려나옵니다.(fig.2)
디스크 삽입
1. INSERTING THE MAGAZINE
Make sure that the magazine loaded with discs befor inserting
it into the player.
Be careful to insert the magazine into the player with the label
facing upward.
2. REMOVING THE MAGAZINE
Press the "EJECT" button to remove.
INSERTING THE MAGIGANE, REMOVING THE MGAZINE
1. 매거진 삽입
매거진을 삽입할 때 방향을 확인하여 고정 위치까지 밀어서 넣어 주
십시오.
2. 매거진 빼냄
매거진 나옴(EJECT) 버튼을 누르고, 본체로 부터 매거진이 자동으로
나온 후에 매거진을 꺼내십시오.
매거진 삽입, 빼냄
6
5
4
3
2
1
1. Press the eject button to remove the magazine.
2. Push the release keys to remove the discs
REMOVING DISCS
b. 디스크를 빼낼때는 PUSH LEVER를 당긴다.
c. 그림에서 보듯 PUSH LEVER를 당긴 상태에서 일부 튀어나온 디
스크를 다른 손으로 살짝 꺼내면 됩니다.(fig.3)
중요사항 :모든이 제품의 매거진은 12Cm(5-inch) CD전용
이기때문에 만약, 8Cm(3-inch) CD를 사용할때는 정상적으로
동작하지 않으므로 절대 이 매거진에는 8Cm(3-inch) CD를
넣어서는 않됩니다.
PRECAUTIONS
1. Do not leave the magazine exposed to high temperature or
direct sunlight.
2. Do not attempt to disassemble the magazine.
3. Take care not to drop the magazine.
4. Take care not to drop the magazine or knock it against hard
surface. Store the pulled-out magazine in a safe place.
5. Benzine, thinner, or other volatile chemicals may cause damages
to the magazine.
IMPORTANT NOTICE :
Magazine of this unit is only for 12cm (5-inch) CD.
Do not insert 8cm (3-inch) CD to prevent misuse.
1. 디스크의 녹음을 읽는 부분을 손으로 만지지 않도록 주의하여
주십시오.
2. CD 매거진의 각각의 슬롯에는 한개의 디스크만 삽입해야 합니다.
한 슬롯에 두 개의 디스크가 들어가지 않도록 주의하여 주십시오.
잘못된 방법으로 사용하면 매거진과 디스크의 손상이 올 수 있습니다.
주의
Figure. 1 Figure. 2 Figure. 3
HOW TO USE THE COMPACT DISC MAGAZINE

FEATURES
CAR STEREO AUTO 6CD CHANGER DECK MECHANISM USE
특 징
PLAY/PAUSE FUNCTION
STOP FUNCTION
EJECT FUNCTION
TRACK SELECT FUNCTION (T-UP, T-DN)
REPEAT(DISC) FUNCTION(RPT)
RANDOM(DISC) FUNCTION(RDM)
SCAN(DISC) FUNCTION(SCAN)
PICK-UP(SONY)
PERMISSABLE REMOTE-CONTROL
L,R STEREO OUTPUT AND MONO OUTPUT
AC, DC24V USE
REMOTE-CONTROLLER RECEIVER SENSOR
LED DISPLAY
DAMPER STRUCTURE BY EXTERNAL OLD DAMPER(4UNITS)
AND COIL SPRING(6UNITS)
DISC SELECT (D-UP, D-DN)
FEATURES (특징)
4
차량용 스테레오 자동 6CD체인저 테크 메카니즘 채택.
작동/일시정지 버튼(PLAY/PAUSE)
정지 버튼(STOP)
디스크 선택 버튼(DISC UP/DOWN)
반복버튼(REPEAT)
무순서 연주 버튼(RANDOM)
곡 자동 탐색 버튼(SCAN)
픽-업(SONY사)
전면 판넬 명령 버튼 및 원격 제어 기능(REMOTE CONTROL)
L, R 스테레오 출력및 모노 출력.
AC, DC 24V 겸용.
리모콘 수관 센서(리모콘)
문자 표시부(LED DISPLAY)
외부 오일 댐퍼(4부분)와 코일 스프링(6부분)에 의한 댐퍼구조.
곡 이동 버튼(TRACK UP/DOWN)
1. 전원 스위치1. MAIN POWER SWITCH
2. POWER LED
Press main power switch, power LED will be turn on.
3. VOLUME
Adjust the volume to output of power level.
5. MAGAZINE INSERT SLOT
Insert disc magazine at this point.
6. LIQUID CRYSTAL DISPLAY (LCD)
LCD will be displayed only when the changer power is on.
it displays disc insert data and every operation key in the magazine
including disc number, track number and disc icon.
4. RESET BUTTON
If there are no power response when the CD controller button and
LCD window's display is not working correctly, press reset button
with pointed pen to play correctly.
이 스위치를 누르면 2번의 STAND-BY LED가 켜지며 셋트에 전원이
공급됩니다.
2. POWER LED
전원 스위치를 누르면 STAND-BY LED가 켜집니다.
3. 볼륨
오디오 출력 레벨을 조절하는 볼륨.
5. 매거진 삽입구
이곳에 디스크 매거진을 삽입하십시오.
6. LCD표시창
CD의 동작 상태를 표시하는 LCD입니다.
4. 기능회복 버튼 (RESET)
전원이 켜지지 않거나 본체(CD CONTROLLER)의 버튼을 눌렸을때
본체가 작동하지 않거나 LCD 표시창의 디스플레이가 정확하지 않을
때 본체의 기능회복(RESERT) 버튼을 연필과 같이 끝이 뾰족한 부분
을 이용, 올바른 작동이 될 수있도록 눌려 주십시오.
6
5
4
3
2
1
MAIN POWER
LEVEL
OFF
ON
0
10
CD-POWER
ON/OFF
RESET
REPEAT RANDOM SCAN PLAY/
PAUSE STOP DOWN UP DOWN UP
POWER
EJECT
SENSOR
DISCTRACK
RDM
RPT
DISC
SCAN
S3
S2
S1
S4
S3
S1
S2
S4
DISC TRACK
1 2 3 4 5 6
J6CD-10
6CD CHANGER
1 3 2 4 5
8 9 6 7
10 11 12 13 14 15 16
POWER
PLAY/
PAUSE
RPT RDM SCN
T-DN T-UP
REMOTE CONTROLLER
ON/OFF
13
815
D-DN
D-UP
10 11
12
Press this switch to turn on the set and stand-By LED of No.
2 will be turn on.
FRONT PANEL CONTROLS (전면기능)
16

5
7. REMOTE-CONTROLLER SENSOR RECEIVING LIGHT
This is to receive infrared signal form card-type remote controller.
(Avoid any foreign substances or contamination)
9. EJECT BUTTON (EJECT)
Press eject button for take out magazine from the CD mechanism.
10. REPEAT PLAY BUTTON (TRACK OR DISC REPEAT)
It is used for repeating the play. Pressing this button once,"RPT"
at the left upper part of LCD is displayed and the playing is repeated.
When this button is pressed for more than 2 seconds, " "
and "RPT : is displayer at the upper left of LCD display and the disc
on play is repeated. When pressing one of these two buttons repeat
("RPT") or disc repeat (" ", "RPT") once again, the repeat
function will be released.
11. RANDOM PLAYER BUTTOM (TRACK OR DISC RANDOM)
It is used for random selection which has nothing to do with containing
/sequence of the music in the disc on play and disc sequence
of the magazine. Once you press this button, "RDM" is displayed
at the upper left of LCD of commander, and it is played randomly
without regard to the sequence contained in the disc on play.
When this button is pressed for more than 2 seconds, " ",
and "RDM" are displayed and disc is selected to play randomly in
irregular sequence without regard to the disc sequence in the
magazine. Pressing one of these two buttons, random selection
("RDM")or random disc selection (" ","RDM") once again,
the random selection will be seleased.
12. SCAN PLAYER BUTTOM (TRACK OR DISC SCAN)
It is used to scan a desired disc or desired music in the disc on play.
When pressing this button, "SCAN" is displayed at the lower left
of LCD and plays each first track for only 10 seconds, when this
button is pressed for move than 2 seconds, " " and "SCAN"
is displayed at the left of LCD and plays the first part of each disc
for 10 seconds.
Pressing this button once again when you get a track or disc you
desired by scnning, the scan function will be released.
8. CD-POWER BUTTON(CD-POWER ON/OFF)
7. 리모콘 수광센서
카드 리모콘을 사용할 때 필요한 창이므로 이곳에 스티커를 붙이면
안됩니다.
CD의 전원 ON/OFF 버튼입니다.
8. CD-POWER ON/OFF 버튼
매거진을 빼내기 위해서 이 버튼을 누르십시오.
9. 매거진나옴(EJECT) 버튼
디스크의 모든 연주곡을 반복없이 무순서로 연주할 수 있습니다.
버튼을 누르면 LCD에 RDM표시가 나타나고 연주되던 곡이 끝난후
무순서로 연주됩니다. 버튼을 2초이상 누르면 LCD에 RDM 가
표시되고, 각 DISC의 곡을 무순서로 연주합니다. 다시 한번 누르면
해제됩니다.
11.무순위 연주버튼(RANDOM)
이 버튼을 누르면 LCD에 SCAN표시가 나오며 각 곡의 첫부분을 10초
동안 차례로 연주합니다.
또한 이 버튼을 2초이상 누르면 SCAN 가 LCD에 표시되며 각
DISC의 첫번째 곡을 10초동안 챠례로 연주합니다.
12.곡 자동 탐색 버튼(SCAN)
이 버튼은 작동과 일시 정지 기능을 갖고 있는 버튼입니다.
CD 체인저가 PAUSE시 버튼을 누르면 CD체인저가 다시 작동합니다.
13.작동/일시 정지버튼(PLAY/PAUSE)
이 버튼을 누르면 CD체인저가 동작을 멈춤니다.
PLAY/PAUSE 버튼을 누르면 연주됩니다.
14.정지버튼(STOP)
이 버튼은 다음곡으로 이동할 때 사용됩니다. "TRACK UP" 버튼을
누르면, LCD에 곡번호가 바뀌며 다음곡의 처음 부분부터 작동됩니다.
"TRACK DOWN"을 현재 곡의 처음 부분부터 3초 이내에 누르면, 전
곡으로 이동하고 3초 이후에 누르면 현재곡의 처음 부분부터 작동됩
니다.
15.곡 이동 버튼(TRACK UP/DOWN)
다른 디스크를 듣고자 할때 "DISC UP" 또는 "DISC DOWN" 버튼을
누르면다음 디스크로 이동합니다. 그 다음 디스크를 선택할 때도 매번
"DISC UP" 또는 "DISC DOWN" 버튼을 누르면, 다음 디스크로 이동
합니다.
16.디스크 선택 버튼(DISC UP/DOWN)
이 버튼은 곡을 반복하여 듣고싶을때 사용됩니다.
한번 버튼을 누르면 LCD에 RPT가 나타나면서 현재의 곡이 반복됩니다.
2초이상 버튼을 누르면 현재 듣고 있는 DISC를 반복합니다.
(표시를 RPT).다시한번 누르면 해제됩니다.
10.반복버튼(REPEAT)
Press this button to turn on/off the changer.
When power is off, the changer will be stopped while turning off
the LCD and letters on LCD will be erased at the same time.
To change to the changer, press this button again.
Then, it strts to play from the original position of disc and track
before power off.
DISC
DISC
DISC
DISC
DISC
DISC
13. PLAY/PAUSE BUTTON(PLAY/PAUSE)
If this button is pressed while playing, the changer continues to play
but the sound does not play.
Then "PAUSE" is displayed on LCD display and some etters are
blinked. Press this button again in "PAUSE", and it is changed into
"PLAY" to play the sound.
14. STOP BUTTON(STOP)
Press this button to stop cd changer.
Press PLAY/PAUSE button to play.
15. TRACK SELECTION(TRACK UP/DOWN)AND TRACK FF/REW
It is used to search a track desired so quickly.
Press T-UP or T-DOWN button to search a track you desired, while
viewing the track displayed in the LCD display.
Press this button for more than 2 seconds, and you can make first
forwarding or rewinding to the direction as you wish.
16. DISC SELECTION BUTTON(DISC SELECT)
It is used to select a desired disc among discs inserted in magazine.
Press D-UP button to select upper disc, and press D-Down button
to select the lower disc, while viewing disc number displayed on the
LCD.
DISC
DISC
FRONT PANEL CONTROLS (전면기능)

1. AC POWER1. AC INLET
6
Plug AC input cord into AC out inlet.
3. DC POWER TERMINAL
Please note the +,- polarity, when connecting DC 24V terminal in
case of using emergency power source for unexpected AC power
failure.
4. MONO OUTPUT BALANCED
Audio signal output connector for mono output 0dB/600ohm balanced.
5. STEREO L,R OUTPUT
Audio signal output connector for stereo L.R output 0dB/600ohm
unbalanced
6. CONNECTOR FOR REMOTE-CONTROLS
This connector is for remote controls to signal output.
There are 2 ways to operate connector as followed.
2. FUSE HOLDER
This fuse holder contains AC fuse. Replaces it with same type fuse.
If it continuously blow, stop replacing fuse and refer servicing to
qualified person.
There is DC fuse in P.C.B board.
AC 입력 코드를 AC INLET에 끼우십시오.
3. DC POWER
이 단자는 24VDC 전원 입력을 위한 단자입니다.
연결하기전에 전원극성(+, -)을 확인해 주십시오.
4. 바란스 모노 출력
오디오 신호 출력잭으로서 출력레벨은 0dB/600ohm 바란스형 입니다.
5. 스테레오 출력
기능없음.
6. 원격제어 콘넥터
이 콘넥터는 원격제어를 위한 신호출력 콘넥터 입니다.
다음과 같이 2가지 방법으로 사용하실 수 있습니다.
2. AC FUSE HOLDER
AC휴즈 홀더 입니다.
휴즈가 끊어지면 같은 타입의 휴즈로 교체하십시오. 만일 휴즈가 계속
끊어지면 휴즈 교체를 멈추고 전문가에게 의뢰하십시오.
DC FUSE는 P.C.B BORD에 있습니다.
MAX 13W
230VAC
T200mAL 250V
240VAC
T200mAL 250V
120VAC
T500mAL 250V
220VAC
T200mAL 250V
CAUTION: TO REDUCE THE RISK OF
FIRE REPLACE ONLY WITH SAME TYPE FUSE.
24V MAX 1.5A
DC POWER
RL
Balanced MONO
0dB
0dB
OUTPUTS
STEREO
CAUTION
RISK OF ELECTRIC SHOCK
DO NOT OPEN
MODEL NO.: J6CD-10
WARNING:
TO REDUCE THE RISK OF FIRE
OR ELECTRIC SHOCK DON'T EXPOSE THIS
EQUIPMENT TO RAIN OR MOISTURE.
6CD CHANGER
MADE IN KOREA
SERIAL NO.:
REMOTE CONTROL
1
POWER ON/OFF
2
PLAY/PAUSE
3
DISC UP
4
TRACK DOWN
5
TRACK UP
6
DISC DOWN
7
EJECT
8
RANDOM
9
SCAN
10
REPEAT
11
STOP
12
+12V
13
GND 1
14 15
GND 2
AC IN 50-60Hz
USE ONLY WITH A 250V FUSE
134
2 6
5
REAR PANEL CONTROLS (후면기능)
120VAC 220V/230V/240VAC
S51 T500mAL 250V 50T T200mAL 250V 55T T1AH 250V
24VDC
8
19
15
1
2
3
4
5
6
7
8
9
10
11
1POWER ON/OFF
PLAY/PAUSE
DISC UP
TRACK DOWN
TRACK UP
DISC DOWN
EJECT
RANDOM
SCAN
REPEAT
STOP
+12V
REMOTE CONTROL
8
19
15
1
2
3
4
5
6
7
8
9
10
11
1POWER ON/OFF
PLAY/PAUSE
DISC UP
TRACK DOWN
TRACK UP
DISC DOWN
EJECT
RANDOM
SCAN
REPEAT
STOP
GND1
REMOTE CONTROL
MICOM or
CMOS, TTL
LEVEL
KEY MATRIX N.C
N.C
GND 2
GND 1 GND 1
Method 2
Method 1
N.C
1
2
3
4
5
6
7
8
9
10
11
12
13
14
15
1
2
3
4
5
6
7
8
9
10
11

7
ERROR DISPLAY (에러 발생시 대응책)
Former key option to be valid (RPT, RDM MODE)
Press this key to be displaying "STP" instead of "PLY" and displaying
disc segment s1~s4.
STOP
이전의 KEY OPTION은 유지한다.(RPT, RDM MODE)
STOP KEY를 입력하면 PLAY DISPLAY에 PLY대신 STP만 추가로
표출되고 DISC도형의 S1S4 SEG를 점등한다.
STOP
Error 3 LOADING is not completed after a certain time(8 sec) passed.
Error 2 It is impossible to discharge magazine while ejecting.
Error 1 There's no magazine, and DISC is clamping.
Error 5 ELEVATOR does not reach to the target position after a certain time(8sec) passed. Hole separated.
Error 6 PICKUP is not moved to the center area even after a certain time (8 sec) passed in movement of SLED center area.
Error 7 It is not completed despite more than 3 time of focusing trial.
Error 10 The temperature in the mechanism continues to rise for a certain time(5 sec) so no more operation can be done.
Error 9 TOC is not read after a certain time(15 sec)passed.
Please contact service center near by in your area if it does not recover by disc up/down button or reset button.
ERROR DISPLAY
Error 4 UNLOADING is not completed after a certain time(8 sec) passed.
Error 8 Error data or subq is not input for more than 3.5sec.
CLV On is not operated to reach CLV constant speed mode, and subq input is proven.
Error 3 LODING동작 중 일정시간 이상(8sec) 경과시에도 LODING이 완료되지 않은 상태.
Error 2 EJECT동작의 수행중 MAGAZINE방출이 불가능한 상태
Error 1 MAGAZINE가 없고, DISC가 CLAMPING 되어있는 상태.
Error 5 ELEVATOR이동 중 일정시간 이상(8sec) 경과시에도 목표 지점에 도달할 수 없는 상태.
Error 6 SLED 최내주 이동 중 일정시간 이상(8sec) 경과시에도 PICKUP이 최내주로 이동 할 수 없는 상태.
Error 7 3회 이상인 FOCUSING 동작에도 완료되지 않은상태.
Error 10 MECHA내의 온도가 상승하여 일정시간(5sec)이상 유지되어 더이상의 동작이 불가능한 상태.
Error 9 TOC READ중 일정 시간이상(15sec) 경과시에도 READ완료가 되지 않은 상태.
Error 4 UNLODING동작 중 일정시간 이상(8sec) 경과시에도 LODING이 완료되지 않은 상태.
Error 8 CLV ON동작 중 CLV정속 MODE에 도달할 수 없는 상태나, 3.5sec이상 계속해서 SUBQ 입력이 ERROR DATA
이거나 SUBQ 입력이 없는 상태.
에러 발생시 대응법
DISC UP/DOWN 버튼을 누르거나 RESET 버튼을 눌러도 회복되지 않으면 가까운 서비스센터에 문의하여 적절한
서비스를 받으십시오.

8
SPECIFICATIONS
TECHNICAL
Output Level MONO 0dB(0.775V) / BAL
L, R 0dB(0.775V) / UNBAL(OPTION)
Digital Filter 8-TIMES OVER SAMPLING
T.H.D(1KHz) LESS THAN 0.03% (JIS A)
Signal to Noise Ratio(1KHz) MORE THAN 85dB (JIS A)
Dynamic Range(1KHz) MORE THAN 70dB
Channel Separation(1KHz) MORE THAN 70dB (JIS A)
Frequency Response 20Hz~20KHz( 3dB )
Wow / Flutter BELOW MEASURABLE LIMIT
Access Time LONG MAX. 8sec
SHORT MAX. 2sec
Power Consumption 6W
GENERAL
Power Source(OPTION) 120V/220V/230V/240VAC 50-60Hz
24VDC
Dimensions(mm) 483(W) x 88(H) x 260(D)
(inch) 19(W) x 3.5(H) x10.2(D)
Weight(kg/lbs) 7.5 / 16.5
NOTE
Specifications and design subject to change without notice for improvements.
(내용상의 규격 및 특징은 제품의 성능 향상을 위하여 사전 예고 없이 변경될 수 있습니다.)

LOCK DIAGRAM (블럭도)
9
CD MECHANISM
AND SERVO -COM
LCD
L
R
AC POWER
120V/220V/230V/240V
50/60Hz (OPTION)
DC POWER
24V MAX 1.5A
POWER
SWITCH
AC FUSE
DC FUSE
+12V
POWER
TRANS
REG
LEVEL
+12V
OUTPUT
0dB/600
(OPTION)
MONO OUTPUT
0dB/600
REMOTE
CONTROL
KEY MATRIX
L.A
L.A
L.A
L.A
32
1
μμ

J6CD-10
OPERATING INSTRUCTIONS
4M-OP299070
6CD CHANGER
Table of contents

