7
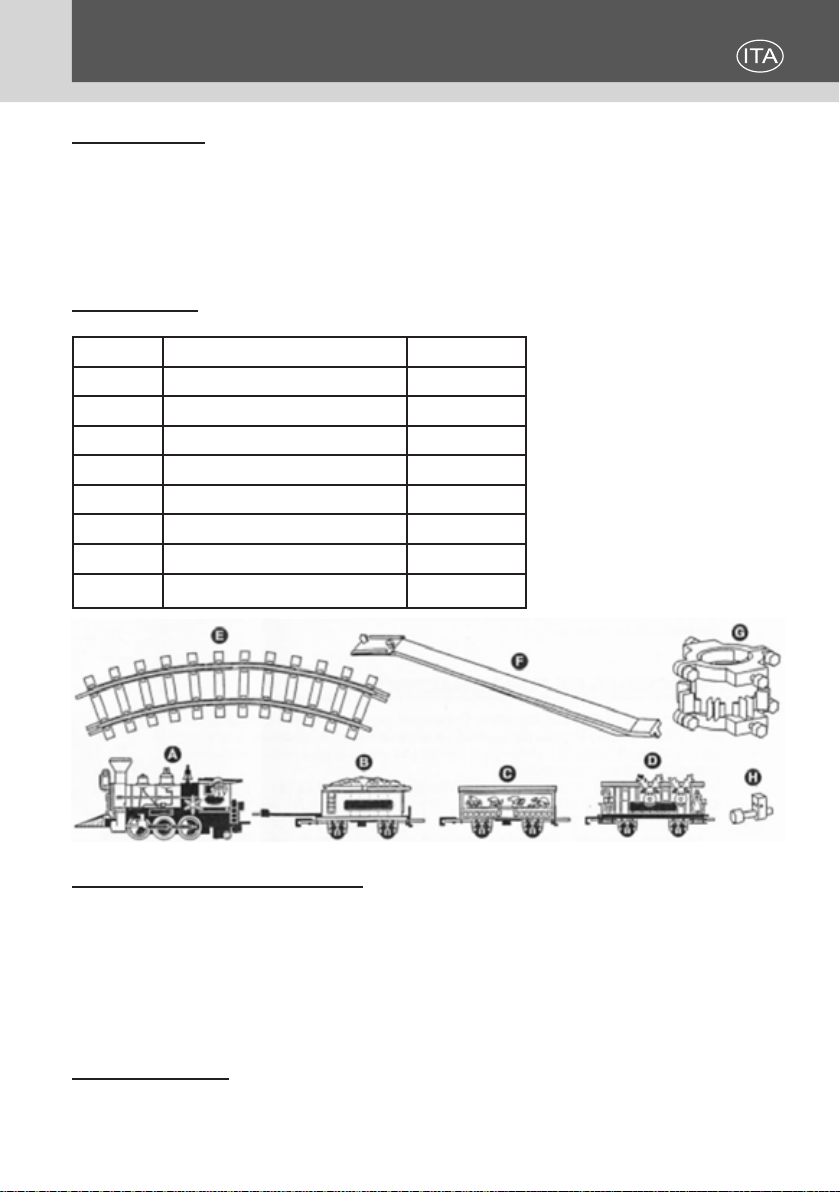
TRENO PER ALBERO DI NATALE
EVENTUALI PROBLEMI E SOLUZIONI
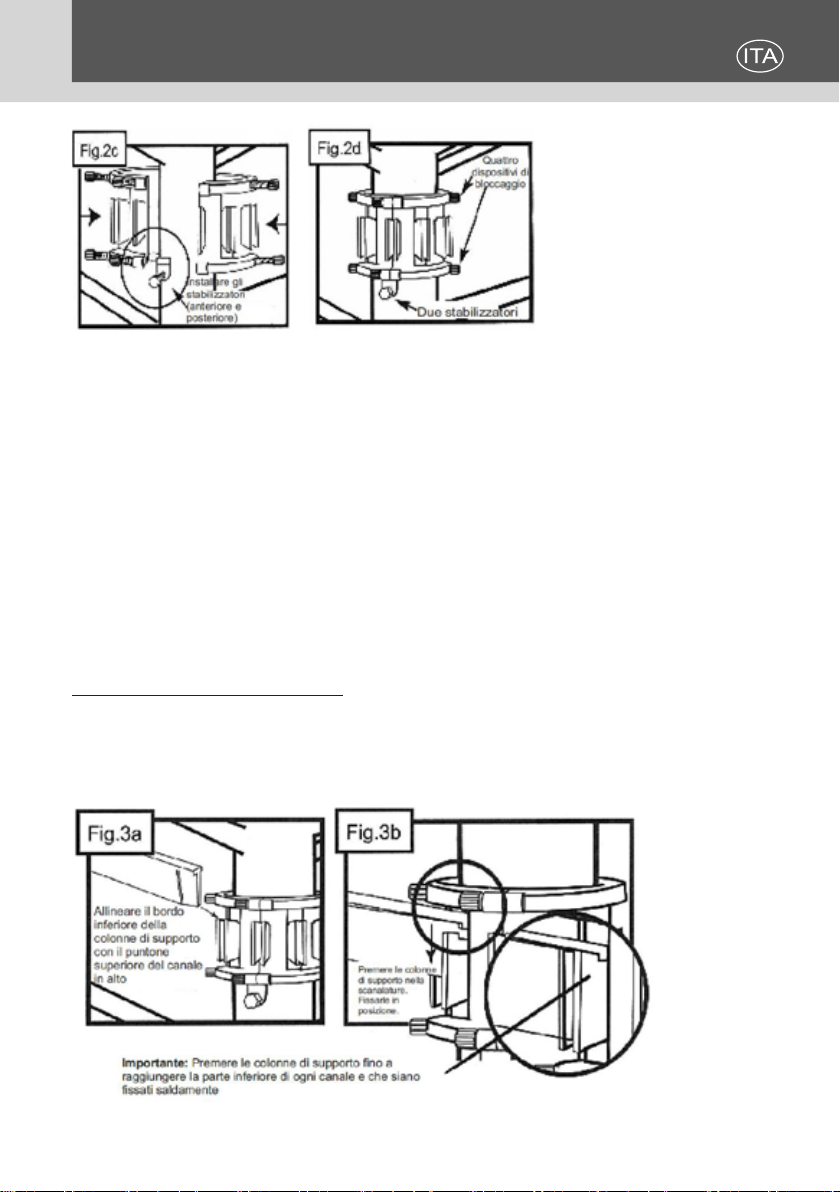
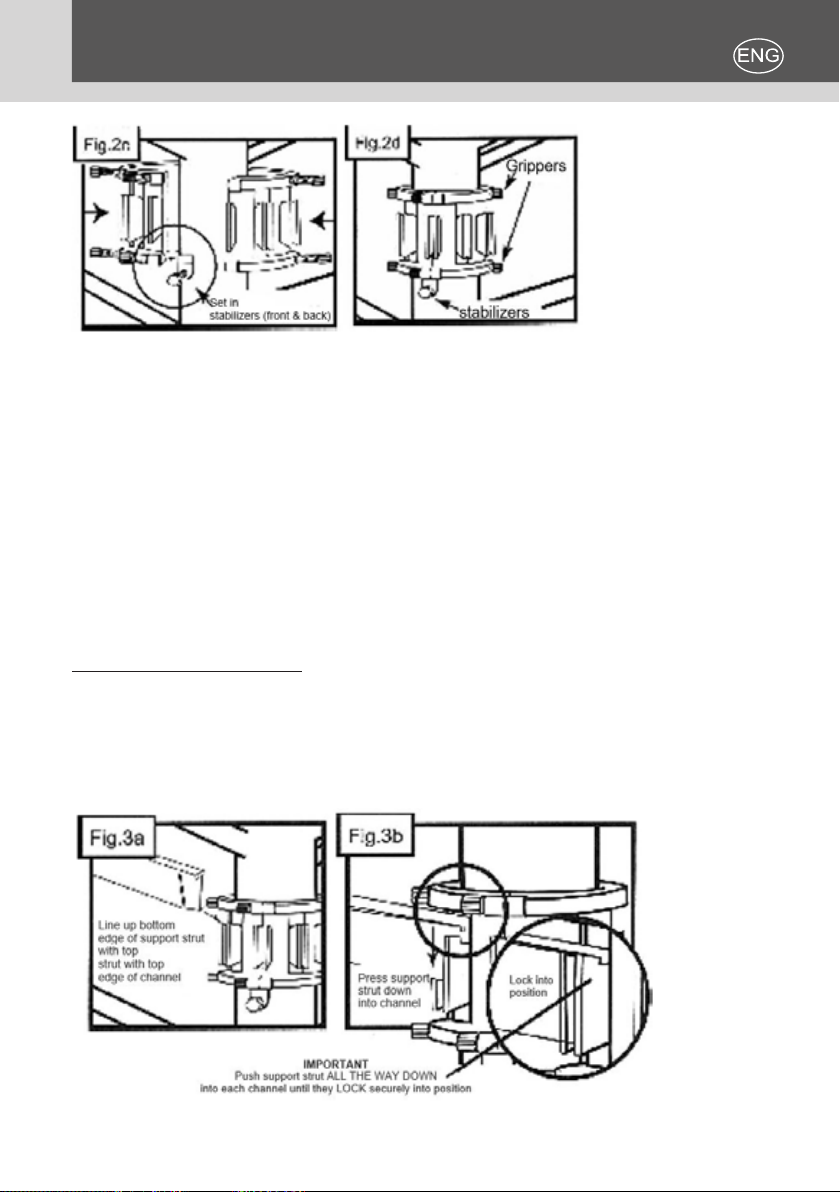
1. Dopo l'installazione la ferrovia non è livellata:
Rifare i passi descritti nelle Figure 2C e 2D per procedere alla regolazione.
2. Il treno non funziona o si ferma improvvisamente:
• Assicurarsi di aver installato le batterie, vedasi la Figura 5a.
• Assicurarsi che il cavo elettrico sia collegato correttamente, vedasi la Figura
5b.
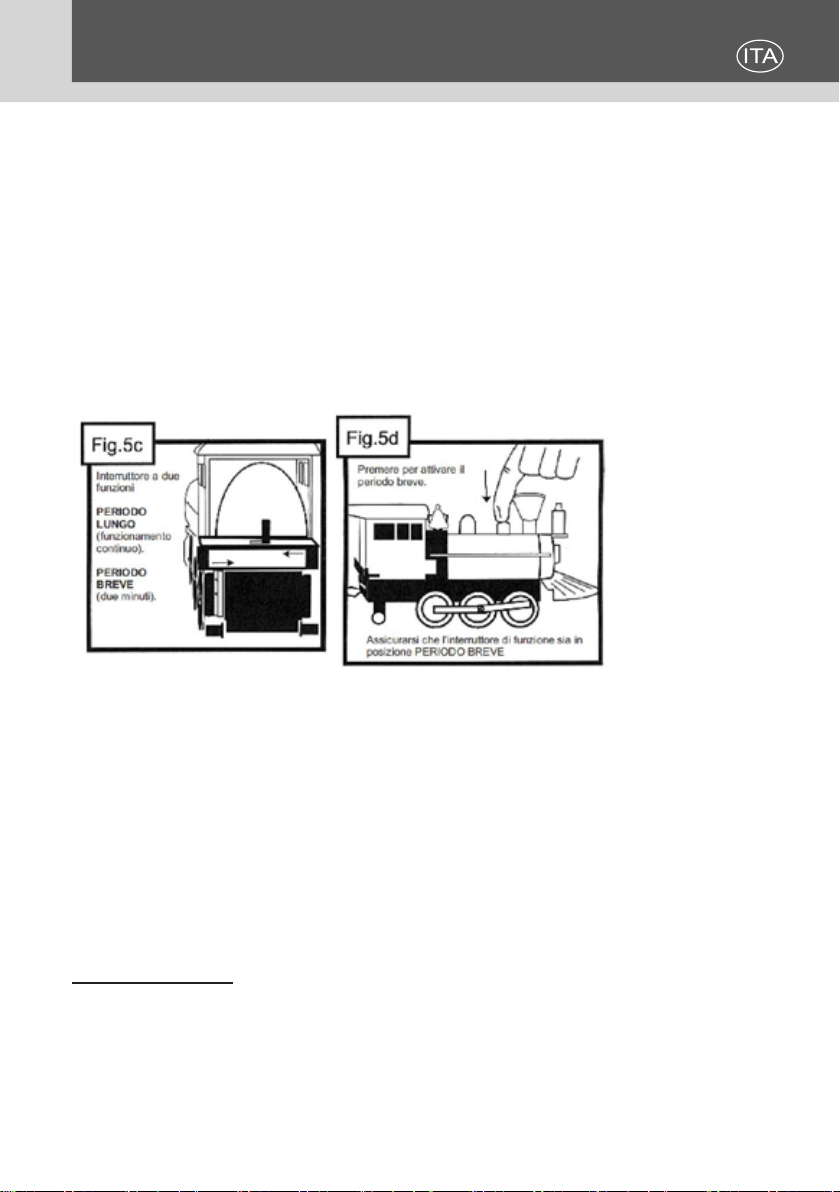
• Assicurarsi che l'interruttore sia in corretta posizione, vedasi Figura 5c e 5d.
3.Il treno si trascina o si scivola sui binari.
• Pulire le tracce di grasso o sporcizia che possano essersi attaccate alle
ruote del motore.
• Assicurarsi che tutte le ruote siano applicate correttamente sui binari e che
ruotino liberamente.
TRATTAMENTO DEL DISPOSITIVO ELETTRICO ED ELETTRONICO
A FINE VITA
Informazione agli utenti per il corretto smaltimento del prodotto ai sensi della Direttiva Europea
2002/96/CE e del D.lgs N. 151/2005
Caro consumatore,
è importante ricordarti che, come buon cittadino, avrai l’obbligo di smaltire questo prodotto non
come riuto urbano, ma di eettuare una raccolta separata. Il simbolo sopra indicato e riportato
sull’apparecchiatura indica che il riuto deve essere oggetto di “raccolta separata”. I dispositivi
elettrici ed elettronici non devono essere considerati riuti domestici. Pertanto, il prodotto alla ne
della sua vita utile, non deve essere smaltito insieme ai riuti urbani. L’utente dovrà conferire (o far
conferire) il riuto ai centri di raccolta dierenziata predisposti dalle amministrazioni locali, oppure
consegnarlo al rivenditore contro l’acquisto di una nuova apparecchiatura di tipo equivalente. La
raccolta dierenziata del riuto e le successive operazioni di trattamento, recupero e smaltimento
favoriscono la produzione di apparecchiature con materiali riciclati e limitano gli eetti negativi
sull’ambiente e sulla salute eventualmente causati da una gestione impropria del riuto.
Grazie!