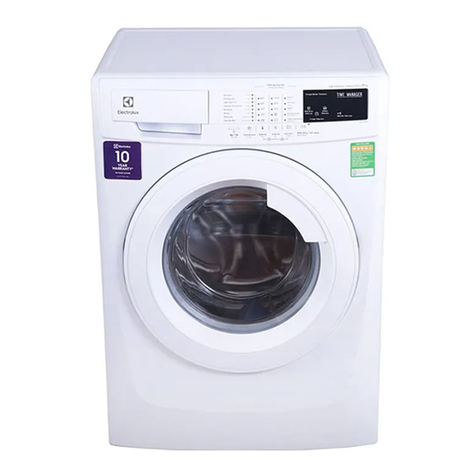
Kelvinator KF835 User manual

9
WASHING
MACHINE
KF 835
INSTRUCTIONSMANUAL
DIMENSIONS Heightwithpanel 895mm
Heightwithoutpanel 850mm
width 397mm
depth 600mm
POWERSUPPLYVOLTAGE/FREQUENCY 230 V / 50 Hz
TOTALPOWERABSORBED 2300 W (10 A)
HEATERRATING 1950W
WATERPRESSURE minimum 0,05MPa(0,5 bar)
maximum 0,8 MPa (8bar)
MAXIMUMLOAD cotton 4,5 kg
synthetics 2 kg
wool 1 kg
SPINNINGSPEED 800/400rpm
This appliance complies with the following EC Directive:
-72/23/EECof 19.02.1973 - Low Voltage Directive
-89/336/EEC of 03.05.1989 (including Amentment Directive 92/31/EEC) - EMV Directive.
TECHNICAL INFORMATION
SAFETY INSTRUCTIONS
Youmustreadthewholeofthisinstructionbookbeforeyouuse
the appliance. Follow the advice carefully. Keep the book for
futurereference.Ifyousellorgiveawaytheappliance,make
sure that the book is passed to the new owner.
The following warnings are provided in the interest of overall
safety.Youmustreadthembeforetheapplianceisinstalledor
used.
Use
This appliance is designed to be used by adults. Children
shouldnotbeallowedtotouchthecontrolsorplaywiththe
product.
Itisdangeroustomodifythespecificationsofthisappliance
in any way.
Always unplug the appliance and turn off the water after
use.
Onlywashfabricswitharedesignedtobemachinewashed.
Ifindoubt,followtheinstructionsyoufindonthelabelofthe
item itself.
Place small metal rings or edged plastic rings in a net or
bag.
Makesure thatallpocketsareempty.Hard,sharpobjects
such as coins, safety pins, nails, screws or stones can
causeextensivedamage.
Do not machine wash fabrics which are saturated with
petroleum products. If volatile cleaning fluids have been
used,makesurethattheyarethoroughlyremovedfromthe
fabrics before they are placed in the appliance.
Small and delicate objects (e.g. baby socks,stockings)
can be easily washed inside a small pillowcase with a zip
fastener or in larger socks.
Useonlytherecommendedquantitiesoffabricconditioner.
Before cleaning, care and maintenance, ensure that the
machine is switched off.
Installation
Anyelectricalworkrequired toinstallthisapplianceshould
be carried out by a qualified electrician or competent
person.
Anyplumbingworkrequiredtoinstallthisapplianceshould
becariiedoutbyaqualifiedplumberorcompetentperson.
Make sure that the appliance does not stand on its
electrical supply cable.
This appliance is heavy. Care should be taken when
moving it.
Allpackagingandtransitboltsmustberemovedbeforethe
applianceisused.Seriousdamagemayoccurifthisisnot
done.
Ifyourwashingmachineisinaroomsubjecttotemperatures
below freezing, the water must be removed from the
machineshouldthe danger of freezing be expected.

10
INSTALLATION
BE CAREFUL : The parts protecting the inner components of the machine during transit are red. They must all be
removed before using your machine for the first time. In order to avoid possible damage to the appliance, it is
indispensable to take away the polystyrene basis, the two red loosened spacers at the back of the applianc and the
polystyreneandplasticwedges(followtheinstructionsoftheunpackingsheet).Closeimperativelythe2holesleftby
the 2 spacers with the plugs provided with the appliance ; do not forget to put on the central cover.
Installation
Thefloormustbecleananddry,freefromfloorpolishandother
greasysubstances,sothatthemachinedoesnotslideabout.
Do not use any grease as lubrification.
Installation on deep pile carpets and floor
coverings with foam backings is not recommended, as the
stability of the machine is no longer guaranteed. If the
installation must be done on a carpetedfloor, the openings
located at the lower part of the back of the appliance must
remainfree.Theseopeningsensureagoodventilationofyour
applicance. In case of small format tiles, place a standard
rubbermatunderthemachine.
With sprung floors, in particular wooden plank floors with
yieldingfloorboards,screwdownawaterproofwoodenbaseat
least 15 mm thick, across at least 2 floor boards. Wherever
possible,place theappliancein thecorneroftheroom-there
wooden floors are most secure and least liable to resonance
vibrations.
Never compensate for small unevennesses in the floor by
placingwood,pasteboard or such like.
The front adjustable feet must be blocked after installation of
the appliance by means of the locking nuts.
Levelling
Carefullylevelthemachineadjustingthelevellingfeetlocated
atthefrontofthebaseandthentightenthelocknutsatthetop
of the feet.
Water connection Connect the water inlet hose to a
cold water tap with a 3/4" gas
threaded orifice, after having
insertedtheruggersealingwasher
into the hose collar. If the water
connectionismadeontonewpipes
orontopipeswhichhavenotbeen
usedforalongtime,itisadvisable
torunoffacertainamountofwater
beforeconnectingthemachine.
Placethecurvedendoftheoutledhoseintoadrainpipehaving
aheightbetween70and100cmfromfloorlevelorsecureitto
a sink or bath tub. Make sure that the drain hose is firmly
securedso thatitwill notslipout orfalldown fromitsposition.
Thewatershoulddrainfreelyand,consequently,thedrainhose
shouldnotbechokedorplacedinsuchawayastoobstructthe
normalwaterflow.Ifanextensionhoseisrequired,remember
thatitmightcauseamalfunctioninthedrainpump,particularly
if the extension has a length in excess of 1 meter or if the
diameter of the extension is smaller than the diameter of the
originaldrainhose.
Electrical connection
Beforeyoufittheplugintothewallsocket,checkthefollowing
points :
1)Thesupplyvoltageofthe domesticwiringsystemdoesnot
fluctuate by more that 10%, plus or minus, from 230 V.
2)Themeter,thefuses,thesupplylineandthewallsocketare
suitable to carry the maximum load required by the machine
(2,3kW).
Veryimportant :
Thewashingmachineisprovidedwithafeedingwirewith
earthconnection:itmustbe connectedtoapluglike that
is provided with a good earth connection.
Thereplacing of thepowercord must onlybe realized by
theAfterSalesService.
The manufacturer declines any responsibility where the
previousrecommendationsarenotfollowed.

11
USE OF YOUR APPLIANCE
The control panel
1 PilotLight
Thislightwillcomeonwhenthemachinestartsoperatingand
goesoutwhenthe cycleisfinished(programmeselectorona
stop position " ").
2 ON/OFF pushbutton " "
Press the ON/OFF pushbutton, the programme starts.
3Spinningspeedreductionpushbutton"800/400"
Thispushbuttonallowstorealizespinningsof400rpm(pushed
in pushbutton) or 800 rpm (released pushbutton) on cotton
programmes. If you want to end the synthetics, delicate and
wool programmes by a short spinning (programme 13), the
spinningspeedwillbethen400rpm(pushedinpushbutton)or
700rpm(releasedpushbutton).
4 Half load pushbutton " "
This pushbutton allows to wash small quantity of linen not
much soiled (2,5 kg) only on the cotton programmes by
cancellingonerinsing.
5 Programme selector
Itenablestoselectthemostadaptedprogrammetothenature
and degreees of soil of your laundry.
Turn the programme selector clockwise to select the chosen
programme.
Theprogrammeselectorindicateseachprogrammephaseas
it takes place.
Attheendoftheprogramme,theappliancestopsautomatically
on a position off " " or on the position rinse hold " ".
Neverturntheprogrammeselectoranticlockwise.
Never turn the programme selector when the appliance is working.
6 Temperature selector
It enables to choose the most adapted temperature between
cold ( ) and 90°C. Choose the temperature which corres-
ponds to the chosen programme, with the help of the indica-
tions or the programme table, according to the fibers and the
fastness of the colours.
Detergent dispenser
Symbols
( ) Washing powder or liquid
detergentfor programmeswithpre-
wash(1).
() Washing powder or liquid
detergentforthe main wash(2)
()Bleachcompartment(3)
()Liquidadditives(fabricsoftener
andconditioner...)(4).
(5)Softeneroverflow
Before use
Beforeusingyour applianceforthefirst time, werecommend
youruna90°Ccottoncyclewithoutanylaundry,toremoveany
manufactureresiduefromthe drum and tub.
Pour1/2ameasureofdetergentintothedetergentdispenser
and start the machine.
1234
5
135624

12
Programmes for cotton/linen - maximum load : 4,5 kg
Programmes
descriptions Detergent
dispensers
to use
Programmes
Times
in min
(2)
Tempera-
tures
(°C)
Cycle description
Cotton with
prewash
Cotton
Cotton
Resistant
coloureds
Delicate
coloureds
Rinsings
Spinning
40°- 90°
40°- 90°
60°
40°- 60°
30°- 40°
(1)
(1)
(1)
1
2
2
3
4
5
Prewash-wash40°-90°
3 rinsings - spinning
Wash40°-90°
3 rinsings - spinning
Wash60°
3 rinsings - spinning
Wash40°-60°
3 rinsings - spinning
Wash30°-40°
3 rinsings - spinning
4 rinsings
Spinning
Spinning800rpm
6
150min
130min
130min
105min
85min
50min
10min
( )
Synthetics
with prewash
Synthetics
Delicates
Wool
Rinsings
Short spinning
Draining
Programmes for synthetics, delicates and wool - maximum loads : synthetics/delicates:2,0kg
wool : 1 kg
40°- 60°
40°- 60°
30°- 40°
40°
7
8
9
10
11
12
14
Prewash-wash40°-60°
3 rinsings
Rinsehold
Wash40°-60°
3 rinsings
Rinsehold
Wash30°-40°
3 rinsings
Rinsehold
Wash40°
3 rinsings
Rinsehold
3 rinsings
Rinsehold
1 rinsing
Rinsehold
Shortspinning700 rpm
Draining
95min
80min
55min
50min
25min
7 min
8 min
4 min
This programme at 60°C is the reference programme for the Energy label according to EEC Directive 92/75
(1)If the laundry can withstand the bleaching treatment.
(²)Theprogrammetimesareintendedasaguideonly.Theactualtimewillvarydependingonincomingwatertemperatureand
pressure.
BE CAREFUL : THE LID CAN ONLY BE OPENED 90 SECONDS AFTER THE MACHINE HAS STOPPED.
PROGRAMMES CHART
13

13
Operatinginstructions
1. Place the laundry in the drum
lift up the lid of the machine
openthedrumwithyourtwohandsbypressingthebuttonA
and the two flapdoors till they disengage.
introducethelaundryintothedrum;closethedrumandthe
lid of the machine. Becareful :beforeclosingthelid
of your machine, make sure that
the drum flapdoors are correctly
closed :
the two flapdoors fastened
the button Apressed out.
2. Measure out the detergent
Measure out the amount of detergent recommended by the
manufacturerin themainwashcompartment( )
If you wish to carry out a prewash, pour the amount required
intothe prewashcompartment( ).
Do not exceed the MAX level.
3. Add the bleach agent
Youmayuse a bleach agent in allthewashing programmes.
However,makesurethatthefabricwithstandsthetreatment.
Bleachisautomaticallywashed downintothedrum.pour1/4
to 1 glass of 12° chl bleach into compartment marked ( )
beforeswitchingthemachineon.
Make sure that the level of the liquid never exceeds the
MAX level.
4. Add the fabric softener
Pour the softener, if required, into the compartment marked
().Do not exceed the MAX level.
5. Press the half load " " and/or the "800/400"
pushbuttons if required.
6. Select the temperature
Choose the temperature which corresponds to the chosen
programme,withthehelpoftheindicationsortheprogramme
table, according to the fibers and the fastness of the colours.
7. Select the programme
Choosetheprogrammeaccordingtothenatureandthedegree
of soil of the laundry.
Turn the programme selector clockwise to select the chosen
programme.
8. Starting of the programme
TheON/OFFpushbuttonenablestoswitch onyourmachine.
9. At the end of the programme
When the selected programme is over, the machine stops
automatically.The timer knob stops on the position" " for the
cottonprogrammes.Thesyntheticprogrammesendbyarinse
hold " ". You can finish these programmes by a spinning
(programmes6or13)oradraining(programme14).Depress
theON/OFFpushbuttonbeforedoingyour choice.
Aftereachwash,depresstheon/offpushbutton.Pressoffthe
otherpushbuttonsifnecessary;unplugthemachinefromthe
wall socket ; turn off the water tap.
A
Youareadvisednottoleaveyourlaundrytoolong,especially
when damp. Damp laundry produces moult and unpleasant
smells.
Moult stains cannot be removed.
Sort your laundry.
Studycarefullythechartinthisbookletexplainingthesymbols
used on clothes labels (see page 6).
Thefollowing points are particularly important :
alineunderthebowlmeansthatthegarmentcannotbewashed
using programmes for resistant fabrics such as cotton and
linen;
do not mix coloured garments with whites;
anticreasematerialslikepolyester/cottonshouldbetreatedas
synthetics;
non-resistant fabrics like acrylic and most curtain materials
should be treated as delicate fabrics;
thewoolprogrammeisdesignedspecificallyforpurenewwool.
Other types of wool and wool mixtures may shrink or felt if
machine-washed.
Woollen garments should be spun briefly immediately after
washing.
Pre-wash
Pre-wash is not normally necessary. Your new washing
machine combined with modern detergents will give perfect
washing results without pre-wash, thus saving energy, time,
wateranddetergent.
However,whenthelaundryisparticularlydirty(forexampleif
you have to wash mechanics' overalls or butchers' aprons),
you are advised to use pre-wash with a biological detergent.
HINTS AND TIPS
Temperatures
Wesuggestthatwhitecottonandlinen,ifitisnotexcessively
soiled,canbewashedat60°insteadof90°C.Thereshouldbe
noreductioninperformance,buttherewillbeanenergysaving
ofapproximately30%.
Thesameappliestoalesserextenttofastcolouredgarments.
Theyusuallyrequireatemperatureof60°Cbutiftheyarenot
excessively dirty, you will have satisfactory results at 40°C.
Garments with non-fast colours should not be washed at
temperatures above 40°C. If fast and non-fast colours are
washedtogether,theyshouldbetreatedasnon-fastcolours
andthereforethetemperatureshouldnotexceed40°C.
Resistant white and coloured synthetics can normally be
washed at 60°C but also in this case 40°C is sufficient if the
laundry is not excessively dirty.
Delicate synthetics, synthetics with non-fast colours and
woollengarments mustneverbewashedabove40°C.
As you already know, your washing machine can also wash
with cold water. However, it must be remembered that the
detergentscurrentlyonthemarkethavenotbeendesignedfor
cold washes and that in winter, when the water is very cold,
they may not dissolve adequately.
We suggest the use of liquid detergents.
How much laundry can be washed in one load?
Strictly speaking you should always weigh your laundry.
Thedrumwilltakeamaximumof5kgofcottonandlinen.For
synthetics and delicate fabrics, the maximum load is 2,5 kg
and for wool, 1 kg.
14
Asweighingcanbecomplicated,wesuggestyouestimatethe
weight according to how full the drum is:
cotton and linen : drum full not too tighty packed
resistant synthetics : nomorethan2/3ofthedrum
delicate fabrics and wool : no more than 1/2 of the drum.
Before placing the laundry in the machine:
mend all tears, holes and ladders;
secure loose buttons and close poppers and zips;
donot wash frayed garments - mendhems before washing;
remove all small objects from pockets. Nails, pins, clips and
similar objects can seriously damage your washing machine
andlaundry;
removecurtainhooks;
washcolouredgarmentsandinparticularthosewith non-fast
colours separately when washing for the first time. They are
likely to lose colour the first time they are washed.
treat obstinate stains such as grass, rust, tar, paint, ink etc.
withastainremoverbeforewashing.
Toremovepaintstains,forexample,useavolatilesubstance
such as turpentine: in this case, you should wait for it to dry
completelybeforewashing.
Themanufacturerofyourwashingmachineisnotresponsible
forany damagederivingfromtheuseofvolatile,inflammable
or toxic substances.
At the end of the washing
Damp laundry should be dried as soon as possible after
finishing the wash.
Knitwear and woollens should be dried flat away from direct
sunlight.
Detergentsandadditives
Goodwashingresultsalsodependonthechoiceofdetergent
anduseofthecorrectquantitiestoavoidwasteandprotectthe
environment.Althoughbiodegradable,detergentscontainsubs-
tances which in large quantities can damage the delicate
ecologicalbalanceofnature.
Always use good quality detergents suitable for use in
washingmachines.
Follow the indications given by the detergent manufacturer
accordingtotheweightof laundry, the degree of soil and the
hardnessofthewaterinyourarea;ifyoudonotknowhowhard
it is, ask your local Water Authority.
Powderdetergents.
The washing powder should be placed in the appropriate
compartments of the dispenser drawer before starting the
programme.Specialdetergentsareavailaibleforcolouredand
delicate fabrics and for wool.
"Concentrated" powderdetergents
Pour the concentrated powder detergent into the main wash
()compartment.
Avoid selecting programmes including prewash when
concentrateddetergentsareused.
Liquiddetergents
Usingthenewautomaticdispenserforliquid detergents, it is
possible to use a liquid detergent for main wash phases.
Liquiddetergents can be used instead of powderdetergents
particularly for lightly soiled laundry and for medium or low
temperature washing programmes, while it is better to use a
powder detergent for high temperature washing
programmes.
Liquidadditives
Anyliquid additivesforsofteningthelaundrymustbepoured
into the compartment of the detergent dispenser drawer
beforestartingtheprogramme.
The addition of water softener is particularly useful when
drying the clothes in a tumble dryer after washing to avoid a
static charge.
Bleach
Youmayuseableachagent in all the washing programmes.
However,makesurethatthefabricwithstandsthetreatment.
Bleach is automatically washed down into the drum. Pour 1/
4 to 1 glass of 12° chl bleach into compartment " " before
switching the machine on.
Make sure that the level of the liquid never exceeds the grid.
Strongwash
WASH
Delicatewash
Max. wash Max. wash Max. wash Max. wash Hand Do not
wash
BLEACHING
Bleach in cold water Do not bleach
IRONING Hot iron max.
200°C Warm iron max.
150°C Lukewarm iron
max. 110°C Do not iron
DRY
CLEANING
Drycleaningin
perchlorethylenepetrol,
Dry cleaning Dry cleaning in
petrol, pure Do not dry clean
DRYING On the line
Flat On clothes
hanger Tumble dry
hight
temp.
low temp.
Do not
tumble dry
WASH SYMBOLS

15
Bodywork
The outside or the machine can be cleaned with warm water
and a neutral non-abrasive household detergent. Wipe with
cleanwateranddry after cleaning.
Important : do not use methylated spirit, diluents or similar
products.
Itisadvisable,fromtimetotime,tocarryoutacompletecycle
withouta washing load, adding a decalcifyingproduct.
The detergent dispenser
The detergent dispenser is very easy to remove.
Exertapressureon the brooches located on each side of the
detergent dispenser and pull it up (fig.1 and fig.2).
Cleanthedetergentdispenserunderrunningwaterwithabrush
orapiece of rag (fig.3). Check that the siphons locatedatthe
back of the detergent dispenser are not obstructed (fig.4).
Replace the detergent dispenser in the notches until the
hanging(fig.5).
The drain filter
Themachine hasgota mecanicfilterlocatedonthefrontpart
to collect lint and small objects (toothpins, coins, pins, etc)
inadvertently left in the clothes. It is essential that this filter is
cleanedregularly.
Frequencyofcleaningdependsonthetypeofarticleswashed
(cleaningshouldbemorefrequentifthearticleshavenohem
and tend to fray).
Opentheflapdoor(fig.6)
To drain the residual water :
Place below a container not very high up with
straight edges. To complete the draining, turn the
cap of the drain filter until its vertical position and the
residualwaterwillbereleased(fig.7).
To clean the filter :
Turn the filter anticlockwise and get it away (fig.8).
Clean it with current water. Replace the filter and
screw down it clockwise. Then, close the flapdoor.
CLEANING AND MAINTENANCE
Make sure that the machine is unplugged and
the water tap turned off before undertaking any kind of maintenance.
fig.4
fig.1 fig.2
fig.3
fig.6 fig.7
fig.8
fig.5

16
The wash results are not as usual
The washing cycle is very much too long.
The washing machine stops during a washing cycle.
The machine does not start up
The machine does not drain and/or does not spin
The machine does not fill
The machine vibrates or is too noisy
The machine empties as it fills
There is water on the floor
Softenerdetergentflowsouttheoverfloworifice
IF SOMETHING DOESN'T WORK ?
Problems Solutions
Check that :
was the wrong quantity or the wrong detergent added ?
Insufficientdetergentleadstogreywashesandscaledeposits
in the machine. Check the quantities more exactly.
werespecial stainspre-treated?
wereprogrammeandtemperaturecorrectly
chosen?
Check that :
the water pression is sufficient.
the pump filter is not obstructed.
therehasnot been a power breakdown.
Check that :
the water pression is sufficient.
the pump filter is not obstructed.
the mains fuse is intact.
there isnotarinseholdendingawashing programme(see
theprogrammeschartpage4).
Check that :
the mains fuse is intact.
the appliance is plugged in,.
the lid is firmly shut.
the programme selector dial is correctly positioned.
the beginning of the programme has been ordered
(on/offpushbuttonpushedon).
therehasnotbeenapowerbreakdown.
Check that :
the drain hose is not squashed or bent.
the drain filter is not clogged.
Check that :
the inlet water hose is opened and the water pression is
sufficent.
the lid of the appliance is closed.
therehas notbeenabreakwater.
Check that :
all the transit bolts and packing have been removed.
all the feet resting firmly on the ground, the lock nuts have
beensecrured.
the machine does not touch something.
the load is sufficent.
Check that :
the end of the drain hose is not too low.
Check that :
thereisnottoomuchdetergentorunsuitabledetergent.The
formation of foam can cause water leaks.
one of the detergent dispenser is not obstructed.
the drain hose is well hanged.
if one of the joints or the tap leaking ? it is not always easy
to see as the leak often runs along the hose.
is the drain filter cover properly closed ?
Check that :
you have respected the adviced quantities.
checkthat the siphons located at the back of the detergent
dispenserarenotobstructed.
Table of contents
Other Kelvinator Washer manuals

Kelvinator
Kelvinator KF820 User manual

Kelvinator
Kelvinator AW500C User manual

Kelvinator
Kelvinator AW300K User manual

Kelvinator
Kelvinator KF836 User manual

Kelvinator
Kelvinator KF526 User manual

Kelvinator
Kelvinator KF320 User manual

Kelvinator
Kelvinator KF525 User manual

Kelvinator
Kelvinator KL72TT User manual

Kelvinator
Kelvinator KF224 User manual

Kelvinator
Kelvinator KL14TT2 User manual