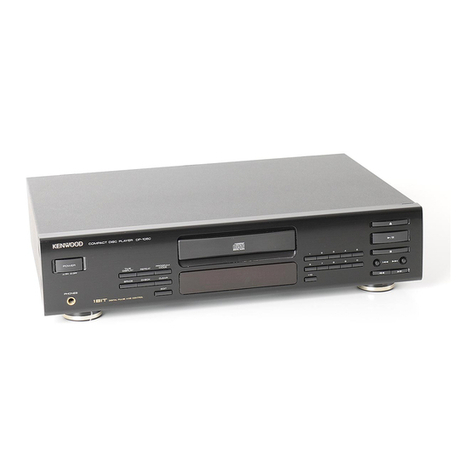
manuals.online logo
Brands
  1. Home
  2. •
  3. Brands
  4. •
  5. Kenwood
  6. •
  7. CD Player
  8. •
  9. Kenwood DP-87 User manual

Kenwood DP-87 User manual

COMPACT
DISC
PLAYER
DP-87
INSTRUCTION
MANUAL
Introduction
Your
choice
of
this
product
indicates
that
you
are
a
devotee
to
excellence
in
sound
reproduction.
We
appreciate
your
patronage
and
take
pride
in
the
long
tradition
of
quality
components.
So
that
you
can
get
the
most
out
of
your
unit,
we
suggest
that
you
take
the
time
to
read
through
this
manual
before
you
hook
up
and
operate
your
system.
This
will
acquaint
you
with
operating
features,
and
system-connection
con-
siderations,
so
that
your
listening
pleasure
will
be
enhanced
right
from
the
start.
You
will
notice
that
in
all
aspects
of
planning,
engineering,
styling,
operating
convenience
and
adaptability,
we
have
sought
to
anticipate
your
needs
and
desires.
Keep
this
manual
handy
for
future
reference.
For
your
records
Record
the
serial
number,
found
on
the
back
of
the
unit,
in
the
spaces
designated
on
the
warranty
card,
and
in
the
space
provided
below.
Refer
to
the
model
and
serial
numbers
whenever
you
cal}
upon
your
dealer
for
informa-
tion
or
service
on
this
product.
Model
DP-87
Serial
Number
Unpacking
Unpack
the
unit
carefully
and
make
sure
that
all
acces-
sories
and
cables
are
put
aside
so
they
will
not
be
lost.
Examine
the
unit
for
any
possibility
of
shipping
damage.
If
your
unit
is
damaged
or
fails
to
operate,
notify
your
dealer
immediately.
If
your
unit
was
shipped
to
you
directly,
notify
the
shipping
company
without
delay.
Only
the
consignee
(the
person
or
company
receiving
the
unit)
can
file
a
claim
against
the
carrier
for
shipping
damage.
We
recommend
that
you
retain
the
original
carton
and
packing
materials
for
use
should
you
transport
or
ship
the
unit
in
the
future.
KENWOOD
©PRINTED
IN
SINGAPORE
B50-8927-00(K,P,M.X.E,U,UE}(G)
88/12
11
109876543214
Nee
DIGITAL
AUDIO
CAUTION:
Use
of
controls
or
adjustments
or
perfor-
mance
of
procedures
other
than
those
specified
herein
may
result
in
hazardous
radiation
exposure.
In
compliance
with
Federal
Regulations.
following
are
reproductions
of
labels
on,
or
inside
the
product
relating
to
laser
product
safety.
‘
KENWOOD
CORPORATION
'
SHIONOG!
SHIBUYA
BUILDING
17-5,
2-CHOME,
1
SHIBUYA,
SHIBUYA-KU,
TOKYO,
JAPAN
KENWOOD
CORP.
CERTIFIES
THIS
EQUIPMENT
CONFORMS
TO
DHHS
REGULATIONS
NO.
21
CFR
1040,
10,
CHAPTER
1,
SUBCHAPTER
J.
DANGER
|
INVISIBLE
LASER
RADIATION
WHEN
OPEN
AND
+
|
INTERLOCK
FAILED
OR
DEFEATED.
AVOID
DIRECT
|
|
EXPOSURE
TO
BEAM.
\
Location:
Inside,
near
the
Laser
mechanism.
Accessories
RCA
pin
plug
cord
System
control
cord
(Except
for
some
areas.)
Contents
A\
Before
applying
power.
A\
Safety
precautions......
A\
Important
safeguards.
Before
operation
Notes
on
handling
compact
System
connections..........
System
control
connections..
NOOO
WN
NM
Caution:
Read
the
following
pages
marked
in
A
ee
to
sie!
your
safety.
Controls
and
indicators...
tata
wunaettlaide,
6
Remote
contro
unit...
Operating
instructions
For
servicing...
add
in
case
of
difficulty.
Specifications
A\
Caution:
Read
this
page
carefully
to
keep
your
safety.
Before
applying
power
important!
U.S.A,,
Canada,
Australia
and
Europe
Units
shipped
to
the
U.S.A.
and
Canada
are
designed
for
operation
on
120
V
AC
only.
Units
shipped
to
Australia
are
designed
for
operation
on
240
V
AC
only.
Units
shipped
to
Europe
are
designed
for
operation
on
220V
AC
only.
These
units
are
not
equipped
with
an
AC
voltage
selector
switch
and
the
discussion
of
such
a
switch
that
follows,
should
be
disregarded.
All
other
countries
Units
shipped
to
countries
other
than
the
above
countries
are
equipped
with
an
AC
voltage
selector
switch
on
the
rear
panel.
Refer
to
the
following
paragraph
for
the
proper
setting
of
this
switch,
AC
voltage
selection
These
units
operates
on
110-120
volts
or
220-240
volts
AC.
The
AC
voltage
selector
switch
on
the
rear
panel
is
set
to
the
voltage
that
prevails
in
the
area
to
which
the
units
was
shipped.
Before
connecting
the
power
cord
to
your
AC
outlet,
make
sure
that
the
setting
position
of
this
switch
matches
your
line
voltage.
if
not,
it
must
be
set
to
your
voltage
in
accordance
with
the
following
direction.
Note:
Qur
warranty
does
not
cover
damage
caused
by
excessive
line
voltage
due
to
improper
setting
of
the
AC
voltage
selector
switch.
Safety
precautions
AC110-120V\4
BAC220-240VV,
AC110-120V\V4
RAC220-240VV
Switch
lever
Safety
precaution
for
AC
plug
(For
U.S.A.
and
Canada)
CAUTION:
To
PREVENT
ELECTRIC
SHOCK
DO
NOT
USE
THIS
(POLARIZED)
PLUG
WITH
AN
EXTENSION
CORD.
This
shows
switch
This
shows
switch
RECEPTACLE
OR
OTHER
OUTLET
UNLESS
THE
BLADES
lever
is
locked
in
fever
is
locked
in
CAN
BE
FULLY
INSERTED
TO
PREVENT
BLADE
EXPOSURE.
110-120V~V
position.
220-240V'v
position.
WARNING:
Move
switch
lever
to
match
your
line
voltage
TO
PREVENT
FIRE
OR
ELECTRIC
SHOCK
with
a
small
screw
driver
or
other
pointed
tool.
%
:
DO
NOT
EXPOSE
THIS
APPLIANCE
TO
AC
voltage
selector
switch
RAIN
OR
MOISTURE
RISK.OF
ELECTRIC
SHOCK
REMOVE
COVER
(OR
BACK).
NO
USER-SERVICEABLE
PARTS
INSIDE.
oo:00
NOEOPES,
REFER
SERVICING
TO
QUALIFIED
SERVICE
PERSONNEL.
h
CAUTION
(
CAUTION:
TO
REDUCE
THE
RISK
OF
ELECTRIC
SHOCK,
DO
NOT
THE
LIGHTNING
FLASH
WITH
ARROWHEAD
SYMBOL,
WITHIN
AN
EQUILATERAL
TRIANGLE,
iS
INTENDED
TO
ALERT
THE
USER
TO
THE
PRESENCE
OF
UNINSULATED
THE
EXCLAMATION
POINT
WITHIN
AN
EQUILATERAL
TRIANGLE
IS
INTENDED
TO
ALERT
THE
USER
TO
THE
PRESENCE
OF
IMPORTANT
OPERATING
AND
MAINTENANCE
(SERVICING)
INSTRUCTIONS
IN
THE
LITERATURE
ACCOMPANYING
THE
APPLIANCE.
“DANGEROUS
VOLTAGE”
WITHIN
THE
PRODUCT'S
ENCLOSURE
THAT
MAY
BE
OF
SUFFICIENT
MAGNITUDE
TO
CONSTITUTE
A
RISK
OF
ELECTRIC
SHOCK
TO
PERSONS.
Important
safeguards
Please
read
all
of
the
safety
and
operating
instructions
before
operating
this
unit.
For
best
results,
follow
all
warnings
placed
on
the
unit
and
adhere
to
the
operating
and
use
instructions.
These
safety
and
operating
instructions
should
be
retained
for
future
reference.
1.
Power
sources
~
The
unit
should
be
connect-
ed
to
a
power
supply
only
of
the
type
described
in
the
operating
instructions
or
as
marked
on
the
appliance.
Power-cord
protection
—
Power-supply
cords
should
be
routed
so
that
they
are
not
likely
to
be
walked
on
or
pinched
by
items
placed
upon
or
against
them,
pay
particular
attention
to
cords
at
plugs,
convenience
receptacles,
and
the
point
where
they
exit
from
the
unit.
Never
pull
or
stretch
the
cord,
Grounding
or
polarization
~
Precautions
that
should
be
taken
so
that
the
grounding
or
polari-
zation
means
of
this
unit
is
not
defeated.
Ventilation
-
The
unit
should
be
situated
so
that
its
location
or
position
does
not
interfere
with
its
proper
ventilation.
To
maintain
good
ventilation,
do
not
put
records
or
a
table-cloth
on
the
unit.
Place
the
unit
at
least
10
cm
away
from
the
walls.
Do
not
use
the
unit
on
a
bed,
sofa,
rug
or
similar
surface
that
may
block
the
ventilation
openings.
.
Water
and
moisture
—
The
unit
should
not
be
used
near
water
~—
for
example,
near
a
bathtub,
washbowi,
kitchen
sink,
laundry
tub,
in
a
wet
basement,
or
near
a
swimming
pool,
etc.
A\
Caution:
Read
this
page
carefully
to
keep
your
safety.
6.
10.
Temperature
—
The
unit
may
not
function
properly
if
used
at
extremely
low,
or
freezing
temperatures.
The
ideal
ambient
temperature
is
above
+5°C
(41°F).
.
Heat
-—
The
unit
should
be
situated
away
from
heat
sources
such
as
radiators,
heat
registers,
stoves,
or
other
units
(including
amplifiers)
that
produce
heat.
.
Electric
shock
-
Care
should
be
taken
so
that
object
do
not
fall
and
liquid
are
not
spilled
into
the
enclosure
throuch
openings.
If
a
metal
object,
such
as
a
hair
pin
or
a
needle,
comes
into
contact
with
the
inside
of
this
unit,
a
dangerous
electric
shock
may
result.
For
families
with
children,
never
permit
children
to
put
anything,
especially
metal,
inside
this
unit.
.
Enclosure
removal
—
Never
remove
the
enclo-
sure.
If
the
internal
parts
are
touched
accidental-
ly,
a
serious
electric
shock
might
occur.
AC
outlets
-
Do
not
connect
other
audio
equipment
with
a
power
consumption
larger
than
that
specified
to
the
AC
outlet
on
the
rear
panel.
Never
connect
other
electrical
units,
such
as
an
iron
or
toaster,
to
it
to
prevent
fire
or
electric
shock.
A\
Caution:
Read
this
page
carefully
to
keep
your
safety.
11.
Magnetic
fields
~
Keep
the
units
away
from
a
source
of
magnetic
fields
such
as
TV
sets,
speaker
systems,
radios,
motorized
toys
or
mag-
netized
objects.
12.
Cleaning
—-
Donotuse
volatile
solvents
such
as
alcohol,
paint
thinner,
gasoline,
benzine,
etc.
to
clean
the
cabinet.
Use
a
clean
dry
cloth.
13.
Nonuse
periods
—-
The
power
cord
of
the
unit
should
be
unplugged
from
the
outlet
when
left
unused
for
a
long
period
of
time.
14.
Abnormal
smell
-
If
an
abnormal
smell
or
smoke
is
detected,
immediately
turn
the
power
OFF
and
pull
out
the
power
cord.
Contact
your
dealer
or
nearest
service
station.
POWER
OFF!
15.
Damage
requiring
service
~
The
unit
should
be
serviced
by
qualified
service
personnel
when:
A.
The
power-supply
cord
or
the
plug
has
been
damaged:
or
B.
Objects
have
fallen,
or
liquid
has
been
spilled
into
the
unit:
or
C.
The
unit
has
been
exposed
to
rain;
or
D.
The
unit
does
not
appear
to
operate
normally
or
exhibits
a
marked
change
in
performance;
or
E.
The
unit
has
been
dropped,
or
the
enclosure
damaged.
6.
Servicing
—
The
user
should
not
attempt
to
service
the
unit
beyond
that
described
in
the
operating
instructions.
All
other
servicing
should
be
referred
to
qualified
service
personnel.
17.
Outdoor
antenna
grounding
-—
If
an
outside
antenna
is
connected
to
the
receiver,
be
sure
the
antenna
system
is
grounded
so
as
to
provide
some
protection
against
voltage
surges
and
built
up
static
charges.
Section
810
of
the
National
Electrical
Code,
ANSI/NFPA
No.
70
-
1984,
provides
information
with
respect
to
proper
grounding
of
the
mast
and
supporting
structure,
grounding
of
the
lead-in
wire
to
an
antenna
discharge
unit,
size
of
grounding
conductors,
location
of
antenna-discharge
unit,
connection
to
grounding
electrodes,
and
requirements
for
the
grounding
electrode.
See
Figure.
®
Use
No.10
AWG
(5.3
mm’)
copper,
No.8
AWG
(8.4
mm?)
aluminum,
No.1
7
AWG
(1.0
mm?)
copper-ciad
steel
or
bronze
wire,
or
larger,
as
a
ground
wire.
o
Secure
antenna
lead-in
and
ground
wires
to
house
with
stand-off
insulators
spaced
from
4
-
6
feet
(1.22
~
1.83
m)
apart.
Mount
antenna
discharge
unit
as
close
as
possible
to
where
lead-in
enters
house.
a
Use
jumper
wire
not
smalier
than
No.6
AWG
(13.3
mm}
copper,
or
the
equivalent,
when
@
separate
antenna-grounding
electrode
is
used.
See
NEC
Section
810-21()}.
Power
lines
—
An
outdoor
antenna
should
be
located
away
from
power
lines.
18.
Notes:
POWER
LINES:
SERVICE
ENTRANCE
CONDUCTORS
STANDOFF
INSULATORS?
ANTENNA
UEAD-IN
WIRE
ANTENNA,
DISCHARGE
‘UNIT
TO
EXTERNAL
ANTENNA
POWER
SERVICE
GROUNDING
TERMINALS
OF
PRODUCT
ELECTRODE
SYSTEM
{e.g.
interior
metas
water
piped
BONDING
JUMPER?
GROUND
CLAMPS
OPTIONAL
ANTENNA
GROUNDING
ELECTRODE
ORIVEN
8
FEET
{2.44
ml
INTO
THE
EARTH
iF
REQUIRED
BY
LOCAL
CODES.
SEE
NEC
SECTION
810-211f}.
FIGURE
EXAMPLE
OF
ANTENNA
GROUNDING
ACCORDING
TO
THE
NATIONAL
ELECTRICAL
CODE
INSTRUCTIONS
CONTAINED
IN
ARTICLE
810
-—“RADIO
AND
TELEVISION
EQUIPMENT”
1.
Item
3
is
not
required
except
for
grounded
or
polarized
equipment.
2.
Item
10
is
not
required
except
for
units
provided
with
AC
outlets.
3.
Itern
17
and
18
are
not
required
except
for
units
provided
with
antenna
terminals.
Before
operation
Beware
of
condensation
Water
vapor
in
the
air
may
condense
on
cold
parts,
forming
"dew"
on
its
surface.
For
example,
when
a
bottle
taken
out
of
the
refrigerator
and
brought
into
a
warm
room,
dropets
of
water
will
form
on
the
bottle
surface.
This
phenomenon
is
called
“conden-
sation”.
If
this
occurs
of
the
unit
internally,
the
player
may
operate
incorrectly
or
may
not
function
at
ali.
This
is
not
a
malfunction,
however,
the
player
should
be
left
until
it
is
dry.
(Turn
the
power
of
this
unit
ON
and
leave
the
player
for
a
while.
After
several
hours,
even
in
the
worse
case,
the
player
will
stabilize
and
correct
playback
will
be
possible).
Be
especially
careful
in
the
following
cases:
@
When
the
unit
is
suddenly
brought
from
a
cold
place
to
a
warm
place
(causing
rapid
temperature
change).
@®
When
the
temperature
of
the
room
is
raised
suddenly
using
a
heater,
etc.
®
When
the
unit
is
brought
from
a
well-cooled
(aircondi-
tioned)
room
to
a
damp
and
hot
room.
®
In
conditions
where
the
temperature
difference
be-
tween
the
surroundings
and
this
unit
might
cause
condensation.
Notes
on
handling
compact
discs
Handling
Compact
discs
are
made
of
plastic
(polycarbonate).
When
the
recorded
side
of
the
compact
disc
is
dirty
or
scratched,
playback
may
be
noisy
or
sound
may
be
missed.
Even
when
the
label
side
is
scratched,
the
recording
may
be
damaged.
Handle
compact
discs
carefully.
Do
not
stick
tape,
etc.
to
compact
discs.
Cleaning
When
a
compact
dise
is
contaminated
with
fingerprints,
etc.,
wipe
with
a
dry
cloth
in
a
radial
direction.
Never
use
chemical
solvents,
such
as
thinner,
benzene,
etc.
and
conventional
record
cleaners
or
aerosols.
Storage
Always
replace
the
compact
disc
in
its
case
and
store
it.
Compact
discs
are
adversely
affected
by
heat
and
mois-
ture.
Do
not
store
compact
discs
in
a
place
exposed
to
direct
sunlight
or
where
humidity
is
high.
How
to
load
a
compact
disc
Press
the
OPEN/CLOSE
(4)
key
to
open
the
tray.
The
disc
is
inserted
with
the
labeled
side
up.
Notes:
1.
Make
sure
of
the
side
of
the
disc.
The
disc
cannot
be
played
it
is
placed
upside
down.
2.
Do
not
place
objects
other
than
disc
on
the
disc
tray.
Labeled
side
Qe
Additional
precautions
When
performing
connections,
always
disconnect
the
power
cord
from
the
AC
outlet.
When
setting
the
power
switch
(POWER)
to
OFF,
always
turn
the
volume
control
of
the
amplifier
to
minimum.
System
connections
@
Make
system
connections
with
the
power
turned
off.
[
When
connected
to
a
receiver
Y
{
Receiver
!
Speaker
systems
Turntable
|
=
\
!
I
{
|
AC
voltage
To
AC
outlet
System
control
selector
switch
terminal
(Except
for
some
areas.)
Power
cord
connection
Connect
the
power
cord
to
a
convenient
AC
outlet.
Connection
to
the
amplifier
Connect
the
OUTPUT
jacks
to
the
right
and
left
CD
or
AUX
jacks
of
the
amplifier.
Note:
Do
not
connect
the
OUTPUT
jacks
to
the
PHONO
jacks
of
the
amplifier.
Precautions
1.
Before
connecting
or
disconnecting
any
cord,
be
sure
to
turn
OFF
the
power
switches
of
the
unit
and
amplifier.
2.
Each
audio
cord
must
be
connected
securely
to
the
corresponding
terminals
((L]
to
[E]
and
[R]
to
[R)).
System
control
connections
(Except
for
some
areas.)
Connection
Using
the
system
control
cord
provided
with
the
KEN-
WOOD
system
component
models,
make
connection
as
below.
Operation
1.
Automatic
play
operation
When
starting
play
with
the
CD
player
connected
to
the
amplifier
or
receiver,
press
the
INPUT
SELECTOR
CD
switch
on
the
amplifier
or
receiver.
The
CD
player
will
automatically
enter
the
play
mode.
In
the
same
way,
pressing
the
Play
key
of
the
CD
player
will
automatically
switch
the
INPUT
SELECTOR
on
the
amplifier
or
receiver
to
the
equipment
on
which
the
Play
key
is
pressed.
2.
Synchro
recording
To
record
the
sound
from
the
CD
player
onto
the
tape
with
the
cassette
deck,
press
the
PLAY
(START)
key
of
the
CD
player.
The
cassette
deck
will
start
recording
automatically.
synchronized
with
the
CD
player
starting
play.
For
more
details,
refer
to
the
instruction
manual
of
the
cassette
deck.
.
Remote
control
When
the
remote
control
unit
provided
with
the
KEN-
WOOD
amplifier
or
receiver,
to
which
the
CD
player
is
connected,
is
equipped
with
CD
player
control
keys,
the
CD
player
can
be
controlled
using
these
keys.
Turntable
Power
amplifier
Tape
deck
e———t
1
To
wall
AC
outlet
ce
je
G
CD
player
(DP-87)
‘ee
|
System
control
cord
Controls
and
indicators
Numbers
in
circles
correspond
to
the
diagram,
symbols
in
brackets
correspond
to
front
panel
indications.
KENWOOD
covrcr
ose
aren
0-07
@
POWER
switch
Press
to
turn
the
power
on.
Pressing
again
turns
the
power
off.
@
PHONES
(Headphones)
jack
Connect
headphones
to
this
jack
for
private
listening.
©
Disc
tray
This
will
be
opened
or
closed
by
pressing
the
OPEN/CLOSE
(4)
key.
Place
a
disc
on
this
tray
with
its
label
surface
up.
@
OPEN/CLOSE
key
(4)
Used
to
open/close
the
disc
tray.
When
this
key
is
pressed
during
play,
the
disc
rotation
will
stop
and
the
disc
tray
will
be
opened.
@
When
this
key
is
pressed
with
the
tray
closed,
the
tray
is
opened.
When
it
is
pressed
in
the
middle
of
tray
opening,
the
tray
will
be
closed.
@
After
the
tray
is
closed,
the
disc
information
(TOC
=
Table
Of
Contents)
will
be
read
out
and
then
the
unit
will
enter
the
stop
mode
automatically.
@
TIME
DISPLAY
key
Used
to
select
the
desired
time
display.
See
page
15.
@
REPEAT
key
Press
this
key
to
play
the
disc
repeatedly.
The
repeat
function
will
be
canceled
by
pressing
the
REPEAT
key
again.
@
SEARCH
keys
(<<,
bP)
Press
to
go
quickly
in
the
forward
or
backward
direction.
©
SKIP
keys
(4,
bP)
Press
to
play
the
next
track
or
the
track
being
played
from
the
beginning.
©
Play
mode
key
(P-MODE)
Press
this
key
to
select
the
mode
between
Program
mode
(programmed
play)
and
Track
mode
(manual
play).
When
the
play
mode
is
changed
from
Program
mode
to
Track
mode
by
pressing
this
key,
all
the
programmed
contents
will
be
erased.
@®
STOP
key
(@)
When
this
key
is
pressed
during
play,
the
play
stops.
@®
CHECK
key
Used
to
check
the
programmed
contents.
The
TIME
DISPLAY
key
is
invalid
during
program
checking.
@
PLAY/PAUSE
key
(>/ll)
When
this
key
is
pressed,
the
PLAY
indicator
lights.and
the
play
starts.
When
it
is
pressed
again.
the
PAUSE
indicator
lights
and
the
unit
enters
the
pause
mode.
When
the
key
is
pressed
with
the
tray
opened,
the
tray
is
closed
and
then
the
play
starts
after
the
disc
information
(TOC)
is
read
out.
If
the
tunes
are
programmed,
the
programmed
play
will
be
started.
@®
CLEAR
key
Used
to
clear
the
programmed
contents.
@®
Numeric
keys
(1~0)
Use
these
keys
to
input
Track
No.
for
tune
selection
or
memory.
@
Display
window
(Cia)
ance)
@
Music
calendar
([1|-[20])
Displays
the
track
numbers
contained
on
the
compact
disc
or
the
track
numbers
of
the
programmed
tunes.
The
Up
to
20
tunes
on
the
disc
can
be
displayed.
@®
Track
number
display
(TRACK
NO.)
®
Program
check
indicator
([P.C.])
Lights
when
checking
the
programmed
contents.
@
Time
counter
display
(SINGLE
TIME/TOTAL
TIME)
Displays
the
elapsed
time
of
the
tune
or
the
total
playing
time
of
the
disc
or
other
time
information.
For
details,
refer
to
page
15.
®
REPEAT
indicator
©
Play
mode
indicator
Track
mode
indicator
(TRACK)
This
indicator
lights
when
the
play
mode
is
set
to
Track
mode
{manual
play).
Program
mode
indicator
(PGM)
This
indicator
lights
when
the
play
mode
is
set
to
Program
mode
(programmed
play).
Auto
space
indicator
(AUTO-S.)
This
indicator
lights
when
the
auto-space
function
(provid-
ing
a
non-recorded
blank
of
about
4
seconds
between
tunes)
is
activated.
The
Auto
Space
function
is
available
in
Program
mode.
@
Play
indicator
(>)
Lights
in
the
play
mode.
Pause
indicator
(1)
Lights
in
the
pause
mode.
Remote
control
unit
Batteries
Operating
range
of
remote
control
unit
Load
two
“R6",
“AA”,
“SUM-3”
type
batteries
in
the
remote
control
unit
as
shown
in
the
illustration.
DP-87
1.
Remove
the
cover.
DOD
coverer
ose
raves
ona
5m
2.
Insert
batteries
with
correct
polarity,
and
close
the
30°
30°
cover,
oa
noo
Dow
as
Seah
xz
pan)
Note:
i
The
provided
batteries
are
to
be
used
for
operation
of
the
remote
control
unit,
and
it
may
have
shorter
life.
When
the
remote
control
unit
becomes
effective
only
for
shorter
distance
or
does
not
operate,
replace
them
with
two
new
batteries.
Operating
method
Towards
DP-87
Remote
control
unit
+
Numeric
keys
(0~9)
ra}
SKIP
(<4,
PI)
keys.
Cj
fa)
|
[faqs
STOP
key
(@
SEARCH
a
=a
|
eee
(P)
key
SEACH
(<<,
b>)
keys
AE
=
al
ise
BGITAL
RUBIO
ee
KENWOOD
REMOTE:
CONTROL
UNIT
RC-P87
Operating
instructions
Manual
play
i
To
play
a
disc
@
Turn
the
POWER
switch
ON.
@
Press
the
OPEN/CLOSE
(4)
key
to
open
the
disc
tray.
@
Place
the
disc
in
the
tray
with
the
label
facing
up.
@
Press
the
PLAY/PAUSE
(>/
fl)
key.
@
In
a
few
seconds,
the
Music
Calendar
displays
the
TRACK
Nos.
(up
to
20)
recorded
on
the
disc,
and
the
player
then
ready
for
play.
®
After
the
final
selection
has
been
played.
the
player
will
go
into
the
stop
mode.
To
use
the
pause
mode
Press
the
PLAY/PAUSE
(>/Il)
key.
@
The
PAUSE
indicator
will
light
up.
@
Press
the
PLAY/PAUSE
(>/Tff)
key
again
to
restart
playing
from
the
point.
@
To
stop
disc
play
Press
the
STOP
(i)
key.
The
play
indicator
(>)
will
go
out,
showing
the
stop
status.
_
@
Repeat
play
@
Press
the
REPEAT
key.
All
tunes
on
the
disc
can
be
played
repeatedly.
@
To
release
repeat
play.
press
the
REPEAT
key
again.
@
When
the
tray
is
opened
by
pressing
the
OPEN/CLOSE
(A)
key,
the
repeat
play
will
also
be
released.
&
Sch
@
To
play
a
particular
track
Operate
the
numeric
keys
(1 to
0)
or
the
SKIP
(@<,
BB)
keys,
and
display
the
desired
TRACK
No.
®
To
select
the
10th
track
or
higher,
first
press
the
Numeric
(1~9)
key
once
to
select
the
desired
ten’s
digit.
then
press
one
of
the
Numeric
(1
to
0)
keys
to
select
the
desired
one’s
digit.
For
example,
To
select
TRACK
No.
16;
Press
1,
then
press
6
within
3
seconds.
To
select
TRACK
No.
20;
Press
2,
then
press
0
within
3
seconds.
@
The
selected
TRACK
No.
is
displayed,
the
play
indicator
lights
(@),
and
playback
starts.
@
When
the
final
music
track
on
the
disc
has
been
played,
the
player
automatically
enters
stop
mode
at
the
beginning
of
TRACK
No.
1.
®
If
the
selected
track
No.
is
higher
than
the
total
number
of
music
tracks
on
the
disc,
the
final
music
track
will
be
played.
EB
To
select
another
selection
during
play
@
Press
the
SKIP
{>PI)
key.
The
pickup
will
search
the
beginning
of
the
next
selection.
@
When
the
SKIP
(®P
key
is
pressed
for
several
times,
the
designated
track
is
searched
and
piay
starts
from
the
beginning
of
that
track.
@
When
it
is
done
during
play
of
the
final
selection,
the
pickup
will
return
to
the
beginning
of
the
first
selection.
@
A
press
of
the
SKIP
(<<)
key
will
move
the
pickup
to
the
beginning
of
the
selection
being
played.
®
When
the
SKIP
(4)
key
is
pressed
several
times,
the
designated
track
is
searched
and
play
starts
from
the
beginning
of
that
track.
@
When
the
SKIP
(4)
key
is
pressed
twice
during
the
playing
of
the
first
track.
play
starts
from
the
beginning
of
the
last
track.
®
When
the
numeric
key
is
pressed,
the
player
will
stop
playing
and
move
the
pickup
to
the
beginning
of
the
selected
track.
®
When
the
numeric
key
is
pressed
during
pause,
the
pickup
will
come
to
the
beginning
of
the
selected
track
while
remaining
in
the
pause
mode,
@
When
a
TRACK
No.
is
selected
using
numeric
keys
or
SKIP
key
with
the
disc
tray
open,
the
tray
closes
automatically
and
the
play
of
the
selected
track
starts
automatically.
To
fast
forward/fast
reverse
the
tune
during
play
@
Press
the
SEARCH
(®P)
key.
The
player
fast
forwards
the
play
while
the
key
is
pressed.
@
Press
the
SEARCH
(44)
key.
The
player
fast
reverses
the
play
while
the
key
is
pressed.
@
When
the
SEARCH
(PP),
(<4)
key
is
released,
normal
play
resumes
at
the
point
where
the
key
is
released.
@
When
the
SEARCH
(®P),
(<<)
key
is
pressed
during
pause
mode,
the
player
fast
forwards
or
fast
reverses
the
play
and
enters
the
pause
mode
at
the
point
where
the
key
is
released.
®
With
the
REPEAT
indicator
lit,
when
the
laser
pickup
exceeds
the
last
tune
by
pressing
the
SEARCH
(PP)
key.
the
player
returns
to
the
first
tune,
and
when
the
laser
pickup
exceeds
the
first
tune
by
pressing
the
SEARCH
(4)
key,
the
player
returns
to
the
last
tune.
Programmed
play
The
required
tunes
on
the
disc
can
be
programmed
up
to
20
tunes
in
any
desired
order.
@
To
program
tunes
@
Press
the
play
mode
key
(P-MODE)
so
that
the
PGM
indicator
lights.
@®
Press
the
desired
tune
number
with
the
numeric
keys.
The
program
number
and
tune
(track)
number
are
displayed
in
the
Display
Window
to
show
that
the
designated
tune
has
been
programmed.
@
For
TRACK
No.
between
1
and
9,
the
program
is
input
about
3
seconds
after
pressing
the
numeric
key,
and
the
music
calendar
will
be
displayed
in
the
Display
Window.
For
10
or
larger
(2-digit)
track
No.,
first
press
the
numeric
key
for
10's
digit
(first
digit),
then
within
3
seconds,
input
the
1's
digit
(second
digit).
@®
The
TRACK
No.
display
shows
the
first
programmed
tune
and
the
play
indicator
(P)
blinks.
®
The
display
is
changed
several
seconds
later
and
the
player
enters
the
program-ready
mode.
(Programming
the
next
is
possible
before
the
display
is
changed.)
@
In
the
same
way
as
@,
up
to
20
tunes
can
be
programmed.
However,
programming
the
tune
number
exceeding
the
last
tune
on
the
disc
is
impossible.
@
Aprogram
can
include
music
tracks
with
a
track
No.
of
44
or
more.
but
the
total
playing
time
will
not
be
displayed
in
this
case.
@®
When
the
play
mode
key
(P-MODE)
is
pressed
in
Stop
mode,
to
switch
from
Track
mode
to
Program
mode,
the
time
display
automatically
changes
to
the
remaining
time
display
for
the
entire
disc.
@
When
the
play
mode
is
changed
from
the
Program
mode
to
the
Track
mode
by
pressing
the
play
mode
(P-MODE)
key,
all
the
programmed
contents
will
be
erased.
@
When
the
play
mode
is
changed
to
the
Program
mode
by
pressig
the
play
mode
(P-MODE)
key
during
Manual
play,
the
currently
playing
tune
will
be
automatically
programmed
as
the
first
program.
@
To
change
the
last
program
@
To
change
the
last
program,
press
the
CLEAR
key.
When
the
CLEAR
key
is
pressed
once,
the
last
programmed
tune
is
canceled.
@®
Then
press
the
desired
tune
number
with
the
numeric
keys.
@
Ifthe
CLEAR
key
is
pressed
repeatedly
without
pressing
the
numeric
keys,
programmed
tunes
will
be
canceled
in
the
reverse
order
sequentially
from
the
last
program.
®
When
the
programmed
tune
is
being
played,
it
cannot
be
erased
with
the
CLEAR
key.
J
tonsa
wed
pL
Sy
@
To
check
the
program
To
check
the
programmed
contents,
press
the
CHECK
key.
®
Each
time
the
CHECK
key
is
pressed,
the
programmed
tune
number
and
program
number
of
that
tune
are
displayed.
@
The
P.C.
indicator
lights
during
program
checking.
@
Program
checking
is
also
possible
during
play.
@
The
display
shows
the
program
content
for
about
5
seconds
after
the
CHECK
key
is
pressed,
then
returns
to
the
time
display.
BH
To
change
the
program
while
checking
@
Press
the
CHECK
key
to
display
the
programmed
TRACK
No.
to
be
changed.
@To
change
the
displayed
program,
first,
press
the
CHECK
key
to
select
the
music
track
No.
to
be
changed.
Then
press
the
desired
tune
number
with
the
numeric
keys
(1~0)
while
the
P.C.
indicator
is
lit.
The
display
shows
the
newly-selected
tune
number
and
program
number.
(The
P.C.
indicator
disappears
in
about
5
seconds.)
@
When
the
programmed
tune
is
being
played,
it
cannot
be
changed.
&
To
check
or
change,
programmed
tracks
during
playback
@
Press
the
CHECK
key
to
display
the
music
track
No.
to
be
modified.
@
To
change
the
music
track
No.
being
displayed,
select
the
desired
track
No.
by
pressing
the
numeric
keys
(1
to
0)
within
5
seconds
after
pressing
the
CHECK
key.
Note:
The
programmed
music
track
being
played
cannot
be
changed
or
cleared,
in
addition.
programmed
music
tracks
which
have
already
been
played
cannot
be
cleared.
i
To
add
music
tracks
to
the
program
being
played,
press
the
keys
(1
to
0)
during
program
play.
®
The
track
No.
of
the
selected
music
track
will
be
added
after
the
final
music
track
in
the
program.
B
To
delete
the
entire
program
When
any
of
the
following
operations
are
performed,
the
entire
program
will
be
deleted.
@
When
the
play
mode
key
(P.-MODE)
is
pressed
to
enter
Track
mode.
@
With
the
tray
closed,
press
the
OPEN/CLOSE
(4)
key.
@
In
the
stop
mode,
press
the
CLEAR
key
by
the
number
of
programmed
tunes.
@
Press
the
POWER
switch
to
turn
the
power
off.
&
To
play
in
the
programmed
order
@
To
program
music
tracks,
follow
the
procedure
in
“To
program
tunes”.
@®
Press
the
PLAY/PAUSE
(>/Il)
key.
The
play
indicator
({)
which
blinks
during
programming
lights
and
play
starts
from
the
first
programmed
tune.
@
When
the
play
of
the
last
programmed
tune
is
finished,
the
player
enters
the
stop
mode.
®
During
program
play,
the
auto-space
function
operates
automatically
to
provide
non-recorded
blanks
of
about
4
seconds
between
tunes.
Hi
To
play
the
next
programmed
tune
During
program
playing.
press
the
SKIP
(>)
key.
When
the
key
is
pressed
once,
the
laser
pickup
skips
to
the
beginning
of
the
next
programmed
tune.
Pressing
the
key
repeatedly
or
holding
the
key
depressed
will
skip
to
the
beginning
of
the
tune
several
programs
later.
@
If
the
SKIP
(>)
key
is
pressed
once
in
the
stop
mode,
play
will
start
from
the
2nd
programmed
tune.
@
During
the
play
of
the
last
programmed
tune,
pressing
the
SKIP
(®b)
key
will
return
to
the
first
programmed
tune.
B
To
play
the
previous
program
During
program
playing,
press
the
SKIP
key
(Mt).
When
the
key
is
pressed
once,
the
laser
pickup
returns
to
the
beginning
of
the
current
tune
(program).
Pressing
repeatedly
or
holding
it
depressed
will
skip
to
the
begin-
ning
of
the
tune
several
programs
before.
@
During
the
play
of
the
first
programmed
tune,
pressing
SKIP
(<<)
key
twice
will
skip
to
the
fast
programmed
tune.
@
When
the
SKIP
(<4,
BPI)
key
is
pressed
in
the
pause
mode,
the
player
enters
the
pause
mode
at
the
begin-
ning
of
the
selected
program.
To
start
play.
press
the
PLAY/PAUSE
(>/If)
key.
&
Program
repeat
operation
@
Press
the
REPEAT
key.
@®
The
whole
tunes
will
be
played
repeatedly.
@
When
the
program
consists
of
only
one
music
track,
repeated playback
of
the
music
track
starts.
@®
To
release
program
play,
press
the
REPEAT
key
again.
Time
display
The
contents
of
the
time
display
can
be
selected
between
4
functions.
@
To
change
the
display
Press
the
TIME
DISPLAY
key.
The
contents
of
the
time
display
will
be
changed
in
the
following
order.
The
time
in
the
brackets
[
]
is
shown
in
the
Program
mode.
1.
Elapsed
time
of
the
current
tune
(Fig.
1}
2.
Remaining
time
of
the
current
tune...
ee
{Fig.
2)
3.
Total
elapsed
time
on
the
disc
[of
the
programmed
tunes]...
ecucseeeene
(Fig.
3)
4.
Total
remaining
time
on
the
disc
of
the
programmed
tunes}...
(Fig.
4)
When
the
TIME
display
key
is
pressed
once
more,
the
time
display
returns
to
1.
ci
Example:
SINGLE
=
TIME
3B
Fig.
1
SINGLE
=
TIME
Ge:45
Fig.
2
TOTAL
TIME
Ge:ud
Fig.
3
TOTAL
TIME
-Be4
1
Fig.
4
For
servicing
Should
this
unit
require
servicing,
be
sure
to
repack
the
unit
with
original
carton
box and
material.
Sending
the
unit
without
repacking
may
result
in
damaged
finish
or
malfunction.
Before
repacking,
be
sure
to
secure
the
laser
pick-up
system
with
the
transportation
screws
as
follows.
1.
Turn
the
power
ON
without
loading
disc.
2.
Turn
OFF
the
power
after
the
display
shows
the
following
indication.
TRACK
SINGLE
=
TIME
in
case
of
difficulty
if
your
unit
should
not
perform
as
expected,
consult
the
table
below
to
see
if
the
problem
can
be
corrected
before
seeking
help
from
your
dealer
or
service
representative.
Symptom
Possible
cause
Remedy
Even
when
the
POWER
switch
is
turned
ON
the
power
is
not
supplied.
The
power
plug
is
not
properly
fitted.
Reconnect
the
power
plug
properly
into
the
AC
outlet.
When
a
disc
is
loaded,
it
does
not
start
play.
1.
Disc
is
loaded
labei
side
upward.
2.
Disc
is
dirty.
3.
Optical
system
collects
dew.
1.
Reverse
the
disc.
2.
Clean.
3.
Keep
the
unit
warm
for
an
hour.
No
sound.
Loose
connection
Connect
the
connection
cord
tightly.
Sound
skipped.
1.
Disc
is
very
dirty.
2.
Disc
is
greatly
damaged.
3.
Vibration
is
transmitted
to
the
unit.
1.
Clean.
2.
Replace
the
disc
with
the
new
one.
3.
Move
the
unit
to
a
place
where
no
vibration
is
transmitted
to
the
set.
Selection
searching
time
is
extremely
fong.
Disc
is
dirty
or
damaged.
Clean
the
disc
or
replace
it
with
the
new
one.
Tray
does
not
open
even
after
the
OPEN/CLOSE
(4)
key
is
pressed.
Specifications
Number
of
channels
..
Frequency
response
Dynamic
range
....
Signal
to
noise
ratio
.
Total
harmonic
distortion
..
Channel
separation
Wow
&
flutter
.......
Line
output
level/impedance
Headphones
output
level/impedance
.
Playing
speed
..
Quantization
Sampling
frequency
.
Power
consumptions
.
Dimensions
.................
Weight
(Net)
occ
neeeeescneeenenny
Note:
improper
insertion
of
a
power
plug.
.
2
channels
More
than
92
dB
.
Unmeasurable
limit
.
1.6
V/3.3
kohms
.
31
mW/32
ohms
44.1
kHz
15
W
H:
90
mm
(3-9/16”)
D:
262
mm
(10-5/16")
3.8
kg
(8.36
Ib)
"20
Hz~20
kHz,
+
1
dB
More
than
92
dB
at
1
kHz
W:
420
mm
(16-9/16")
Insert
the
power
plug
tightly
into
the
AC
outlet.
Less
than
0.007%
at
1
kHz
More
than
88 dB
at
1
kHz
.
1.2-1.4
m/sec
{constant
linear
velocity)
.
16
bits
linear
1
channel
We
follow
a
policy
of
advancements
in
development.
For
this
reason
specifications
may
be
changed
without
notice.

Other manuals for DP-87

2

Other Kenwood CD Player manuals

Kenwood KDC-C810 User manual

Kenwood

Kenwood KDC-C810 User manual

Kenwood KDC-CPS89 User manual

Kenwood

Kenwood KDC-CPS89 User manual

Kenwood DPX-MP4070 User manual

Kenwood

Kenwood DPX-MP4070 User manual

Kenwood DPC-351 User manual

Kenwood

Kenwood DPC-351 User manual

Kenwood DPF-1010 User manual

Kenwood

Kenwood DPF-1010 User manual

Kenwood KDC-C803 User manual

Kenwood

Kenwood KDC-C803 User manual

Kenwood CD-324M User manual

Kenwood

Kenwood CD-324M User manual

Kenwood DPC-141 User manual

Kenwood

Kenwood DPC-141 User manual

Kenwood KCA-S210A User manual

Kenwood

Kenwood KCA-S210A User manual

Kenwood DPC-885 User manual

Kenwood

Kenwood DPC-885 User manual

Kenwood DVF-3060 User manual

Kenwood

Kenwood DVF-3060 User manual

Kenwood DPX513WBT User manual

Kenwood

Kenwood DPX513WBT User manual

Kenwood DP-M993 User manual

Kenwood

Kenwood DP-M993 User manual

Kenwood DP-R797 User manual

Kenwood

Kenwood DP-R797 User manual

Kenwood DP-R6080 User manual

Kenwood

Kenwood DP-R6080 User manual

Kenwood KDC-CX85 User manual

Kenwood

Kenwood KDC-CX85 User manual

Kenwood DPC-472 User manual

Kenwood

Kenwood DPC-472 User manual

Kenwood CD-223M User manual

Kenwood

Kenwood CD-223M User manual

Kenwood DP-R4440 User manual

Kenwood

Kenwood DP-R4440 User manual

Kenwood CD-2260M User manual

Kenwood

Kenwood CD-2260M User manual

Kenwood DV-5050M User manual

Kenwood

Kenwood DV-5050M User manual

Kenwood KDC-C715 User manual

Kenwood

Kenwood KDC-C715 User manual

Kenwood LVD-300 User manual

Kenwood

Kenwood LVD-300 User manual

Kenwood LVD-320 User manual

Kenwood

Kenwood LVD-320 User manual

Popular CD Player manuals by other brands

Samsung yePP MCD-CM150 Manuel d'instructions

Samsung

Samsung yePP MCD-CM150 Manuel d'instructions

Sony DVP-FX705 - Portable Dvd Player operating instructions

Sony

Sony DVP-FX705 - Portable Dvd Player operating instructions

Sony CFD-RS60CP Service manual

Sony

Sony CFD-RS60CP Service manual

Coby Sports CX-CD565 Specifications

Coby

Coby Sports CX-CD565 Specifications

Sony CD Walkman D-EJ2000 Specification sheet

Sony

Sony CD Walkman D-EJ2000 Specification sheet

Roberts CD965 manual

Roberts

Roberts CD965 manual

JVC RC-BX75VSL instructions

JVC

JVC RC-BX75VSL instructions

Sony CFD-F10 - Cd Radio Cassette-corder Specifications

Sony

Sony CFD-F10 - Cd Radio Cassette-corder Specifications

Marantz SA-7S1 Specifications

Marantz

Marantz SA-7S1 Specifications

Philips CDC771V user manual

Philips

Philips CDC771V user manual

Sony CDP-991 operating instructions

Sony

Sony CDP-991 operating instructions

Philips AZT9500 Specifications

Philips

Philips AZT9500 Specifications

Pioneer DEH-P700R Service manual

Pioneer

Pioneer DEH-P700R Service manual

Philips AZ9202/05 user manual

Philips

Philips AZ9202/05 user manual

Philips AZ216 user manual

Philips

Philips AZ216 user manual

Audiolab 8000CD User instructions

Audiolab

Audiolab 8000CD User instructions

Philips Soundmachine AZB500/79 user manual

Philips

Philips Soundmachine AZB500/79 user manual

Sharp MD-S301MK Service manual

Sharp

Sharp MD-S301MK Service manual

manuals.online logo
manuals.online logoBrands
  • About & Mission
  • Contact us
  • Privacy Policy
  • Terms and Conditions

Copyright 2025 Manuals.Online. All Rights Reserved.