manuals.online logo
Brands
  1. Home
  2. •
  3. Brands
  4. •
  5. Kenwood
  6. •
  7. CD Player
  8. •
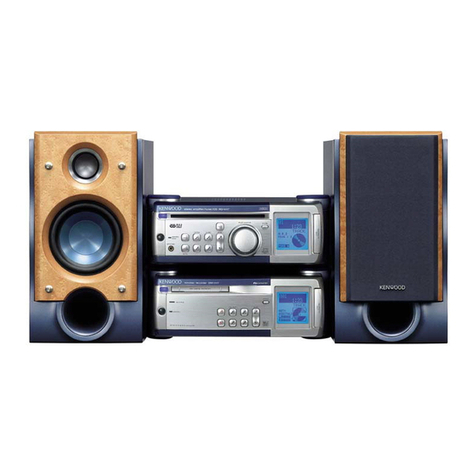
  9. Kenwood DP-M5570 User manual

Kenwood DP-M5570 User manual

Other manuals for DP-M5570

2

This manual suits for next models

1

Other Kenwood CD Player manuals

Kenwood DPX513WBT User manual

Kenwood

Kenwood DPX513WBT User manual

Kenwood KDC-C715 User manual

Kenwood

Kenwood KDC-C715 User manual

Kenwood KDC-C64FM User manual

Kenwood

Kenwood KDC-C64FM User manual

Kenwood DV-5050M User manual

Kenwood

Kenwood DV-5050M User manual

Kenwood LVD-300 User manual

Kenwood

Kenwood LVD-300 User manual

Kenwood DPC-361 User manual

Kenwood

Kenwood DPC-361 User manual

Kenwood KDC-C711 User manual

Kenwood

Kenwood KDC-C711 User manual

Kenwood DP-860 User manual

Kenwood

Kenwood DP-860 User manual

Kenwood KDC-C469FM User manual

Kenwood

Kenwood KDC-C469FM User manual

Kenwood LVD-700 User manual

Kenwood

Kenwood LVD-700 User manual

Kenwood MS-A5 User manual

Kenwood

Kenwood MS-A5 User manual

Kenwood DVF-9010 User manual

Kenwood

Kenwood DVF-9010 User manual

Kenwood LVD-K9200 User manual

Kenwood

Kenwood LVD-K9200 User manual

Kenwood DP-M5570 User manual

Kenwood

Kenwood DP-M5570 User manual

Kenwood CD-406 User manual

Kenwood

Kenwood CD-406 User manual

Kenwood DPC-42 User manual

Kenwood

Kenwood DPC-42 User manual

Kenwood CD-423M-S User manual

Kenwood

Kenwood CD-423M-S User manual

Kenwood CD-3280M User manual

Kenwood

Kenwood CD-3280M User manual

Kenwood DP-2040 User manual

Kenwood

Kenwood DP-2040 User manual

Kenwood DPC-7 User manual

Kenwood

Kenwood DPC-7 User manual

Kenwood DP-R797 User manual

Kenwood

Kenwood DP-R797 User manual

Kenwood DP-R5070 User manual

Kenwood

Kenwood DP-R5070 User manual

Kenwood DP-M960 User manual

Kenwood

Kenwood DP-M960 User manual

Kenwood DV-5050M User manual

Kenwood

Kenwood DV-5050M User manual

Popular CD Player manuals by other brands

Arcam CD23 Handbook

Arcam

Arcam CD23 Handbook

Sanyo MCD-Z1F Service manual

Sanyo

Sanyo MCD-Z1F Service manual

JVC RC-ST3SL instructions

JVC

JVC RC-ST3SL instructions

Technics SL-P9066 operating instructions

Technics

Technics SL-P9066 operating instructions

Marantz HD-CD1 quick start guide

Marantz

Marantz HD-CD1 quick start guide

Sony DVP-FX850 Service manual

Sony

Sony DVP-FX850 Service manual

Philips AZ1140 Instrukcja obs?ugi

Philips

Philips AZ1140 Instrukcja obs?ugi

Alpine 7909 owner's manual

Alpine

Alpine 7909 owner's manual

JVC CH-X350 instructions

JVC

JVC CH-X350 instructions

RCA RP-7923 instruction manual

RCA

RCA RP-7923 instruction manual

Pioneer DEH-P3550MP XM Operation manual

Pioneer

Pioneer DEH-P3550MP XM Operation manual

Philips Shockproof AX2102 brochure

Philips

Philips Shockproof AX2102 brochure

Philips CD582 user manual

Philips

Philips CD582 user manual

Philips AZ 6821 operating manual

Philips

Philips AZ 6821 operating manual

Lasonic MSU-2020 user manual

Lasonic

Lasonic MSU-2020 user manual

Denon DCD-1420 Service manual

Denon

Denon DCD-1420 Service manual

Panasonic SJ-MR100 operating instructions

Panasonic

Panasonic SJ-MR100 operating instructions

Onkyo DX-7210 instruction manual

Onkyo

Onkyo DX-7210 instruction manual

manuals.online logo
manuals.online logoBrands
  • About & Mission
  • Contact us
  • Privacy Policy
  • Terms and Conditions

Copyright 2025 Manuals.Online. All Rights Reserved.

CD
PLAYER
DP-M5570
DP-M3370
Se
INSTRUCTION
MANUAL
KENWOOD
CORPORATION
For
Europe
and
U.K.
C €
NOTICE
This
instruction
manual
is
used
for
two
models,
Madei
availability
and
features
This
(these}
equipment(s)
is
{are}
in
confar-
mity
with
the
provision
of
EMC
Directive,
B9/336/EEC,
92/31/EEC
and
93/68/EEC.
(functions)
may
differ
depencing
on
the
country
and
sales
area.
For
your
records
Record
the
serial
number,
found
on
the
back
of
the
unit,
in
the
spaces
designated
on
the
warranty
card,
and
in
the
space
provided
below.
Refer
to
the
mcdel
and
serial
numbers
whenever
you
call
upon
your
dealer
for
information
or
service
on
this
product.
Model.
Serial
Number
Unpacking
Unpack
the
unit
carefully
and
make
sure
that
all
accessories
are
put
aside
so
they
will
not
be
lost.
Examine
the
unit
for
any
possibility
of
shipping
damage.
If
your
unit
is
damaged
or
fails
to
operate,
notify
your
dealer
immediately.
If
your
unit
was
shipped
to
you
directly,
notify
the
shipping
company
without
delay,
Only
the
consignee
(the
person
or
company
receiving
the
unit}
can
file
a
claim
against
the
carrier
for
shipping
damage.
We
recommend
that
you
retain
the
original
carton
and
packing
materials
for
use
should
you
transport
or
ship
the
unit
in
the
future.
Accessories
POUCH
CON
eo
ie
acadecrerdieieesewectendine
tees
(OP-M5570
only)
Remote
control
unit
SYSTEM
CONEOl
COM
ee
eeseeseeneseeneresseseeenee
Batteries
(R6/AA)
Dist
Magazine
........cscsssessesersceessesessareesesanaes
(With
6
disc
trays)
AC
plug
adaptor
(Except
for
U.S.A.,
Canada,
Australia,
U.K.
and
Europe.)
Contents
Caution:
Read
the
pages
marked
A,
carefully
to
ensure
safe
operation.
Special
features
Program
playback
/\Before
applying
power
Playing
desired
tracks
in
/\Safety
precautions
desired
order
(PGM
mode}
System
connections
Repeated
playback
Controls
and
indicators
Random
playback
Operation
of
remote
Playing
tracks
in
a
random
order...
13
control
unit
(DP-M5570
only}
EOUAG
Siccnvuzpinieadsalteacttedesanales
14
Before
playing
CDs
To
edit
a
disc
Loading
a
disc
into
the
magazine..
6
Timer
operations
Loading
a
magazine
Maintenance
Normal
playback
In
case
of
difficulty
Playing
a
CD
from
the
begining
....
8
Specifications
Listening
from
the
desired
track...
9
GOO/AN>AD
B60-1927-00
(SID
(K,
P,
M,
X,
Y,
E,
T,
G)
|
AP}
Special
features
Utilizing
a
mechanism
with
a
magazine
that
can
accommodate
6
discs
+
1
CISC
tray
........:.cssseeeeeceveeceee
reece
eeeeeceeee
ee
The
CD
player
changer
can
playback
7
discs
in
succession.
PROGMAIN
DIG
VOAGIC
xs
cececrcceccccecdecscese
guns
saccnensubedvssesnnereass
vemeeeeenssecsactos
The
program
mode
allows
you
to
play
desired
tracks
of
7
dises
in
the
order
you
want
to
listen
to.
A
maximum
of
20
selections
can
be
entered
in
memory.
{Refer
to
page
10.}
EDIT.
Tei
Chia
-sciiiiistcnscawsistideaiisavccacecnacitevanicustetvectanctedessessvsetwaasenndens
When
recording
tunes
from
one
or
more
CDs
onto
a
tape,
this
function
edits
the
tunes
to
ensure
that
the
tunes
fit
within
the
specified
tape
length
and
that
the
last
tune
on
either
side
does
not
get
cut
off
in
the
middle.
(Refer
to
page
14.)
FeariGortt
Playback
sssiwsieisvecccesiussensensana
raisins
tcvontvevsvivetsasneeownvseneeeseesess
Random
playback
function
that
automatically
selects
disc
No.
and
track
No.
(Refer
to
page
13.)
Before
applying
power
A
Caution:
Read
this
section
carefully
to
ensure
safe
operation.
Units
are
designed
for
operation
as
follows.
*
AC
voltage
selection
U.S.A.
and
CAAA
weiseccsiscdsccsasteesteenenseneseecendetss
120
V
only
The
AC voltage
selector
switch
on
the
rear
panel
is
set
to
the
voltage
PSE
OLB
iis
scuaniieosssnseuiaivedcacndehanasuctataveiervenatesvaries
240
V
only
that
prevails
in
the
area
to
which
the
unit
is
shipped.
Before
Europe
amd
U.K.
........ccesseccsssssessneseaeersnnersszeseres
2G
V
only
connecting
the
power
cord
to
your
AC
outlet,
make
sure
that
the
*
Other
countries
...............
110-120
/
220-240
V
switchable
setting
position
of
this
switch
matches
your
line
voltage.
If
not,
it
must
be
set
to
your
voltage
in
accordance
with
the
following
direction.
For
the
United
Kingdom
AC
voitage
selector
switch
Factory
fitted
moulded
mains
plug
1.
The
mains
plug
contains
a
fuse.
For
replacement,
use
only
a
13-Amp
ASTA-approved
(BS1362)
fuse.
2.
The
fuse
cover
must
be
refitted
when
replacing
the
fuse
in
the
moulded
plug.
3.
Bo
not
cut
off
the
mains
plug
fram
this
equipment.
If
the
plug
fitted
is
not
suitable
for
the
power
points
in
your
home,
or
the
cable
is
too
short
to
reach
a
power
point,
then
obtain
an
appropriate
safety
approved
extension
lead
or
adaptor,
or
consult
your
dealer.
If
nonetheless
the
mains
plug
is
cut
off,
remove
the
fuse
and
dispose
of
the
plug
immediately,
to
avoid
a
possible
shock
hazard
by
inadvertent
connection
to
the
mains
supply.
AGTIONIZOV-
«»
ACZ2O-240V-
IMPORTANT
The
wires
in
tha
mains
lead
are
coloured
in
accordance
with
the
following
code.
Blue
:
Neutral
Brown
:
Live
Do
not
connect
those
leads
to
the
earth
terminal
of
a
three-pin
plug.
Move
switch
lever
to
match
your
line
voltage
with
a
small
screwdriver
or
other
pointed
tool.
Note:
———
ia
—_—
_—_————
Our
warranty
does
not
cover
damage
caused
by
excessive
line
voltage
due
to
improper
setting
of
the
AC
voltage
selector
switch.
AY
Caution:
Read
this
section
carefully
to
ensure
safe
operation.
Safety
precautions
WARNING:
To
PREVENT
FIRE
OR
ELECTRIC
SHOCK,
DO
NOT
EXPOSE
THIS
APPLIANCE
TO
RAIN
OR
MOISTURE.
CAUTION:
TO
REDUCE
THE
RISK
GF
ELECTRIC
SHOCK,
DO
NOT
REMOVE
COVER
(OR
BACK),
NO
USER-SERVICEABLE
PARTS
INSIDE,
REFER
SER-
VICING
TO
QUALIFIED
SERVICE
PERSONNEL.
CAUTION
AISK
OF
ELECTRIC
SHOCK
BO
NOT
OPEN
THE
LIGHTNING
FLASH
WITH
ARROWHEAD
SYMBOL,
WITHIN
AN
EQUILATERAL
TRIANGLE,
IS
INTENDED
TO
ALERT
THE
USER
TO
THE
PRESENCE
OF
UNINSULATED
“DANGEROUS
VOL-
TAGE”
WITHIN
THE
PRODUCT'S
ENCLOSURE
THAT
MAY
BE
OF
SUFFICIENT
MAGNITUDE
TO
CONSTITUTE
A
RISK
OF
ELECTRIC
SHOCK
TO
PERSONS.
THE
EXCLAMATION
POINT
WITHIN
AN
EQUILATERAL
TRIANGLE
IS
INTENDED
TO
ALERT
THE
USER
TO
THE
PRESENCE
OF
IMPORTANT
OPERATING
AND
MAINTENANCE
(SERVICING)
IN-
STRUCTIONS
IN
THE
LITERATURE
ACCOMPANYING
THE
APPLIANCE,
|
2
DP-M5570/DP-M3370
(En)
System
connections
Make
connections
as
shown
below.
When
connecting
the
related
system
components,
refer
also
to
the
instruction
manuals
of
the
related
components.
Do
not
plug
in
the
power
lead
until
all
connections
are
completed.
Malfunction
of
microcomputer
If
operation
is
not
possible
or
erroneous
display
appears
even
though
all
connections
have
been
made
properly,
reset
the
microcomputer
referring
to
“In
case
of
difficulty’.
(Refer
to
page
18.)
Cassette
deck
System
control
cord
To
AC
outlet
System
contro!
cord
Amplifier
or
Receiver
Audio
cord
System
control
connection
When
connected
to
an
amplifier
having
KENWOOD
SYSTEM
CONTROL
terminals,
system
operation
such
as
remote
control
is
made
possible,
For
details,
refer
to
the
instruction
manual
of
the
amplifier
or
receiver.
lf
your
amplifier
or
receiver
is
not
equipped
with
the
SYSTEM
CONTROL
terminals,
do
not
connect
anything
to
any
SYSTEM
CONTROL
terminal.
One
System
control
cord
is
supplied
with
this
unit.
a
,
;
Do
not
connect
the
unit
in
any
system
configuration
other
than
When
connecting
more
than
cne
component
for
System
contro!
specified,
Operation,
use
the
System
control
cords
provided
with
the
other
components.
CCRS
By
connecting
the
SYSTEM
CONTROL
terminal
of
this
unit
with
the
“CXS!”
SYSTEM
CONTROL
terminal
of
a
KENWOOD
cassette
deck,
CCRS
recording
can
be
carried
out.
:
The
CCRS
function
is
used
when
recording
from
a
CD
to
a
tape
ina
e
Be
sure
to
insert
the
system
contro!
cord
plugs
fully
into
the
cassette
deck,
and
operates
to
adjust
the
cassette
deck’s
recording
SYSTEM
CONTROL
terminals.
level
to
the
optimum
setting
according
to
the
playing
level
of
the
CD,
e
If
the
system
control
cord
and
audio
cords
are
not
connected
For
details
on
the
CCRS
function,
refer
to
the
instruction
manual
properly,
the
automatic
system
governing
remote
contro!
and
provided
with
your
cassette
deck.
system
functions
will
not
operate.
Notes:
1.
Connect
all
cords
firmly.
lf
connections
are
loose,
there
could
be
Joss
of
sound
or
noise
produced.
2.
When
plugging
and
unplugging
connection
cords,
be
sure
to
first
remove
the
power
cord
from
the
AC
outlet.
Plugging/unplugging
connection
cords
without
removal
of
the
power
cord
can
cause
malfunctions
ar
damage
to
the
unit.
DP-MS570/DP-M3370
‘Eni
3
Controls
and
indicators
(0
aS
I
a
a
GN
ee
Disc
No.
indicator
Program
Check
indicator
Program
indicator
TRACK
No.
|
Time
al
program
No.
Disc
indicators
indicator
SINGLE
time
TOTAL
time
ANDOM
indicators
ONE
«>»
ALL)
EDIT
indicators
Play
indicator
Music
calendar
(1~20)
POWER
switch
PHONES
jack
|
:
PHONES
LEVEL
;
contro
DP-M5570
only
£
ee
oe
ee
reaps
ewes
ely
I
I
'
I
i]
r
I
F
t
Pause
indicator
REPEAT
indicator
Remote
sensor
Disc
selector
keys
DP-IM5570
only
(PI),
DiS¢
1~BiSC6))
PLAY/PAUSE
key
[>
si]
)
Magazine
insertion
slot
Tan)
key
tr]
:
Cope
rere
rere
rs
betes
4
:
‘Cl
Di
ris)
eye
ir
Lae
Tis
Tee
}
eee
ee
eee
i
ee
eee
el
deer
eee
:
Skip
keys
Plus-1
disc
tray
OPEN/CLOSE
key
——
(i)
}
(
<]
Pi)
)
EJECT
key
Numeric
keys
(4
}
(fil~[20/0))
Search
keys
{<i
,
[e]
}
CHECK
key
i
ci
Ammer
a9
afin
CLEAR
key
7
oo
fo
DIN-7
EDIT-2
RANDOM
E
EDIT-1
key
——€__)
(_
=}
RANDOM
play
key
#10
=TIME
DISP.;
REPEAT
key
__C)
Ci
REPEAT
key
TIME
DISP.
key
EDIT-2
key
4
DP-M5570/DP-M3370
(En)
OPEN/CLOSE
key
Disc
selector
key
‘at
aad
keys
Plus-1
disc
{P}
P.MODE
key
CLEAR
key
*
ae
ca
umeric
keys
[+10]
CHECK
key
TIME
DISP.
key
Skip
keys
REPEAT
key
Play/Pause
key
RANDOM
key
Stop
key
Search
keys
dialing
UNIT
Model:
RC-P0702
Infrared
control
system
The
operations
of
each
are
the
same
as
those
of
the
keys
in
the
unit.
M
Loading
batteries
M@
Operation
procedure
Remove
the
cover.
Operating
range
Leu
Remote
control
light
sensor
insert
batteries.
@
Insert
two
(R6/AA)
size
batteries
as
indicated
by
the
polarity
Approx.
operating
range
marking.
Close
the
cover.
@
When
two
operation
keys
on
the
remote
control
unit
are
pressed
successively,
press
each
kay
securely
reserving
an
interval
of
more
than
1
sécond
for
each
press.
Notes:
1.
The
supplied
batteries
are
intended
for
use
in
operation
checks.
Therefore,
their
lives
may
be
shorter
than
ordinary
batteries.
2.
When
the
remote-controjlable
distance
gets
shorter
than
before,
replace
bath
batteries
with
new
ones.
3.
Malfunction
may
occur
if
direct
sunlight
or
the
light
of
a
high-frequency
lighting
fluorescent
lamp
enters
the
remote
control
light
sensor.
In
such
a
case,
change
the
system
installation
position
to
prevent
the
malfunction.
DP-MS570/DP-M3370
(En)
9
Before
playing
CDs
M
Loading
a
disc
into
the
magazine
1
Pull
out
the
disc
tray.
@
While
pressing
in
on
the
lock
button
@
Pull
cut
the
disc
tray.
Magazine
Grooves
Label
side
e
Commercially-available
CD
single
(8
cm)
disc
adapters
cannot
Disc
tray
be
usedin
this
systern.
To
play
CD
single
(8
cm)
discs,
use
the
optional
CDM-608
CD
single
magazine.
3
Insert
the
disc
tray
into
the
magazine.
Grooves
Magazine
Magazine
Disc
No.6
Disc
No.1
:
Disc
tray
Disc
tray
@
Be
sure
to
place
each
disc
ona
disc
tray
before
inserting
into
the
magazine.
@
Even
when
loading
fewer
than
six
discs,
make
sure
there
Align
the
tray
with
the
corresponding
left
and
right
graoves
and
are
six
disc
trays
inserted
in
the
magazine
during
use.
insert
horizontally
into
the
magazine.
@
Always
hold
the
magazine
level
when
carrying.
How
to
Use
Labels
ot
eee
Labeling
example:
in
me
¢
Sore
A:
Title
of
magazine
6
DpP-M5570/DP-M3370
(En)
Magazine
insertion
siot
EJECT
key
POWER
switch
Plus-1
dise
tray
OPEN/CLOSE
key
Mm
Loading
a
magazine
m@
Removing
a
magazine
1
Press
the
POWER
key
to
ON.
z=
1
Press
the
POWER
key
to
ON.
POWER
Pons
2
Insert
the
magazine.
2?
Remove
the
magazine.
@
Press
the
eject
key.
Magazine
Hold
the
magazine
in
the
center.
@
OQOpenthe
plus-1
disc
tray.
@)
Place
a
disc
on
the
tray.
@
Close
the
plus-1
disc
tray.
Label
side
Groove
for
CD
singles
Plus-1
dise
tray
DP-MSS70/DP-M3370
(En)
7
Magazine
insertion
slot
Disc
selector
keys
(Fi
GSt
7
~
BSc
4)
PHONES
LEVEL
control
PHONES
jack
:
eo
pepe
ata
Plus-1
disc
tray
STOP
key
PLAY/PAUSE
key
—
Playing
a
CD
from
the
beginning
1
Place
a
disc
in
the
magazine
or
on
the
plus-1
All
disc
indicators
light
regardless
of
disc
tray.
how
many
discs
are
in
the
magazine.
(Refer
to
pages
6,
7.)
Plus-1
disc
If
there
is
no
disc
in
the
selected
disc
tray,
Start
playback.
the
corresponding
indicator
goes
out.
Select
the
desired
disc.
Disc
No.
Elapsed
time
Lights
up,
@
Playback
starts
from
the
selected
disc.
If
two
or
more
discs
are
loaded,
the
discs
are
played
in
order
of
their
disc
numbers.
@
|f
the
play
key
is
pressed
without
selecting
a
disc,
the
discs
will
be
played
automatically
in
the
following
order:
P
+1+2
+3-+4
+56.
(P:
Plus-1
disc
tray)
@
To
play
a
single
disc
anly,
remove
the
magazine
and
place
a
disc
only
in
the
plus-1
disc
tray.
To
pause
playback
|
|
To
stop
playback
PLAY/PAUSE
Lights
up.
To
resume
playback,
press
the
key
again.
ee
the
headphone
plug
into
the
headphones
?
Adjust
the
volume.
TC
LEVEL
MIN
Ove
{commercially-available}
B
pp-45570/DP-M3370
{En)
TIME
DISP.
key
Disc
selector
keys
(2).
Bist
~BSsc
&)
P.MODE
key
(iF
}
Mm
Listening
from
the
desired
track
Make
surethe
indicator
is
extinguished.
PO)
indicator
goes
off.
@
if
the
[PGM]
indicator
is
lighted,
press
the
[P.MODE]
key.
Select
the
desired
disc.
3
Select
the
desired
track.
Main
unit
Ramote
contro!
unit
{(DP-M5570
only}
ooo
ooo
Ca
P2z
tsa
pee)
se
ts
a 8
(a3
baz
Dis
ba
Ds
Die
1
te
te
te
2075)
4
Examples
of
input
Track
No.
7:
Track
No.
11;
G10]
[1]
Track
No.
20:
[o]
Examples
of
input
Track
No,
11:
——s
Track
No.
21:
Gl
Track
No.
30:
e
Play
starts
from
the
selected
tune
and
after.
TIME
DISPLAY
Numeric
keys
Search
ke
(
i],
}
To
skip
tracks
@
The
tunes
are
skipped
in
the
cirection
of
the
key
and
the
play
starts
at
the
beginning
of
the
selected
tune.
@
When
the
[Iai]
key
is
pressed
once
during
play,
the
track
starts
again
from
the
beginning.
(If
pressed
again,
the
play
position
returns
to
the
preceding
track.)
To
fast
forward
and
backward
Fast-reverse
Cax
T
Fast-fonvard
Pa
n
@
The
track
will
start
to
play
from
where
you
release
the
key.
Press
the
[IME
DISP]
key
when
you
want
to
check
the
elapsed
time
and
remaining
time
of
the
track
being
playec.
Every
time
the
key
is
pressed,
the
displayed
time
changes
as
shown
below.
The
time
information
display
may
not
appear
when
playing
a
CD
containing
21
or
more
tracks.
In
such
a
case,
the
display
(remaining
SINGLE
TIM
E)
will
show
“
SINGLE/TOTAL
TIME
display
SINGLE
TIME
TOTAL
THE
Elapsed
time
TME
ai
-LI
of
the
track
ft
5
a,
being
played
Ss
8
fF
8
f&
10
TIME
DISP.
anicie
Time
display
examples
......cuieeren
ren
129
———
"
(However,
only
the
SINGLE
TIME
can
be
displayed
during
random
playback
and
program
playback.)
TOTAL
TIME
Remaining
time
of
the
whole
CD
SINGLE
TIME
TOTAL
TIME
Remaining
time
of
the
track
being
played
OP-MESTO/DP-M3370
En
9
Program
playback
Disc
selector
keys
P.MODE
key
CHECK
key
The
program
mode
allows
you
to
play
desired
tracks
of
sae
i
ied
(PF).
DSC
7
~DISt
8)
CLEAR
kay
7
dises
in
the
order
you
want
to
listen
to.
A
maximum
of
20
selections
can
be
entered
in
memory.
(EB
Se
no
:
a
a
ae.
Teeter
e
ene
Se
ee
2
2,
cme
tne
fe
we
wee
eee
eee
OP
k
Numeric
kays
>
“°Y
PLAY/PAUSE
key
M
Playing
desired
tracks
in
desired
order
(PGM
mode)
1
Enter
the
PGM
mode.
To
check
the
programmed
order
=
[F.C]
indicator
tights
up.
Press
the
key.
indicator
lights
up.
@
Every
time
the
GAECER]
key
is
pressed,
the
track
No.,
DISC
No.
and
the
order
it
was
programmed
{P-No.)
are
displayed
in
the
order
of
programming.
@
The
previous
display
will
resume
in
a
few
seconds,
Program
desired
tracks
in
desired
order.
Example
To
select
track
no.5
on
disc
4:
@®
Select
the
disc.
f
To
resume
normal
playback
POM)
indicator
goes
off.
@
Select
the
track.
@
The
playback
in
the
order
of
the
track
Nos.
on
CD
will
start
after
@
Repeat
steps
T
and
@
to
program
up
to
20
tracks,
After
the
track
being
played.
21
or
more
tracks
are
selected,
"-
-P---—"
is
displayed.
To
program
all
tracks
on
a
disc:
Omit
step
2-2.
@
|f
more
than
eight
seconds
elapse
before
praceecing
to
step
2-2,
all
tracks
on
the
selected
disc
will
be
pro-
grammed.
If
you
make
a
mistake
during
entry:
Pressthe
(CLEAR!
key
andre-enterthe
correct
number.
Start
playback.
PLAY/PAUSE
@
Tracks
are
played
in
the
order
they
are
programmed
(P-No.}.
@
If
one
of
the
skip
keys
(
fie]
or
[Re]
)
is
pressed
during
programmed
playback,
the
track
being
played
!s
skipped
in
the
forward
or
reverse
direction.
Note:
lf
the
magazine
does
not
contain
a
disc
corresponding
to
the
disc
No.
selected
in
step
2-(D,
the
disc
and
track
are
programmed
but
cancelled
at
the
time
of
playback.
90
penissz0/pP-m3970
(En)