Selecting
Entering Scan Mode Viewing the Results Switching to Track
Searching Tracking
If you have shot multiple
XTN’s or if you are unsure
of the XTN number, use
Scan mode to view all the
enabled XTN’s within range.
Press the Scan button, the
display will appear as shown
above.
The Tracker will scan for
each XTN type, starting with
To switch to tracking mode,
press the Track button
repeatedly until the cursor is
over the desired number and
then press the SEL button.
If no active XTN tracking
nocks are within range then
move as necessary to get
within range.
To stop scanning, press
Stop.
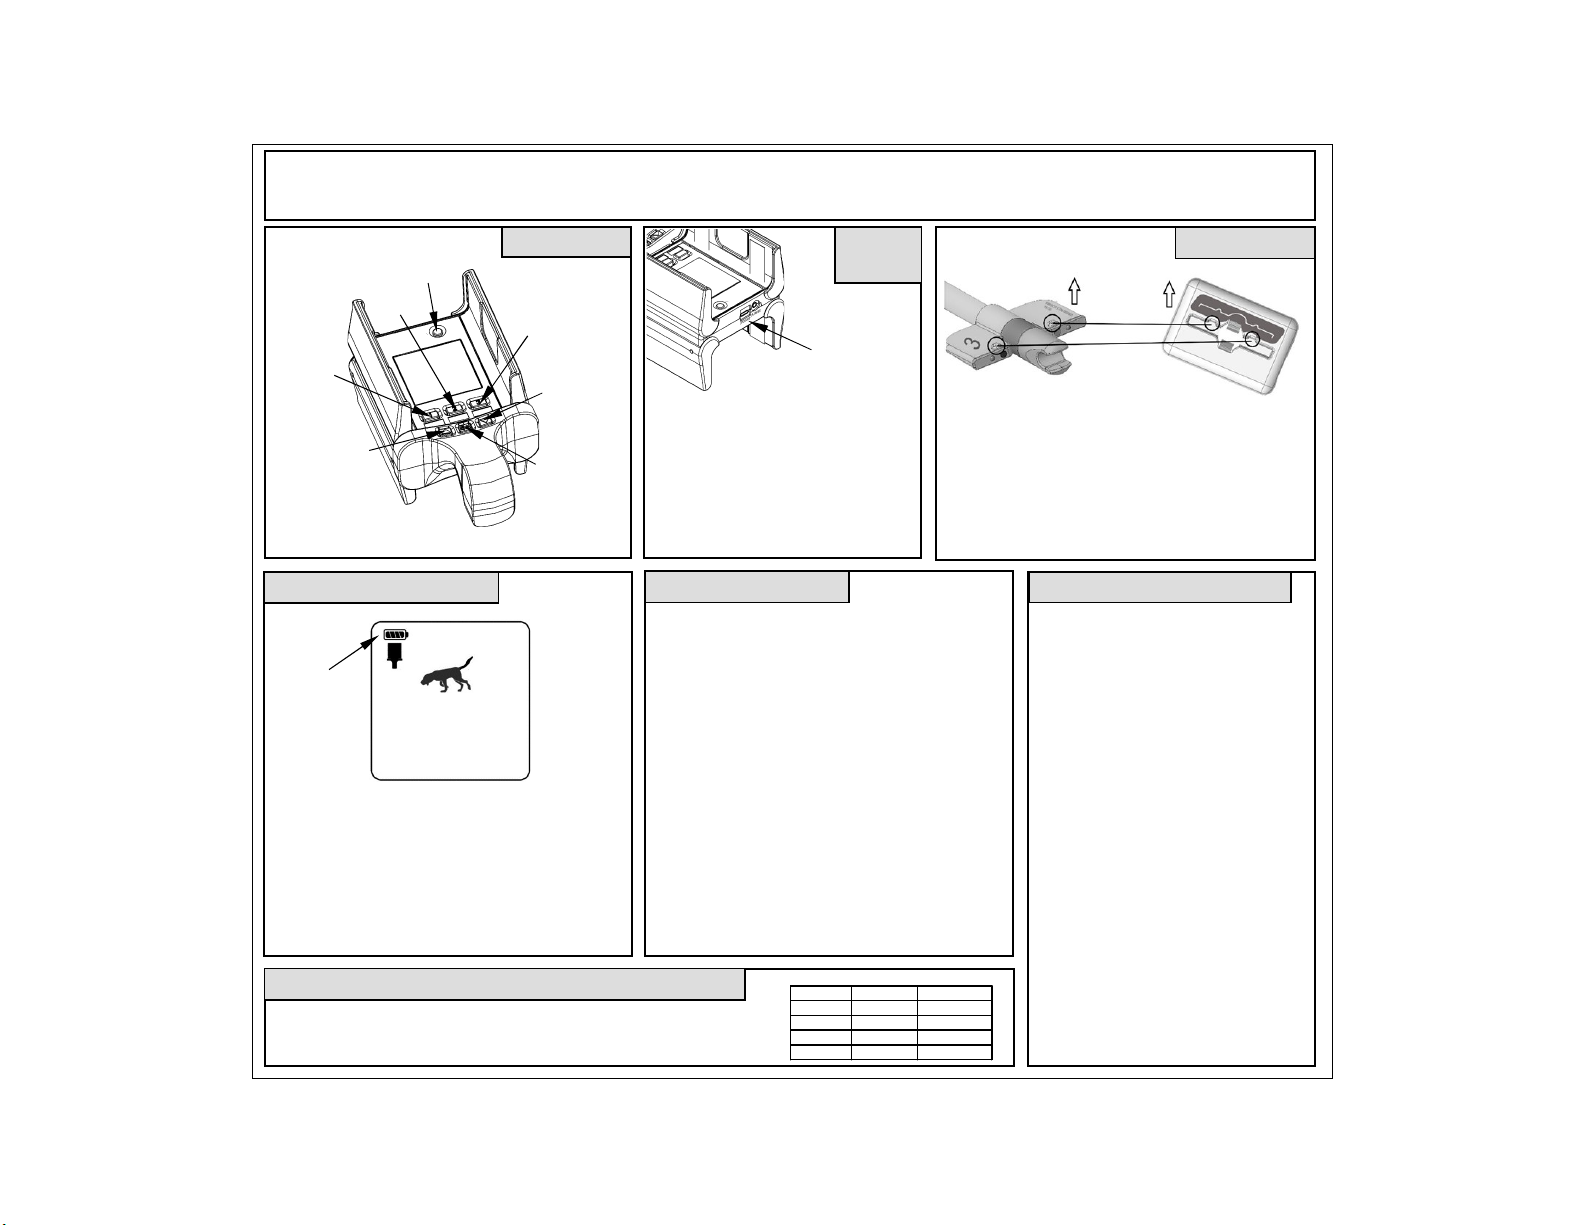
est Mode / Canceling Transmit
You may activate the XTN to practice tracking without
shooting the arrow. Hold the magnet at the junction of the
shaft and the plastic wings while inserting and removing the
XTN from the charging adapter – then remove the magnet.
To stop the XTN from transmitting in test or normal shooting
mode, hold the magnet over the XTN for 2 seconds.
A short press of the Tracker’s “sun” button will switch the
display backlights on and off for viewing in reduced light.
A short press of the Tracker’s “speaker” button will activate
sounds. When tracking, you will hear 1 beep when far from
the XTN, 2 when closer and 3 beeps when very close.
Kirsch LLC Toll Free: 800.970.8041
CustomerService@KirschHunting.com
www.KirschHunting.com
Copyright © 2020 Kirsch, LLC ALL RIGHTS RESERVED
Protected under the following US and Foreign Patents: US 8,821,325 US 6,788,199 US 7,148,801 CA 2438172
Once the XTN is within
range, the Tracker will show
the signal strength level,
XTN battery status and may
show a directional arrow.
Please refer to the tracking
tips here and in the manual.
To stop tracking, press Stop.
Once Tracking is started,
Searching will flash at the
top of the display.
If the selected XTN is not
within range then move as
necessary until Searching
disappears and tracking
starts.
To start Track mode, press
the Track button. All
enabled XTN numbers will
be shown.
Repeatedly press the Track
button until the cursor is
over the desired number and
then press the SEL button.
Always hold the Tracker in front of you, waist high
and level to the ground (display facing upwards).
Begin the search using the techniques that you normally
use (i.e. observing the direction of the game, following the
blood trail, etc.)
Use the signal strength indication (higher numbers =
closer) and directional arrow to lead you to the XTN.
If no directional arrow is shown then use the following
techniques:
If possible, move to a clear, unobstructed area away from
buildings, automobiles, hills, etc., higher ground is better.
Turn to face different directions with the handle of the
tracker held close to your body.
Once an arrow is shown, always point the Tracker in the
direction of the XTN while moving, not away from it.
If the arrow is lost or jumps in direction continue on in the
last known direction.
If no arrow is displayed, use the signal strength indication
in a “warmer/colder” fashion until the direction is shown.
The cursor will move to
each XTN type 1-6 and start
back at number 1 again.
As the scan progresses, each
XTN number found will be
shown on the display.
If more than one XTN is
found to be within range
then an will be shown
next to the one with the
highest signal level.