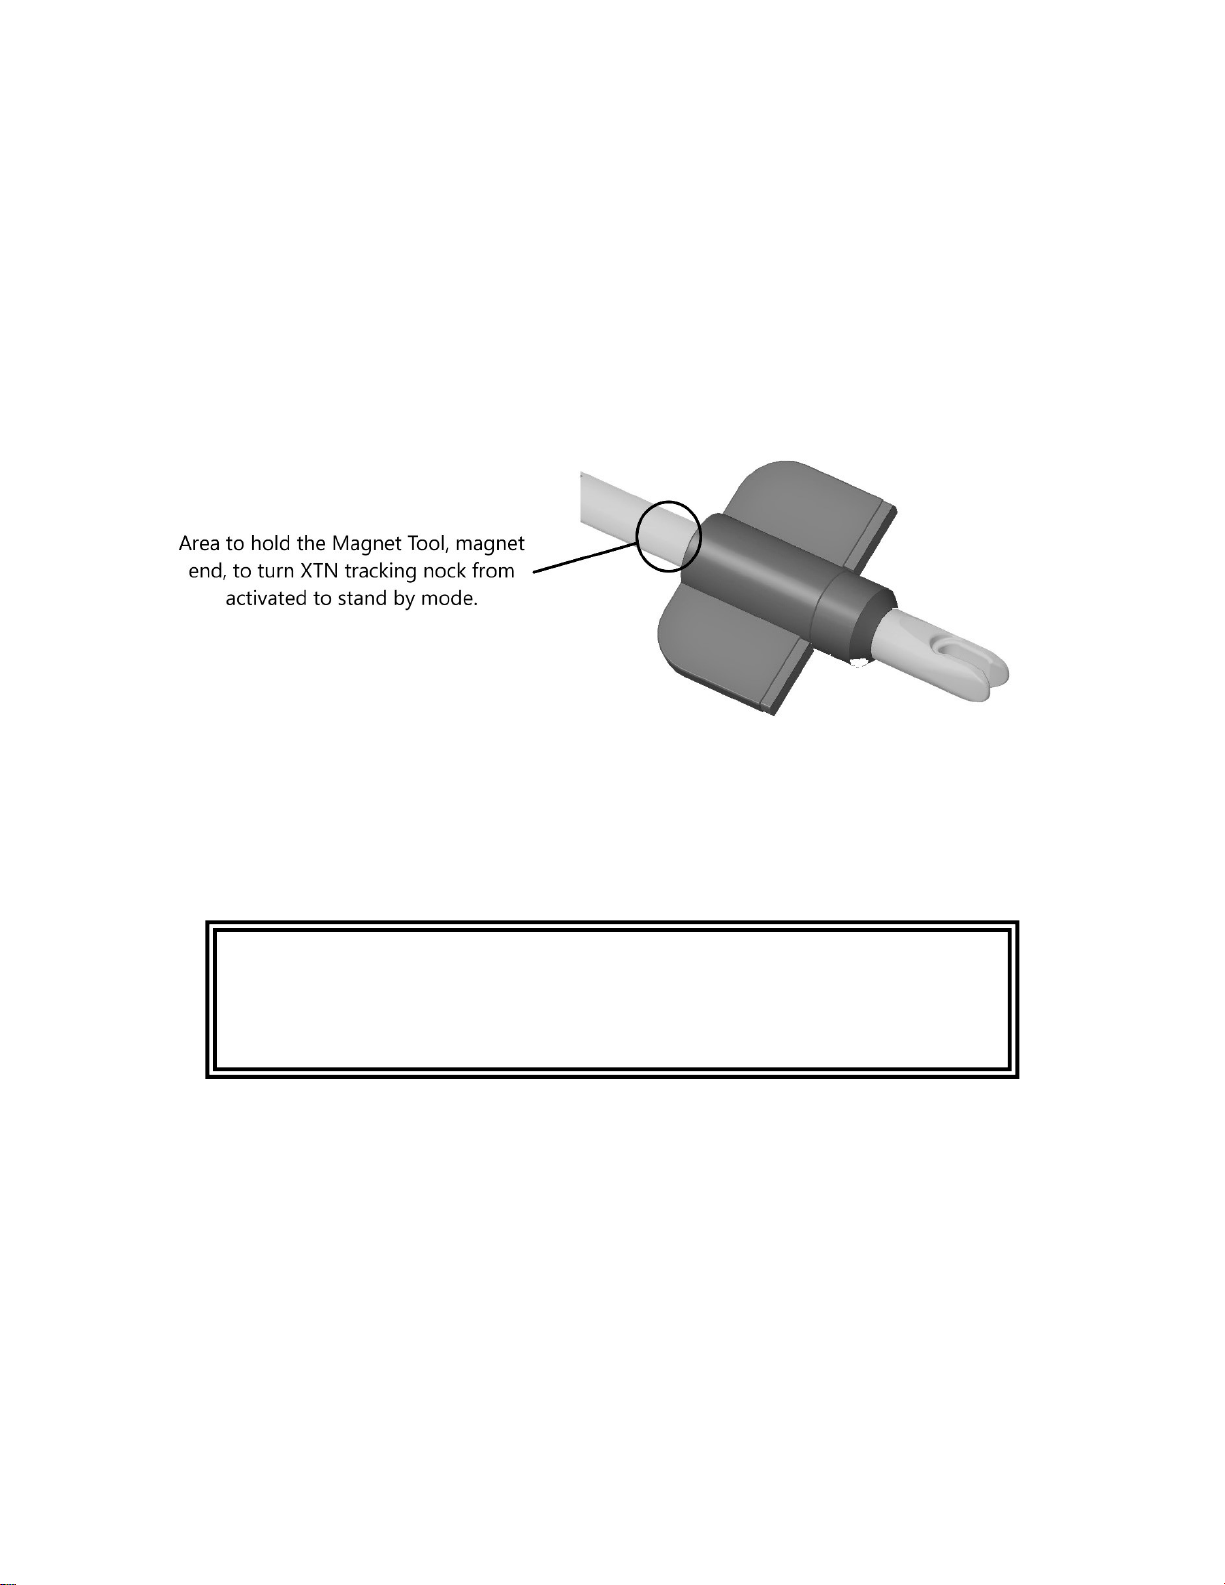
Bloodhound XTN Operating Instructions
5
Crossbow:
Component part number XTN-00007 flat pin nock
Component part number XTN-00008 half-moon pin nock
Component part number XTN-00009 capture pin nock
1. While rotating, press the pin nock onto the pin bushing until it is fully seated against
the base of the pin bushing.
2. Rotate the XTN wings so they are perpendicular to the index vane (odd colored
vane) of the bolt so the XTN wings float across (horizontal) the rail of the crossbow.
3. Rotate the pin nock to index it to the crossbow string and XTN wings. Be sure not to
rotate the wings from the prior arranged position.
CAUTION!
- Please note: pin nocks included in your kit are designed for use with their corresponding
weapon as described above. Do NOT use the designated compound bow pin nock in crossbows.
Crossbows increased acceleration requires the more robust designated crossbow pin nocks. Use
of the compound bow pin nock in a crossbow may result in personal injury and/or equipment
damage.
- Do NOT use this product if the XTN wing rear outside corners come in contact to the crossbow
string when the crossbow is cocked. If the nock wings touch the string this may result in
personal injury and/or equipment damage during firing of the crossbow.
- Do NOT glue pin nocks onto the pin bushing. Doing so may weaken the pin nock and result in
personal injury and/or equipment damage.
- Inspect pin nocks before EACH shot. Cracked, chipped, or loose-fitting pin nocks should be
discarded and replaced immediately. Failure to inspect and replace may result in personal injury
and/or equipment damage.
- Make sure usage of this product DOES NOT inactivate your crossbows anti dry fire feature (if
equipped with an anti-dry fire feature).
4) Activation.
WARNING! Seek expert advice for proper setup before using. Bow cables, cable rollers, bow riser,
arrow rest, and bow site clearance by the XTN tracking nock wings is required! If the XNT tracking
nock wings do not clear their entire travel path before exiting the front of the bow it may result in
personal injury and / or equipment damage.
The XTN Tracking Nock will automatically activate upon arrow / bolt launch because of the force that
activates a proprietary inertial switch built into the XTN. Upon string release two LED lights will light up
in the rear of the wings for 3 seconds letting you know the XTN is on and aiding you in seeing the flight