KRWX KERWAX REPLICA User manual

Operating Manual
Model KRWX-REP
TUBE LINE PREAMPLIFIER


KERWAX Replica – Operating Manual
3
TABLE OF CONTENTS
Safety Information......................................................... 4
General Information........................................................ 5
1. Introduction .......................................................... 7
1.1 About the Replica ..................................................... 7
1.2 A word from Christophe Chavanon ....................................... 7
2. Preparation ........................................................... 8
2.1 Contents of the Box ................................................... 8
2.2 Unboxing the Unit ..................................................... 8
2.3 Installation and Use .................................................. 9
2.4 First Operation ....................................................... 9
3. Names and Functions of Parts ......................................... 10
4. Using the Replica .................................................... 13
4.1 Making Connections ................................................... 13
4.2 Processing Features .................................................. 13
4.3 Signal Paths ......................................................... 14
4.4 Controls ............................................................. 16
4.5 Starting Point ....................................................... 17
4.6 Audio Processing ..................................................... 18
4.7 Replacing Vacuum Tubes ............................................... 19
5. Troubleshooting ...................................................... 20
6. Technical Specifications ............................................. 21
7. Recall Sheet ......................................................... 22
8. Warranty ............................................................. 23

KERWAX Replica – Operating Manual
4
SAFETY INFORMATION
NOTES, NOTICES AND CAUTIONS
i A note indicates important information that helps you make better use of
your equipment.
Ü A notice indicates potential damage to hardware and tells you how to avoid
the problem.
ê A CAUTION indicates a potential for property damage, personal injury or
death.
SAFETY PRECAUTIONS
ê SELECT THE RIGHT MAIN OPERATING VOLTAGE RANGE USING THE 115V/230V VOLTAGE
SELECTOR ON THE REAR PANEL BEFORE USING THE DEVICE.
ê THE DEVICE MUST BE CORRECTLY SET UP AND CONNECTED TO A GROUNDED ELECTRICAL
OUTLET.
ê ALWAYS USE THE CORRECT FUSE TYPE ACCORDING TO THE MAIN OPERATING VOLTAGE.
ê ALWAYS USE THE SAME FUSE CAPACITY FOR REPLACEMENT.
ê DO NOT OBSTRUCT VENTILATION SLOTS. THIS WOULD CAUSE OVERHEATING AND
IRREMEDIABLY DAMAGE THE DEVICE.
ê NEVER TRY TO OPEN THE PANELS WHEN DEVICE IS POWERED. LETHAL HIGH VOLTAGES
INSIDE COULD CAUSE ELECTRIC SHOCK.
ê DO NOT TRY TO REPAIR THE DEVICE BY YOURSELF. SHALL YOU ENCOUNTER HARDWARE
FAILURE, PLEASE CONTACT MULANN IMMEDIATELY IN ORDER TO TAKE APPROPRIATE
ACTION.
ê DO NOT LEAVE THE DEVICE UNATTENDED WHILE IN OPERATION.
ê NEVER OPERATE THE DEVICE NEITHER IN EXPLOSIVE NOR IN DUSTY ENVIRONMENT.
ê THE DEVICE MUST NOT BE USED EITHER OUTSIDE OR IN CONDENSING ENVIRONMENT.
ê ALWAYS KEEP THE DEVICE AWAY OF LIQUIDS AND LIQUID PROJECTIONS.

KERWAX Replica – Operating Manual
5
GENERAL INFORMATION
MANUFACTURING INFORMATION
This product is manufactured in France by MULANN.
Address: 9 rue Blaise Pascal
22300 Lannion, FRANCE
Telephone: +33 (0)2 96 14 16 59
E-mail: [email protected]
Website: www.mulann.com
CERTIFICATION INFORMATION
This product is CE certified (European Union).
RECYCLING INFORMATION
MULANN recommends that customers dispose of their used equipment hardware and
peripherals in an environmentally sound manner. Potential methods include
reuse of parts or whole products and recycling of products, components, and/or
materials.
Waste Electrical and Electronic Equipment (WEEE) Directive
In the European Union, this label indicates that this product should
not be disposed of with household waste.
It should be disposed at an appropriate facility to enable recovery
and recycling. For information on how to recycle this product
responsibly in your country, please contact your town hall or retailer.
This logo indicates that the transportation box is recyclable.
We recommend to save it for future uses such as moves or product
service.
COPYRIGHT INFORMATION
All information, texts and photos are the sole property of MULANN and cannot
be reproduced without prior written agreement. Informations provided are not
contractual and are subject to modification. Great care was taken during the
preparation of this Operating Manual, however, as we cannot guarantee its
accuracy, it should be used for reference only.
Trademarks used in this document are registered trademarks of MULANN, unless
stated otherwise. Other trademarks and trade names may be used in this document
to refer to either the entities claiming the marks and names of their products.
MULANN disclaims any proprietary interest in trademarks and trade names other
than its own.
Contents copyright © 2016-2017 MULANN. All rights reserved.

KERWAX Replica – Operating Manual
6
Designed by KERWAX
Manufactured by MULANN
FRANCE

KERWAX Replica – Operating Manual
7
1. INTRODUCTION
Thank you for choosing KERWAX Replica! We hope it will give you years of
satisfaction and musical creativity. It was manufactured in France with the
finest materials and components, by and for professional audio users. Please
read this operating manual thoroughly before operating your new Replica.
1.1 ABOUT THE REPLICA
KERWAX Studio is a residential and all-analog recording studio located in a
former boarding school in Brittany. Fully loaded with an exceptional
collection of analog vintage gear from the 1940’s to the 1970’s, it hosts an
internally developed 24-channel vacuum tube mixing console to meet the
requirements of in-house sound engineers and producers.
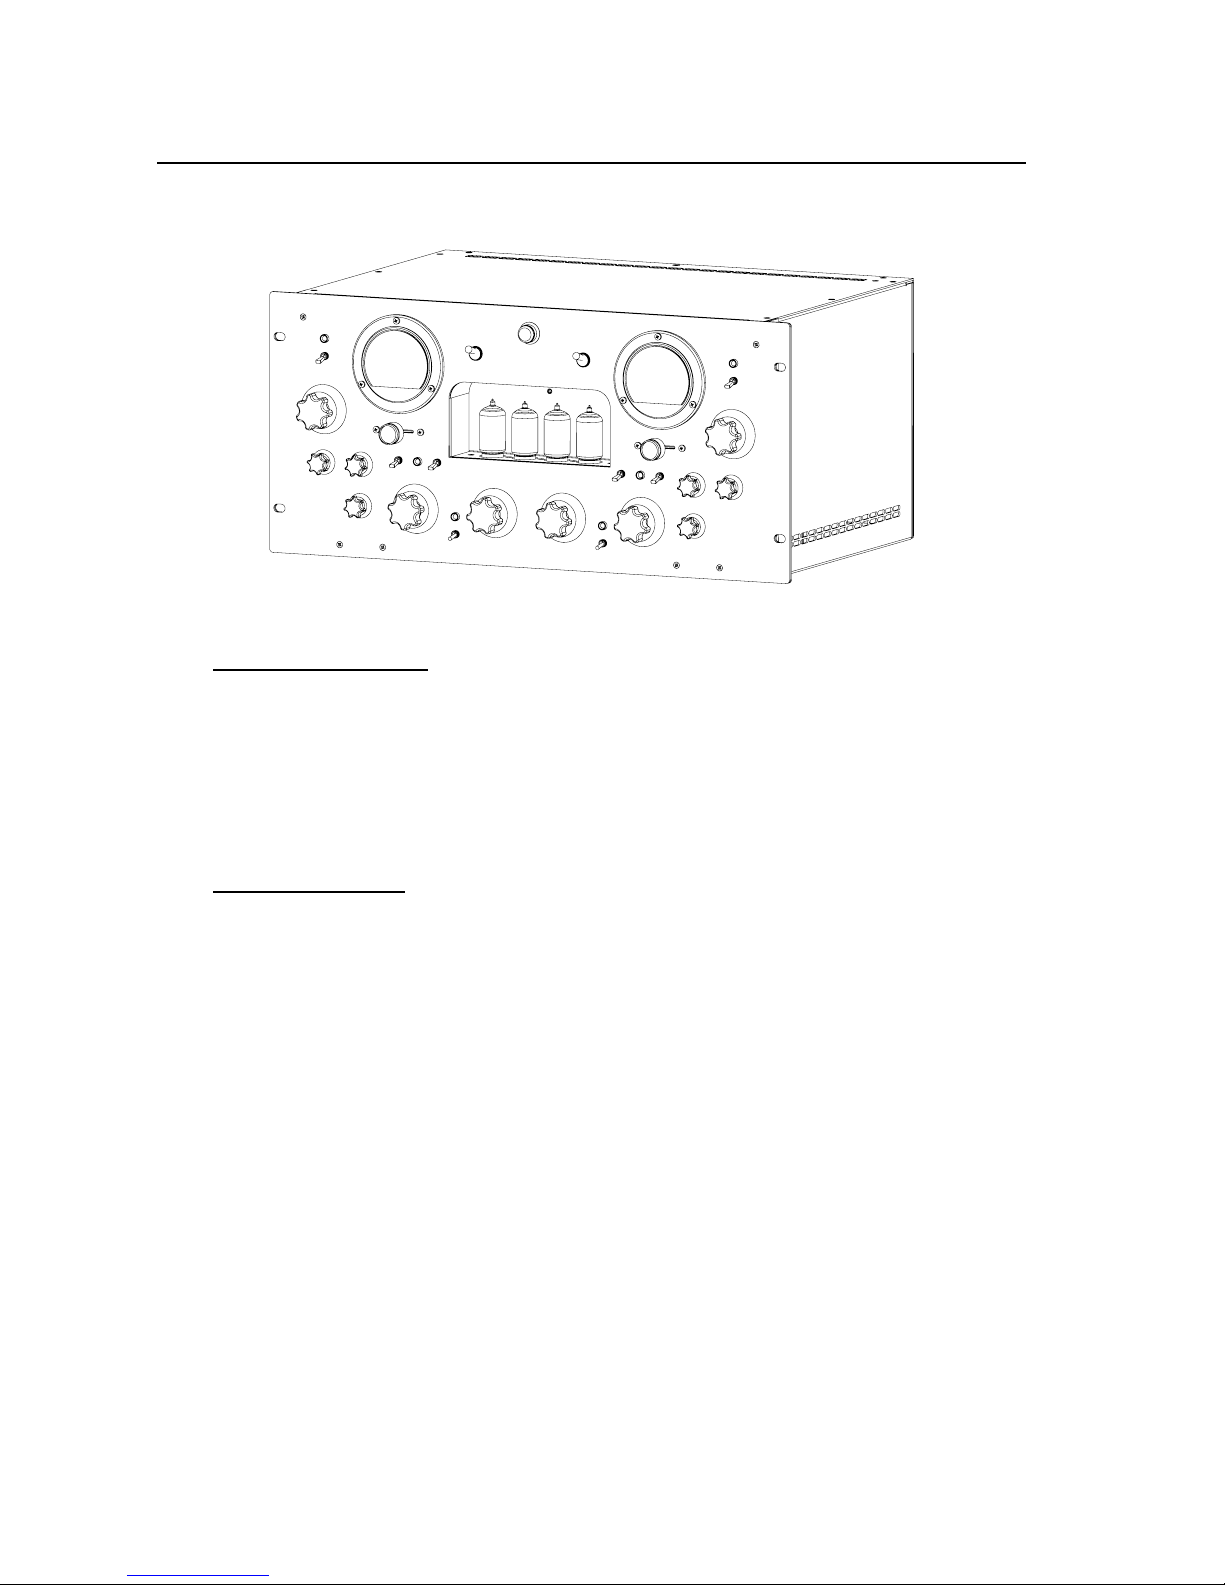
The Replica includes 2 channels of this unique mixing console, integrated into
a compact 5U rack enclosure. Its design, inspired by 50's and 60's tube
amplifiers, allows to fully exploit intrinsic properties of vacuum tubes such
as natural compression, saturation and distortion, which bring colors and
textures that can't be found in today's digital audio products.
With balanced conception, the Replica features dual-mode audio processing:
standard L/R (dual mono or stereo) and M/S (Mid/Side). With 2 vacuum tubes
per channel, it allows you to strongly process the audio signal, by varying
its non-linear and linear features.
Not only the Replica has high quality construction, but also excellent audio
properties. Its sound has been carefully adjusted for months and validated at
KERWAX Studio. Versatile, it is compatible with any music style or instrument.
This operating manual will guide you through the endless possibilities of your
Replica. It was conceived to be as accessible and clear as possible, to help
you understand basic operation before discovering its capabilities as a daily
creative tool.
For more information, please visit our website:
kerwaxreplica.recordingthemasters.com
1.2 A WORD FROM CHRISTOPHE CHAVANON
"Our machine was conceived to facilitate the physical experience of tweaking
the sound and forget about rules and limits in the art of music production.
Pick the tubes, shape your sound.
Turn the knobs... and enjoy...!"
Christophe Chavanon
Owner, KERWAX Studio

KERWAX Replica – Operating Manual
8
2. PREPARATION
2.1 CONTENTS OF THE BOX
The shipping box comes with the Replica model KRWX-REP and an accessory box
containing the following items:
- 1x 3-pole power cord adapted to the country of destination,
- 2x fuses allowing to change the operating voltage,
- 4x protective feet (optional).
2.2 UNBOXING THE UNIT
When receiving your Replica, inspect the shipping box for any damage before
accepting and signing for the delivery.
- Open the shipping box.
- Take out the protective crate with the help of the strapping.
- Cut the strapping and open the protective crate.
- Lift the Replica carefully and place the device on an horizontal, stable
and non-slip surface.
- Remove the protective bag and check thoroughly the condition of the unit.
- Open the accessory box and check if all the accessories listed above are
present.
i If any accessories are missing, if the unit is damaged or fails to operate,
please contact MULANN immediately.
i The protective crate contains custom foams that should not be removed.
i The shipping box and protective crate should be retained. They are
specifically designed to ensure maximum protection of the device: they
will be useful for service or future use.

KERWAX Replica – Operating Manual
9
2.3 INSTALLATION AND USE
The Replica can be installed and used in 2 different ways:
- Rack integration,
- Free-standing.
• Rack integration
The Replica is designed to be installed in a standard 19-inch width (482 mm)
equipment rack. Its height conforms with a standard 5U (5 units) rack space.
To install the Replica in a standard equipment rack:
- Align the device against the screw holes of the equipment rack.
- Secure the device using 4 standard rack screws with washers.
Ü Considering its weight (23.37lbs), at least 2 persons are required to
ensure its proper installation.
• Free-standing
Place the unit on an horizontal, stable and non-slip surface. To avoid
scratching the bottom of the device when using it, install the 4 optional
protective feet (included in the accessory box) under the chassis.
Ü Do not obstruct the ventilation slots. It could cause overheat and you
could irremediably damage the device. Extra room must be kept free around
the Replica to ensure good air circulation.
2.4 FIRST OPERATION
ê WARNING: PLEASE READ THE FOLLOWING INSTRUCTIONS CAREFULLY BEFORE
CONNECTING THE DEVICE TO MAINS POWER. IF THE WRONG MAINS VOLTAGE OR WRONG
FUSES ARE SELECTED, YOU COULD IRREMEDIABLY DAMAGE THE DEVICE!
The Replica supports both 110V-120V and 220V-240V mains voltages.
The voltage selector is preset at the factory to the mains voltage of the
country of destination.
To change the operating voltage of the device:
- Remove the security sticker placed over the AC power connector or unplug
the power cord from mains if connected.
- Open the fuses holder tray using a small screwdriver and remove the
installed fuses.
- Put the new fuses inside the fuses holder and close the tray.
- Set the voltage selector to the desired operating voltage (110V-120V or
220V-240V) using a small screwdriver.
Ü Only when these steps have been completed, plug the AC power cord into a
properly grounded AC outlet.

KERWAX Replica – Operating Manual
10
3. NAMES AND FUNCTIONS OF PARTS
i The names and functions of parts indicated below and described in the
following pages are used as references throughout the next chapters.
FRONT PANEL
#1 to #16
i #3 to #17 functions are described for one channel only.
REAR PANEL
#17 to #19
Kerwax Replica Kerwax Replica
2
4
6
8
1
0
1
2
1
4
1
6
1
8
T
R
I
M
2
4
6
8
1
0
1
2
1
4
1
6
1
8
T
R
I
M
2
4
6
8
1
0
1
2
1
4
1
6
1
8
G
A
I
N
2
4
6
8
1
0
1
2
1
4
1
6
1
8
v
o
l
u
m
e
2
4
6
8
1
0
1
2
1
4
1
6
1
8
v
o
l
u
m
e
t
r
e
b
l
e
HP HP
EQ
80 _80
120 120
PREAMP PREAMPDRIVE DRIVE1 2
DRIVE DRIVE
EQ
b
a
s
s
t
r
e
b
l
e
B
I
A
S
b
a
s
s
2
4
6
8
1
0
1
2
1
4
1
6
1
8
G
A
I
N
on
bypass
muteMUTE
POWER
B
I
A
S
BYPASS
on
Kerwax Replica
m S
L r

KERWAX Replica – Operating Manual
11
1
Power switch and main indicator light
Switches the unit on or off. The main indicator light
illuminates to indicate the Replica is powered on and
the vacuum tubes' power supply is functioning correctly.
2
Audio mode switch
Toggles between L/R (dual mono or stereo) and M/S
(Mid/Side) modes:
- L/R (dual mono or stereo) mode
Standard use with 2 independent mono channels.
- M/S (Mid/Side) mode
Special use with Mid/Side sum and difference matrix.
When M/S mode is activated, channel 1 is used for Mid
section and channel 2 is used for Side section.
3
Phase switch (Ø)
Reverses the signal phase of the selected channel.
When activated, the LED indicator illuminates.
4
Listening mode selector
Toggles between 3 different listening modes:
- MUTE: signal is muted on the selected channel.
- BYPASS: signal is passing through the selected
channel without processing. In M/S (Mid/Side) mode,
only the processing of the vacuum tubes is bypassed.
- ON: signal is passing through the selected channel
with processing.
5
TRIM control
Adjusts the input level in/of PREAMP vacuum tube [14].
6
BIAS control
Varies Bias current of PREAMP vacuum tube [14]. As a
result, audio signal is more compressed or low
frequencies are strengthened.
7
High-pass filter switch
Attenuates low frequencies with a roll-off of 6dB per
octave. The cutoff frequencies are set to 80Hz or 120Hz,
filter is disabled when switch is set in the middle
position.
8
EQ switch
Activates or deactivates TREBLE [9] and BASS [10]
equalization circuits. When activated, the LED indicator
illuminates.
i When working in L/R mode with stereo material or in
M/S mode, both EQ switches must be activated
simultaneouly to preserve signal coherence (phase,
frequencies and dynamics)!
! !
POWER
m S
L r
onMUTE
BYPASS
HP
80
120
EQ

KERWAX Replica – Operating Manual
12
9
TREBLE tone control
Adjusts treble tone level with Baxandall-type curve.
Vertical cursor position is neutral.
10
BASS tone control
Adjusts bass tone level with Baxandall-type curve.
Vertical cursor position is neutral.
11
DRIVE switch
Activates or deactivates DRIVE vacuum tube [15], GAIN
[12] and VOLUME [13] controls. When activated, the LED
indicator illuminates.
12
GAIN control
Adjust the amount of gain applied to the signal, bringing
harmonic distortion and saturation from the DRIVE section
[15].
13
VOLUME control
Adjusts output level of the DRIVE section.
14
PREAMP vacuum tube
Adds color and warmth tone to the signal.
Involved in preamplifier and EQ circuits.
15
DRIVE vacuum tube
Adds harmonic distortion and saturation to the signal.
16
VU-meter
Allows to monitor OUTPUT 1 and OUTPUT 2 [17] audio
levels. The VU-meters are factory calibrated to the
standard operating level 0dBVU = +4dBu.
17
Line I/O
Balanced main XLR inputs and outputs with +4dBu standard
operating level.
18
Voltage selector
Allows to select correct operating voltage between 110V-
120V and 220V-240V, 50/60 Hz. The voltage selector is
preset at the factory to the mains voltage of the country
of destination.
19
AC power connector and fuses holder
Mains input with 3-pole standard IEC connector, connects
to mains with supplied power cord.
2 fuses are used for each operating voltage (see 2.4
First Operation).
PREAMP DRIVE
Kerwax Replica

KERWAX Replica – Operating Manual
13
4. USING THE REPLICA
4.1 MAKING CONNECTIONS
The Replica can be easily integrated within your studio configuration. It uses
+4dBu standard line operating level and features balanced XLR connections,
which pins conform to the AES standard (see 6. Technical Specifications).
• Suggested configurations
Any +4dBu standard line
operating level peripheral
Mono or stereo bus insert
from mixing console
i The Replica may remain connected even if it is powered off. Hardware links
inside the I/O panel enables the sound to pass through the unit even when
not in use!
4.2 PROCESSING FEATURES
The Replica combines non-linear and linear features:
- The non-linear functionalities enable you to explore amazing artifacts due
to the vacuum tube characteristics that bring warmth to the audio signal.
- On the other side, the linear features are common functionalities,
available on all pre-amplifiers for adjusting the tone and filtering the
audio signal.
The two channels are independent and identical.
•Non-linear features
Non-linear features allow to explore a range of unconventional audio
corrections such as audio signal saturation or distortion.
The non-linearity modifies the audio signal in such a way that the output
signal is not proportional to the input signal.
- The TRIM control [5] defines the input signal level and can overload the
first pre-amplifier stage to the saturation level, creating artifacts.

KERWAX Replica – Operating Manual
14
- The BIAS control [6] allows to change the standard functioning point of
the PREAMP vacuum tube [14]. By changing its bias, the vacuum tube is able
to operate outside its linear range and bring some distortion, creating a
warm sound.
- The GAIN control [12] defines the amplification of the DRIVE stage [15].
The amplification factor can be increased to some extent where the DRIVE
stage exceeds its linear range of functioning and starts to distort the
signal.
- The VOLUME control [13] sets the overall level of the DRIVE section.
•Linear features
The linear features are mainly used to correct the tone of the audio signal
after processing. Saturation and distortion bring too much level or undesired
effects to some frequencies. Baxandall-type curve and filtering allow you to
correct the overall rendition of the processed signal.
- The EQ switch [8] enables audio tone control: TREBLE [9] and BASS [10]
controls reinforce or reduce high and low frequencies level, respectively.
The EQ circuit follows the DRIVE section, allowing to correct its effects.
This can cause a change in level when the EQ switch [8] is activated.
- The High-pass filter switch [7] removes frequencies below 80Hz or 120Hz
with a roll-off of 6dB per octave.
- The Phase switch [3] enables to invert the phase of the signal by 180°
(opposite phase).
4.3 SIGNAL PATHS
The Replica features 2 independent audio modes: L/R (dual mono or stereo) and
M/S (Mid/Side) which signal paths are described below.
• L/R (dual mono or stereo) mode signal path
When the Replica is set to L/R mode, its 2 channels are fully identical and
independent.
L/R mode signal path (1 channel)
*See note page 16

KERWAX Replica – Operating Manual
15
• M/S mode signal path
When the Replica is set to M/S mode, the 2 channels are treated through matrixing and dematrixing process.
This process causes a 0.6dB level increase compared to L/R mode.
M/S mode signal path (2 channels)
** See note page 16

KERWAX Replica – Operating Manual
16
4.4 CONTROLS
Depending on the application, you can easily select the most appropriate audio
mode to process the signal using the Audio mode switch [2].
• L/R (dual mono or stereo) mode controls
When the Replica is used to process dual mono or stereo audio signals in L/R
mode, the controls located on the left part of the front panel are devoted to
the left channel processing (INPUT 1 [17] on the rear panel), and the right
part to the right channel processing (INPUT 2 [17] on the rear panel).
• M/S (Mid/Side) mode controls
When the Replica is used to process audio signals in M/S (Mid/Side) mode, the
controls located on the left part of the front panel are devoted to the Mid
channel, and the right part to the Side channel. TRIM control [5] adjusts the
balance between Mid and Side channels.
M/S mode matrixes and dematrixes the input signals so that each Mid or Side
channel can be processed independently with the full range of adjustments.
Ideal for mastering, the built-in Mid/Side mode gives you the possibility to
adjust the sound stage width, using only stereo input signal.
L/R mode: channel 1
L/R mode: channel 2
M/S mode: Mid
M/S mode: Side
*When working in L/R mode with stereo material, both DRIVE and EQ switches
must be activated simultaneouly to preserve signal coherence (phase,
frequencies and dynamics)!
** When working in M/S mode, BYPASS, DRIVE and EQ switches must be activated
simultaneouly to preserve signal coherence (phase, frequencies and dynamics)!
Kerwax Replica Kerwax Replica
2
4
6
8
1
0
1
2
1
4
1
6
1
8
T
R
I
M
2
4
6
8
1
0
1
2
1
4
1
6
1
8
T
R
I
M
2
4
6
8
1
0
1
2
1
4
1
6
1
8
G
A
I
N
2
4
6
8
1
0
1
2
1
4
1
6
1
8
v
o
l
u
m
e
2
4
6
8
1
0
1
2
1
4
1
6
1
8
v
o
l
u
m
e
t
r
e
b
l
e
HP HP
EQ
80 _80
120 120
PREAMP PREAMPDRIVE DRIVE1 2
DRIVE DRIVE
EQ
b
a
s
s
t
r
e
b
l
e
B
I
A
S
b
a
s
s
2
4
6
8
1
0
1
2
1
4
1
6
1
8
G
A
I
N
on
bypass
muteMUTE
POWER
B
I
A
S
BYPASS
on
Kerwax Replica
m S
L r

KERWAX Replica – Operating Manual
17
4.5 STARTING POINT
Setting the starting point is a good way to begin working with the Replica.
This is achieved when audio processing is the most neutral and the less effect
is applied to the audio signal.
To set the Replica to its starting point:
- Select L/R mode with the Audio mode switch [2],
- Set all knobs indicators to their neutral zones, highlighted below [5, 6,
9, 10, 12, 13].
Also, note the following informations:
i Phase switches [3] must be set to the same position to be neutral.
i DRIVE section [11] may be equally set on or off.
Starting point (1 channel)
From this starting point, you can experience the impact of each adjustment
individually, then explore a wide range of possibilities through custom
settings (see 4.6 Audio Processing).
i The Replica has a rather flat response when all the controls are set as
mentioned above, and audio processing does not affect the input signal.
i Switching Listening mode selector [4] between ON and BYPASS positions does
not change the signal but the level slightly.
For better level balance between ON and BYPASS positions [4], you can
adjust the TRIM control [5].
Kerwax Replica Kerwax Replica
2
4
6
8
1
0
1
2
1
4
1
6
1
8
T
R
I
M
2
4
6
8
1
0
1
2
1
4
1
6
1
8
T
R
I
M
2
4
6
8
1
0
1
2
1
4
1
6
1
8
v
o
l
u
m
e
2
4
6
8
1
0
1
2
1
4
1
6
1
8
v
o
l
u
m
e
t
r
e
b
l
e
HP HP
EQ
80 _80
120 120
PREAMP PREAMPDRIVE DRIVE1 2
DRIVE DRIVE
EQ
b
a
s
s
t
r
e
b
l
e
B
I
A
S
b
a
s
s
2
4
6
8
1
0
1
2
1
4
1
6
1
8
G
A
I
N
on
bypass
muteMUTE
POWER
B
I
A
S
BYPASS
on
Kerwax Replica
m S
L r

KERWAX Replica – Operating Manual
18
4.6 AUDIO PROCESSING
The Replica is composed of 2 independant channels, ideal for individual
instrument or stem processing. Its unique design allows you to quickly replace
and combine vacuum tubes to sculpt and color the sound, using vintage or
modern references.
It is composed of two factory-installed 12AX7-type (ECC83, 7025) vacuum tubes
per channel: PREAMP [14] and DRIVE [15]. The steps below follow the logical
processing path inside the Replica and allows you to process audio signal
quickly and efficiently:
• To start: PREAMP vacuum tube [14]
Modifies the color and roundness of the audio signal.
It is activated when Listening mode selector [4] is set to ON position.
- Adjust input audio level using TRIM control [5].
- To remove excessive low frequencies, the High-pass filter switch [7]
attenuates frequencies from 80Hz or 120Hz with a roll-off of 6dB per octave.
- Use BIAS control [6] to vary current of PREAMP vacuum tube [14]. As a
result, audio signal is more compressed or low frequencies are strengthened.
This setting is sensitive: gently turn the BIAS control as current inside
PREAMP vacuum tube varies and need to stabilize.
- To add equalization, activate the EQ switch [8]. It enables TREBLE [9] and
BASS [10] tone adjustments. The Replica uses Baxandall-type equalization,
a gentle curve allowing to open treble frequencies without getting harsh
and make the bass frequencies fatter.
• To go further: DRIVE vacuum tube [15]
Adds distortion and harmonic saturation to the audio signal.
DRIVE vacuum tube is optional and only activated when DRIVE switch is on [11].
- Modify GAIN control [12] to adjust the level of distortion and harmonic
saturation applied to the audio signal.
- To compensate output level, adjust VOLUME control [13].
i All these controls interact with each other and allow you to shape your
very own sound character. It may require several adjustments to find the
right setting.
i If DRIVE section levels are set very high, the vacuum tubes may become
microphonic and capture the surrounding sounds!
i You may experience phase cancellation, a phenomenon that can make certain
frequencies vanish from the audio signal, if both 2 channels are used in
stereo configuration. In this case, you can correct this problem using the
adequate Phase switch [3].
i To go even further, you can replace vacuum tubes by alternative references
with different gain and tonal characteristics (see 4.6 Replacing Vacuum
Tubes).

KERWAX Replica – Operating Manual
19
4.7 REPLACING VACUUM TUBES
The Replica features easy and quick vacuum tubes replacement, thanks to its
removable protective cover. Vacuum tubes can be replaced if defective, damaged
or to explore new sound possibilities.
Before taking any action, always follow these safety instructions:
ê SWITCH OFF THE UNIT AND DISCONNECT POWER CORD FROM MAINS!
ê WAIT AT LEAST 30 MINUTES TO ALLOW HIGH-VOLTAGE COMPONENTS TO DISCHARGE:
UNIT CONTAINS LETHAL VOLTAGE INSIDE!
Ü Allow the vacuum tubes to cool down for at least 30 minutes before removal.
Ü Always use protective gloves to avoid touching the glass envelope of the
vacuum tubes.
• How to remove a vacuum tube?
- Unscrew the retaining 2.5mm Hex screw from the protective cover (see
picture below).
- Gently pull out the vacuum tube from its socket with your hand. You may
experience some resistance as it is firmly inserted.
Ü Do not pull the vacuum tube too quickly to avoid damaging the tip of the
vacuum tube by hitting the top of the case.
Ü Do not twist the vacuum tube, this could break the connectors or cap.
ê DO NOT TOUCH THE SOCKET NOR CONNECTORS OF THE VACUUM TUBE, LETHAL HIGH
VOLTAGE COULD STILL REMAIN INSIDE!
ê DO NOT USE A SCREWDRIVER OR OTHER TOOL TO REMOVE THE VACUUM TUBES! YOU
COULD BREAK THE GLASS ENVELOPE, THE PINS OR GET AN ELECTRICAL SHOCK!
Removal of the protective cover
(requires 2.5mm Hex screwdriver)
• How to replace a vacuum tube?
i Sockets are designed to allow vacuum tubes to be plugged in only one
orientation. Check the pin orientation carefully.
- Gently insert the new vacuum tube inside the socket. Check that it is fully
locked and no pins are visible.
- Replace correctly the protective cover and screw it back on.
- Connect power cord and switch on the unit. If a problem occurs, please
observe the discharging delay of the circuits before replacing the vacuum
tube again.
ê ONLY USE COMPATIBLE REFERENCES WHEN REPLACING A VACUUM TUBE!

KERWAX Replica – Operating Manual
20
5. TROUBLESHOOTING
The Replica is made of high-quality components and was designed for years of
trouble-free usage. If you still encounter some problems, the list below
should help you find a solution.
The Replica doesn't power up.
- Check mains power and connect grounded power cord for your country of
operation to the Replica [19].
- Check main voltage selection on the Voltage selector [18].
- If selected main voltage is correct, check the 2 fuses and replace them
with the same type [19].
- Check if Power switch is set to POWER and Main indicator light is
illuminated [1].
i To change mains operating voltage of the device, see 2.4 First Operation.
There is no sound.
- Check if the Replica correctly powers up.
- Check input XLR connections [17] and input level. The Replica uses +4dBu
standard operating line level.
- Check illumination of vacuum tubes [14, 15]. If one vacuum tube doesn't
work, switch off the unit and replace defective part (see 4.7 Replacing
Vacuum Tubes).
- Is input level high enough? Modify the input level with TRIM control [5].
- Adjust GAIN [12] and VOLUME [13] settings if DRIVE [11] function is
activated, or deactivate it.
VU-meters doesn't work.
- Does the VU-meters [16] lighten when unit is powered on? If no, check if
the Replica is correctly connected to mains power.
- Only output level is shown on VU-meters: check if VOLUME control [13] is
correctly adjusted.
- Check if the Replica receives signal from INPUT [17] XLR connections.
There is too much saturation or distortion.
- To remove saturation, lower input level with TRIM control [5] and/or GAIN
control [12] if DRIVE switch [11] is activated.
- To lower distortion, lower BIAS control [6] until distortion becomes
negligible.
Low frequencies aren't present enough.
- Is the High-pass filter switch [7] enabled? If yes, disable the option to
recover low frequencies (switch is set to middle position).
i If you still have problems or specific questions about the operation of
your Replica, please contact MULANN.
This manual suits for next models
1
Table of contents
Popular Amplifier manuals by other brands

Infineon Technologies
Infineon Technologies IRAUDAMP8 user manual

Matrix
Matrix M-Stage HPA-3U manual

Miranda
Miranda DENSITE HDA-1851 Guide to installation and operation

Rolls
Rolls RDB109 owner's manual

Clearaudio
Clearaudio Absolute phono inside user manual

J&M
J&M ROKKER XXRP 630W Installation and operation instructions