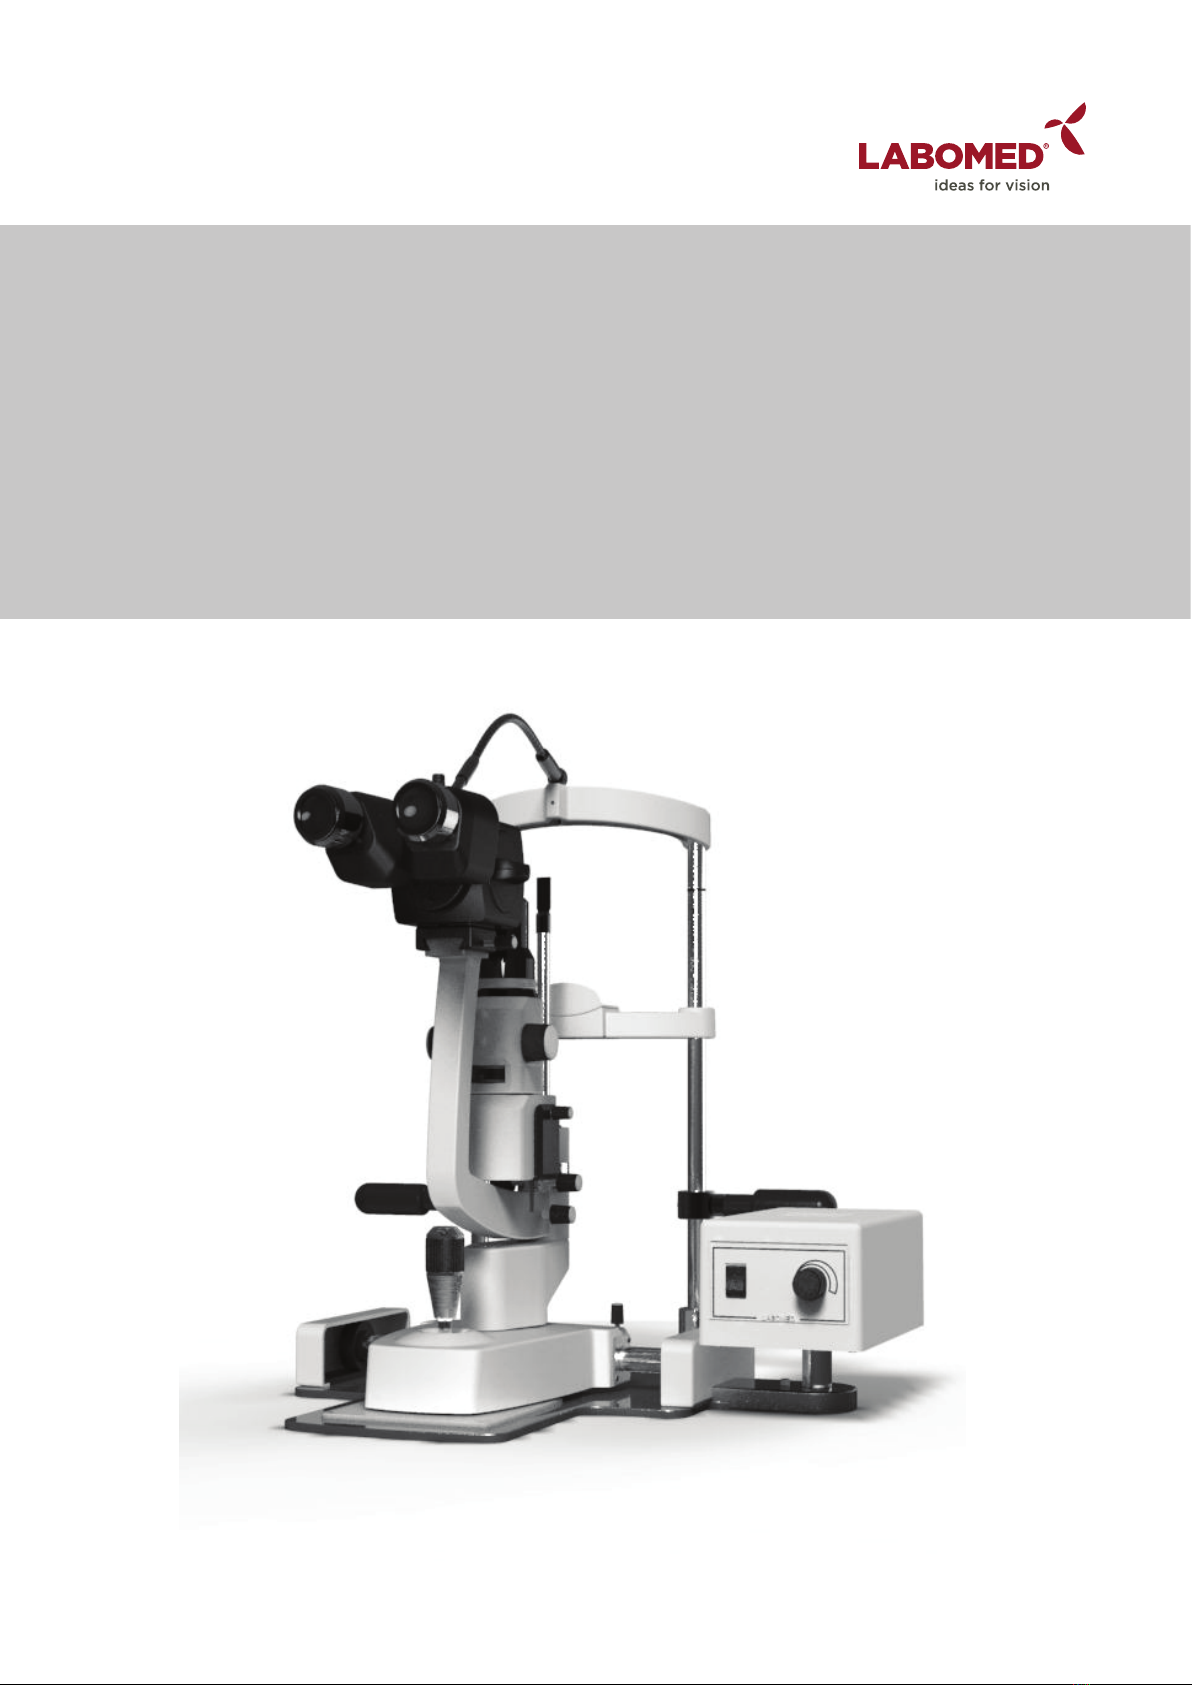
Labomed SLx 40 User manual

8126400-795 SLx 40 Issue 1.3
Printed onApril,2019
SLx 40
Slit Lamp
User Manual

8126400-795
2
SLx 40 Issue 1.3
Printed onApril,2019
SLx 40
SLx 40 is a registered Trade Mark of Labotech Microscopes India Pvt. Ltd.
Labomed is the registered Trade Mark of Labo America Inc.
All other trade marks are property of their respective owners.
The information contained in this document was accurate at the time of publication. Specification subject to change
without notice.
Labotech and Labo America Inc. Reserves the right to make change in the product described in this manual without notice
and without incorporating those changes in any products already sold.
ISO 13485 Certified - LABOMED products are designed and manufactured under quality management system conforming
to ISO 13485 requirements.
No parts of this publication may be reproduced, stored in the retrieval system, or transmitted in any form or by any means,
electronic, mechanical, recording, or otherwise without the prior written permission of LABOTECH.
Caution: Federal law restrict this devices to sale by or on the order of a licensed physician. Rx only.

3
8126400-795 SLx 40
SLx 40
Issue 1.3
Printed onApril,2019
TABLE OF CONTENTS
WARNINGS AND CAUTIONS 4
SYMBOL INFORMATION 6
INTRODUCTION 7
INDICATIONS FOR USE 7
CONTRAINDICATIONS 7
SETUP 8
PART IDENTIFICATION 8
SLX 40 PACKAGE CONTENTS 8
ACCESSORIES 8
UNPACKING & INSTALLATION 9
APPLICATIONOF INPUT POWER 11
DISCONNECTION OF INPUT POWER 11
INSTRUCTIONS FOR USE 12
OPERATION 12
SLIT LENGTH 13
FILTER DIAL 13
SLIT ROTATION 13
CHANGING THE HALOGEN BULB 14
CHANGING THE LED
15
REPLACEMENT OF CHIN REST LIGHT INDICATOR 15
FUSE REPLACEMENT 16
TROUBLESHOOTING 17
CHART OF COMMON ERRORS 17
SPECIFICATIONS 18
DISPOSAL 19
SOFTWARE REVISION 19
SYSTEM CLASSIFICATION 19
RESTOCKING CHINREST TISSUE 19
CLEANING & MAINTENANCE 20
EXTERNAL CLEANING 20
FOREHEAD / CHIN REST PREPARATION 20
CLEANING THE GLIDE PLATE 20
CLEANING LENSES & PRISMS 20
SYSTEM CONFIGURATION 21
GUIDANCE TABLES
22
WARRANTY 26

4
SLx 40
8126400-795 SLx 40 Issue 1.3
Printed onApril,2019
WARNINGS AND CAUTIONS
LABOMED is not responsible for the safety and reliability of this instrument when:
- Assembly, disassembly, repair, or modification is made by unauthorized dealers or persons.
- The instrument is not used in accordance with this user manual.
A WARNING is an instruction that draws attention to the risk of injury or death.
WARNING: UNITED STATES FEDERAL LAW AND EUROPEAN REGULATIONS REQUIRE THAT THIS
DEVICE BE PURCHASED ONLY BY A PHYSICIAN OR A PERSON ACTING ON BEHALF OF A PHYSICIAN.
WARNING: THIS INSTRUMENT SHOULD BE USED IN STRICT ACCORDANCE WITH THE INSTRUCTIONS
OUTLINES IN THIS USER’S GUIDE. THE SAFETY OF THE OPERATOR AND THE PERFORMANCE OF
THE INSTRUMENT CANNOT BE GUARANTEED IF USED IN A MANNER NOT SPECIFIED BY LABOMED
TECHNOLOGIES.
WARNING: DO NOT REPAIR OR SERVICE THIS INSTRUMENT WITHOUT AUTHORIZATION FROM
THE MANUFACTURER. ANY REPAIR OR SERVICE TO THIS INSTRUMENT MUST BE PERFORMED
BY EXPERIENCED PERSONAL OR DEALERS WHO ARE TRAINED BY LABOMED OR SERIOUS
INJURY TO THE OPERATOR OR PATIENT MAY OCCUR.
WARNING: MODIFICATIONS TO THIS INSTRUMENT ARE NOT ALLOWED. ANY MODIFICATION TO THIS
UNIT BE AUTHORIZED BY LABOMED OR SERIOUS INJURY TO THE OPERATOR OR PATIENT
MAY OCCUR.
WARNING: IF THIS INSTRUMENT IS MODIFIED, APPROPRIATE INSPECTION AND TESTING MUST BE
CONDUCTED TO ENSURE CONTINUED SAFE USE OF THIS INSTRUMENT.
WARNING: TO AVOID RISK OF ELECTRIC SHOCK, THIS EQUIPMENT MUST ONLY BE CONNECTED
TO A SUPPLY MAIN WITH PROTECTIVE EARTH OR DAMAGE TO THIS INSTRUMENT AND/OR INJURY
TO THE OPERATOR OR PATIENT MAY OCCUR.
WARNING: ENSURE THAT THE VOLTAGE APPLIED TO THE UNIT IS THE SAME AS THE VOLTAGE THAT
IS INDICATED ON THE DATA PLATE OR DAMAGE TO THE UNIT MAY OCCUR.
WARNING: THIS INSTRUMENT MUST BE PLUGGED INTO AN OUTLET WITH AN EARTH GROUND. DO
NOT REMOVE OR DEFEAT THE EARTH GROUND CONNECTION ON POWER INPUT CONNECTOR OR
THE UNIT’S POWER CORD OF THIS INSTRUMENT OR DAMAGE TO IT AND/OR INJURY TO THE
OPERATOR OR PATIENT MAY OCCUR.
WARNING: THE EQUIPMENT OR SYSTEM SHOULD NOT BE USED ADJACENT TO OR STACKED WITH
OTHER EQUIPMENT AND THAT IF ADJACENT OR STACKED USE IS NECESSARY, THE EQUIPMENT OR
SYSTEM SHOULD BE OBSERVED TO VERIFY NORMAL OPERATION IN THE CONFIGURATION IN
WHICH IT WILL BE USED.
WARNING: THIS INSTRUMENT IS NOT SUITABLE FOR USE IN THE PRESENCE OF FLAMMABLE
ANESTHETIC MIXTURES, SUCH AS OXYGEN OR NITROUS OXIDE.
WARNING: BECAUSE PROLONGED INTENSE LIGHT EXPOSURE CAN DAMAGE THE RETINA, THE USE
OF THE DEVICE FOR OCULARE EXAMINATION SHOULD NOT BE UNNECESSARILY PROLONGED, AND
THE BRIGHTNESS SETTING SHOULD NOT EXCEED WHAT IS NEEDED TO PROVIDE CLEAR VISUALIZATION
OF THE TARGET STRUCTURES. THIS DEVICE PROVIDED WITH FILTERS THAT ELIMINATE UV RADIATION
<400NM) AND, WHENEVER POSSIBLE, FILTERS SHORT- WAVELENGTH BLUE LIGHT <420NM).
WARNING: THE USE OF ACCESSORIES OR CABLES OTHER THAN THOSE SPECIFIED, WITH THE
EXCEPTION OF THOSE SOLD BY THE MANUFACTURER AS REPLACEMENT PARTS FOR THE INTERNAL
COMPONENTS, MAY RESULT IN INCREASED EMISSIONS OR DECREASED IMMUNITY OF THE
EQUIPMENT OR SYSTEM.

5
8126400-795 SLx 40 Issue 1.3
Printed onApril,2019
SLx 40
WARNINGS AND CAUTIONS (continued)
A CAUTION is an instruction that draws attention to the risk of damage to the product.
CAUTION: THE INTERNAL CIRCUITRY OF THE INSTRUMENT CONTAIN ELECTROSTATIC SENSITIVE
DEVICES (ESD) THAT MAY BE SENSITIVE TO STATIC CHARGES PRODUCED BY THE HUMAN
BODY. DO NOT REMOVE THE COVERS WITHOUT TAKING PROPER ESD PRECAUTIONS.
CAUTION: DO NOT USE SOLVENTS OR STRONG CLEANING SOLUTIONS ON ANY PART OF THIS
INSTRUMENT, AS DAMAGE TO THE UNIT MAY OCCUR SEE THE CARE AND MAINTENANCE
SECTION FOR DETAILED CLEANING INSTRUCTIONS.
CAUTION: MEDICAL ELECTRONIC EQUIPMENT NEEDS SPECIAL PRECAUTIONS WITH RESPECT TO
ELECTROMAGNETIC CHARGE (EMC) AND NEEDS TO BE INSTALLED AND SERVICED
ACCORDING TO THE EMC INFORMATION PROVIDED IN THE ACCOMPANYING DOCUMENTS.
CAUTION: PORTABLE AND MOBILE RF COMMUNICATIONS EQUIPMENT CAN AFFECT MEDICAL
ELECTRICAL EQUIPMENT.
CAUTION: THIS INSTRUMENT IS NOT TO BE USED NEAR HIGH-FREQUENCY EMITTING SURGICAL
EQUIPMENT.
CAUTION: THIS INSTRUMENT IS NOT INTENDED TO BE CONNECTED TO EQUIPMENT OUTSIDE THE
CONTROL OF LABOMED OR MUST BE TESTED TO AN APPLICABLE IEC OR ISO STANDARDS.
CAUTION: CHIN REST PAPER-FOR SINGLE USE ONLY. REPLACE WITH EACH PATIENT.

SLx 40
6
The following symbols appear on the instrument:
LABOMED
REF
S/N
Rx
Only
EXPLANATION OF SYMBOLS
8126400-795 SLx 40 Issue 1.3
Printed onApril,2019
Caution symbol indicating important operating and maintenance
instructions that are included in this User’s Guide.
Type B Applied Part
Alternating Current Power
Protective Earth
Connection ON/OFF
Manufacture
Catalog Number
Serial Number
Waste of Electrical and Electronic Equipment
Compliance to medical Device Directive 93/42/EEC
Accompanying Document must be consulted.
Authorized Representative in European Community.
Fragile Contents in Shipping Container- Handle with care
Keep Dry- Package shall be kept away from rain.
This way Up- Indicates correct upright position of package.
U.S. Federal law restricts this devices to sale by or on the order of a physician.

7
SLx 40
INTRODUCTION
8126400-795 SLx 40 Issue 1.3
Printed onApril,2019
Congratulations on your purchase of the SLx 40 Slit Lamp.
This User Manual is designed as a training and reference manual for the operation and maintenance
of the instrument. We recommend that you read it carefully prior to use and follow the instructions to
ensure optimum performance of your new instrument. Properly trained eye care professionals such
as ophthalmologists, optometrists, opticians and eye care technicians should operate this instrument.
Please retain this manual for future reference and to share with other users. Additional copies can be
obtained from your authorized LABOMED dealer or from the LABOMED Customer Service Department at:
Tel: (510) 445-1257
Fax: (510) 991-9862
INDICATIONS FOR USE
The SLx 40 Slit Lamp is an AC-powered slit lamp biomicroscope that is intended for use in examining
the anterior segment, from the corneal epithelium to the posterior capsule. It is used to aid in the diagno-
sis of diseases or trauma, which affect the structural properties of the anterior segment of the eye.
CONTRAINDICATIONS
None.

8
SLx 40
SETUP
8126400-795 SLx 40 Issue 1.3
Printed onApril,2019
PART IDENTIFICATION
1. On/Off Switch
2. Illumination level Control
3. Glide Plate
4. Joystick for horizontal and
vertical movement
5. Bulb Access Door
6. Filter Dial
7. Slit Length Dial
8. Breath Shield Mount
9. Eyepieces
10. Focusing Ring
11. Fixation Light
12. Magnification Dial
13. Microscope Lock Knob
14. Slit Rotation Scale
15. Slit Width/Rotation knob
16. Illumination Arm Lock Knob
17. Microscope Arm Lock Knob
18. Instrument base Lock Knob
19. Guide Rail Cover
20. Geared Rollers
21. Guide Rails
22. Chin Rest Assembly
23. Power Supply Assembly
24. Table Top
25. Patient Handles
SLx 40 PACKAGE CONTENTS
1. SLx 40 Slit Lamp HL (8126400)
2. SLx 40 Slit Lamp LED (8126401)
3. User’s Guide (8126400-795)
ACCESSORIES
1. Focusing Rod Assembly (15120-226)
2. Hex Wrench - 3mm (LK-003)- X54264
3. Hex Wrench - 4mm (LK-004)- X54248
4. Hex Wrench - 5mm (LK-005)- X54318
5. Blue Dust Cover (15120-225)
6. Halogen lamp,Main (15121)
7. Guide Rail Covers (15140-003)
8. Replacement Fuses (8124900-900)
9. Chin Rest Paper-1 pack (15140-006)

9
Fig.- 4 Chin Rest Ground
Fig.- 3 Chin Rest Attaching Screw
Fig.- 1 Table Top and Power Supply Bracket
Fig.-2 Chin Rest Assembly
A
B
M3 Screws
(6) Nos.
SLx 40
SETUP (continued)
8126400-795 SLx 40 Issue 1.3
Printed onApril,2019
UNPACKING AND INSTALLATION
1. Open the outside shipping box and remove the
three (3) inner boxes.
2. Remove the User’s Guide and follow it for Slit
Lamp installation.
3. Open the box marked as “Platform Assembly”
and take out the table top and power supply bracket
(shown as “A”) in fig. 1.
4. Open the box marked as “Chin Rest Assembly”
and take out the complete chin rest assembly as
shown in fig. 2.
5. Assemble chin rest assembly to table top using
(6) Allen Screw of M3, securing with help of Allen
Wrench 2.5mm. refer in fig. 3.
6. Assemble the power supply bracket to the table
top using (2) M4 Allen screws provided with it.
referred as (B) in fig. 4.

10
Chin Rest
Wire
Base Lamp
Wire
Figure- 8 Connections
Figure- 5 Microscope, Base, Power Supply &
Accessories
Figure- 6 Install Base
Slit lamp Base
Accessories
Power
Supply
microscope
Slide
C
Figure. 7 Assembling Power Supply on the
Power Supply Bracket
Move
Handles
up or
down
Allen Cap
Screw
Figure- 9 Adjusting Patient
Handle Height
D
Figure- 7 a. Earthing wire attaching
screw
SLx 40
SETUP (continued)
8126400-795 SLx 40 Issue 1.3
Printed onApril,2019
UNPACKING AND INSTALLATION (continued)
7. Open the box marked as “Microscope Assembly”.
Remove the microscope Assembly, Slit Lamp
Assembly, Power supply and Accessories. Refer
to Figure-5.
8. Install the Slit Lamp Assembly onto the tracks of
the Table Top and slide the Guide Rail Covers around
the tracks. Refer to Figure-6.
9. Assemble Power Supply to the table top just by
pushing into the hole shown as (C), refer figure-7.
10. Connect the power supply earthing wire with
table top at point “D” using 3mm Allen Wrench. Refer
fig-7a.
11. Attach the Base Lamp Wire Connector to the back
of the Power Supply Assembly. Refer to fig-8.
12. Connect the Chin rest target light Connector to
the Power Supply Assembly by plugging it in.
Refer to Figure-8.
13. Using the 4mm Hex Wrench, adjust the Patient
Handles by loosening the Allen Cap Screws that are
Securing them to the Chinrest Posts. Slide the
Patient Handles up or down to the desired height,
and secure them in place by tightening the Allen
Cap Screws. Refer to Fig.-9.

SLx 40
SETUP (continued)
Figure -9 Install Microscope
Power
Cord Dust
Cover
Focusing
Rod
Chin Paper
Wrenches
Guide Rails Replacement
Bulb
Figure -10 Accessories
Figure-11 Power Supply Assembly
Slide
Microscope
Assembly
Lock
Turn Counter Clockwise
11
8126400-795 SLx 40 Issue 1.3
Printed onApril,2019
UNPACKING AND INSTALLATION
13. Install the Microscope Assembly onto the top of the arm
by sliding it into position, making sure it is up against the
stop. Then, tighten the lock Knob located on the right side
of the Microscope Assembly. Refer to figure-9.
NOTE: Do not adjust the Microscope stop knob behind the
base of the microscope, or the vertex distance will cause
misalignment of focus and require re-calibration of the
slit lamp assembly.
14. Remove the accessories and store them in an
Appropriate place so that when they are needed they will
be available. Refer to figure-10.
APPLICATION OF INPUT POWER
WARNING: CARE MUST BE TAKEN TO ARRANGE THE CABLES
FOR THE ACCESSORIES SUCH THAT THEY DO NOT PRESENT
A TRIPPING HAZARD TO THE EXAMINER OR A DANGER TO
THE PATIENT.
WARNING: POSITION THIS INSTRUMENT SO THAT IT IS NOT
DIFFICULT TO OPERATE THE DISCONNECTION DEVICE (PLUG).
1. After the unit is in its secure location, apply the correct
input voltage to the instrument using the Power Cord from
the Accessory Tray.
NOTE: The powet inlet is located on the backside of the
Power Supply Assembly.
2. Press down on the “I” located on the ON/OFF Switch.
Refer to figure-11.
NOTE: The ON/OFF Switch will illuminate green when
there is power to the unit. When the ON/OFF Switch
is set to off, the green light will turn off.
DISCONNECTION OF INPUT POWER
1. At any time, the power switch can be set to OFF. The unit
does not have a power down sequence. To terminate
operation of this instrument, press the ON/OFF switch to
the OFF position (O).
2. If this instrument is intended to be OFF for an extended
period of time, it can be disconnected from power by
detaching the power cord from the receptacle.

SLx 40
INSTRUCTIONS FOR USE
12
Height Lock
Projected
Slit
Figure-12 Focus on Slit
Figure-13 Adjust Patient Height
Adjust Lamp
Base
Figure-14 Adjust Height
Slit
Width/Rotation
Knob
Figure-15 Adjust Slit Width
Chinrest
Elevation
Handle
Canthus
Mark
8126400-795 SLx 40 Issue 1.3
Printed onApril,2019
OPERATION
1. Turn on the power using the On/Off switch located on the front
of the power supply. Brightness can be adjusted by rotating the
illumination level knob.
NOTE: The maximum position is for intermittent use only.
Continuous use will shorten lamp life.
2. Insert the Focusing Rod in the pivot post of the instrument
body to make rough IPD and focus adjustments.
3. Position the light onto the flat surface of the focusing rod and
adjust the pupillary distance and focus of the eyepieces to suit
the needs of the operator. Refer to figure-12.
4. Using the Slit Width Knobs, adjust the projected slit so that the
thinnest slit is shown on the Focusing Rod. Refer to fig.-12 & 15.
NOTE: The thinnest line will allow for greater accuracy.
5. Remove the Focusing Rod.
6. To position a patient, adjust the chinrest height by turning
the Chinrest Elevation Handle on the post of the Chin Rest
Assembly until the patient’s canthus is in line with the canthus
mark on the chin rest post. Refer to figure-13.
7. Microscope elevation is adjusted by rotating the joystick and
observing the slit image through the Microscope Assembly until
slit is centered on the patient’s cornea. Refer to figure-14.
8. Move the slit lamp with the joystick held firmly and slightly
angled toward the patient, until the slit appears sharply on the
cornea.
NOTE: The accuracy of this rough adjustment should be checked
by the naked eye. The fine adjustment is performed while
observing the slit through the microscope.
9. Tilt the Joystick, which is now held lightly at its upper end, until
the slit appears sharply at the depth of the eye which is to be
observed.
10. The horizontal motion of the base can be locked by tightening
the Base Locking Screw. Refer to figure-14.
NOTE: Lock the base whenever the lamp is not in use.
11. The slit width can be adjusted by rotating the Slit Width/
Rotation Knob on either side of the instrument. Refer to figure-15.

SLx 40
INSTRUCTIONS FOR USE (continued)
13
Figure-16 Illumination Angle
Figure-17 Illumination Angle Scale
Filter
Dial
Slit Length Dial
Figure-18 Filters and Slit Length
Slit Rotation
Scale
Figure-19 Slit Rotation Scale
Magnification
Dial
8126400-795 SLx 40 Issue 1.3
Printed onApril,2019
OPERATION
12. The angle between the illumination system and the
microscope can be varied between 0°and 90°to
either the left or to right. Refer to figure-16.
13. The illumination angle is indicated in the scale of
the slit lamp arm. Refer to figure-17.
14. Magnification is altered by rotating the Magnification
Dial on the Microscope Assembly. Refer to figure-16.
SLIT LENGTH
The Slit length is adjusted by rotating the Slit Length
Dial. The dial has five stops for adjustments. They
are 0.6, 5.8, 9, 13.5mm diameter and continuous
1.5 to 12.0mm. They index into place. Refer to figure-18.
FILTER DIAL
The Filter Dial has four positions that index into place,
and are color coded to indicate the active filter. Refer
to figure-18. The color coded index stops are as
follows:
Blue dot = Cobalt Blue
Red dot = Heat Absorbing
White dot = Open
Green dot = Red-free
SLIT ROTATION
Slit Rotation is achieved by grasping the Slit Width/
Rotation Knob and twisting the slit body to the left or
right. The degree of rotation is indicated by the Slit
Rotation Scale above the slit body. Refer to figure-19.

SLx 40
14
Retaining
spring
Retaining
Spring
Rotated
Bulb
Holder
Figure-21 Retaining Spring
Bulb
Bulb
Holder
Notch
Figure-22 Bulb
Cut Out
Figure-23 Notches
8126400-795 SLx 40 Issue 1.3
Printed onApril,2019
CHANGING THE HALOGEN BULB
WARNING: NEVER REMOVE A BULB THAT HAS RECENTLY
BEEN IN USE AS IT WILL BE VERY HOT. WAIT UNTIL IT HAS
COOLED AND USE GLOVES OR A THICK CLOTH WHEN HAN
-DLING ANY HALOGEN BULB.
WARNING : NEVER TOUCH A HALOGEN BULB WITH BARE
HANDS AS FINGERPRINTS WILL SHORTEN THE BULB LIFE.
1. Remove input power to the instrument.
2. Open the bulb door.
3. Swing the retaining spring away from tha Bulb.
Refer to figure-21.
4. Pull the Bulb Holder and Bulb from the unit. Refer fig.-22.
5. Replace the Bulb with the correct Bulb as indicated in the
Specifications section of this manual.
6. Place the Bulb Holder back into the lamp housing.
NOTE: Position the Bulb Holder so the cut out in the metal
collar of the Bulb lines up with the Notch in the lamp housing.
Refer to figure-23.
7. Move the retaining spring back into its original position.
Refer figure-21.
8. Close the bulb door.

SLx 40
Figure- 24
A
Figure -25
B
C
Figure- 26
D
Figure-27
LED Cap
Pull LED Bulb
Figure -28 Changing
Target Light LED Figure-28 A
Changing
Target Light LED
15
8126400-795 SLx 40 Issue 1.3
Printed onApril,2019
CHANGING THE LED
(For LED illumination only
)
WARNING: NEVER REMOVE A LED THAT HAS
RECENTLY BEEN IN USE AS IT MAY BE VERY HOT.
WAIT UNTIL IT IS COOLED.
WARNING: NEVER TOUCH A LED WITH BARE HANDS
AS FINGERPRINTS WILL SHORTEN THE LED LIFE.
1
. Remove input power to the instrument.
2. Remove the black dust cover shown as “A” and remove
the circlip by using circlip plier. Refer Figure-24.
3. Lift up the illumination housing carefully.
4. Remove the Lamp House Cover by unscrewing the
Four Screws by using screwdriver shown as “B”.
refer in Figure-25.
5. Unscrew the two M3 Allen screws to disassemble the
Heat sink by using 2.5 Allen Wrench shown as “C”. refer
Figure-26.
6. Unscrew the LED from heat sink by unscrewing the two
screwing shown as”D”. refer to figure-27.
7. Replace new LED and follow Reverse to complete
assembly.
Replacement of Chin Rest Light Indicator
1. Unscrew the LED cap refer fig.-28.
2. Pull out the defective LED and replace with new LED.
refer fig.-28A. Thread in the LED cap back.
NOTE: If New LED does not light up after switching on.
remove it and re-fix after changing its polarity.

SLx 40
16
Pull
Out
Tabs
Figure- 29 Pull Out Fuse Door
Fuses
Open
Door
Figure-30 Open Fuse Door
8126400-795 SLx 40 Issue 1.3
Printed onApril,2019
FUSE REPLACEMENT
Replace the fuses in the Power Input Module with the
fuses indicated in the Specifications section of this
manual.
1. Remove input power to the instrument.
2. Press down on the top tab in the middle of the
Power Input Module to release the Fuse Holder,
and gently pull out the Fuse Holder by gripping the
two small tabs. Refer to figures- 24 & 25.
3. Open the Door to the Fuse Holder by pulling
it down. Refer to figure-24.
NOTE: The Fuses will pop up when the door is open,
making removal easier.
4. Install new fuses into the Fuse Holder that is
indicated in the Specification section of this manual.
5. Install the Fuse Holder by closing the door, and
pushing the Fuse Holder back until it snaps
into place.

SLx 40
TROUBLESHOOTING TABLE
17
Chart of Common Errors
ISSUE PROBABLE CAUSE POSSIBLE SOLUTION
Lamp won’t turn on.
Incorrect input power supplied to Check the outlet to ensure proper power is
being supplied.
the SLx 40 Slit Lamp.
Defective Power Cord. Replace the Power Cord.
Bulb may be blown out. Replace Bulb.
Defective Power Supply. Replace the Power Supply.
Slit Lamp won’t move.
Rubber stopper may be attached
under the joystick. Remove the rubber stopper.
Base Lock Screw may be tightened.
Rough base
movement.
Rubber stopper may be attached
under the joystick. Remove the rubber stopper.
Bearings may be damaged. Replace the base.
Shaft may be damaged. Replace the base.
Fixation light does not
light up.
Fixation Light Harness not plugged
into the Power Supply Assembly.
Ensure the Fixation Light Harness is properly
seated in the Power Supply Assembly.
Defective Power Supply. Replace the Power Supply.
Light too dim.
Glass Visible in Eye
Piece F.O.V
Illumination field is not
uniform/has shade/is
dark
Incorrect wattage for bulb being used.
Bulb not installed properly. Check bulb and ensure notch lines up with
bulb housing.
Double slit visible in
microscope.
Microscope not focused on focusing
rod before use.
Install focusing rod and check to ensure
microscope is focused on it.
Bulb not installed properly.
Finger Prints on CMO.
Illumination lamp is not fitted in place.
Aperture/slit length selector turret is
not clicked into place.
Filter selector lever is not clicked into
place.
Fit the illumination lamp into the socket.
Click the aperture/slit length selector turret in
place.
Click the filter selector lever in place.
Clean Finger Prints.
Check bulb and ensure notch lines up with
bulb housing.
8126400-795 SLx 40 Issue 1.3
Printed onApril,2019
Loosen the Base Lock Screw.
Replace with the proper Bulb.
The following is a checklist of items that need to be assessed in order to determine if the SLx 40 Slit Lamp
requires servicing.
•Check the outside of the Slit Lamp for any damage or missing components.
•Inspect the power cord for damage.
•Test the lamp by turning the lamp on and turning the light all the way to it’s brightest setting, and
all the way down to its lowest setting.
•Check to ensure all switches are functioning properly.
•Check the filters by cycling through all the options.
•Check the Slit Wheel by cycling through all the options.
•Check the base movement.
The following chart outlines some common issues with the Slx 40 Slit Lamp and some steps you can
take to correct the issue. If problems persist, please contact the LABOMED as listed in the Introduction
section of this manual.

SLx 40
SPECIFICATIONS
18
Catalog Number 8126400-795
Physical Dimensions
Size: Weight, unpacked: 23.0 lbs. (10.4 Kg)
Height: 19.8 in. (50.2 cm) Weight, packed:52 lbs (23.64 Kg)
Width: 10.5 in. (26.7 cm)
Depth: 14.0 in. (35.6 cm)
Electrical
Voltage: 100-240V AC
Power Input: Max 56-73vA
Frequency: 50/60Hz
Fuses: T 1.6A L 250V
Halogen Bulb: (6V,20W), LED 5 Watt
OperationalConditions
Environmental: 70°C
The environmental conditions are as follows:
Operating: -20°C
Temperature: 10° C (50° F) to 35° C (95° F)
Relative Humidity: 30% to 75% 80%
Atmospheric Pressure: 80 kPa (23.6 in. Hg) to
106 kPa (31.3 in. Hg)
Transportation & Storage: 10%
Temperature: -20°C (-4°F) to +70°C (158°F). 106
kPa Relative Humidity: 10% to 80% (non-condensing)
Atmospheric Pressure: 50kPa (14.8 in. Hg) to
106 kPa (31.3 in. Hg) 50 kPa
Exposure to extreme temperature conditions indicated above must not exceed 15 weeks.
Microscope
Mag Change
Eyepiece
Mag Ratio
IPD Range
Diopter Adjustment
Slit Illumination
Slit Width
Slit Length
Slit Apertures
Slit Rotation
Filters
Galilean
3 Step Drum Rotation; Optional: 5 Step Drum Rotation
12.5X/18mm
10X, 16X, 25X; Optional: 6.5X, 10X, 16X, 25X, 40X
49 -78mm
+/-5mm
6v 20W Halogen/ LED 5 Watt
0 – 13.5mm
0 – 13.5mm
0.6, 5.8, 9, 13.5mm and continuous 1.5 to 12.0mm
0°-180°
Red Free, Heat Absorbing, Cobalt Blue
8126400-795 SLx 40 Issue 1.3
Printed onApril,2019

SLx 40
SPECIFICATIONS (continued)
19
Movement Ranges
Longitudinal (In/Out) 100mm
Lateral (Left/Right) 107mm
vertical (Up/Down) 30mm
Chin rest Range 80mm
8126400-795 SLx 40 Issue 1.3
Printed onApril,2019
DISPOSAL
This product does not generate any environmentally hazardous residues. At the end of its product life,
follow your local laws and ordinances regarding the proper disposal of this equipment.
SOFTWARE REVISION
There is no software installed in this unit.
SYSTEM CLASSIFICATION
•Classification of applied part by grade of protection against electric shocks: B type applied part
B type applied part provides a certain grade of protection against electric shocks, particularly
with regard to leak current, measuring current for patient, and reliability of connection to
protective facility (Class I equipment).
•Type of protection against electric shocks: Class I equipment
Class I equipment does not depend on basic insulation only for electric shocks; it also provides
means for connecting the equipment to a protective grounding system so that the accessi
-ble metal parts do not become conductive in case of failure in the basic insulation.
•Grade of protection against a hazardous ingress of water: IPxO
This product does not provide protection against ingress of water.
(Grade of protection against a hazardous ingress of water stated by IEC 60529: IPxO)
•Classification by the method of sterilization/disinfection: None
This product has no part requiring sterilization/disinfection.
•Classification of safety of use in an environment containing air/combustible gas, oxygen or
nitrogen monoxide/combustible anesthetic gas: Equipment not suited for use in an environment
containing air/combustible gas, oxygen or nitrogen monoxide/combustible anesthetic gas
Use this product in an environment not containing combustible anesthetic gas and combusti
-ble gas.
•Classification by mode of operation: Continuous operation equipment
Continuous operation refers to an operation under normal load conditions without exceeding
specified temperatures, without a limit of time.
RESTOCKING CHINREST TISSUE
When the chinrest tissue supply is depleted, pull out the chinrest tissue pins and replace the tissue.

CLEANING AND MAINTENANCE
SLx 40
Figure-31 Cleaning Main Unit
20
8126400-795 SLx 40 Issue 1.3
Printed onApril,2019
WARNING: RISK OF ELECTRIC SHOCK. ALWAYS DISCON-
NECT THE POWER CORD FROM THE WALL AND THE
INSTRUMENT BEFORE PERFORMING ANY OF THE
FOLLOWING CARE AND MAINTENANCE PROCEDURES.
EXTERNAL CLEANING
Clean the external surfaces of this instrument using a
clean, soft cloth moistened with a mild detergent solution
of liquid dish soap (filtered below 5 microns). Refer to
figure-31.
FOREHEAD/CHIN REST PREPARATION
For hygienic reasons, wipe the forehead rest with an
alcohol wipe and change the chin-rest papers after each
patient.
CLEANING THE GUIDE PLATE
If the Guide Plate is dirty it may cause a rough feeling
when maneuvering the base of the slit lamp. Clean the
Guide Plate with a sift cloth lightly dampened with a mild
soap and water solution.
CLEANING LENSES AND PRISMS
To prevent damaging lens surfaces, do not use
gauze held by tweezers and the like.
•Prepare a solution of ethyl alcohol 20% and ether
80%.
•Remove dust from lens and prism surfaces.
•Using clean gauze, lightly draw a circle from the
lens/prism center outward.
•If the stains remain, repeat this 2 to 3 times.
•If stains are persistent, call your dealer or
LABOMED (see the back cover).
This manual suits for next models
1
Table of contents
Popular Outdoor Light manuals by other brands

M-Elec
M-Elec ML-MSL8-W manual

SACKit
SACKit Lamp Intelligent user manual

HAMPTON BAY
HAMPTON BAY KJC2601LX-04 Use and care guide

Heath Zenith
Heath Zenith DualBrite Installation and operating instructions

HAMPTON BAY
HAMPTON BAY DL10103BKS Use and care guide

LIVARNO LUX
LIVARNO LUX 54313 Operation and safety notes

Heath Zenith
Heath Zenith DualBrite 4030 Installation and operating instructions

Tracer
Tracer AMBIENCE-Smart Spiral instruction manual

Easy@Home
Easy@Home 3 SHELF FLOOR LAMP user manual

Delta Light
Delta Light SKELP X P 40 Installation instruction

Delta Light
Delta Light KIX M1 93033 instruction manual

Expolite
Expolite TOUR-PAR 18 user manual