Lacerta OAGhu48 User manual

BEDIENUNGSANLEITUNG -MANUAL FOR
OAGhu48
ACHTUNG:
Bitte die Schraube NICHT an der flachen Seite des Guidefingers festdrehen!
CAUTION!!!!!
Put the platform NEVER tighten the screw on the flat side!
Bedienungsanleitung (Verwendung mit EOS) -short description for using the OAG with EOS:
Schritt 1.: Befestigen Sie das Bajonett-Ende des
OAGhu48 am EOS-Gehäuse, als ob es ein
Teleobjektiv wäre. Die kleine Markierung am
OAGhu48 soll mit dem roten (oder weissem) Punkt
am Kameragehäuse übereinstimmen.
1.: Fix the bajonet end off the OAG on the Eos body as
you would do with a tele lens. There is a little mark on the
OAG ring to show the position of the red (or white) mark
on the Eos to slip in.
Schritt.2.: Lösen Sie die Madenschraube am Schieber
und schieben Sie den Schieber in die ungefähr
parfokale Stellung (für MGEN und ALCCD5 durch die
Lage der Abschlussplatte gekennzeichnet, MGEN an
der Innenkante, AlCCD5 an der Aussenkante)
2.: Loose the small srew on the platform and move the
platform on the guidefinger into the approx.parfocal
position (for MGEN and ALCCD5 marked via the position
of the platform, MGEN on the inner end, AlCCD5 on the
outer end, see photos)

Schritt 3.: ACHTUNG!!!!! Schrauben Sie den Schieber
sanft an der gekrümmten Fläche fest, aber AUF
KEINEN FALL auf der flachen Seite des des Guide-
Fingers. Hier ist die Wand extrem dünn gebaut, was
das Verkanten des OAGhu48 am EOS-Gehäuse
vermeiden soll. Diese Seite dient nur als Lichtschutz
und nicht als Befestigungsebene -egal wie einladend
das aussieht. Die Befestigung erfolgt mittels EINER
EINZIGEN Madenschraube.
3.: CAUTION!!!!! Put the platform gently to the guide
finger, but screw it to the curved area only, NEVER tighten
the screw on the flat side. Here the material is very thin to
allow for moving the OAG body along the Eos body. This
side is only to prevent light from shining into the guide
finger, not for screwing anything against it, never mind how
inviting it looks... Please use ONLY ONE SCREW to fix the
platform.
Schritt 4.: Schrauben sie Ihren Komakorrektor oder
Bildfeldebner an das teleskopseitige M48 Gewinde.
Korrektorlinsen mit T2 Gewinde (z.B. Baader MPCC)
kann man mit Hilfe eines T2M48 Adapterrings
befestigen.
4.:If you use a Comacorr or a flattener, screw it to the M48
thread of the OAG on the telescope side. If you use a
corrector with T2 thread you can use a T2M48 adapter
ring.
If not,screw the OAG directly on your extension tube using
a T2M48 adapter ring when needed as well.
Schritt 5.: Stellen Sie Ihr Teleskop mit EOS Kamera auf
eine Lichtquelle ein (Sterne, wobei offene Haufen wie
Pleiades bevorzugt sind, oder sehr entfernte Laterne),
stellen Sie die Eos scharf und verändern Sie die OAZ-
Scharfstellung nicht mehr.
5.: Point your telescope with Eos camera to a light source
(stars, best are open clusters with plenty of stars like the
Pleiades, or a very distant light bulb), focus on the Eos and
keep this position.
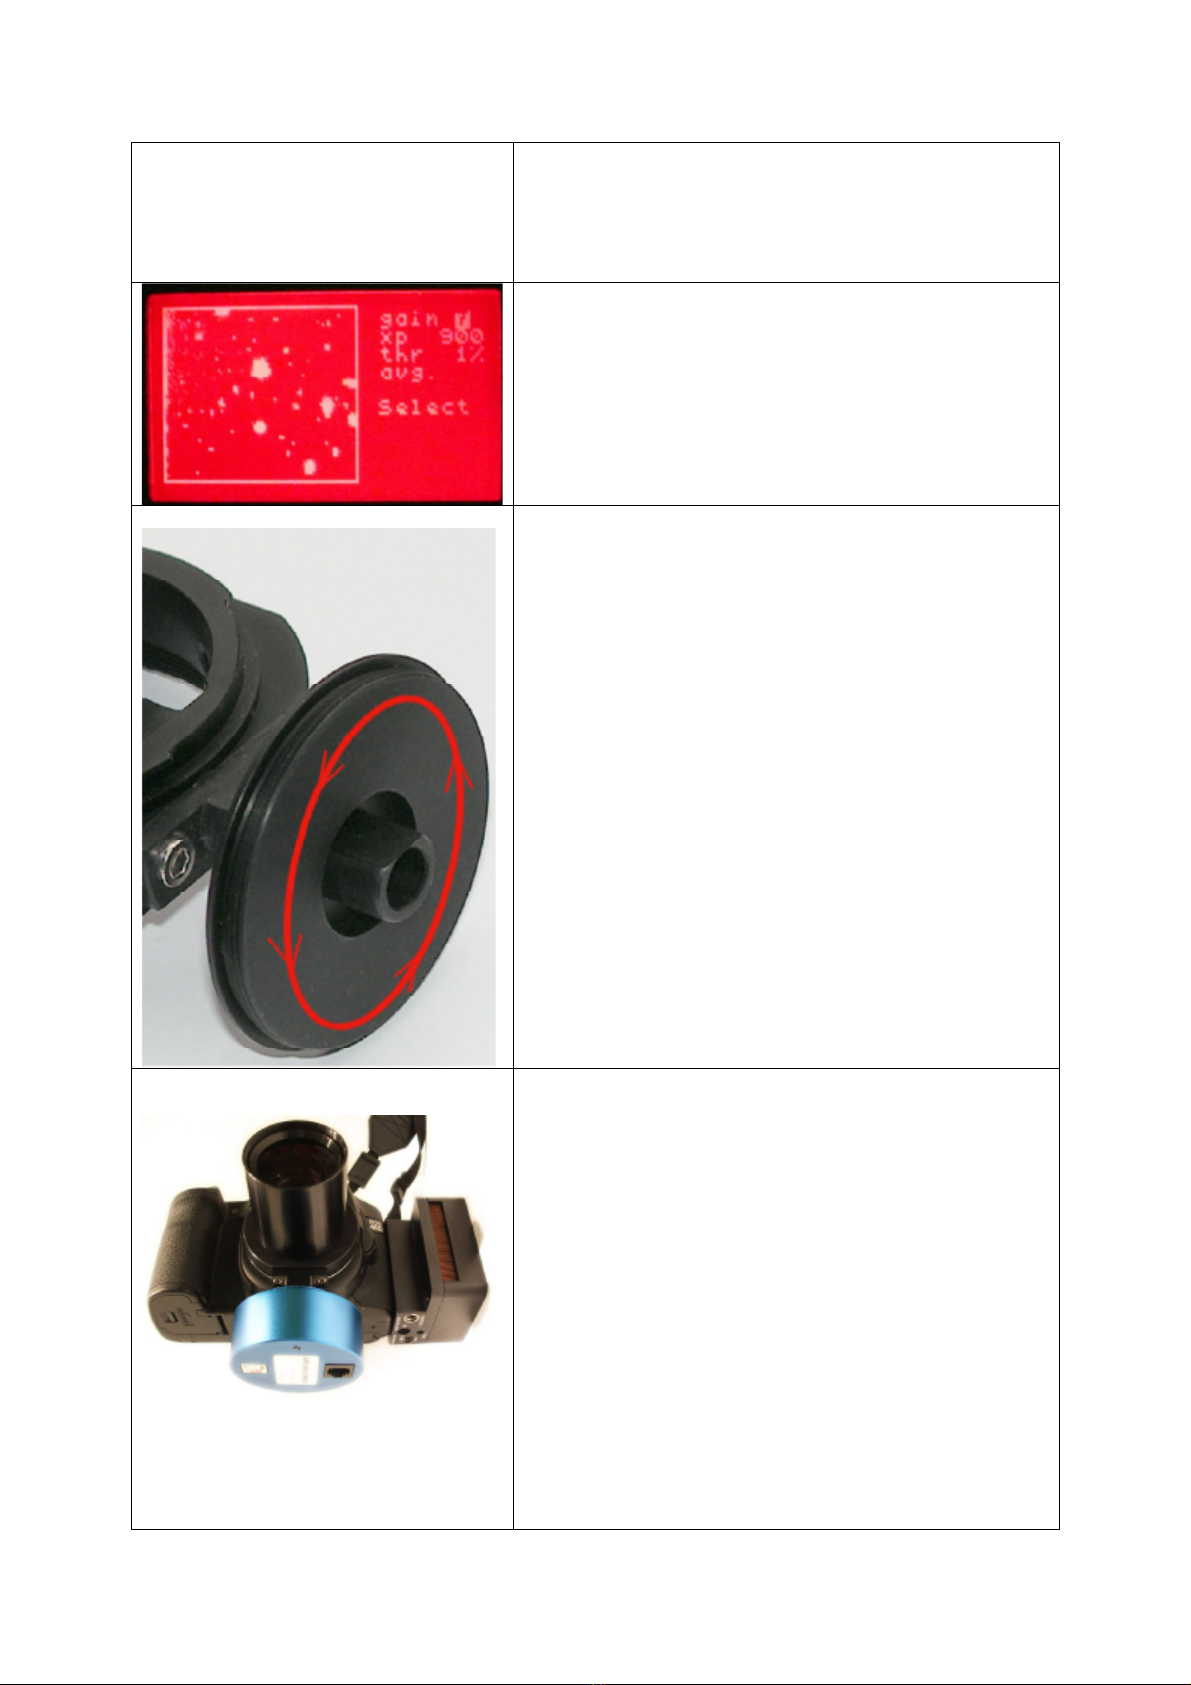
Schritt 6.: Bewegen Sie das Teleskop in die markierte
Richtung (siehe Bild mit rotem Pfeil) so, dass die
Lichtquelle auch im OAGhu48 sichtbar wird (wenn
nicht schon ein Stern sichtbar ist).
6.: Move your telescope in the appointed direction (see
picture with red arrow), so the star can be seen in the OAG
guidefinger (if there is none seen in the first position).

Schritt 7.: Schrauben Sie Ihre Guidekamera an das T2-
Gewinde des Schiebers.
7.: Screw your guide camera to the T2 thread of the
platform.
Schritt 8.: Bewegen Sie die Autoguider-Kamera und
Schieber auf diejenige Position am Guidefinger, wo
das Bild am schärfsten ist. Das ist die GENAUE
parfokale Stellung.
8.:Move the platform with guidecam on the guidefinger to
the position where the best focus on the guidecam is
reached. It is the EXACT parfocal-position.
Schritt 9.: Falls Ihr Autoguider verlangt, dass die
Pixelreihen mit RA/DEC parallel ausgerichtet sind (z.B.
SynGuider, oder andere Guide-Systeme ohne
Autokollimation), dann drehen Sie den Schieber
solange, bis die Parallelität erreicht ist. Vergessen Sie
nicht die parfokale Position nachher nocheinmal
überprüfen (Punkt 8)
9.:If your Autoguider demands the pixel rows of the
guidecam being parallel to RA/DEC, (f.e.: Synguider or
older Guidesystems without autocollimation) you may turn
the platform now to reach the desired position. Please
make it sure and controll the parfocal position again (step
8)!
Schritt 10.: Befestigen Sie endgültig den Schieber am
Guidefinger, aber AUF KEINEN FALL auf der flachen
Seite des des Guide-Fingers. Hier ist die Wand extrem
dünn gebaut, was das Verkanten des OAGhu48 am
EOS-Gehäuse vermeiden soll. Diese Seite dient nur als
Lichtschutz und nicht als Befestigungsebene -egal
wie einladend das aussieht. Die Befestigung erfolgt
mittels EINER EINZIGEN Madenschraube. Falls nötig
(weil z.B. die Schraube die gerade Fläche treffen
würde) verwenden Sie ein anderes Loch am Schieber.
10.: Now you may finally fix the platform on the guidefinger
by tightening the screw, but
NEVER ON THE FLAT SIDE OF THE GUIDEFINGER !!!
Here the material is very thin to allow movement of the
OAG relative to the Eos. This side is thought only to
prevent light from falling into the guidefinger. Please use
ONE SREW ONLY to fix the platform on the guidefinger. If
necessary, you may use one of the alternative threads.

Schritt 11.: Markieren Sie die Position des Schiebers
so, dass Sie die optimale Einstellposition das nächste
Mal sofort einstellen können (meistens lässt sich aber
der OAGhu48 samt Autoguiderkamera vom EOS-
Gehäuse ohne Zerlegen entfernen)
11.: If the approximative parafocal position was not
relevant or usefull in your case, mark your position to find it
again
OAGhu48 mit Adaptationsmöglichkeiten -OAGhu48 with all available adapters:
Table of contents