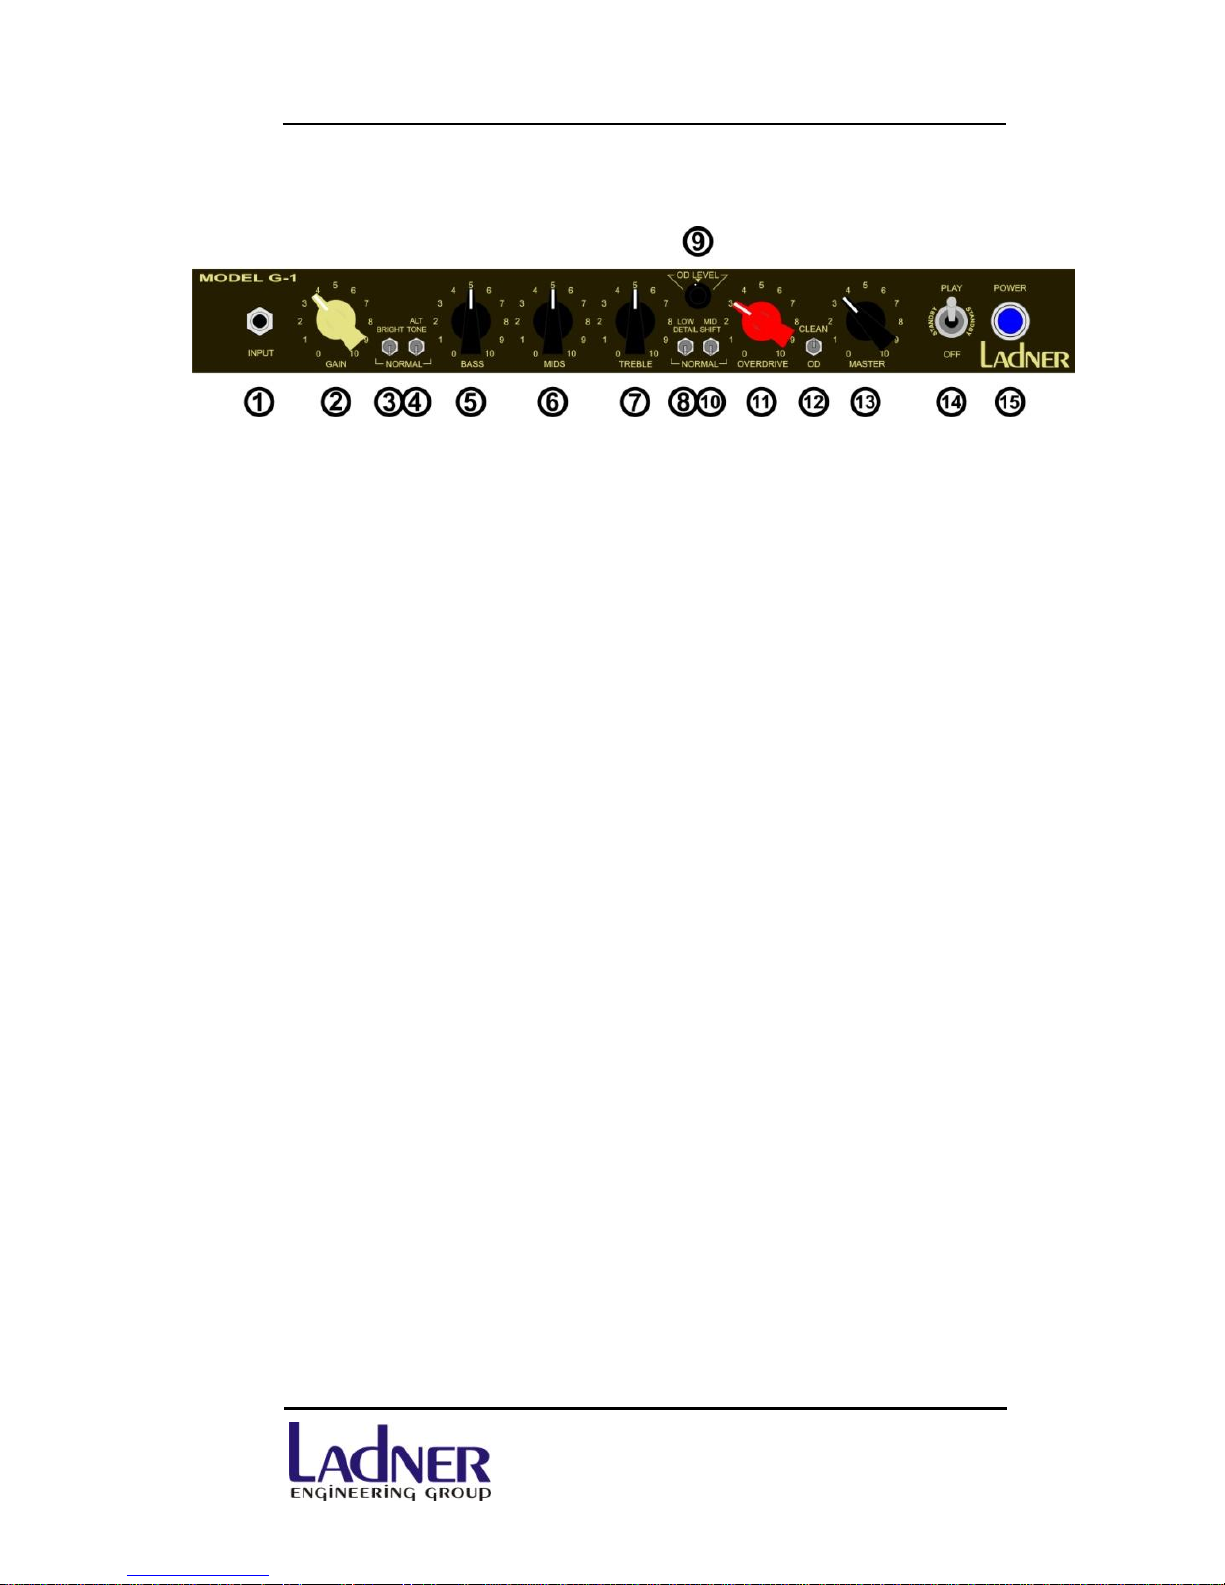
Model G-1 Guitar Amplifier Owner’s Manual
Page 3 of 14
INTRODUCTION
Generations of amplifiers have ushered sounds that are
unmistakable and powerful. From early amplifiers of
Fender and Marshall to the modern amplifiers of
Mesa/Boogie and Two Rock, there has been a lot of
magic trapped within the tubes. Ladner Engineering has
developed a new generation of vacuum tube amplifiers
that hopes to cement its name within the greats of the
past. First off, we thank you for purchasing the G-1
amplifier the first Ladner Engineering Group design. The
G-1 was developed to be an amplifier of versatility and
soul. From the fat powerful clean sound to the singing
overdrive, the G-1 was designed with the musician in
mind. Creating a palette of tones that can be used to
maximize the potential of the player and his sound.
Players also demand reliability and that was not over
looked. With all our amplifiers we ensure a hundred
percent quality within our hand built amplifiers. Built
upon a ceramic strip substrate, we kick quality up a
notch, no circuit boards, turret boards, no boards at all,
leaving out any potential malfunction from the sub-
structure. The heart and soul comes primarily from our
custom designed Mercury Magnetic transformers, in
response to our fine tuned pre-amp section to deliver
nothing less than pure tonal performance. Each knob
has sensitive control in their respective position, bringing
forth a wide spectrum of sounds to choose from. Enough
of this stuff, go out and play your G-1 for a thousand
hours a day!
Andrew & D.C. Ladner
Ladner Engineering Group