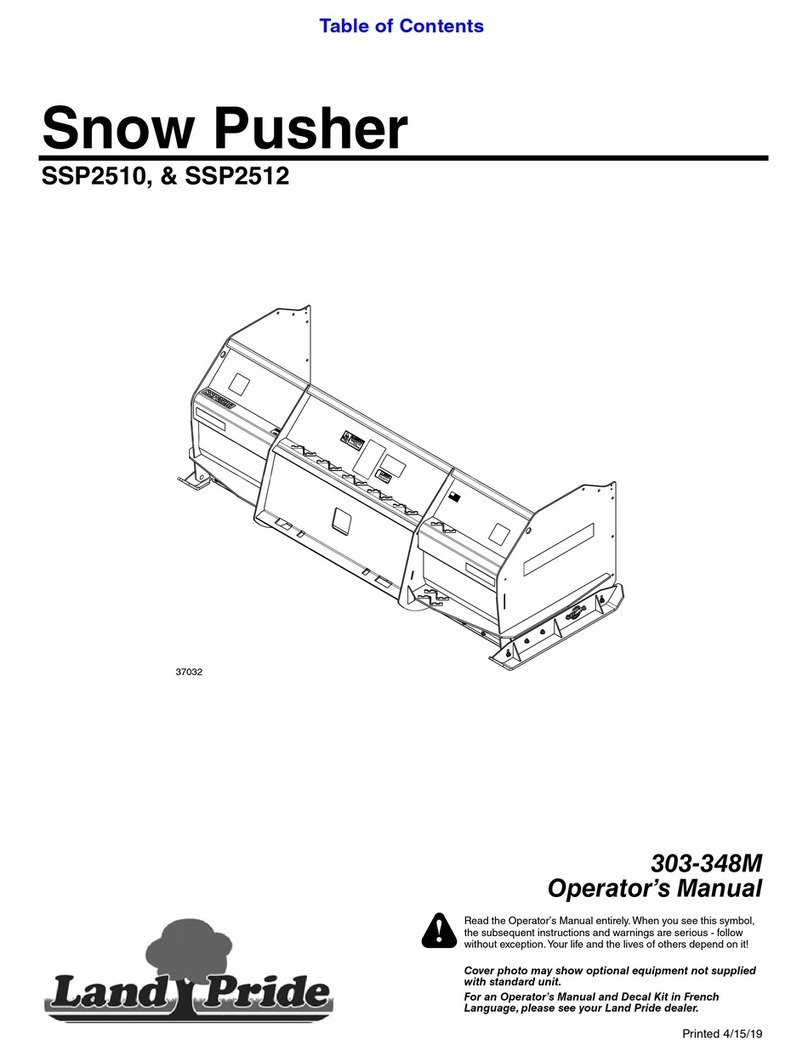
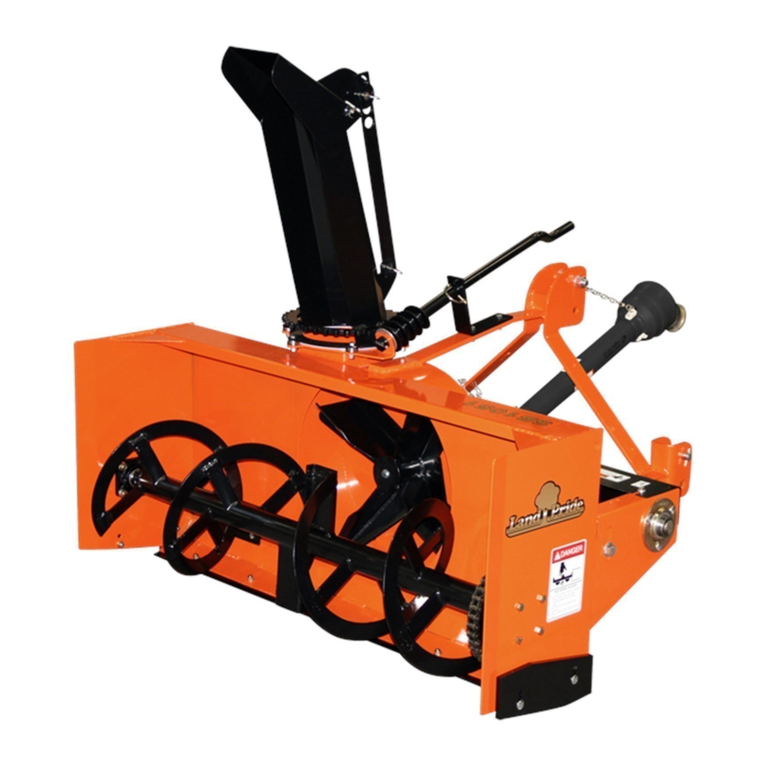
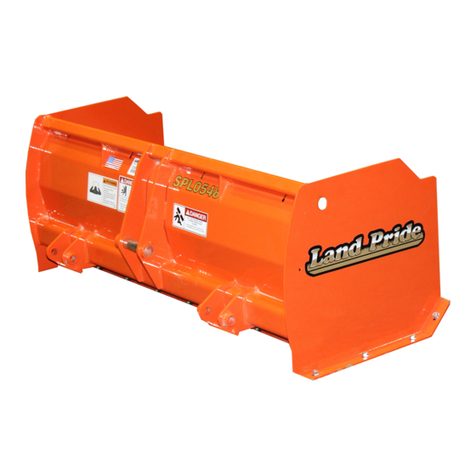
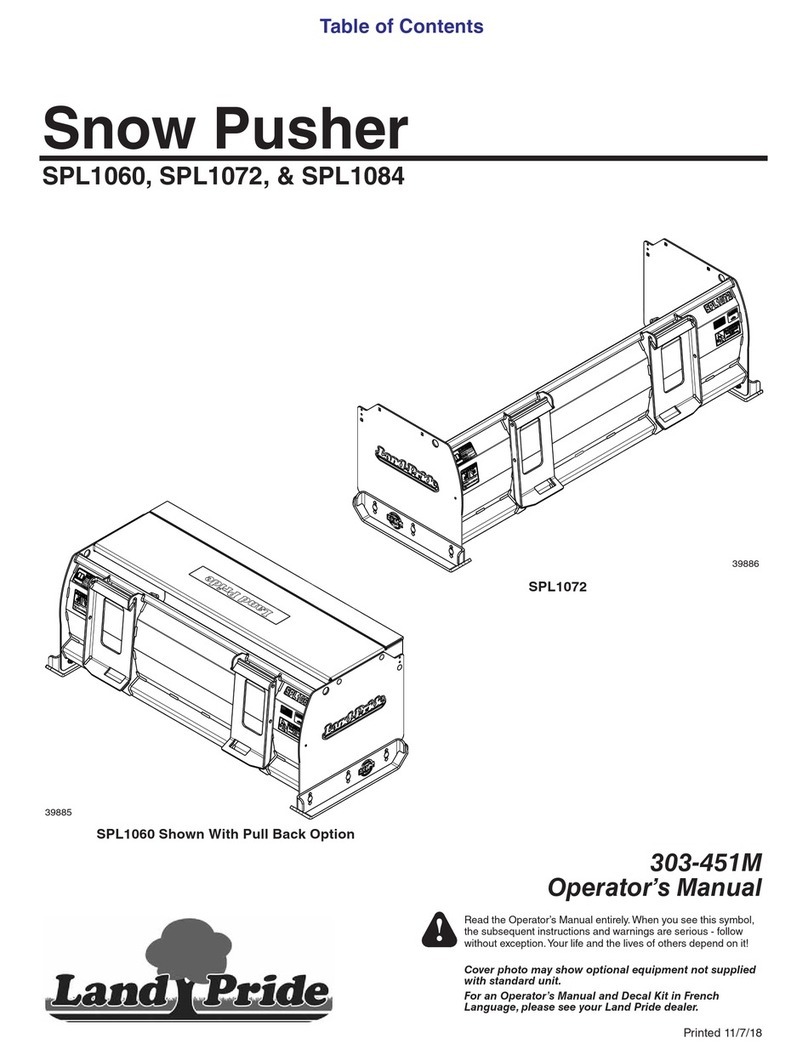
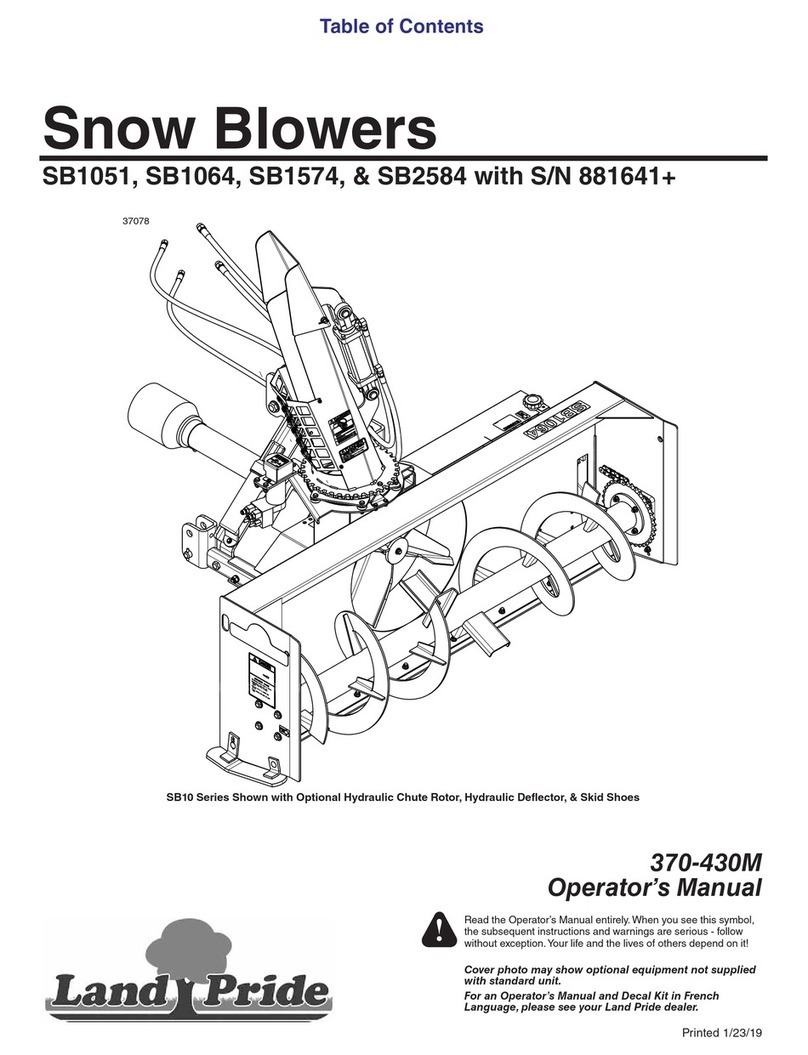
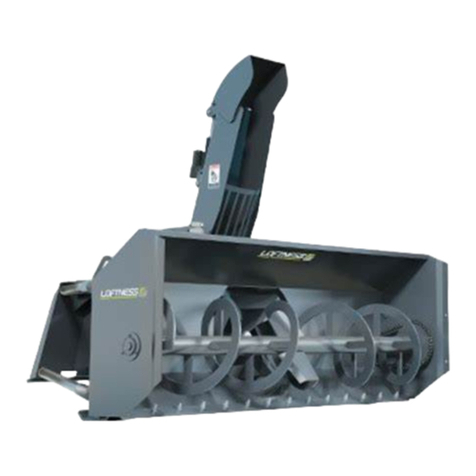
Land Pride SBL2566 User manual

Table of Contents
Cover photo may show optional equipment
not supplied with standard unit.
Read the Operator’s Manual entirely. When you
see this symbol, the subsequent instructions and
warnings are serious - follow without exception.
Your life and the lives of others depend on it!
!
© Copyright 2014 Printed
SBL2566, SBL2574, & SBL2584
Snow Blowers
35598
370-258M
Operator’s Manual
9/18/14

Table of Contents
SBL2566, SBL2574, & SBL2584 Snow Blowers 370-258M 9/18/14
©Copyright 2014 All rights Reserved
Land Pride provides this publication “as is” without warranty of any kind, either expressed or implied. While every precaution has been taken in the
preparationofthismanual,Land Prideassumes noresponsibilityforerrorsoromissions.Neitheris anyliabilityassumedfordamagesresultingfrom theuse
ofthe information containedherein. Land Pride reservesthe right toreviseand improveits productsas it sees fit.This publicationdescribesthe state of this
product at the time of its publication, and may not reflect the product in the future.
Land Pride is a registered trademark.
All other brands and product names are trademarks or registered trademarks of their respective holders.
Printed in the United States of America.
Table of Contents
Important Safety Information . . . . . . . . . . . . . 1
Safety at All Times . . . . . . . . . . . . . . . . . . . . . . . . . 1
Look For The Safety Alert Symbol . . . . . . . . . . . . . . 1
Safety Labels . . . . . . . . . . . . . . . . . . . . . . . . . . . . . 4
Introduction . . . . . . . . . . . . . . . . . . . . . . . . . . . 6
Application . . . . . . . . . . . . . . . . . . . . . . . . . . . . . . . . 6
Using This Manual . . . . . . . . . . . . . . . . . . . . . . . . . . 6
Owner Assistance . . . . . . . . . . . . . . . . . . . . . . . . . . 6
Serial Number . . . . . . . . . . . . . . . . . . . . . . . . . . . 6
Section 1: Assembly & Set-up . . . . . . . . . . . . 7
Skid Steer/Tractor Requirements . . . . . . . . . . . . . . 7
Torque Requirements . . . . . . . . . . . . . . . . . . . . . . . 7
Loading & Unloading . . . . . . . . . . . . . . . . . . . . . . 7
Optional Outer Skid Shoes . . . . . . . . . . . . . . . . . . . 7
Optional Inner Skid Shoes . . . . . . . . . . . . . . . . . . . . 7
Chute & Spout Assembly . . . . . . . . . . . . . . . . . . . . . 8
Spout Deflector, Hydraulic Cylinder . . . . . . . . . . . . . 9
Quick Coupler Set-up . . . . . . . . . . . . . . . . . . . . . . 10
Section 2: Equipment Hook-up & Unhook . . 11
Snow Blower Hook-up . . . . . . . . . . . . . . . . . . . . . . 11
Hydraulic Hose Hook-up . . . . . . . . . . . . . . . . . . . . 11
Solenoid Hook-up . . . . . . . . . . . . . . . . . . . . . . . . . 12
Check Equipment Clearances . . . . . . . . . . . . . . . . 13
Unhooking The Snow Blower . . . . . . . . . . . . . . . . 13
Section 3: Options . . . . . . . . . . . . . . . . . . . . . 14
Motor Assembly . . . . . . . . . . . . . . . . . . . . . . . . . . . 14
Flat Face Couplers . . . . . . . . . . . . . . . . . . . . . . . . 14
Case Drain Coupler & Cable Ties . . . . . . . . . . . . . 14
Toggle Switch Control Harness . . . . . . . . . . . . . . . 15
Tractor Control Harness 370-133A . . . . . . . . . . . 15
Skid Steer Control Harness 370-434A . . . . . . . . 16
Skid Steer Control Harness 370-134A . . . . . . . . 16
Deutsch HGD30 14 Pin Wiring Harness . . . . . . . . 17
Outer Skid Shoes . . . . . . . . . . . . . . . . . . . . . . . . . 17
Inner Skid Shoes . . . . . . . . . . . . . . . . . . . . . . . . . . 17
Section 4: Adjustments . . . . . . . . . . . . . . . . . 18
Discharge Chute & Spout Deflector . . . . . . . . . . . .18
Spout Deflector Adjustment . . . . . . . . . . . . . . . . 18
Chute Rotation Gear Alignment . . . . . . . . . . . . .18
Chute Rotation Adjustment . . . . . . . . . . . . . . . . .18
Outer Skid Shoe Adjustment . . . . . . . . . . . . . . . . .19
Inner Skid Shoe Adjustment . . . . . . . . . . . . . . . . .19
Auger Speed . . . . . . . . . . . . . . . . . . . . . . . . . . . . .20
Level Run Indicator Adjustment . . . . . . . . . . . . . . .20
Section 5: Operating Instructions . . . . . . . . . 21
Introduction . . . . . . . . . . . . . . . . . . . . . . . . . . . . . .21
Pre Operational Safety Check . . . . . . . . . . . . . . . .21
Operational Safety Check . . . . . . . . . . . . . . . . . . .21
General Safety Information . . . . . . . . . . . . . . . . . .22
Mounting & Dismounting Skid Steer . . . . . . . . . . .24
Transporting . . . . . . . . . . . . . . . . . . . . . . . . . . . . . 24
Leveling The Snow Blower . . . . . . . . . . . . . . . . . .25
General Operator Instructions . . . . . . . . . . . . . . . .25
Section 6: Maintenance & Lubrication . . . . . 27
General Maintenance Information . . . . . . . . . . . . .27
Tractor/Skid Steer Maintenance . . . . . . . . . . . . . .27
Auger & Impeller Inspection . . . . . . . . . . . . . . . . . .27
Outer Skid Shoe Option . . . . . . . . . . . . . . . . . . . . .28
Inner Skid Shoe Option . . . . . . . . . . . . . . . . . . . . .28
Grader Blade . . . . . . . . . . . . . . . . . . . . . . . . . . . . .29
Long Term Storage . . . . . . . . . . . . . . . . . . . . . . . . 29
Ordering Replacement Parts . . . . . . . . . . . . . . . . .29
Lubrication . . . . . . . . . . . . . . . . . . . . . . . . . . . . . . . 30
Auger Flange Bearing . . . . . . . . . . . . . . . . . . . . .30
Section 7: Specifications & Capacities . . . . . 31
Section 8: Features & Benefits . . . . . . . . . . . 32
Section 9: Troubleshooting . . . . . . . . . . . . . . 33
Section 10: Torque Values Chart . . . . . . . . . . 34
Section 11: Warranty . . . . . . . . . . . . . . . . . . . 35

1
Important Safety Information
9/18/14 SBL2566, SBL2574, & SBL2584 Snow Blowers 370-258M
Table of Contents
Important Safety Information
▲
These are common practices that may or may not be applicable to the products described in
this manual.
Safety at All Times
Thoroughly read and understand
the instructions given in this
manual before operation. Refer to
the “Safety Label” section, read all
instructions noted on them.
Do not allow anyone to operate
this equipment who has not fully
read and comprehended this
manual and who has not been
properly trained in the safe
operation of the equipment.
▲The operator must not use drugs
or alcohol as they can change the
alertness or coordination of that
personwhileoperatingequipment.
The operator should, if taking
over-the-counter drugs, seek
medical advice on whether he/she
can safely operate the equipment.
▲Operator should be familiar with all
functions of the unit.
▲Make sure all guards and shields
are in place and secured before
operating implement.
▲Start skid steer with steering
levers and hydraulic controls in
neutral.
▲Keep all persons away from
equipment and work area.
▲Operate implement and loader
arms from the driver’s seat only.
▲Dismounting from a moving unit
can cause serious injury or death.
▲Do not allow anyone to stand
between skid steer/tractor and
implement while hooking-up to
implement.
▲Keep hands, feet, and clothing
away from power-driven parts.
▲Watch out for objects overhead
and along side such as fences,
buildings, wires, trees, limbs, etc.,
while transporting and operating
attached implement.
▲Detach and store implement in an
area where children normally do
not play. Secure implement by
using blocks and supports.
Look For The Safety Alert Symbol
The SAFETY ALERT SYMBOL indicates there is a
potential hazard to personal safety involved and extra
safety precaution must be taken. When you see this
symbol, be alert, and carefully read the message that
follows it. In addition to design and configuration of
equipment, hazard control, and accident prevention are
dependent upon the awareness, concern, prudence, and
proper training of personnel involved in the operation,
transport, maintenance, and storage of equipment.
Parts Manual QR Locator
The QR (Quick Reference) code on the
front cover and to the left will take you to
the Parts Manual for this equipment.
Download the appropriate App on your
smart phone, open the App, point your
phone on the QR code and take a picture.
Dealer QR Locator
The QR code on the left will
link you to available dealers
for Land Pride products.
Refer to Parts Manual QR
Locator on this page for
detailed instructions.
For Your Protection
▲Thoroughly read and understand
the “Safety Label” section, read all
instructions noted on them.
!
!
!
!
Be Aware of
Signal Words
A Signal word designates a degree or
level of hazard seriousness. The
signal words are:
Indicates an imminently hazardous
situation which, if not avoided, will
result in death or serious injury. This
signal word is limited to the most
extreme situations, typically for
machine components that, for
functional purposes, cannot be
guarded.
DANGER
Indicates a potentially hazardous
situation which, if not avoided, could
result in death or serious injury, and
includes hazards that are exposed
when guards are removed. It may also
be used to alert against unsafe
practices.
Indicates a potentially hazardous
situation which, if not avoided, may
result in minor or moderate injury. It
may also be used to alert against
unsafe practices.
WARNING
CAUTION
Use Safety
Lights and Devices
▲Slow moving tractors, skid steer,
self-propelled equipment, and
towed implements can create a
hazard when driven on public
roads. They are difficult to see,
especially at night.
▲Flashing warning lights and turn
signals are recommended
whenever driving on public roads.

2
Important Safety Information
SBL2566, SBL2574, & SBL2584 Snow Blowers 370-258M 9/18/14
Table of Contents
These are common practices that may or may not be applicable to the products described in
this manual.
Skid Steer Shutdown
& Storage
Before leaving operator’s
seat:
▲Lower lift arms and put
attachment flat on the ground.
▲Turn off engine.
▲Engage park brake.
▲If included, raise seat bar and
move controls until both lock.
▲Remove key to prevent
unauthorized starting.
▲Use steps, grab-handles and
skid-resistant surfaces when
getting on and off the loader.
▲Detach and store implements in
an area where children normally
do not play. Secure implement by
using blocks and supports.
OFF
REMOVE
Practice Safe Maintenance
▲Understandprocedure beforedoing
work. Use proper tools and
equipment, refer to Operator’s
Manual for additional information.
▲Work in a clean dry area.
▲Lower attached implement to the
ground and follow all shutdown
procedures before leaving the
operator’s seat to perform
maintenance.
▲Allow implement to cool completely
before working on it.
▲Disconnect battery ground cable (-)
before servicing or adjusting
electrical systems or before
welding on implement.
▲Do not grease or oil implement
while it is in operation.
▲Inspect all parts. Make sure parts
are in good condition & installed
properly.
▲Remove buildup of grease, oil, or
debris.
▲Remove all tools and unused parts
from implement before operation.
Transport Safely
▲Comply with state and local laws.
▲Use towing vehicle and trailer of
adequate size and capacity. Secure
equipment towed on a trailer with
tie downs and chains.
▲Sudden braking can cause a towed
trailer to swerve and upset. Reduce
speed if towed trailer is not
equipped with brakes.
▲Avoid contact with any over head
utility lines or electrically charged
conductors.
▲Always drive with load on end of
loader arms low to the ground.
▲Always drive straight up and down
ramps with load on “uphill” side of
skid steer or tractor.
▲Engage park brake when stopped
on an incline.
▲Maximum transport speed for an
attached implement is 20 mph. DO
NOT EXCEED. Never travel at a
speed which does not allow
adequate control of steering and
stopping. Some rough terrains
require a slower speed.
▲As a guideline, use the following
maximum speed weight ratios for
an attached implement:
20 mph when weight of attached
implement is less than or equal
to the weight of machine towing
the implement.
10 mph when weight of attached
implement exceeds weight of
machine towing implement but
not more than double the weight.
▲IMPORTANT: Do not tow a load
that is more than double the weight
of the vehicle towing the load.
Tractor Shutdown & Storage
Before leaving operator’s
seat:
▲If engaged, disengage PTO.
▲Lower attached implement to
ground or onto support blocks.
▲Put tractor in park or set park
brake, turn off engine, and remove
switch key to prevent unauthorized
starting.
▲Wait for all components to come to
a complete stop before leaving the
operator’s seat.
▲Detach and store implement in an
area where children normally do
not play. Secure implement using
blocks and supports.
OFF
REMOVE

3
Important Safety Information
9/18/14 SBL2566, SBL2574, & SBL2584 Snow Blowers 370-258M
Table of Contents
Prepare for Emergencies
▲Be prepared if a fire starts.
▲Keep a first aid kit and fire
extinguisher handy.
▲Keep emergency numbers for
doctor, ambulance, hospital, and
fire department near phone.
These are common practices that may or may not be applicable to the products described in
this manual.
Tire Safety
▲Tire changing can be dangerous
and should be preformed by
trained personnel using the
correct tools and equipment.
▲When inflating tires, use a clip-on
chuck and extension hose long
enough to allow you to stand to
one side and NOT in front of or
over the tire assembly. Use a
safety cage if available.
▲When removing and installing
wheels, use wheel handling
equipment adequate for the
weight involved.
911
Avoid High
Pressure Fluids Hazard
▲Escapingfluidunderpressurecan
penetrate the skin causing
serious injury.
▲Avoid the hazard by relieving
pressure before disconnecting
hydraulic lines or performing work
on the system.
▲Make sure all hydraulic fluid
connections are tight and all
hydraulic hoses and lines are in
good condition before applying
pressure to the system.
▲Use a piece of paper or
cardboard, NOT BODY PARTS, to
check for suspected leaks.
▲Wear protective gloves and safety
glasses or goggles when working
with hydraulic systems.
▲DO NOT DELAY. If an accident
occurs, see a doctor familiar with
this type of injury immediately.
Any fluid injected into the skin or
eyes must be treated
within a few hours or
gangrene may
result.
Use Seat Belt and ROPS
▲Operate only tractors & skid steer
loaders equipped with Roll-Over
Protective Structure (ROPS) and
seat belt.
▲Fasten seat belt snugly and
securely to help protect operator
from being thrown, crushed, or
severely injured if a rollover
occurs; and from falling off the
tractor or skid steer loader and
being ran over. Not using the seat
belt can result in serious injury or
death.
▲Wearing protective equipment
such as safety shoes, safety
glasses, hard hat, and ear plugs
is highly recommended.
Wear
Protective Equipment
▲Wear protective clothing and
equipment appropriate for the job.
Clothing should be snug fitting
without fringes and pull strings to
avoid entanglement with moving
parts.
▲Prolonged exposure to loud noise
can cause hearing impairment or
hearing loss. Wear suitable
hearing protection such as
earmuffs or earplugs.
▲Operating equipment safely
requires the operator’s full
attention. Avoid wearing radio
headphones while operating
machinery.
Keep Riders
Off Machinery
▲Never carry riders or use
machinery as a personlift.
▲Riders obstruct operator’s view.
▲Riders could be struck by foreign
objects or thrown from the
machine.
▲Never allow children to operate
equipment.

4
Important Safety Information
SBL2566, SBL2574, & SBL2584 Snow Blowers 370-258M 9/18/14
Table of Contents
818-831C
Warning: High Pressure Fluid Hazard
Used only with hydraulic motor and hydraulic cylinders.
818-132C
Danger: Thrown Object Hazard
2-Places
Safety Labels
Your Snow Blower comes equipped with all safety labels in
place. They were designed to help you safely operate your
implement. Read and follow their directions.
1. Keep all safety labels clean and legible.
2. Refer to this section for proper label placement. Replace
all damaged or missing labels. Order new labels from your
nearest Land Pride dealer. To find your nearest dealer,
visit our dealer locator at www.landpride.com.
3. Some new equipment installed during repair requires
safety labels to be affixed to the replaced component as
specified by Land Pride. When ordering new components
make sure the correct safety labels are included in the
request.
4. Refer to this section for proper label placement.
To install new labels:
a. Clean the area the label is to be placed.
b. Spray soapy water on the surface where the label is to
be placed.
c. Peel backing from label. Press firmly onto the surface.
d. Squeeze out air bubbles with the edge of a credit card
or with a similar type straight edge.
35599
35599
35599
848-840C
Danger: Hands in Chute
2-Places: On both sides
of chute

5
Important Safety Information
9/18/14 SBL2566, SBL2574, & SBL2584 Snow Blowers 370-258M
Table of Contents
858-148C
Warning: Pinch Point Hazard
35599
35598
35599
35599
818-858C
Warning: To Prevent Serious Injury or Death
818-634C
Danger: Rotating Auger
2-Places

6
Introduction
SBL2566, SBL2574, & SBL2584 Snow Blowers 370-258M 9/18/14
Table of Contents
Owner Assistance
The Online Warranty Registration should be completed
by the dealer at the time of purchase. This information is
necessary to provide you with quality customer service.
The parts on your Snow Blower have been specially
designedbyLand Prideand shouldonlybereplacedwith
genuine Land Pride parts. Contact a Land Pride dealer if
customer service or repair parts are required. Your Land
Pride dealer has trained personnel, repair parts, and
equipment needed to service the implement.
Serial Number
Model No. _____________Serial No. _______________
For quick reference and prompt service, record model
number and serial number in the spaces provided above
and again on Warranty page 35. Always provide model
and serial number when ordering parts and in all
correspondences with your Land Pride dealer. Refer to
Figure 1 for location of your serial number plate.
Serial Number Plate Location
Figure 1
Further Assistance
Yourdealer wantsyoutobesatisfied withyournewSnow
Blower. If for any reason you do not understand any part
of this manual or are not satisfied with the service
received, the following actions are suggested:
1. Discuss the matter with your dealership service
manager making sure that person is aware of any
problems you may have and has had the opportunity
to assist you.
2. If you are still not satisfied, seek out the owner or
general manager of the dealership, explain the
problem, and request assistance.
3. For further assistance write to:
Land Pride Service Department
1525 East North Street
P.O. Box 5060
Salina, Ks. 67402-5060
E-mail address
lpser[email protected]
35599
Right Side
Left Side
Introduction
Land Pride welcomes you to the growing family of new
product owners.
This Snow Blower has been designed with care and built
by skilled workers using quality materials. Proper
assembly,maintenance,andsafeoperatingpracticeswill
help you get years of satisfactory use from this machine.
Application
Land Pride offers the SBL2566, SBL2574, and SBL2584
Series of residential Snow Blowers ranging from 66" up
to 84" in width. They are equipped with a universal quick
attachmountforattachingtoskidsteersandtractorswith
front loaders. These Snow Blowers are designed to
remove snow from parking lots, farm yards, feed lots,
driveways, walking paths, and sidewalks in residential
and commercial areas.
Land Pride’s unique patent-pending level run indicator
provides the operator with a clear, visible indication that
the Snow Blower is operating level. The auger, impeller,
and chute rotation are powered with individual hydraulic
motors. Adjustable skid shoes mounted on both sides
can be adjusted to carry the Snow Blower above hard
surfaces, loose gravel, and rocks to help increase the life
of the unit.
See “Specifications & Capacities” on page 31 and
“Features & Benefits” on page 32 for additional
information and performance enhancing options.
Using This Manual
•This Operator’s Manual is designed to help familiarize
you with safety, assembly, operation, adjustments,
troubleshooting, and maintenance. Read this manual
and follow the recommendations to help ensure safe
and efficient operation.
•The information contained within this manual was
current at the time of printing. Some parts may change
slightly to assure you of the best performance.
•To order a new Operator’s or Parts Manual, contact
your authorized dealer. Manuals can also be
downloaded, free-of-charge, from our website at
www.landpride.com.
Terminology
See Figure 1: “Right” or “Left” as used in this manual is
determined by facing in the direction the machine will
operate while in use unless otherwise stated.
Definitions
IMPORTANT: A special point of information related
to the following topic. Land Pride’s intention is this
information must be read & noted before continuing.
NOTE: A special point of information that the
operator should be aware of before continuing.

7
Section 1: Assembly & Set-up
9/18/14 SBL2566, SBL2574, & SBL2584 Snow Blowers 370-258M
Table of Contents
Section 1: Assembly & Set-up
Skid Steer/Tractor Requirements
The Snow Blower is designed to attach to tractor loaders
equipped with Land Pride’s 3-point mounted Hydraulic
Reservoir System (HRS) or equivalent and skid steers
with the following minimum requirements:
SAE Lift Capacity. . . . . . . . . . . . . . . . . . . . . 1200 lbs
Hitch Type . . . . . . . . . . .Universal Quick Attach Hitch
Hydraulic Pressure Rating . . . . . . . . .1500 - 3500 psi
Low Volume Motors & Hoses . . . . . . . . . 12 - 19 gpm
Medium Volume Motor & Hoses. . . . . . . 20 - 26 gpm
High Volume Motor & Hoses . . . . . . . . . 27 - 33 gpm
Hydraulic Hoses. . . . . . . . . . . . . 2 - Hydraulic outlets
Case Drain Hose . . . . . . . . . . . . . 1 - Hydraulic outlet
Skid Steer Weight. . . . . . . . . . . . .See warning below
!WARNING
Ballast weights may be required to maintain steering control.
Refer to your skid steer or tractor Operator’s Manual to
determine proper ballast requirements.
Torque Requirements
Refer to “Torque Values Chart” on page 34 to
determine correct torque values for common bolts.
Loading & Unloading
Refer to Figure 1-1:
There are two lifting holes (one on each end panel). Use
these holes to attach lift chains during loading/unloading
and while installing skid shoes in assembly & set-up.
Lift Points
Figure 1-1
IMPORTANT: The skid steer or tractor mounted
hydraulic reservoir system must be equipped with a
case drain system.
35599
Outer Skid Shoe Assembly (Right-Hand Shown)
Figure 1-2
Optional Outer Skid Shoes
Refer to Figure 1-2:
1. Attach outer right-hand skid shoe (#1) to the right-
hand side panel with 1/2"-13 x 1 1/4" GR5 carriage
bolts (#2) and hex flange lock nuts (#3) using the
bottom square holes as shown.
2. Tighten hex flange lock nuts (#3) to the correct
torque.
3. Repeat steps 1&2fortheleft-hand side.
Inner Skid Shoe Assembly (Left-Hand Shown)
Figure 1-3
Optional Inner Skid Shoes
Refer to Figure 1-3:
1. Attach skid shoe mount (#2) to the back, left side of
the Snow Blower with 1/2"-13 x 1 1/2" GR5 bolts (#3)
andhexflangelocknuts(#4).Tightenhexflangelock
nuts to the correct torque.
2. Attach inner skid shoe (#1) to skid shoe mount (#2)
with bent pin (#6) as shown. Secure bent pin with
hairpin cotter (#5).
3. Repeat steps 1&2fortheback,right side of the
Snow Blower.
37225
37226

8
Section 1: Assembly & Set-up
SBL2566, SBL2574, & SBL2584 Snow Blowers 370-258M 9/18/14
Table of Contents
Chute & Spout Assembly
Refer to Figure 1-4:
1. Remove hex nuts (#10), spring lock washers (#12),
hex head bolts (#7), and rotational stop (#6). Keep
hardware for reuse.
2. Remove hex nuts (#11), spring lock washers (#13),
hex head bolts (#9), bearing strap (#2A), and chute
bearings (#5). Keep hardware for reuse.
3. With discharge chute (#1) facing straight forward as
shown. Slide base of chute over UHMW chute
bearing ring (#14) until base of chute is fully under
remaining bearing straps (#2B & #2C) and engage
with sprocket (#4).
4. Reattach bearing strap (#2A) to snow blower
housingwithexisting3/8"-16 x 1 1/2" GR5 bolts(#9),
chute bearings (#5), lock washers (#13), and nuts
(#11). Tighten nuts (#11) to the correct torque.
5. Reattach rotational stop (#6) to Snow Blower
housing with existing 1/4"-20 x 3/4" GR5 bolts (#7),
rotational stop (#6), lock washers (#12) and hex nuts
(#10). Tighten nuts (#10) to the correct torque.
Refer to Figure 1-5:
6. Verify stop bolts (#8A & #8B) are left of rotational
stop (#6) as shown.
7. Tighten hex bolts (#7) to the correct torque.
IMPORTANT: Position chute (#1) facing straight
forward as shown in Figure 1-4 before sliding base
of chute over bearing ring (#14).
Chute & Spout Assembly
Figure 1-4
Rotational Stop Bar Set-up
Figure 1-5
35600
35601

9
Section 1: Assembly & Set-up
9/18/14 SBL2566, SBL2574, & SBL2584 Snow Blowers 370-258M
Table of Contents
Priority Valve Ports
Figure 1-6
Spout Deflector, Hydraulic Cylinder
Refer to Figure 1-6 & Figure 1-7:
1. Route hydraulic hoses (#3 & #4) through hose
guides (#6 & #7).
2. Tie hoses (#3 & #4) together below hose guide (#7)
with cable tie (#8) in the locations shown.
Refer to Figure 1-8:
3. Screw o-ring end of 9/16" elbows (#2A & #2B) into
cylinder ports on hydraulic cylinder (#1). Do not
tighten elbows at this time.
4. Screw 1/4" x 45" short hydraulic hose (#3) to
elbow (#2B) until tight.
5. Screw 1/4" x 55" long hydraulic hose (#4) to
elbow (#2A) until tight.
6. Tighten elbows (#2A & #2B) to hydraulic
cylinder (#1) until tight.
37229
Hydraulic Hose Hook-up (Spout Deflector to Solenoid)
Figure 1-7
Hydraulic Cylinder Assembly For Spout Deflector
Figure 1-8
35603
35602

10
Section 1: Assembly & Set-up
SBL2566, SBL2574, & SBL2584 Snow Blowers 370-258M 9/18/14
Table of Contents
Quick Coupler Set-up
Refer to Figure 1-9
Two high pressure hydraulic outlets are required for
attaching hydraulic hoses (#7 & #8) and a third outlet is
required for attaching case drain line (#9).
1. Thread hydraulic hoses (#7, #8, & #9) through holes
on the left-hand side of Snow Blower frame. Holes
not shown in illustration.
2. Continue threading hoses through hose loop (#10).
Refer to Figure 1-10
3. Consult your skid steer Operator’s Manual or
Auxiliary Hydraulic Reservoir Manual to determine
which line on your machine is under pressure when
locked for continuous operation.
4. If installing optional large flat face couplers, skip to
step 5 below. If installing optional small flat face
couplers, screw adapters (#13) to small flat face
couplers (#11 & #12) until tight.
5. Remove plastic cap from hydraulic line (#7).
6. Select couplers (#11 or #12) that will mate with your
machine’scoupling thatisunder pressureandattach
that coupling to hydraulic line (#7) and tighten.
7. Remove plastic cap from hydraulic line (#8) and
screw remaining coupler to line (#8) until tight.
8. If customer chooses to screw case drain line (#9)
directly to the tank/sump, then skip step 9 and go to
“Snow Blower Hook-up” on page 11.
9. If attaching optional coupler (#6) to case drain
line (#9):
a. Remove plastic cap from case drain line (#9).
b. Wrap teflon tape around the pipe threads on the
end of the case drain line.
c. Screw optional coupler (#6) on tight.
NOTE: How to identify hydraulic lines (#7, #8, & #9):
•Hydraulic pressure line (#7) attaches to port (#1)
located on right-hand side of impeller motor.
•Hydraulic return line (#8) attaches to tee (#3)
located beneath impeller motor.
•Case drain line (#9) attaches to port (#2) located
on top of impeller motor.
NOTE: Flat face couplers (#11 & #12) and adapters
(#13)areoptional. Theycan bepurchasedfrom your
local Land Pride dealer. See “Flat Face Couplers”
onpage 14 fordetailed information andLandPride’s
part number.
NOTE: Coupler (#6) is optional. It can bepurchased
from your local Land Pride dealer. See “Case Drain
Coupler & Cable Ties” on page 14 for detailed
information and Land Pride’s part number.
Hydraulic Hose Layout (View Without Hitch Plate)
Figure 1-9
Quick Disconnect Coupling Set-up
Figure 1-10
IMPELLER MOTOR
35605
35604

11
Section 2: Equipment Hook-up & Unhook
9/18/14 SBL2566, SBL2574, & SBL2584 Snow Blowers 370-258M
Table of Contents
Snow Blower Hook-up
Refer to Figure 2-1:
!DANGER
A Crushing Hazard exists when hooking-up equipment. Do
not allow anyone to stand between skid steer/tractor and
implement while hooking-up to implement. Do not operate
hydraulics while someone is near the skid steer/tractor or
implement.
!CAUTION
Make sure your skid steer/tractor hitch is properly attached to
the Snow Blower hitch. It must be secured under the Snow
Blower top angle bars and loader hitch plate lock handles
must be locked down with locking pins extending fully through
bottom slots in the Snow Blower hitch. An improperly attached
Snow Blower can come loose and fall.
Refer to Figure 2-1:
1. Check for and remove debris in the hitch point areas
before hooking-up to Snow Blower.
2. Raise lock pins on loader hitch for hook-up.
3. Drive skid steer or tractor slowly to the Snow Blower
hitchmakingsurehitchplate ontheskidsteer/tractor
is parallel with the Snow Blower’s top angle bars.
NOTE: The Snow Blowers are designed for skid
steers and tractors with front mounted loaders.
Section 2: Equipment Hook-up & Unhook
Hook-up to Snow Blower
Figure 2-1
35599
Bottom slots
Top Angle Bars
1
2
3
5
4
4. Rotate top of skid steer/tractor tilt arms slightly
forward.
5. Position top ofskid steer/tractor hitchplateunder the
topangledbarsand slowlyraiseloader hitchplateup
until hitch plate is seated under the topangle bars.
6. Rotate top of skid steer/tractor tilt arms back until
Snow Blower makes full contact with face of hitch
plate.
7. Push lock pins on the loader hitch down. Make sure
lockpinsgothrough bottom slots in theSnow Blower
hitch and handles are fully locked down.
8. Set loader arms to float.
Hydraulic Hose Hook-up
!DANGER
Hydraulic fluid under high pressure can penetrate skin. Wear
protective gloves and safety glasses or goggles when working
with hydraulic systems. Use a piece of cardboard or wood
rather than hands when searching for hydraulic leaks. If
hydraulic fluid is injected into the skin or eyes, it must be
treated by a doctor familiar with this type of injury within a
few hours or gangrene may result. DO NOT DELAY.
IMPORTANT: Set loader arms to float before
blowing snow. The skid shoes can have increased
wear if loader arms are rigid.
IMPORTANT: Collect and dispose all oil spills and
leaks in an environmentally safe manner.
IMPORTANT: Hose routing is the responsibility of
the owner/operator of the Snow Blower. Pinched
and/or stretched hoses are not covered under the
warranty.
IMPORTANT: Make sure all coupler fittings are
clean before connecting them to skid steer couplers.

12
Section 2: Equipment Hook-up & Unhook
SBL2566, SBL2574, & SBL2584 Snow Blowers 370-258M 9/18/14
Table of Contents
Refer to Figure 2-3 on page 13:
Two high pressure hydraulic outlets are required for the
hydraulic motor and one outlet for the case drain.
1. Routehydraulichosesalongthemostconvenientpath
to access your skid steer or tractor mounted hydraulic
reservoir couplings.
2. Cleanquickconnect couplersofdirt andthenconnect
couplers (#1 & #2) to the skid steer couplers or
couplers at the tractor mounted hydraulic reservoir.
Makesurequickconnectcouplershavefullyengaged.
If they have not, check the following:
a. Make sure couplers are same size and type.
b. Make sure hydraulic pressure has been released.
3. If case drain line is fitted with the optional coupler,
then connect that coupler (#3) to the tank/sump
coupler and skip to step 5 below.
4. If screwing case drain line directly to the tank/sump:
a. Remove plastic cap from case drain line (#3) and
wrap teflon tape around the pipe threads on the
end of the case drain line.
b. Screw case drain line (#3) to your equipment’s
tank/sump port until tight. All required adapter
fittings are supplied by customer.
5. Turn auxiliary hydraulics onto checkimpeller rotation.
The impeller should rotate counterclockwise viewed
from the operator’s seat and clockwise viewed facing
impeller and auger from the front. If impeller rotates
incorrectly, switch male and female couplers on the
hydraulic hoses and reconnect hoses.
6. Cable ties to be added at end of solenoid hook-up.
Solenoid Hook-up
Refer to Figure 2-2:
There are six optional wiring harnesses and all connect
the same way to the Snow Blower solenoids (#1 & #2) but
connect differently to the skid steer or tractor. See pages
15 thru 17 for a detailed descriptions of all six.
1. Skip to step 3 if optional wire harness (#4) has a 6 pin
connector. Otherwise, continue with step 2 below.
2. If solenoid harness has a 14 pin connector, attach
harness to the 14 pin connector located on the end of
the loader arm. Skip to step 4 on this page.
3. There are three toggle switch control harnesses
available. One is for tractor mounted Snow Blowers,
and two are for skid steer mounted Snow Blowers.
•Install “Tractor Control Harness 370-133A” using
“Installation Instructions for Tractor Harness” on
page 15.
•Install “Skid Steer Control Harness 370-434A”
using instructions in manual 370-452M included
with this kit. See page 16 for harness description.
•Install “Skid Steer Control Harness 370-134A”
using instructions in manual 370-349M included
with this kit. See page 16 for harness description.
Quick Disconnect Coupling Set-up
Figure 2-2
4. Route wire harness (#4) in Figure 2-2 & Figure 2-3
along side hydraulic hoses to solenoids (#1 & #2).
Do not secure wire harness (#4) with cable ties at
this time.
5. At solenoid (#1), attach brown banded
connector (#1B) to brown wire connector (#3B) and
white banded connector (#1W) to white wire
connector (#3W).
6. At solenoid (#2), attach red banded connector (#2R)
to red wire connector (#3R) and green banded
connector (#2G) to green wire connector (#3G).
7. Sit in the skid steer or tractor seat, fasten seat belt,
start unit, turn auxiliary hydraulics “on”, and position
loader arms fully down.
8. At the control box, push on the “Tilt Up/Down”
toggle switch to tilt deflector spout up and pull toggle
switch to tilt deflector spout down. Watch spout to
make sure it moves in the proper direction.
9. At the control box, push on the “Rotate Left/Right”
toggleswitchtorotatechutetothe leftandpulltoggle
switch to rotate chute to the right. Watch chute to
make sure it rotates in the proper direction.
10. Shut skid steer/tractor down and make any needed
adjustments to the solenoid connections as follows:
•If spout tilts opposite of what it should, change
green wire connector (#3G) with red wire
connector (#3R) at solenoid (#2).
•If chute rotates in the opposite of what it should,
changebrownwireconnector(#3B)withwhitewire
connector (#3W) at solenoid (#1).
Refer to Figure 2-3 on page 13:
11. Adjust path of hydraulic hoses (#1, #2, #3) and wire
harness (#4) to suit and secure with cable ties (#5)
as needed.
35606

13
Section 2: Equipment Hook-up & Unhook
9/18/14 SBL2566, SBL2574, & SBL2584 Snow Blowers 370-258M
Table of Contents
Check Equipment Clearances
It is important to check clearance before putting the
Snow Blower into operation. Make sure hydraulic hoses
and wiring harness are long enough and won’t become
pinched or entangled in the equipment. Also, make sure
SnowBlowerdoes notcome in contact withtractorframe
and tires by carefully going through its full range of
motions.
1. Visually inspect hydraulic hoses for possible pinch
points and shortness. If needed, make hose
adjustments before putting equipment into service.
2. Visually inspect wiring harness for possible pinch
points and shortness. If needed, make adjustments
to the wiring harness before putting equipment into
service.
3. If necessary, have someone stand nearby that can
motion for the operator to stop if a problem develops
while completing steps 4 thru 6 below.
4. Start skid steer/tractor and raise loader arms high
enough to tilt hitch plate fully down without Snow
Blower making contact with the ground.
5. Fully extend and retract hydraulic cylinders on the
end of the skid steer/tractor loader arms while
watchingforinterferencesbetween skidsteer/tractor
and Snow Blower frame.
6. Raise skid steer/tractor loader arms fully up and
repeat steps 4 thru 5 above.
IMPORTANT: Makesurehydraulichosesandwiring
harness are long enough and properly secured so
that they do not become stretched or pinched
through their full range of motions.
Unhooking The Snow Blower
Refer to Figure 2-3:
1. See “Long Term Storage” on page 29 before
parking Snow Blower for long periods.
1. Park skid steer/tractor on a flat, level, solid surface,
and lower Snow Blower onto the surface.
2. Place transmission in park, set park brake, shut
power equipment off, and remove switch key.
3. With Snow Blower resting on the ground, release all
hydraulic system pressure before dismounting skid
steerortractor.SeeSkidSteerOperator’sManualfor
instructions on how to release skid steer hydraulic
system pressure.
4. Disconnect solenoid wire harness (#4) from the front
of the loader arm. Do not disconnect harness from
the solenoids.
5. Disconnect hydraulic hoses (#1, #2, & #3) from skid
steer or tractor mounted hydraulic reservoir.
6. Storehydraulichoses and wire harness on theSnow
Blower frame to keep dirt away from the couplings
and electrical connector.
7. Raise lock pins on loader hitch. If lock pins are
activated from the operator’s seat, return to the skid
steer/tractor to raise lock pins.
8. From the operator’s seat, tilt top of loader hitch
slightly forward towards the Snow Blower.
9. Slowly lower skid steer/tractor hitch plate until top
angle bars and hitch plate have separated.
10. Back skid steer/tractor slowly away from the Snow
Blower while making sure it does not interfere with
the equipment.
Hook-up to Snow Blower
Figure 2-3
35599
Bottom slots
Top Angle Bars
1
2
3
5
4

14
Section 3: Options
SBL2566, SBL2574, & SBL2584 Snow Blowers 370-258M 9/18/14
Table of Contents
Motor Assembly
Refer to Figure 3-1:
MOTOR BUNDLE HYD 12-19 GPM . . . . . . . 370-253A
MOTOR BUNDLE HYD 20-26 GPM . . . . . . . 370-254A
MOTOR BUNDLE HYD 27-33 GPM . . . . . . . 370-255A
Three impeller motor assembly options are available to
meet your hydraulic flow requirements. They are
interchangeable and do not require adapter kits.
Compare your motor’s GPM rating located on an
attached decal with the GPM ratings above.
If your Snow Blower’s impeller motor is not compatible
with your skid steer or tractor, you should replace it with
one of the above assemblies that is compatible.
Flat Face Couplers
Refer to Figure 3-2:
The following flat face hydraulic couplers are available.
LARGE FLAT FACE COUPLERS . . . . . . . . . 316-289A
Large flat face couplers consist of one large flat face
male coupler and one large flat face female coupler
SMALL FLAT FACE COUPLERS . . . . . . . . . 316-290A
Small flat face couplers consist of one small flat face
male coupler, one small flat face female coupler, and two
adapters.
Case Drain Coupler & Cable Ties
Refer to Figure 3-3:
CTL/SS COUPLER PACKAGE . . . . . . . . . . . 326-474A
When needed, order this optional 3/8" female quick
disconnect coupler for attaching to the Snow Blower’s
case drain line. Included with this package are three
cabletiesforsupportingthecase drainline along its path
to the tank/sump.
Section 3: Options
Quick Release Couplers
Figure 3-2
Case Drain Coupler
Figure 3-3
37219
35808
Motor Assembly
Figure 3-1
37231 37223
Motor assembly for units with S/N- & below Motor assembly for units with S/N + & above

15
Section 3: Options
9/18/14 SBL2566, SBL2574, & SBL2584 Snow Blowers 370-258M
Table of Contents
Tractor Mounted Toggle Switch Control Harness
Figure 3-4
FOUR CONNECTORS THIS END
CONNECTS TO EQUIPMENT SOLENOIDS
20 AMP FUSE
TWO EYELETS
CONNECTS TO 12V
POWER SOURCE
35809
See Figure 4-1
on page 18.
Toggle Switch Control Harness
If the skid steer or tractor is not equipped with a Deutsch
HGD30 14 Pin connector at the front of the loader arm,
the customer should purchase a Toggle Switch Control
Harness option. Three options are available. One is
designed for tractor-mounted Snow Blowers and the
other two are for skid steer-mounted Snow Blowers.
Tractor Control Harness 370-133A
Refer to Figure 3-4:
370-133A CONTROL HARNESS TRACTOR
This harness is used only with tractor mounted Snow
Blowers and consist of the following:
•Powercord(#1):Attachestotractor batteryandcontrol
box (#2).
•Control box (#2): Mounts in a convenient location for
the operator to access from the seat. See also Figure
4-1 on page 18.
•Wire harness (#3): Attaches to control box (#2) and
terminates at the front of one of the loader arms.
•Wiringharness (#4): Attachesto wire harness(#3) and
solenoids at the Snow Blower.
•Cable ties (#5): For securing wire harnesses (#1, #3,
& #4) to the tractor loader and Snow Blower.
Installation Instructions for Tractor Harness
1. Before doing anything else, determine the path
power cord (#1) will travel from tractor battery to
control box (#2), location of control box (#2), and
path wire harness (#3) will travel from control box to
the front end of the loader arm. Make sure control
box is mounted in an area where the operator can
operate the toggle switches easily from the tractor
seat. Method of mounting the control box is to be
determined by the customer.
2. Disconnect negative(-)blackpowercord from its
battery post.
3. Attach positive(+)redwire eyelet on end of power
harness (#1) to the battery’s positive ( + ) post and
tighten fastener hardware.
4. Attachnegative(-)blackwireeyeletonendof power
harness (#1) and negative(-)blackpowercord to
the battery’s negative(-)post and tighten.
5. Route power cord (#1) from the battery to the
predetermined location of control box (#2).
6. Mount toggle switch control box (#2) to the tractor
using hardware furnished by customer.
7. Plugpowercord(#1)andwireharness(#3)tocontrol
box (#2).
8. Routewire harness (#3) to thefrontend of one ofthe
loader arms.
9. Make any final adjustments to wire harness (#3) and
power cord (#1) and make sure wire harness (#4)
can reach from solenoids at the Snow Blower to
connector at the end of wire harness (#3).
10. Secure power cord (#1) and wire harness (#3) with
cable ties (#5).
11. Connect 6 pin connector on end of wire harness (#4)
to wire harness (#3).
12. Continue with step 4 under “Solenoid Hook-up” on
page 12.

16
Section 3: Options
SBL2566, SBL2574, & SBL2584 Snow Blowers 370-258M 9/18/14
Table of Contents
Skid Steer Control Harness 370-434A
Refer to Figure 3-5:
370-434A Kubota CTL Skid Steer Control Harness
This harness is used with skid steers equipped with a
Deutsch 2 pin coupler but not the Deutsch HD30 14 pin
coupler. It consist of the following:
•Powercord(#1):Attachestoskidsteer’s2-pinDeutsch
plug and control box (#2).
•Control box (#2): Mounts in a convenient location for
operator to access from the seat. See also Figure 4-1
on page 18.
Toggle Switch Control Harness For Kubota CTL Skid Steers
Figure 3-5
37145
See Figure 4-1
on page 18.
•Wire harness (#3): Attaches to control box (#2) and
runs from control box to rear of the loader arm.
•Wiring harness (#4): Attaches to wire harness (#3) at
the loader arm and solenoids at the Snow Blower.
•Cable ties (#5): For securing wire harnesses
(#1, #3, & #4) to the skid steer and Snow Blower.
•Installation Manual 370-452M: (not shown)
Skid Steer Control Harness 370-134A
Refer to Figure 3-6:
370-134A Skid Steer Control Harness
Thisharness is usedwith skid steers notequipped with a
Deutsch HD30 14 pin or 2 pin coupler. It consist of the
following:
•Power cord (#3): Attaches to skid steer battery and
control box (#6).
•Control box (#6): Mounts in a convenient location for
operator to access from the seat. See also Figure 4-1
on page 18.
Toggle Switch Control Harness
Figure 3-6
2 EYLETS
CONNECTS TO 12V
POWER SOURCE 20 AMP FUSE
4 CONNECTORS THIS END
CONNECTS TO EQUIPMENT SOLENOIDS 35246
See Figure 4-1
on page 18.
•Wire harness (#2): Attaches to control box (#6) and
runs from control box to rear of the loader arm.
•Wireharness (#1): Attaches towire harness (#2) atthe
rear of the loader arm and travels along the loader arm
to the front of the loader arm.
•Wiring harness (#4): Attaches to wire harness (#1) at
the loader arm and solenoids at the Snow Blower.
•Cable ties (#5): For securing wire harnesses
(#1, #2, #3, & #4) to the skid steer and Snow Blower.
•Installation Manual 370-349M: (not shown)

17
Section 3: Options
9/18/14 SBL2566, SBL2574, & SBL2584 Snow Blowers 370-258M
Table of Contents
Deutsch HGD30 14 Pin Wiring
Harness
Refer to Figure 3-7:
Three14pin wiring harnessesareavailable. Theyattach
to the Snow Blower solenoids and skid steer 14 pin
coupler. 3 Cable ties are included with the wiring
harnesses. Pick the 14 pin wire harness that is designed
for your particular skid steer.
370-336A Deutsch HGD30 14 Pin 2 Function
This harness will work with the following skid steers:
•Bobcat with 14 pin coupler
•GEHL with 14 pin coupler
•Kubota with 14 pin coupler
•Komatsu with 14 pin coupler
•Mustang with 14 pin coupler
•Takeuchi with 14 pin coupler
•Volvo with 14 pin coupler
Itwill alsowork withthe followingskidsteers byreversing
the red and green wires at the solenoid:
•Case-Post 9/1/01 with 14 pin coupler
•Case-400 Series with 14 pin coupler
•New Holland with 14 pin coupler
370-337A Deutsch HGD30 14 Pin 2 Function
This harness will work with the following:
•John Deere with 14 pin coupler
370-338A Deutsch HGD30 14 Pin 2 Function
This harness will work with the following:
•John Deere “EH” with 14 pin coupler
Outer Skid Shoes
Refer to Figure 3-8:
Outer skid shoes are mounted on the outside of the side
panels and are adjustable by unbolting them and
reattaching them at a different height.
370-451K SBL2566 SKID SHOE BUNDLE
370-438K SBL2574 & SBL2584 SKID SHOE BUNDLE
Inner Skid Shoes
Refer to Figure 3-9:
Inner skid shoes are mounted behind the Snow Blower
and are adjustable vertically by pulling a bent pin and
moving the skid shoes up or down.
370-440K SKID SHOE BUNDLE
Deutsch HGD30 14 Pin 2 Function Wiring Harness
Figure 3-7
Outer Skid Shoes
Figure 3-8
Inner Skid Shoes
Figure 3-9
35358
37221
37222

18
Section 4: Adjustments
SBL2566, SBL2574, & SBL2584 Snow Blowers 370-258M 9/18/14
Table of Contents
Discharge Chute & Spout Deflector
!WARNING
Never rotate chute or spout to throw snow at the tractor,
animals, or people. The Snow Blower is capable of picking up
large solid objects and discharging them out the spout causing
serious bodily injury or death.
Control Switches for Chute Rotation & Spout Deflector
Figure 4-1
Spout Deflector Adjustment
Refer to Figure 4-1:
The end of the spout can be angled up or down to direct
blown snow close or far away.
1. Stop skid steer/tractor and place in park before
adjusting spout deflector.
2. Push on “Tilt Up/Down” toggle switch to tilt
deflector spout up and pull toggle switch to tilt
deflector spout down.
3. Resume snow blowing once new angle is set.
IMPORTANT: Never operate a Snow Blower with
chute throwing snow towards property such as
vehicles, buildings, trailers etc. that can be
scratched, dented or broken by thrown projectiles.
IMPORTANT: Never operate a Snow Blower that
canthrowsnowtowardstheskid steer/tractorand/or
operator. If this can happen, make sure the chute
rotation stop is properly repaired before putting the
Snow Blower back into service.
IMPORTANT:Adjustmentscrewsonhydraulicmotor
are preset at the factory. Do not change factory
settings. Changing factory settings can cause
structural damage to the Snow Blower.
35810
Connects to 12V
Power Source Connects to
Wire Harness
Not Used
Section 4: Adjustments
Chute Rotation Gear Adjustment
Figure 4-2
Chute Rotation Gear Alignment
Refer to Figure 4-2:
1. Stop skid steer or tractor, place in park, shut engine
off and remove switch key.
2. Loosen all three hex head bolts (#6). Do not remove.
3. Move hydraulic motor mount (#3) as needed until
drivegear (#2)hasfull tooth engagementwithdriven
gear (#1).
4. Hold hydraulic motor mount (#3) in this position and
tighten all three 3/8"-16 GR5 hex head bolts (#6) to
the correct torque.
If removed, be sure to replace gear guard (#4) with
existing 10-24pan screws (#5), star washer (#7), and flat
washer (#8). Tighten pan screws (#5).
Chute Rotation Adjustment
Refer to Figure 4-1:
1. Stop skid steer/tractor and place in park before
adjusting chute rotation angle.
2. Push on “Rotate Left/Right” toggle switch to rotate
chute to the left and pull toggle switch to rotate chute
to the right.
3. Resume snow blowing once new chute angle is set.
37220
IMPORTANT: Gear guard (#4) is shown removed for
clarity only. This adjustment can be made without
removing the gear guard. Should the guard be
removed, make certain gear guard (#4) is replaced
before putting Snow Blower back into service.
This manual suits for next models
2
Table of contents
Other Land Pride Snow Blower manuals

Land Pride
Land Pride SB10 Series User manual

Land Pride
Land Pride Snow Plow User manual

Land Pride
Land Pride SBD3596 User manual

Land Pride
Land Pride SB10 Series User manual

Land Pride
Land Pride SSP2510 User manual

Land Pride
Land Pride SPL05 Series User manual

Land Pride
Land Pride SBD3596 User manual

Land Pride
Land Pride SB10 Series User manual

Land Pride
Land Pride SPL1060 User manual