LAX-MAX LI-S15bt User manual

Carefully read operating manual to oprate this unit properly,
and keep this manual handy for further reference.
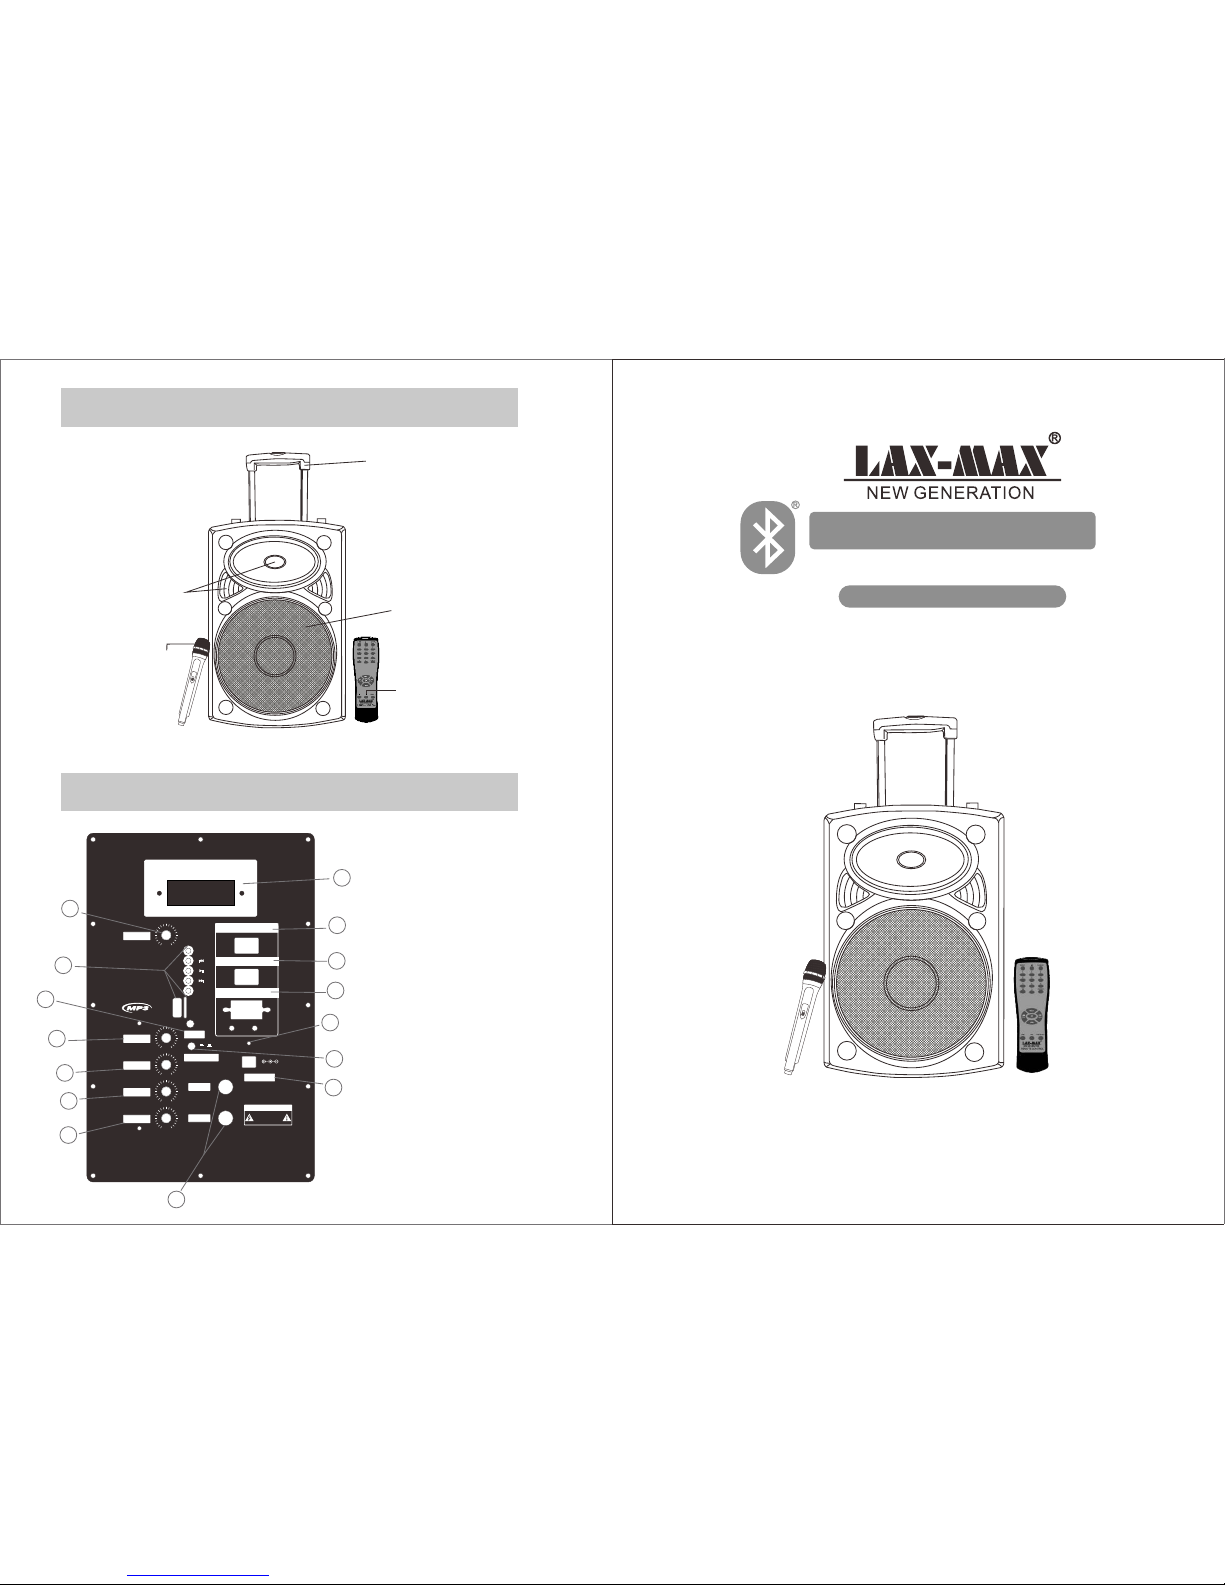
TWEETERS
MICROPHONE
SPEAKER
REMOTE
CONTROL
SPEAKER
TROLLEY HANDLE
PANEL FUNCTION
min ma x
min ma x
min ma x
BASS
MIC.VOL
ECHO
MOD E
min ma x
VOLUME
EQ
min ma x OFFON
LIN E IN
MIC P RIORI TY
TREBLE
U
S
B
DIGITAL DISPLAY
ON OFF
ON OFF
-
+
POWER
LED
DC 12V INPUT
MIC1 IN
MIC2 IN
Red c hargi ng
Gre en Full
DC IN 15V
MADE IN CHINA
CAU TION
RISK O F ELECT RIC
SHOC K CAUTI ON
MICRO SD
11
12
13
14
15
2
3
4
5
6
7
8
9
10
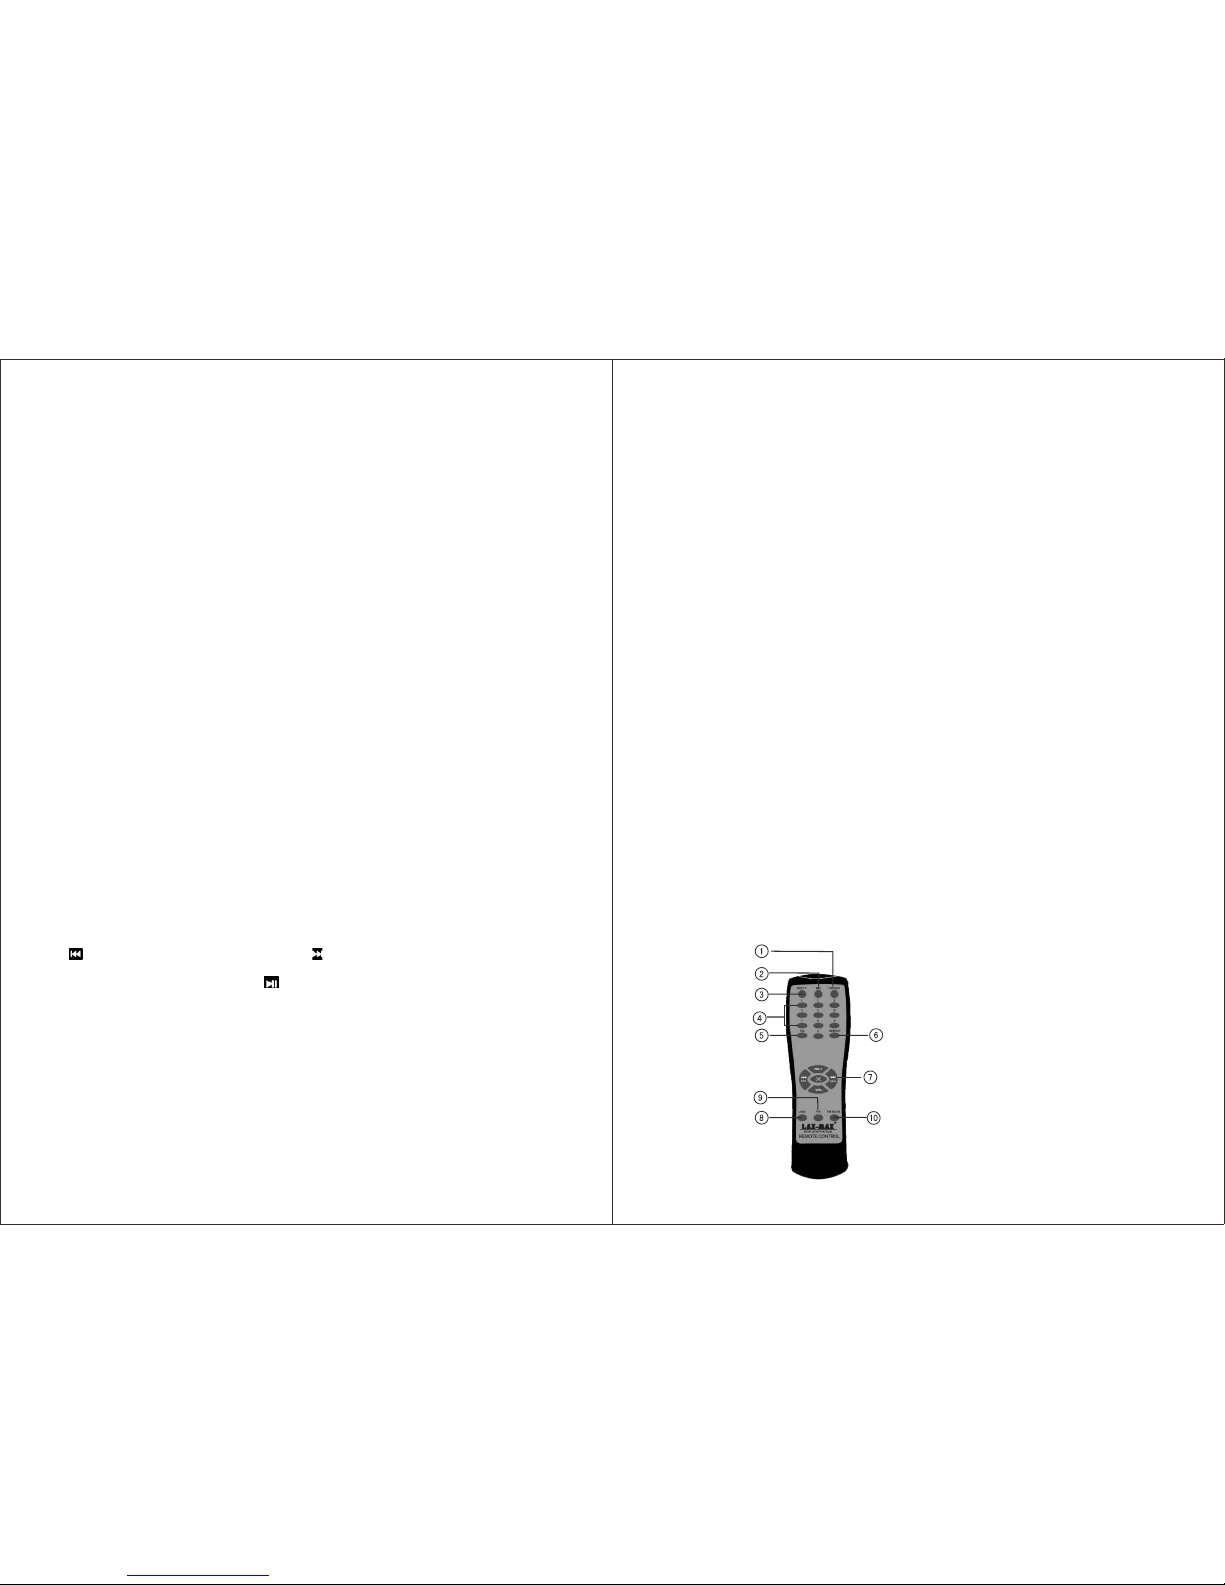
1.Digital Display
2.VOLUME Adjustor
3.USB/TF play control
4.main treble volume
5.MIC 1&2 input jack
6.main bass volume
7.MIC volume
8.DC15V in
9.MIC ECHO adjustor
10.charging and full light
11.LINE IN (3.5mm input)
12.MIC PRIORITY
13.power switch
14.LED light switch
15.DC 12V input
1
MODEL:LI-S15bt
KARAOKE SPEAKER
WITH NFC AUTO PAIRING
USB/MICRO SD
Bluetooth
* Bluetooth® function
*NFC connectivity
*Plays MP3 Files stored in your micro SD Card or USB Drive or external audio device.
*FM Radio
*Twin Karaoke jacks.
*One Wireless MIC included
*With Infrared remote control for convenience
*Trolley for easy portability
*Built in rechargeable battery.
*Dual Antenna for FM and Wireless MIC.
Features
Playing MP3 Files through the Speaker using the
micro SD Card or the USB Stick
*To select Aux use “” MODE” button on unit main panel or from remote control “LINE” will
show on display
*Disconnect USB,micro SD Microphone while using Aux.
*To select Bluetooth use” MODE” button on unit main panel or from remote control,
“BLUE” will show on display.
*Scan from your phone, tablet, notebook for “LAX-MAX” and pair the device to listen
Audio files through speaker.
* Unpair from speaker when finished listening.
Using Aux( LINE IN 3.5mm)
*Connect DC 15V. Turn on volume knob to switch on unit , located on the back side of
the unit. This unit is manufactured to use on DC 15V.
*To charge battery, plug in to the DC 15V . When battery is charging Red LED light will
be on, When completely charged, green LED light will be on. If plugged in to DC 15V,
internal battery will charge even if unit is switched off.
*Speaker battery can also be charged using 12V external car battery(connecting cable
not included) through the point “ DC 12V input” When connecting cable please make
sure of “+” and “-” points.
* “FM Antenna” to be used for better reception of FM stations.
*Wireless Mic Antenna” to be used for better reception of wireless microphone while
using karaoke.
Connecting Unit.
Using Bluetooth
* Use “Mode” button on the unit or remote control to switch between USB/ /FM/
AUX/Bluetooth or from remote control can press “ USB/SD” button to switch between
USB or micro SD
*Plug in your USB disk and /or micro SD card in the slots provided. Please make sure you
use the correct file format in your media devices-MP3Files only. Please ensure that your
media is properly connected and that your files are MP3 format, or that the MODE button
is on the correct source.
*Turn up the volume to the desired level, either from the unit's volume control knob on the
control panel or from the remote by pressing Vol- for Down or Vol+for up. The sound output
quality off the speakers will depend on the quality of the MP3 files. Volume from remote
will be maximum to the level set manually through unit volume knob.
*Press to listen to the previous track and to skip to the next track from unit control
panel or remote control.
*To pause or release pause, press the button from the control panel or remote control.
*Disconnect AUX (LINE IN ) while using other audio devices through speaker.
*Please remember to turn off the power of the speaker before removing the USB Disk or
micro SD card.
micro SD
NFC connectivity
*On the speaker, be sure you turn on the Bluetooth mode.
*Switch on the Bluetooth and NFC feature on your phone.
*Touch the speaker with your phone to connect to NFC. Phone will be paired with
speaker through the NFC.
*To disconnect touch the speaker with your phone again.
Listening to the FM Radio from the Speaker.
*To select FM use “MODE”button on unit main panel or from remote control or from
remote control press “FM”
*From the unit control panel. Long press to scan for station or press to manually access
preset stations up or down.
*From remote control press “SCAN” to scan for FM frequency or press to manually
select preset station up or down.
* “FM Antenna” to be used for better reception for FM station.
Using Microphone
*When using Microphone-plug your microphone into the microphone jack on unit
main control panel .
*Use the MIC VOL knob to control the voice level of the microphone
*Use the “ECHO” knob to control microphone echo.
*When Using included wireless Microphone, switch on microphone, make sure unit
power is on.
*Microphone is designed to be used together with this unit only.
*Wireless microphone uses “AA”*2 batteries (not included), make sure batteries are
charged.
*Wireless MIC Antenna” to be used for better reception of wireless microphone while
using karaoke.
Using WIRELESS Microphone
Using Guitar Jack.
*When using Guitar-plug your guitar into the guitar jack on unit main control panel.
*Use the Guitar VOL knob to control the volume level of the Guitar.
“BASS” & “TREBLE” on unit control panel can be used to adjust sound when using
micro SD, USB, FM. “EQ” button on unit control panel or remote control can be used
to adjust sound effect to preset levels.
Please keep this manual in a safe place for future reference
1. USB/SD
2.
3.
select key
number select key
USB/SD play/pause control key
Input select USB/SD; FM ; LINE; BLUE
4. USB/SD play
5. EQ control key
6. USB/SD play repeat select key
7. Play control & FM CH- or CH+ & volume + or -
8. Line AUX input select key
9. Radio FM input select key
10. Radio FM scan control key
Bocina
Panel de Función
min ma x
min ma x
min ma x
BASS
MIC.VOL
ECHO
MOD E
min ma x
VOLUME
EQ
min ma x OFFON
LIN E IN
MIC P RIORI TY
TREBLE
U
S
B
DIGITAL DISPLAY
ON OFF
ON OFF
-
+
POWER
LED
DC 12V INPUT
MIC1 IN
MIC2 IN
Red c hargi ng
Gre en Full
DC IN 15V
MADE IN CHINA
CAU TION
RISK O F ELECT RIC
SHOC K CAUTI ON
MICRO SD
11
12
13
14
15
2
3
4
5
6
7
8
9
10
1
MODEL:LI-S15bt
KARAOKE SPEAKER
WITH NFC AUTO PAIRING
USB/MICRO SD
Bluetooth
Tweeter
Micrófono
Altavoz
Control Remoto
Manillar
Lea atentamente el manual de funcionamiento para operar esta
unidad correctamente y mantenga este manual a mano para
futuras consultas.
1. Pantalla digital
2. Ajustador de VOLUMEN
3. Control de reproducción SD / USB
4. Volumen principal de agudos
5. Toma de entrada de micrófono 1 y 2
6. Volumen principal
7. Volumen de micrófono
8. Entrada de DC15V
9. Ajustador de eco del micrófono
10. Carga y plena luz
11. LINE IN (entrada de 3,5 mm)
12. Prioridad de micrófono
13. Botón te poder
14. Botón de luz LED
15. Entrada de 12V DC

Características
- Función de Bluetooth
- Conectividad NFC
-Reproduce archivos MP3 almacenados en su tarjeta del SD o memoria USB o un
dispositivo de audio externo.
- Radio FM
- Tomas gemelas de karaoke
- Un micrófono inalámbrico incluido
- Con el control remoto infrarrojo para mayor comodidad
- Trolley para un fácil transporte
- Batería recargable.
- Antena dual para FM y micrófono inalámbrico
®
Conexión de Unidad
-
lado posterior de la unidad. Este equipo ha sido fabricado para su uso en DC 15V.
- Para cargar la batería, conecte al 15V DC. Cuando la batería se está cargando la luz
LED rojo estará encendida. Cuando está completamente cargada, la luz LED verde se
encenderá. Si está enchufado a DC 15V, batería interna se cargará incluso si la unidad
está apagada.
- La batería de altavoz también se puede cargar con la batería de coche de 12V externa
(cable de conexión no incluido) a través del punto "de entrada DC 12V" Cuando conecte
el cable por favor asegúrese los puntos "+" y "-".
- Utiliza la antena "FM" para mejorar la recepción de las estaciones FM.
- Utiliza la antena del micrófono inalámbrico para mejorar la recepción de micrófono
durante el uso de karaoke.
Conecte DC 15V. Activar el control de volumen para encender la unidad, situado en el
Reproducción de archivos MP3 a través del altavoz con
la tarjeta del SD o la memoria USB
-
/AUX/BT o desde el control remoto presione el botón "USB/SD" se puede presionar para
cambiar entre USB o SD
- Conecte el disco USB y/o la tarjeta SD en las ranuras previstas. Por favor, asegúrese
de usar el formato de archivo correcto y sólo use archivos MP3. Por favor, asegúrese de
que sus medios de comunicación estén conectados correctamente y que sus archivos
- Pulse "l◀◀" para escuchar la pista anterior y "▶▶l" para pasar a la siguiente pista
desde el panel de control de la unidad o del control remoto.
- Para hacer una pausa o cancelar la pausa, pulse el botón "▶||" del panel de control o el
control remoto.
- Desconecte AUX (LINE IN), mientras que usa otros dispositivos de audio a través del
altavoz.
- Por favor, recuerde apagar el altavoz antes de retirar el disco USB o tarjeta de SD.
Utilice el botón "Mode" en la unidad o el control remoto para cambiar entre USB/SD/FM
Usando Aux (LINE IN 3.5mm)
- Para seleccionar AUX, use el botón "MODE " en el panel de la unidad principal o del
control remoto. "LINE "aparecerá en la pantalla
- Desconectar el USB, micrófono SD durante el uso de Aux.
Usando Bluetooth
-Para seleccionar Bluetooth, presione el botón "MODE" en el panel de la unidad
principal o del control remoto. La palabra “BLUE" aparecerá en la pantalla.
-Desde su teléfono o tableta escanee para "LAX-MAX" y emparejar el dispositivo para
escuchar archivos de audio a través del altavoz.
-Desactivar del altavoz cuando termine de escuchar.
Conexión NFC
- En el altavoz, asegúrese de encender el modo Bluetooth.
- Encienda la función Bluetooth y NFC en su teléfono.
- Toque el altavoz con el teléfono para conectar con NFC. El teléfono será emparejado
con el altavoz a través de NFC
- Para desconectar toque el altavoz con el teléfono de nuevo.
Escuchar el radio FM a través del altavoz
- Para seleccionar FM, use el botón "MODE" en el panel de la unidad principal o del
control remoto y presione "FM".
- Desde el panel de control de la unidad, pulse para escanear para la estación o pulsar
para acceder manualmente las emisoras memorizadas hacia arriba o hacia abajo.
- Desde el control remoto, presione "SCAN " para buscar la frecuencia de FM o presione
para seleccionar manualmente las frecuencias pre sintonizada presione hacia arriba
o abajo.
- Use la antena "FM" para mejorar la recepción de las estaciones FM.
Usando El Micrófono
- Cuando use el micrófono, conecte el micrófono a la toma del micrófono en el panel de
control de la unidad principal.
- Utilice el mando de volumen del micrófono para controlar el nivel de voz del micrófono.
- Utilice el mando del "ECO " para controlar el eco del micrófono.
Usando El Micrófono Inalámbrico
- Cuando utilice el micrófono inalámbrico incluido, conecte el micrófono y asegúrese
que la unidad este encendida.
- El micrófono está diseñado para ser utilizado junto con este aparato solamente.
- El micrófono inalámbrico utiliza baterías "AA" (baterías no incluidas) asegúrese que
las baterías estén cargadas.
- La antena inalámbrica puede ser utilizada para mejorar la recepción del micrófono
inalámbrico durante el uso de karaoke.
Uso De Toma De La Guitarra
- Cuando utiliza la guitarra - enchufe su guitarra a la toma de la guitarra en el panel
de control de la unidad principal.
-Utilice el mando de volumen para controlar el nivel de volumen de la guitarra.
- "BASS" y "TREBLE " en el panel de control de la unidad se puede utilizar para ajustar
el sonido
al utilizar TF, USB, FM. El botón "EQ" en el panel de control de la unidad o el control
remoto se puede utilizar para ajustar el efecto de sonido al nivel preestablecido.
1. Tecla de selección de USB / SD
2. Tecla de reproducción de USB / SD / control de pausa
3. Selección de entrada USB / SD;FM ; LÍNEA; AZUL
4. Selección de tecla para reproducir USB / SD
5. Tecla de control EQ
6. Tecla de selección de USB / SD de repetición para reproducción
7. Juega el control y FM CH- o CH + y volumen + o -
8. Tecla de selección de entrada línea AUX
9. Tecla de selección Radio FM
10. Tecla de control de exploración de radio FM
Guarde este manual en un lugar seguro para futuras consultas

FCCCaution
Thisdevicecomplieswithpart15oftheFCCRules.Operationissubjecttothe
followingtwoconditions:(1)Thisdevicemaynotcauseharmfulinterference,and(2)
thisdevicemustacceptanyinterferencereceived,includinginterferencethatmay
causeundesiredoperation.
AnyChangesormodificationsnotexpresslyapprovedbythepartyresponsiblefor
compliancecouldvoidtheuser'sauthoritytooperatetheequipment.
Note: ThisequipmenthasbeentestedandfoundtocomplywiththelimitsforaClass
Bdigitaldevice,pursuanttopart15oftheFCCRules.Theselimitsaredesignedto
providereasonableprotectionagainstharmfulinterferenceinaresidentialinstallation.
Thisequipmentgeneratesusesandcanradiateradiofrequencyenergyand,ifnot
installedandusedinaccordancewiththeinstructions,maycauseharmfulinterference
toradiocommunications.However,thereisnoguaranteethatinterferencewillnot
occurinaparticularinstallation.Ifthisequipmentdoescauseharmfulinterferenceto
radioortelevisionreception,whichcanbedeterminedbyturningtheequipmentoff
andon,theuserisencouragedtotrytocorrecttheinterferencebyoneormoreofthe
followingmeasures:
-Reorientorrelocatethereceivingantenna.
-Increasetheseparationbetweentheequipmentandreceiver.
-Connecttheequipmentintoanoutletonacircuitdifferentfromthattowhichthe
receiverisconnected.
-Consultthedealeroranexperiencedradio/TVtechnicianforhelp.
Table of contents
Languages:


