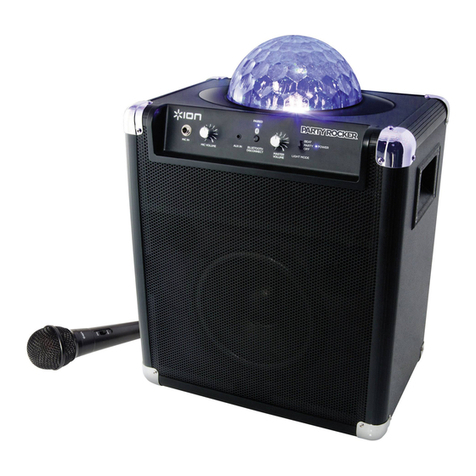
ION Party Rocker Max MK2 User manual

Party RockerTM Max MK2
User Guide English ( 2 – 10 )
Guía del usuario Español ( 11 – 20 )
Guide d’utilisation Français ( 21 – 30 )
Appendix English ( 31 )
SUPPORT / SOPORTE / ASSISTANCE
ionaudio.com/support
Tap or click for technical support.
Toque o haga clic para obtener
soporte técnico.
Appuyez ou cliquez pour obtenir
une assistance technique.

2
User Guide (English)
Introduction
Thank you for purchasing the Party RockerTM Max. At ION, your entertainment is as important
to us as it is to you. That’s why we design our products with one thing in mind—to make your
life more fun and more convenient.
Note: Before you first use the product, please fully charge the batteries. Your unit was
purposely shipped with a reduced battery charge to ensure safe transit. For optimal charging,
power off the speaker while charging.
Use the included power cable to connect the unit to a power outlet and let it charge for up to
10 hours. This helps ensure the longest life for your battery.
Box Contents
Party RockerTM Max
IEC320 C13 Power Cable (6 ft / 183 cm)
Microphone with cable (8 ft / 250 cm)
Quickstart Guide
Support
For the latest information about this product (documentation, technical specifications, system
requirements, compatibility information, etc.) and product registration, visit ionaudio.com.
For additional product support, visit ionaudio.com/support.
Setup
Charging & Battery Information
For the quickest charging time, power off Party RockerTM Max and use the included Power
cable to connect the speaker to a to a power outlet.
The Battery icon on the left side of the display indicates Party RockerTM Max battery charge
level. The lightning bolt Charging icon will appear on the display when charging and disappear
when Party Rocker MaxTM is fully charged.
If no audio is played through the Party RockerTM Max speaker for 15 minutes, the unit will
power off automatically to conserve battery life.

4
Features
Front Panel
1. Display: This LCD screen displays icons indicating the statuses of Party RockerTM Max
functions such as power on, charging, battery power level, sound source, Bluetooth
connection, and current the radio station and setting.
2. Control Knob: Turn this knob to adjust the volume of the audio source indicated on the
bottom of the Display. Push the knob in to select a sound source indicated on the
Display.
3. Power Button: Press and hold this button for 2 seconds to power Party RockerTM Max
on or off.
4. Bluetooth Button: Press this button to enter Bluetooth pairing mode. See Operation >
Bluetooth Connecting with Party RockerTM Max to learn more. Press and hold this
button to enable or disable Voice Prompts.
5. Lights Button: Press this button to cycle through various light modes. See Operation >
Light Modes for more details.
6. BOOMTM/Link Button: Press this button while music is playing to activate heightened
bass frequencies and beat sync lighting effects. Press and hold this button to search for
an additional ION speaker to link to. See Stereo-LinkTM: Syncing two Party RockerTM
Max speakers to learn how to link multiple speakers.
7. FM/AUX/Optical Button: Press this button to cycle through FM1, FM2, AUX, and
Optical source modes.
8. Next Track: Press this button to skip to the next Bluetooth track or tune to the next
radio station. Press and hold to seek forward through radio stations.
9. Previous Track: Press and this button skip to the previous Bluetooth track or tune to the
previous radio station. Press and hold to seek backwards through radio stations.
10. Play/Pause/Presets Button: Press this button to play or pause Bluetooth audio. Press
and hold this button while in FM1 or FM2 mode to save a station as a preset. See
Operation > Using the Radio to learn more about saving presets.

5
Display Icons
•Charging Indicator ():
oWhen the power cable is connected, the movement of the battery segments
indicates that it is charging.
oWhen the power cable is disconnected, the battery segments show the battery
level.
oWhen the battery level is low, the bottom battery segment will blink.
oIf a front panel button is not pressed within 60 seconds, the battery level
indicator will turn off (to save energy). The battery level indicator will reappear
when any button is pressed. Also, when the battery gets to the lowest battery
icon segment, the battery level indicator will turn back on.
•Power Icon (): The power icon will display when Party RockerTM Max is powered
on.
•Lightning Bolt Icon (): The lightning bolt icon will display when Party RockerTM Max is
connected to a power outlet.
•Stereo-LinkTM Icon ( ): The Stereo-LinkTM icon will display when Party RockerTM Max
linked to another speaker. The Stereo-LinkTM icon will be off when a single speaker is
used. See Bluetooth Connecting with Party RockerTM Max below for instructions on
how to link two speakers.
•Bluetooth Icon ():The Bluetooth icon will display when a device is paired to Party
RockerTM Max.
•Radio Station: The numerals in the center indicate the current radio station that is
selected.
•FM Icons: When Party RockerTM Max is in Radio mode, this icon displays whether it is in
FM1 or FM2 mode.
•BOOMTM Icon: The BOOMTM icon will display when the BOOMTM Button is pressed. The
icon will be off when the function is deactivated.
•Volume Source: These icons indicate the current function of the Volume Control.

6
Rear Panel
1. Mic Inputs: Connect the included microphone to one of these 1/4” inputs. Push the
Control Knob in to select MIC1 or MIC2 and then turn the knob to adjust the volume of
each input.
2. Aux In: Connect an MP3 player or other external audio source to this input using a 1/8”
Auxiliary cable (sold separately).
3. Optical In: Use an Optical audio cable (sold separately) to connect Party RockerTM Max to
a compatible TV to amplify its audio output. Then, plug in a microphone for an instant
karaoke setup!
4. USB Charging Port: Connect a USB type-A cable (sold separately) here to charge a
mobile device.
5. AC Power in: Connect the AC end of the included power cable here and connect the
other end to a wall outlet to power Party RockerTM Max.

7
Operation
App Control
IMPORTANT: To ensure the best possible experience with the App, use the most current
Android OS or iOS on your device.
Follow these steps to download the free App on your device:
1. Open the Apple App Store or Google Play on your device. Then, search for the ION
Sound XPTM App.
2. Follow the on-screen instructions to download and install the App. Once downloaded,
the ION Sound XPTM App will appear on your device's home screen.
3. Connect your device to Party RockerTM Max via Bluetooth. See the Bluetooth Connecting
with Party RockerTM Max to learn how to do this.
4. Open the ION Sound XPTM App. If prompted, allow the app to access your device's
Bluetooth and Location Services.
5. Tap to select Add A Product on the screen. The App will scan and find Party RockerTM Max.
If you are having issues connecting, tap Help with setting up? for additional tips.
6. Select the Party RockerTM Max icon to go to the next screen, where you can use the App
to control various functions of the speaker such as:
•EQ: Adjust the speaker's equalization.
•FM Radio: Save station presets and fine-tune the station frequency.
•Voice Prompts: Enable or disable the voice prompts.
•Lights: Change the light modes.
•Battery Life: Check the speaker’s battery life status.
•Support: Visit ionaudio.com, contact Technical Support, and view Warranty
information and Frequently Asked Questions.
Bluetooth Connecting with Party RockerTM Max
1. Power on Party RockerTM Max by holding down the Power button for 2 seconds. Party
RockerTM Max will automatically enter Bluetooth pairing mode. When searching for a
connection, the Bluetooth button LED and display icons will appear flashing.
2. Navigate to your device’s Bluetooth setup screen, find Party Rocker Max, and connect.
When connected, the Bluetooth icon on the Display and the LED under the Bluetooth
button will stop blinking and display solid and you will hear “Connected” (if voice prompts
are enabled).
Note: Do not connect to iPA137_BLE; this is reserved exclusively for connecting to the
ION Sound XPTM App. If you experience trouble in connecting, select “Forget this Device”
on your Bluetooth device and try to connect again.
3. Now you can use the buttons on the front panel to control audio playback:
•Press the Play/Pause button to play or pause the current track.
•Press the Next Track button to skip to the next track.
•Press the Previous Track button to skip to the previous track.
4. To disconnect, turn off Bluetooth on your device’s Bluetooth settings, or press the
Bluetooth button. Party RockerTM Max will automatically recognize and pair with a
previously connected device if it is in range the next time Bluetooth pairing mode is
activated.
8
Stereo-LinkTM: Syncing Two Party RockerTM Max Speakers
1. Make sure both of your speakers are in Bluetooth pairing mode before attempting to link
them.
2. Press and hold the BOOMTM button on one Party RockerTM Max to enter Stereo-LinkTM
mode and then do the same on the other unit. The Link icon will flash on the Display and
you will hear tones from both speakers to indicate they are searching for a speaker to
connect to.
Note: Speakers should be within 50’ (15 m) of each other to properly sync. The closer the
speakers are, the faster they will sync.
3. Once a successful sync is established, the Link icon will appear solid and the tones will
stop sounding. Press the Bluetooth button on your Party RockerTM Max to set it as the
primary (left channel) speaker.
4. Press Play/Pause on Party RockerTM Max or your Bluetooth device to begin playing audio
in stereo.
Note: Aux, Optical, and Radio modes are disabled when Party RockerTM Max is linked to
another speaker.
5. Double-press the BOOMTM button to break the link between speakers.
Note: Party RockerTM Max speakers powered off in Stereo-LinkTM mode will automatically
enter Stereo-LinkTM mode the next time they are powered on and begin searching for
secondary speakers to connect to.
Connecting an Audio Device Using the Aux Input
1. Connect a 1/8” (3.5 mm) auxiliary cable to the input on Party RockerTM Max’s rear panel
and connect the other end to an audio device such as an MP3 or CD player.
2. Press the FM/Aux/Optical button three times to switch the audio source to Aux.
3. Press play on your device’s music player. Use the Control Knob to adjust the Aux volume.
Note: Party RockerTM Max speaker volume controls act independently from your
connected device. Lower the volume on your device if signal distortion occurs.
Using the Radio
1. Press the FM/Aux/Optical button to turn on the FM radio. Press once to access FM1
stations and press again to access FM2. The current audio source will be indicated in the
top right corner of the display.
2. Press the Next Track button to tune to the next strongest station signal. Press the
Previous Track button to tune to the previous strongest station. Press and hold both
these buttons to scan through each station one at a time in sequence.
Saving Presets:
1. Follow the instructions above to tune to the radio station you wish to save as a preset.
Press and hold the Play/Pause button until “P1” is visible on the display.
2. Use the Next Track and Previous Track buttons to select a preset slot from P1 - P10,
then press Play/Pause again to save the preset.
Note: You can also use the ION Sound XPTM app to save a station to one of ten preset
slots. See Operation > App Control to learn how to download and use the app as a
remote control for your Party RockerTM Max speaker.
3. Press and then quickly release the Play/Pause button to cycle through the ten station
presets. All presets are set to the factory default 87.5 FM.

9
Light Modes
1. Press the Lights button or use the ION Sound XPTN App to cycle through 18 grille light
modes:
•Graphic EQ: Columns of colorful light on the speaker grille rise and fall to the music
with a gradation of color.
•Color Cycle: All lights appear the same color with a slight gradation and cycle
smoothly through the hues of the rainbow.
•Light Themes 1-16: The grille lights display an animated icon while the other lights
match the color scheme of the icon. See the table below these instructions for a full
list of light themes.
2. Press and hold the Lights button in Color Cycle mode to freeze on the current color.
3. Double-press the Lights button to turn off only the Dome light. Double-press the button a
second time to turn off all lights.
GRILLE ICON BUTTON LIGHTS DOME LIGHT
Confetti White All colors
Checkerboard Pink Blue, White, Pink, Orange
Heart Red Red and White
Clover Green Green and White
Flower Pink Pink, Green, White, Blue
Maraca Orange Red, Green, Orange
Fireworks Blue Red, White, Blue
Pumpkin Orange Orange and White
Dreidel Blue Blue and White
Tree Green Red, Green, and White
Candles Orange Red, Green, Orange, Blue
Champagne White White
Unicorn Pink Pink and White
Flamingo Pink Pink, Orange
Pineapple Orange Green, Orange, White
Pizza Red Red, Green, Orange, White

10
Troubleshooting
If the unit is not charging: Make sure the micro-USB cable is properly connected to the
power input, the power adapter and the power outlet
If the sound is distorted: Try lowering the volume control of your sound source.
If there is too much bass: Try adjusting the tone or EQ control on your sound source to lower
the bass level. This will allow you to play the music louder before clipping (distortion) occurs.
If you cannot connect your audio device to Party RockerTM Max via Bluetooth:
•Have your audio device (e.g., smartphone or tablet) and Party RockerTM Max as close
together as possible while trying to connect. Make sure both the audio device and Party
RockerTM Max Speaker are unobstructed by walls, furniture, etc.
•Reset the Bluetooth connection on Party RockerTM Max to disconnect Party RockerTM Max
from any other audio device and restart the search process. If this does not work right
away, power off Party Rocker Max and then power it back on. See Bluetooth
Connecting with Party RockerTM Max for more information.
•Reset the Bluetooth connection on your audio device by turning Bluetooth off and back
on. You can find this under the Bluetooth menu in the Settings for your phone or other
audio device.
If this does not work, and you have connected to Party RockerTM Max before, find Party
RockerTM Max in the list of available or previously connected devices in your audio
device's Bluetooth menu, tap the "gear" or “i” icon located next to it and then select
Unpair or Forget. Turn Party RockerTM Max off and back on and try pairing again once it
reappears in your available devices list.
Note: If Party RockerTM Max has been paired to another audio device recently that is still
within range, you may need to repeat this process with that audio device to fully
disconnect.
If you experience audio dropouts while playing music from a Bluetooth device, this may
be happening because your unit is trying to link to another speaker. This can occur if you
power off a speaker that was linked to your unit or if you have just turned on your unit and it is
in Stereo-LinkTM mode. To stop the audio dropouts, exit Stereo-LinkTM mode by double-
pressing the Bluetooth button. Alternatively, you can wait for your unit to link to another
speaker if there is one within range.
If you would like to stop your speaker from automatically linking when you power it on,
make sure you double-press the Bluetooth button to exit Stereo-LinkTM mode before you
power it off.

11
Guía del usuario (Español)
Introducción
Gracias por comprar el altavoz Party RockerTM Max. En ION, su entretenimiento es tan
importante para nosotros como para usted. Por eso es que diseñamos nuestros productos
con una sola cosa en mente—hacer que su vida sea más divertida y cómoda.
Nota: Antes de utilizar por primera vez el producto, cargue completamente la batería. Su
unidad se despachó intencionalmente con una carga reducida de la batería por razones de
seguridad en el tránsito.
Utilice el cable del suministro eléctrico incluido para conectar la unidad a una toma de
corriente y permita que la unidad se cargue durante hasta 10 horas. Esto contribuye a
asegurar la vida útil más larga de su batería.
Contenido de la caja
Altavoz Party RockerTM Max
Cable de alimentación (IEC320 C13, 183
cm)
Micrófono y cable (250 cm)
Guía de inicio rápido
Soporte
Para obtener la información más reciente acerca de este producto (documentación,
especificaciones técnicas, requisitos de sistema, información de compatibilidad, etc.) y
registrarlo, visite ionaudio.com.
Para obtener soporte adicional del producto, visite ionaudio.com/support.
Carga y información de la batería
Para lograr una carga más rápida, apague el altavoz Party RockerTM Max y utilice el cable del
suministro eléctrico incluido para conectar la unidad a una toma de corriente.
El ícono de la batería a la izquierda indica el nivel de carga de la batería de Party RockerTM
Max. El icono del relámpago se encenderá cuando el cable de corriente está conectado a una
toma de corriente de pared y desaparecerá cuando Party RockerTM Max está completamente
cargado.
Si no se reproduce audio a través del altavoz Party RockerTM Max durante 15 minutos, la
unidad se apagará automáticamente para ahorrar energía.

13
Características
Panel Frontal
1. Pantalla: Esta pantalla LCD muestra los iconos que indican los estados de las funciones
del Party RockerTM Max tales como el encendido, carga en curso, nivel de energía de la
batería, fuente de audio, conexión Bluetooth, y la estación y ajustes de radio actuales.
1. Perilla de control: Gire esta perilla para ajustar el volumen de la fuente de audio indicada
en la parte inferior de la pantalla. Presione esta perilla hacia adentro para seleccionar la
fuente de audio indicada en la pantalla.
2. Botón de encendido: Mantenga pulsado este botón para activar o desactivar el Party
RockerTM Max.
3. Botón Bluetooth®:Pulse este botón para entrar al modo de apareamiento Bluetooth.
Consulte Conexión Bluetooth con el altavoz Party RockerTM Max para aprender a
conectar y sincronizar múltiples altavoces de Party RockerTM Max a través de Bluetooth.
Mantenga pulsado este botón para activar o desactivar los avisos de voz.
4. Botón de iluminación: Pulse este botón para alternar los diversos modos de iluminación.
Consulte Funcionamiento > Modos de iluminación para obtener más detalles.
5. BOOMTM/Link: Pulse este botón para mejorar la ecualización y el volumen de los graves, y
simultáneamente activar un show de luces que se ilumina al ritmo de la música. Mantenga
pulsado este botón para buscar un altavoz ION adicional al cual enlazarse. Consulte
Stereo-LinkTM: Cómo sincronizar dos altavoces Party RockerTM Max para aprender
cómo enlazar múltiples altavoces.
6. Botón FM/AUX/Óptica: Pulse este botón para alternar por los modos de fuente FM1,
FM2, auxiliar y óptica.
7. Pista siguiente: Pulse este botón para pasar a la siguiente pista Bluetooth o sintonizar la
siguiente estación de radio. Manténgalo pulsado para buscar estaciones de radio hacia
adelante.
8. Pista anterior: Mantenga pulsado este botón volver a la pista Bluetooth anterior o
sintonizar la estación de radio anterior. Manténgalo pulsado para buscar estaciones de
radio hacia atrás.

14
9. Reproducir/Pausa/Presets: Pulse este botón para reproducir o hacer pausa en una pista
de un dispositivo Bluetooth conectado. Mantenga pulsado este botón estando en los
modos FM1 o FM2 para guardar una estación como preset. Para más detalles, consulte
Funcionamiento > Usando la radio.
Iconos de la Pantalla
•Indicador de carga ():
oCon el indicador de carga de la batería, cuando el cable de alimentación está
conectado, el movimiento de los segmentos de la batería muestra que se está
cargando. Una vez completamente cargada, todos los segmentos de la batería
estarán encendidos sin parpadear.
oCuando se desconecta el cable de corriente, el segmento de la batería muestra en
nivel de la misma.
oCuando el nivel de la batería sea bajo, parpadeará el segmento inferior de la batería.
oSi no se pulsa ningún botón del panel delantero en los siguientes 60 segundos, el
indicador de nivel de batería se apagará (para ahorrar energía). El indicador de nivel
de la batería volverá a aparecer cuando se pulse algún botón. Además, cuando la
batería llegue al segmento más bajo del icono de la batería, el indicador de nivel de la
batería volverá a encenderse.
•Icono de encendido (): El icono de encendido se encenderá cuando el Party Rocker
Max se encienda. Este icono de encendido no se encenderá cuando Party Rocker Max
está apagado.
•Icono del relámpago (): El icono del relámpago se encenderá cuando el cable de
corriente esté conectado a una toma de corriente de pared.
•Icono de enlace ( ): El icono de enlace encendido cuando se haya concretado el enlace
con otro altavoz. El icono de enlace estará apagado cuando se utilice un solo altavoz.
•Icono de Bluetooth ():El icono de Bluetooth se enciende con luz azul continua cuando
hay un dispositivo apareado al Party Rocker Max.
•Icono de BOOM: El icono de BOOM se iluminara cuando la función esté activada. El
icono estará apagado cuando la función esté desactivada.
•Iconos FM: Cuando la radio está encendida, este icono muestra si se encuentra en modo
FM1 o FM2.
•Mic/Vol: Estos iconos indican la función actual del control de volumen.
•Estación de radio: Muestra la estación de radio actual seleccionada.

15
Panel trasero
1. Entradas de micrófono (6,35 mm [1/4 pulg.], no balanceada): Estas entradas admite unas
entradas de micrófonos. Pulse la perilla de control y seleccione MIC1 o MIC2 para ajustar el
volumen del micrófonos.
2. Entrada auxiliar: conecte aquí un reproductor de audio con un cable auxiliar de 3,5 mm
(1/8 pulg.).
3. Entrada óptica: Utilice un cable de audio óptico (que se vende por separado) para
conectar el Party RockerTM Max a un TV compatible para amplificar su salida de audio.
Luego, ¡enchufe un micrófono para tener un equipo de karaoke instantáneo!
4. Puerto de carga micro-USB: Conecte aquí un cable USB tipo A (que se vende por
separado) para cargar un dispositivo móvil.
5. Entrada de corriente alterna: Conecte aquí el extremo de CA del cable de corriente
incluido y conecte el otro extremo a un tomacorriente para alimentar al Party RockerTM
Max.

16
Funcionamiento
Control de aplicación
IMPORTANTE: Para asegurarse la mejor experiencia posible con la aplicación, utilice el
Android OS o IOS más actualizado en su dispositivo.
Siga los pasos indicados a continuación para descargar la aplicación a su dispositivo:
1. En su dispositivo, vaya a la tienda de aplicaciones respectiva de Apple o Google Play.
LueMax busque la aplicación gratuita ION Sound XPTM.
2. Siga las instrucciones que aparecen en la pantalla para descargar e instalar la aplicación.
Una vez descargada, la aplicación ION Sound XPTM aparecerá en la pantalla de inicio de
su dispositivo.
3. Conecte su dispositivo al altavoz Party RockerTM Max mediante Bluetooth. Consulte Cómo
aparear un dispositivo de audio Bluetooth para saber cómo hacer esto.
4. Abra la aplicación ION Sound XPTM. Si se le pide elegir, permita a la aplicación acceder a
los servicios de Bluetooth y ubicación de su dispositivo.
5. Toque para seleccionar Add A Product en la pantalla. La aplicación escaneará y
encontrará Party RockerTM Max.
Si tiene problemas para conectarse, toque ¿Necesita ayuda para la configuración? Para
obtener consejos adicionales.
6. Seleccione el icono del altavoz Party RockerTM Max Speaker para ir a la siguiente pantalla,
donde puede controlar la configuración del altavoz desde su dispositivo:
•Ecualización: Ajustar la ecualización del altavoz.
•Radio FM: Reproducir la radio, cambiar estaciones y editar presets.
•Avisos de voz : Activar o desactivar los avisos de voz.
•Luces: Cambiar el modo de iluminación.
•Vida útil de la batería: Verifique la vida útil de la batería del altavoz.
•Soporte: Visite ionaudio.com, contáctese con soporte técnico y obtenga información
sobre la garantía y preguntas frecuentes.

17
Conexión Bluetooth con el Party RockerTM Max
1. Encienda el Party RockerTM Max manteniendo pulsado el botón Power durante 2
segundos. El Party RockerTM Max entrará automáticamente al modo de apareamiento de
Bluetooth. Al buscar una conexión, el LED del botón Bluetooth y los iconos de la pantalla
aparecen parpadeando.
2. Navegue a la pantalla de configuración Bluetooth de su dispositivo, busque Party Rocker
Max, y conéctelo. Una vez establecida la conexión, el icono Bluetooth de la pantalla y el
LED debajo del botón Bluetooth dejan de parpadear y quedan encendidos
permanentemente, y se escucha el mensaje “Connected” (si los avisos de voz están
activados).
Nota: No se conecte con iPA137_BLE; está reservado exclusivamente para conectar la
aplicación ION Sound XPTM. Si tiene problemas para conectarse, seleccione "Forget this
Device" (Olvidar este dispositivo) en su dispositivo Bluetooth e intente conectarse
nuevamente.
3. Ahora puede utilizar los botones del panel delantero para controlar la reproducción de
audio:
•Pulse el botón de Reproducción/Pausa para reproducir o poner en pausa la pista
actual.
•Pulse el botón de Pista siguiente para pasar a la pista siguiente.
•Pulse el botón de Pista anterior para volver a la pista anterior.
5. Para desconectarlo, apague el Bluetooth desde los ajustes Bluetooth de su dispositivo o
mantenga pulsado el botón Bluetooth. El Party RockerTM Max reconocerá y se apareará
automáticamente con dispositivos previamente conectados si se encuentran dentro del
alcance la próxima vez que se activa el modo de apareamiento Bluetooth.
Stereo-LinkTM: Cómo sincronizar dos altavoces Party RockerTM Max
1. Asegúrese de que ambos altavoces se encuentren en modo de apareamiento Bluetooth
antes de intentar enlazarlos.
2. Mantenga pulsado el botón BOOMTM de uno de los Party RockerTM Max para entrar al
modo Stereo-LinkTM y luego haga lo mismo en otra unidad. El icono de enlace parpadeará
en la pantalla y escuchará tonos provenientes de ambos altavoces que indican que están
buscando altavoces con los cuales conectarse.
Nota: Los altavoces Party RockerTM Max deben encontrarse a menos de 15 m (50 pies)
entre sí para sincronizarse correctamente. Mientras más próximos se encuentran los
altavoces, más rápido se sincronizarán.
3. Una vez establecida una sincronización exitosa, el icono de enlace permanecerá
encendido y los tonos dejarán de sonar. Pulse el botón Bluetooth de su Party RockerTM
Max para configurarlo como altavoz primario (canal izquierdo).
4. Pulse Reproducción/Pausa en su Party RockerTM Max o su dispositivo Bluetooth para
comenzar a reproducir audio en estéreo.
Nota: Los modos auxiliar, óptico y de radio se deshabilitan cuando el Party RockerTM Max
se enlaza con otro altavoz.
5. Pulse el botón BOOMTM dos veces para interrumpir el enlace entre los altavoces.
Nota: Los altavoces Party RockerTM Max que se apaguen estando en modo Stereo-LinkTM
entrarán a dicho modo automáticamente la próxima vez que se enciendan y comenzarán a
buscar altavoces secundarios con los cuales conectarse.

18
Cómo conectar un reproductor de audio con la entrada auxiliar
1. Conecte un cable auxiliar de 3,5 mm (1/8 pulg.) a la entrada ubicada en el panel trasero
del Party RockerTM Max y conecte el otro extremo a un dispositivo de audio, como por
ejemplo, un reproductor de MP3 o CD.
2. Pulse el botón FM/Aux/Optical tres veces para cambiar la fuente de audio a Auxiliar.
3. Inicie la reproducción en el reproductor de música de su dispositivo. Use la Perilla de
control para ajustar el volumen auxiliar.
Nota: Los controles de volumen del altavoz Party RockerTM Max actúan
independientemente de su dispositivo conectado. Baje el volumen de su dispositivo si se
produce distorsión en la señal.
Usando la Radio
1. Pulse el botón FM/Aux/Optical para encender la radio FM. Púlselo una vez para acceder
a las estaciones de FM1 y una vez más para acceder a FM2. La fuente de audio actual se
indica en la esquina superior derecha de la pantalla.
2. Pulse el botón de Pista siguiente para sintonizar la estación siguiente con buena señal.
Pulse el botón de Pista anterior para sintonizar la estación anterior con buena señal.
Mantenga pulsados estos botones para escanear cada estación de una por vez en
secuencia.
Guardado de presets:
1. Siga las instrucciones anteriores para sintonizar la estación de radio que desea guardar
como preset. Mantenga pulsado el botón de Reproducción/Pausa hasta que aparezca
“P1” en la pantalla.
2. Utilice los botones de Pista siguiente y Pista anterior para seleccionar una ranura de
preset entre P1 - P10 y luego pulse Reproducción/Pausa nuevamente para guardar el
preset.
Nota: También puede utilizar la aplicación ION Sound XPTM para guardar una estación en
una de las 10 ranuras para presets. Consulte Funcionamiento > Control de aplicación
para aprender cómo descargar y utilizar la aplicación como un control remoto para su
altavoz Party RockerTM Max.
3. Pulse y luego suelte rápidamente el botón Reproducción/Pausa para recorrer los 10
presets de estaciones. Todos los presets sintonizan el valor predeterminado de fábrica
de 87.5 FM.

19
Modos de las Luces
1. Pulse el botón Lights o utilice la aplicación ION Sound XPTN para recorrer los 18 modos
de iluminación de la rejilla:
•Ecualizador gráfico: Columnas de luces coloridas en la rejilla del altavoz que suben
y bajan al ritmo de la música con una gradación de colores.
•Ciclo de colores: Todas las luces aparecen del mismo color con una ligera
gradación y recorren suavemente todos los colores del arco iris.
•Temas de iluminación 1-16: Las luces de la rejilla muestran un icono animado
mientras que las otras luces imitan la paleta de colores del icono. Consulte las
instrucciones para la lista completa de temas de iluminación en la siguiente tabla.
2. Mantenga pulsado el botón Lights estando en modo de ciclo de colores para dejar fijo
el color actual.
3. Pulse el botón Lights dos veces para apagar solamente la luz del domo. Repita la
pulsación doble del botón para apagar todas las luces.
ICONO DE LA REJILLA LUCES DE LOS BOTONES LUZ DEL DOMO
Papel picado Blanco Todos los colores
Tablero de damas Rosa Azul, blanco, rosa, naranja
Corazón Rojo Rojo y blanco
Trébol Verde Verde y blanco
Flor Rosa Rosa, verde, blanco, azul
Maraca Naranja Rojo, verde, naranja
fuegos artificiales Azul Rojo, blanco, azul
Calabaza Naranja Naranja y blanco
Dreidel Azul Azul y blanco
Árbol Verde Rojo, verde y blanco
Velas Naranja Rojo, verde, naranja, azul
Champagne Blanco Blanco
Unicornio Rosa Rosa y blanco
Flamenco Rosa Rosa, naranja
Piña Naranja Verde, naranja, blanco
Pizza Rojo Rojo, verde, naranja, blanco

20
Solución de problemas
Si la unidad no se carga: Asegúrese de que el cable micro-USB esté conectado
correctamente a la entrada de corriente, al adaptador y al tomacorriente. Si utiliza el panel
solar para prolongar la vida útil de la batería entre cargas, asegúrese de colocar la unidad en
un área que reciba al menos 3 horas de luz solar directa.
Si el sonido está distorsionado: Pruebe bajando el control de volumen de su fuente de
sonido o instrumento musical. Pruebe también reduciendo el volumen general del Party
Rocker Max Speaker.
Si los graves son demasiado fuertes: Intente ajustando el control de tono o ecualización de
su Party Rocker Max Speaker o fuente de sonido para reducir el nivel de graves. De esta
forma podrá reproducir la música con más volumen antes de que se produzca el recorte
(distorsión).
Si no puede conectar su dispositivo de audio al Party Rocker Max Speaker mediante
Bluetooth:
•Mantenga su dispositivo de audio (por ej., teléfono inteligente [smartphone] o tableta) y el
Party Rocker Max Speaker lo más cerca posible entre sí al realizar la conexión.
Asegúrese que tanto el dispositivo de audio como el Party Rocker Max Speaker no estén
obstruidos por paredes, muebles, etc.
•Reinicie la conexión Bluetooth del Party Rocker Max Speaker para desconectarlo Party
Rocker Max Speaker de cualquier otro dispositivo de audio y reinicie el proceso de
búsqueda. Si esto no funciona en seguida, apague el Party Rocker Max Speaker y
lueMax vuelva a encenderlo. Para más información, consulte Conexión Bluetooth con el
altavoz Party RockerTM Max.
•Reinicie la conexión Bluetooth de su dispositivo de audio apagando el Bluetooth y
lueMax volviendo a encenderlo. Puede encontrar esta opción dentro del menú Bluetooth
en los ajustes de su teléfono o dispositivo de audio.
Si esto no funciona y ya se había conectado al Party Rocker Max Speaker anteriormente,
busque Party Rocker Max Speaker en la lista de dispositivos disponibles o previamente
conectados en el menú Bluetooth de su dispositivo de audio, toque el icono de engranaje
o "i" ubicado junto a él y lueMax seleccione Desaparear u Olvidar. Apague el Party
Rocker Max Speaker, lueMax vuelva a encenderlo e intente aparearlo nuevamente una
vez que vuelva a aparecer en su lista de dispositivos disponibles.
Nota: Si Party Rocker Max Speaker ya ha sido recientemente apareado con otro
dispositivo de audio que aún se encuentre dentro del alcance, es posible que tenga que
repetir este proceso con ese dispositivo de audio para desconectarlo completamente.
Si experimenta cortes en el audio al reproducir música desde un dispositivo Bluetooth,
es posible que esto suceda debido a que su unidad está intentando enlazarse con otro
altavoz. Esto puede ocurrir si apaga un altavoz que estaba enlazado con su unidad o si acaba
de encender su unidad y la misma se encuentra en modo Stereo-LinkTM. Para detener los
cortes de audio, salga del modo Stereo-LinkTM pulsando dos veces el botón Bluetooth. Como
alternativa, puede esperar a que su unidad se enlace con otro altavoz Party Rocker Max
Speaker si es que hay uno dentro del alcance.
Si desea impedir que su unidad se enlace automáticamente cuando la enciende,
asegúrese de pulsar dos veces el botón Link para salir del modo Stereo-LinkTM antes de
apagarlo.
Table of contents
Languages:
Other ION Karaoke System manuals

ION
ION star power User manual

ION
ION Karaoke Pro User manual

ION
ION Karaoke Star User manual

ION
ION PARTY ROCKER EFFECTS User manual

ION
ION DISCOVER KEYBOARD USB User manual

ION
ION Karaoke Star User manual

ION
ION BLOCK ROCKER FLASH User manual

ION
ION iPK5B User manual

ION
ION Karaoke Party User manual

ION
ION Party Rocker Express User manual
Popular Karaoke System manuals by other brands

Magic Sing
Magic Sing ED-8000 user manual

Audio 2000
Audio 2000 AKJ7808 owner's manual

GPX
GPX Karaoke Party Machine J108BL instruction manual

VocoPro
VocoPro DVD-Duet Multi Format Digital Karaoke System 5-Band Stereo Equalizer... owner's manual

Arirang
Arirang AR-36L user manual

Acesonic
Acesonic DSP9900 user manual