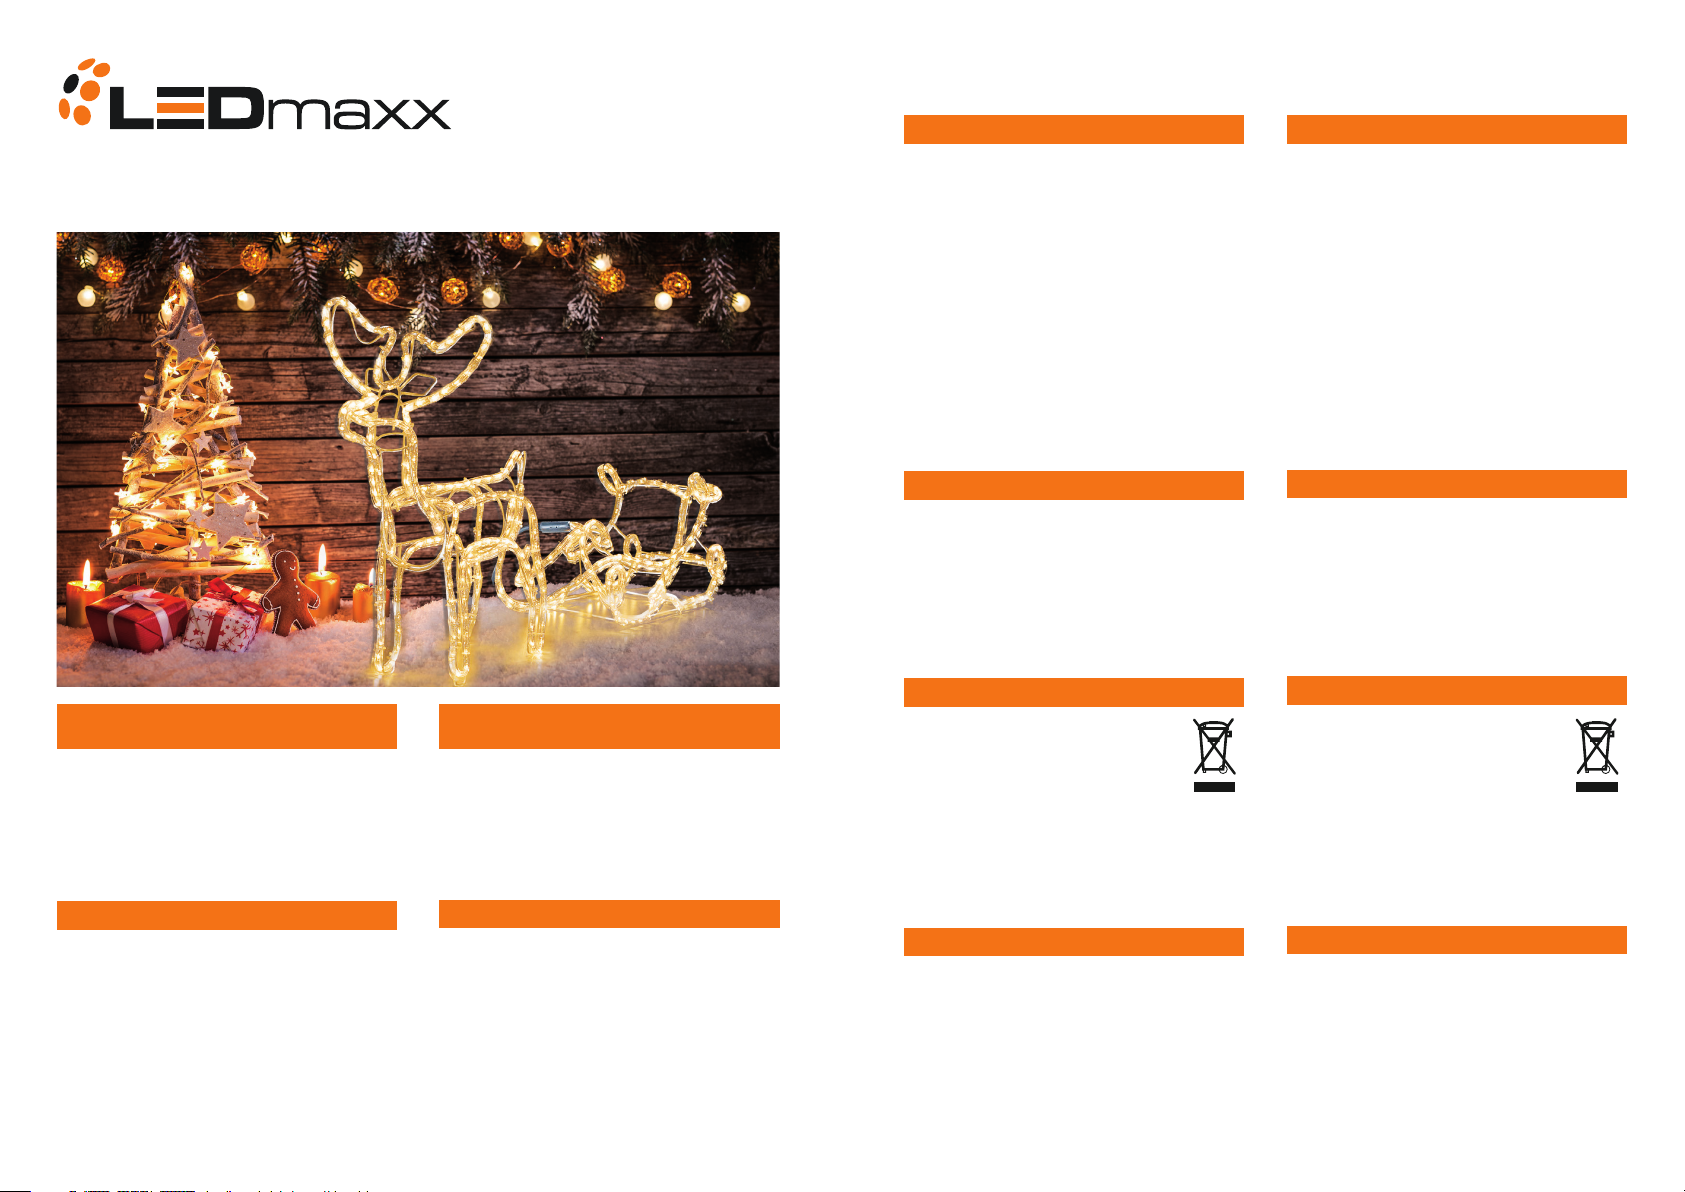
Premium Rentier mit Schlitten
Premium Reindeer with sleight
WRT002
AWH21
Rentier mit Schlitten
Art-Nr. WRT002
Herzlichen Dank, dass Sie sich für den Kauf eines unserer Produkte
entschieden haben. Lesen Sie diese Installations- und Gebrauchsan-
weisung vor Inbetriebnahme des Produkts aufmerksam durch und
bewahren Sie dieses Dokument gut auf. Zudem ist es ratsam den
Kassenbon, sowie die Verpackung vom Produkt ebenfalls aufzube-
wahren. Bei Sach- und Personenschäden durch Nichtbeachten der
Anleitung, durch unsachgemäße Handhabung oder für vorgenom-
mene Veränderungen am Produkt übernehmen wir keine Haftung.
Reindeer with sleight
Art.-No.: WRT002
Congratulations on your purchase to one of our products. Read these
instructions before using the product and retain this document for
future reference. In addition, it is also advisable to keep the receipt,
and the packaging of the product.
We are not responsible for any property damage or personal injury
caused by failure to observe these instructions, improper handling or
unauthorised modications to the product.
Altgeräte, die mit dem abgebildeten Symbol
gekennzeichnet sind, dürfen nicht in den Hausmüll
entsorgt werden. Sie müssen bei einer Sammelstelle für
Elektro- und Elektronikgeräte (bitte bei der Gemeinde
erkundigen) oder dem Händler, bei dem es gekauft
wurde, abgegeben werden. Diese sorgen für eine
umweltfreundliche Entsorgung. Mehr Informationen können Sie in
nachfolgenden Richtlinien nden:
• Richtlinie 2012/19/EU „Elektro- und Elektronik-Altgeräte“ und
• Richtlinie 2012/19/EU „Beschränkung der Verwendung
bestimmter gefährlicher Stoe in Elektro-
und Elektronikgeräten“
• Rentier mit Schlitten 1x
• Erdspieße 4x
• Bedienungsanleitung 1x
Eingangsspannung: 220-240V AC 50Hz
LED´s: 31V 9W
Schutzart: IP44
Die Anleitung bitte vor Inbetriebnahme komplett lesen
und an einem sicheren Ort aufbewahren.
Bevor Sie das Gerät reinigen trennen Sie es bitte vom Stromnetz.
Verwenden Sie nur tensidfreie Reinigungsmittel.
Das Gerät wurde sorgfältig auf Mängel überprüft. Wenn Sie trotzdem
einen Grund zur Beanstandung haben, gehen Sie bitte mit dem
Kaufbeleg zum Händler, bei dem Sie das Produkt gekauft haben. Wir
bieten eine 2-jährige Garantie ab Kaufdatum. Wir haften nicht für
Schäden, die durch falsche oder unsachgemäße Handhabung oder
Verschleiß verursacht wurden. Wir behalten uns das Recht vor ohne
vorherige Information, technische Änderungen vorzunehmen die der
Produktverbesserung dienen.
Old units, marked with the symbol as illustrated, may
not be disposed of in your household waste. Please bring
them to a collection point for electrical and electronic
equipment (please ask at your local municipality) or the
dealer from whom it was purchased. This will ensure an
environmentally friendly disposal. More information can
be found in the following guidelines:
• Directive 2012/19/EU „Waste Electrical and Electronic
Equipment“ and
• Directive 2012/19/EU „Restriction of the use of
certain hazardous substances in electrical and
electronic equipment“
• Reindeer with sleight 1x
• Pegs 4x
• User manual 1x
Input voltage: 220-240V AC 50Hz
Output voltage: 31V 9W
Protection class: IP44
Please read the instructions carefully before use and
keep in a safe place.
Before cleaning the appliance disconnect it from the power supply.
Use only surfactant-free cleanser.
The unit has been carefully checked for defects. If you still have a
reason to complain, please proceed with the purchase receipt to
the dealer from whom you purchased the product. We oer a 2 year
warranty from date of purchase. We are not liable for damage caused
by incorrect or improper use or wear. We reserve the right without
prior notice to modify our products useful for product improvement.
Allgemeine Sicherheitshinweise
Gebrauchsanleitung
Verpackungsinhalt
Hinweise für die Entsorgung
Pege und Garantie
• Benutzen Sie dieses Produkt ausschließlich für den dafür
vorgesehenen Zweck.
• Tauchen Sie das Produkt niemals in Flüssigkeiten ein.
• Berühren Sie das Produkt niemals mit feuchten Händen.
• Prüfen Sie das Produkt regelmäßig auf Beschädigungen. Wird
eine Beschädigung festgestellt, darf das Produkt nicht mehr
verwendet werden.
• Reparaturen dürfen ausschließlich von einer Elektro-Fachkraft
ausgeführt werden.
• Kinder sollten beaufsichtigt werden, um sicherzustellen, dass
diese nicht mit dem Produkt spielen.
• Lassen Sie keine Verpackungsteile, wie z.B. Plastikbeutel,
Kartonage, Styropor, etc. in Erreichbarkeit von Kindern liegen,
um eine Gefährdung auszuschließen.
• Lassen Sie das Produkt nur von einer Fachkraft instandsetzen.
• Das gesamte Produkt darf nicht verändert oder umgebaut
werden. Veränderungen an dem Produkt führen zum erlöschen
der Gewährleistung.
• Dieses Produkt eignet sich sowohl für die Verwendung im
Innenbereich als auch im Freien. Das Produkt darf aber nur im
innenbereich angeschloßen werden und nicht im Freien oder in
feuchter Umgebung.
• Der exible Lichtschlauch ist mit vorgefertigten Leuchten
angefertigt.
• Alle Leuchtmittel sind in Serie bzw. Parallel geschaltet.
• Nehmen Sie das Produkt vorsichtig aus der Verpackung.
• Stellen Sie sicher, dass die Anschlusswerte Ihrer Hausinstallation
mit den Daten am Typenschild übereinstimmen.
• Vor einer Installation vergewissern Sie sich, dass der gekaufte
Artikel auf dem Transportweg nicht beschädigt wurde. Bei
Beschädigung am Gehäuse oder elektrischen Teilen darf das
Produkt nicht betrieben werden.
General safety
Instructions for use
Packing and Accessories
Notes on Disposal
Care and Guarantee
• Use this product as intended.
• Do not immerse the product into any liquids.
• Do not touch the product with wet hands.
• Check regularly for damage. If damaged, the product may no
longer be used.
• Repairs must be performed by a qualied electrician.
• Children should be supervised to ensure that they do not play
with the product.
• Do not leave packaging components such as Plastic bags,
cardboard, polystyrene, etc. in the reach of children, to avoid
danger.
• Let repair the product only by a qualied electrician.
• No part of the product shall be modied or changed in any way.
Any changes to the product will void your warranty.
• This product can be used both indoors and outdoors, but please
ensure that the plug is only connected indoors and not outdoors,
or in damp conditions.
• The rope light tted to this product has pre-inserted bulbs in
exible rope tubing.
• All the bulbs are connected in a series/parallel arrangement.
• Take the product carefully out of the box and assemble.
• Ensure that the connection values of your house wiring match
the data on the nameplate.
• Before installation, make sure that the purchased item has not
been damaged during transportation. In case of any damage to
the housing or electrical parts of the product do not proceed with
the installation.
LEDmaxx GmbH
Wiesenweg 2
97353 Wiesentheid


