Phone: 1-510-770-1189 | Fax: 1-510-217-9461 | Web:www.ledonedistribution.com | E-mail: info-service@ledonedistribution.com
WIRING
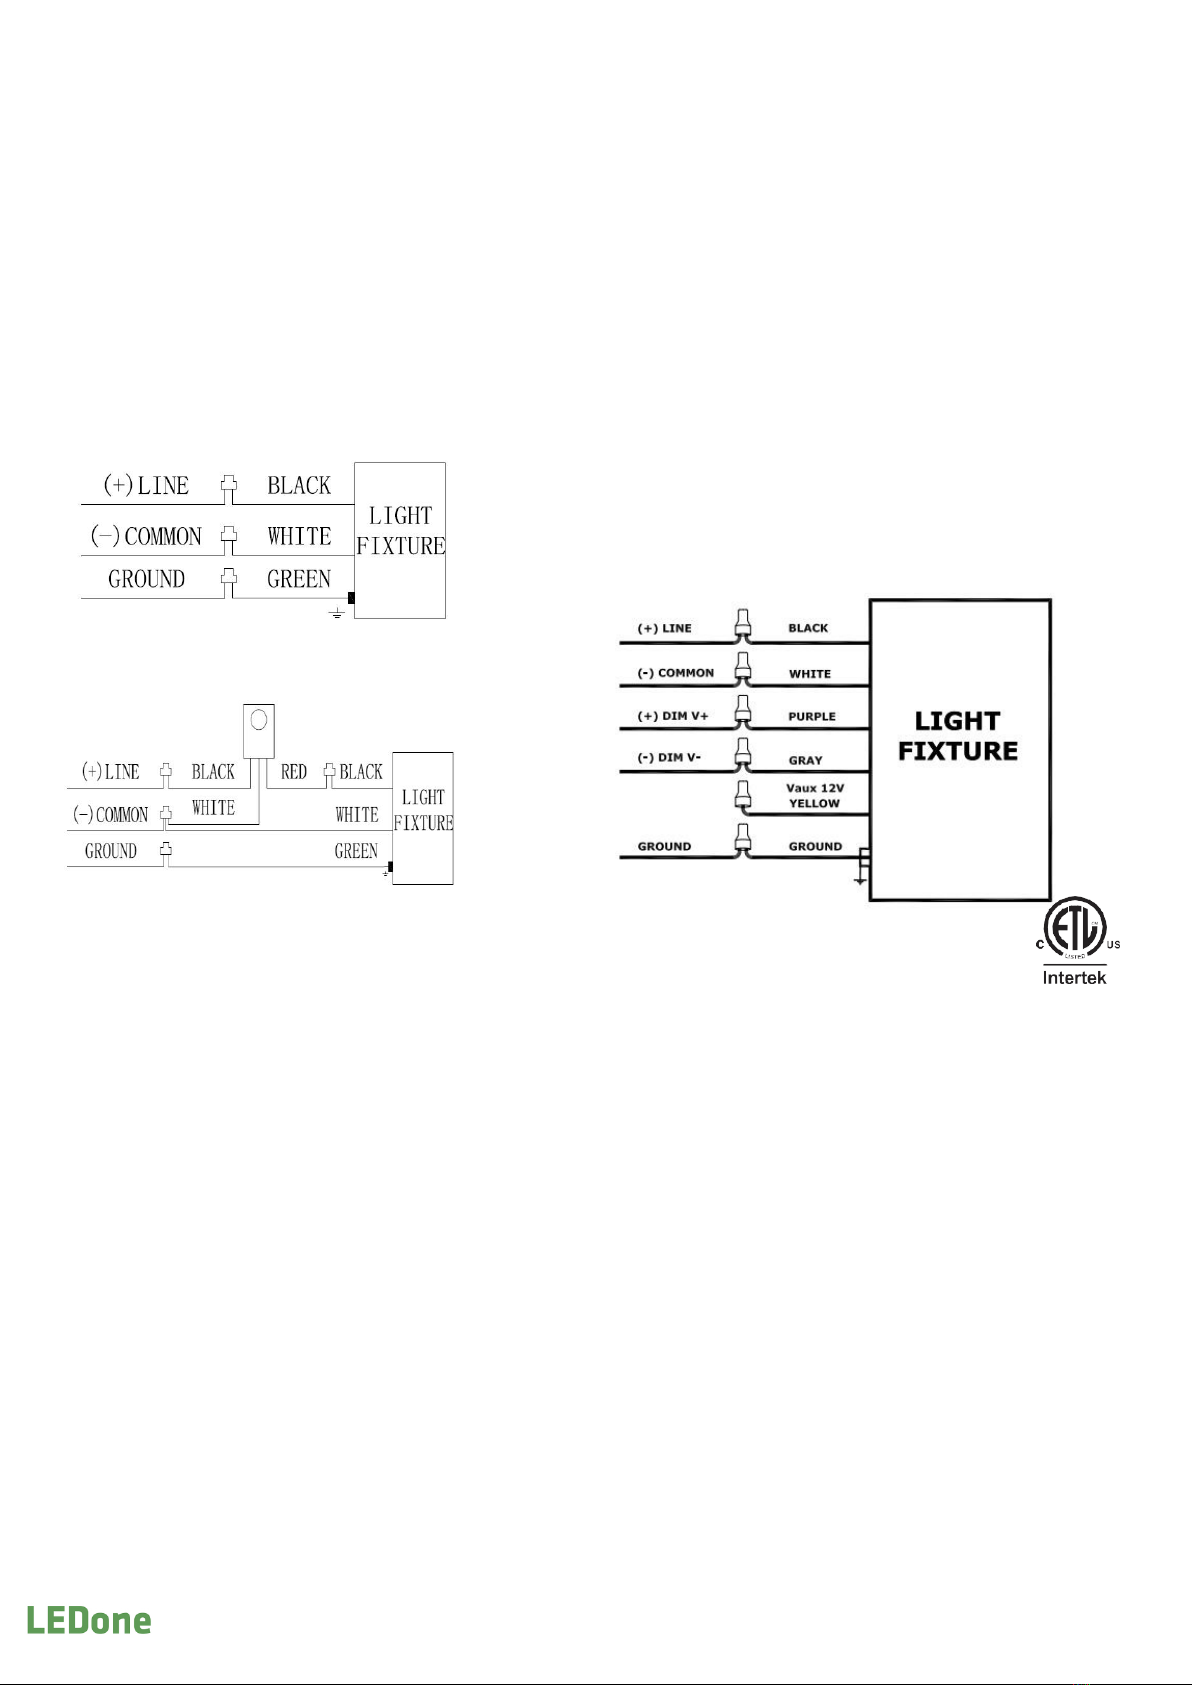
Without photocell
With photocell
CLEANING & MAINTENANCE:
CAUTION: Be sure fixture temperature is cool enough to touch. Do not clean or maintain while fixture is energized.
1. Clean glass lens with non-abrasive glass cleaning solution.
2. Do not open fixture to clean the LED. Do not touch the LED
TROUBLESHOOTING
1. Check that the line voltage at fixture is correct. Refer to wiring directions.
2.Is the fixture grounded properly?
Note: These instructions do not cover all details or variations in equipment nor do they provide for every possible situation
during installation operation or maintenance.
Universal voltage driver permits operation at
100V to 277VAC, 50 or 60Hz except fixtures
factory ordered with a 120V photocell (/PC).
1. Connect the black fixture line to the (L) Live
line supply wire.
2. Connect the white fixture line to the (N)
Neutral line supply wire.
3. Connect the green fixture line to the (G)
Ground line supply ground.
0-10V DIMMABLE WIRING
Universal voltage driver permits operation at 120V thru 277V,
50 or 60 Hz. For 0-10V Dimming, follow the wiring directions
as in fig. 4.
1. Connect the black fixture lead to the (+) LINE supply lead.
2. Connect the white fixture lead to the (-) COMMON supply
lead.
3. Connect the GROUND wire from fixture to supply ground.
Do NOT connect the GROUND of the dimming fixture to the
output.
4. Connect the purple fixture lead to the (V+) DIM lead.
5. Connect the gray fixture lead to the (V-) DIM lead.
6. Cap the yellow fixture lead, if present. Do NOT connect.


