9
8.0 TROUBLESHOOTING
WARNING: Your pump must be serviced by a professional service technician qualified in pool / spa installation.
The following procedures must be followed exactly. Improper installation and / or operation can create
dangerous electrical hazards, which can cause high voltage to run through the electrical system. This can
cause property damage, serious personal injury and / or death. Improper installation and / or operation will
void the warranty.
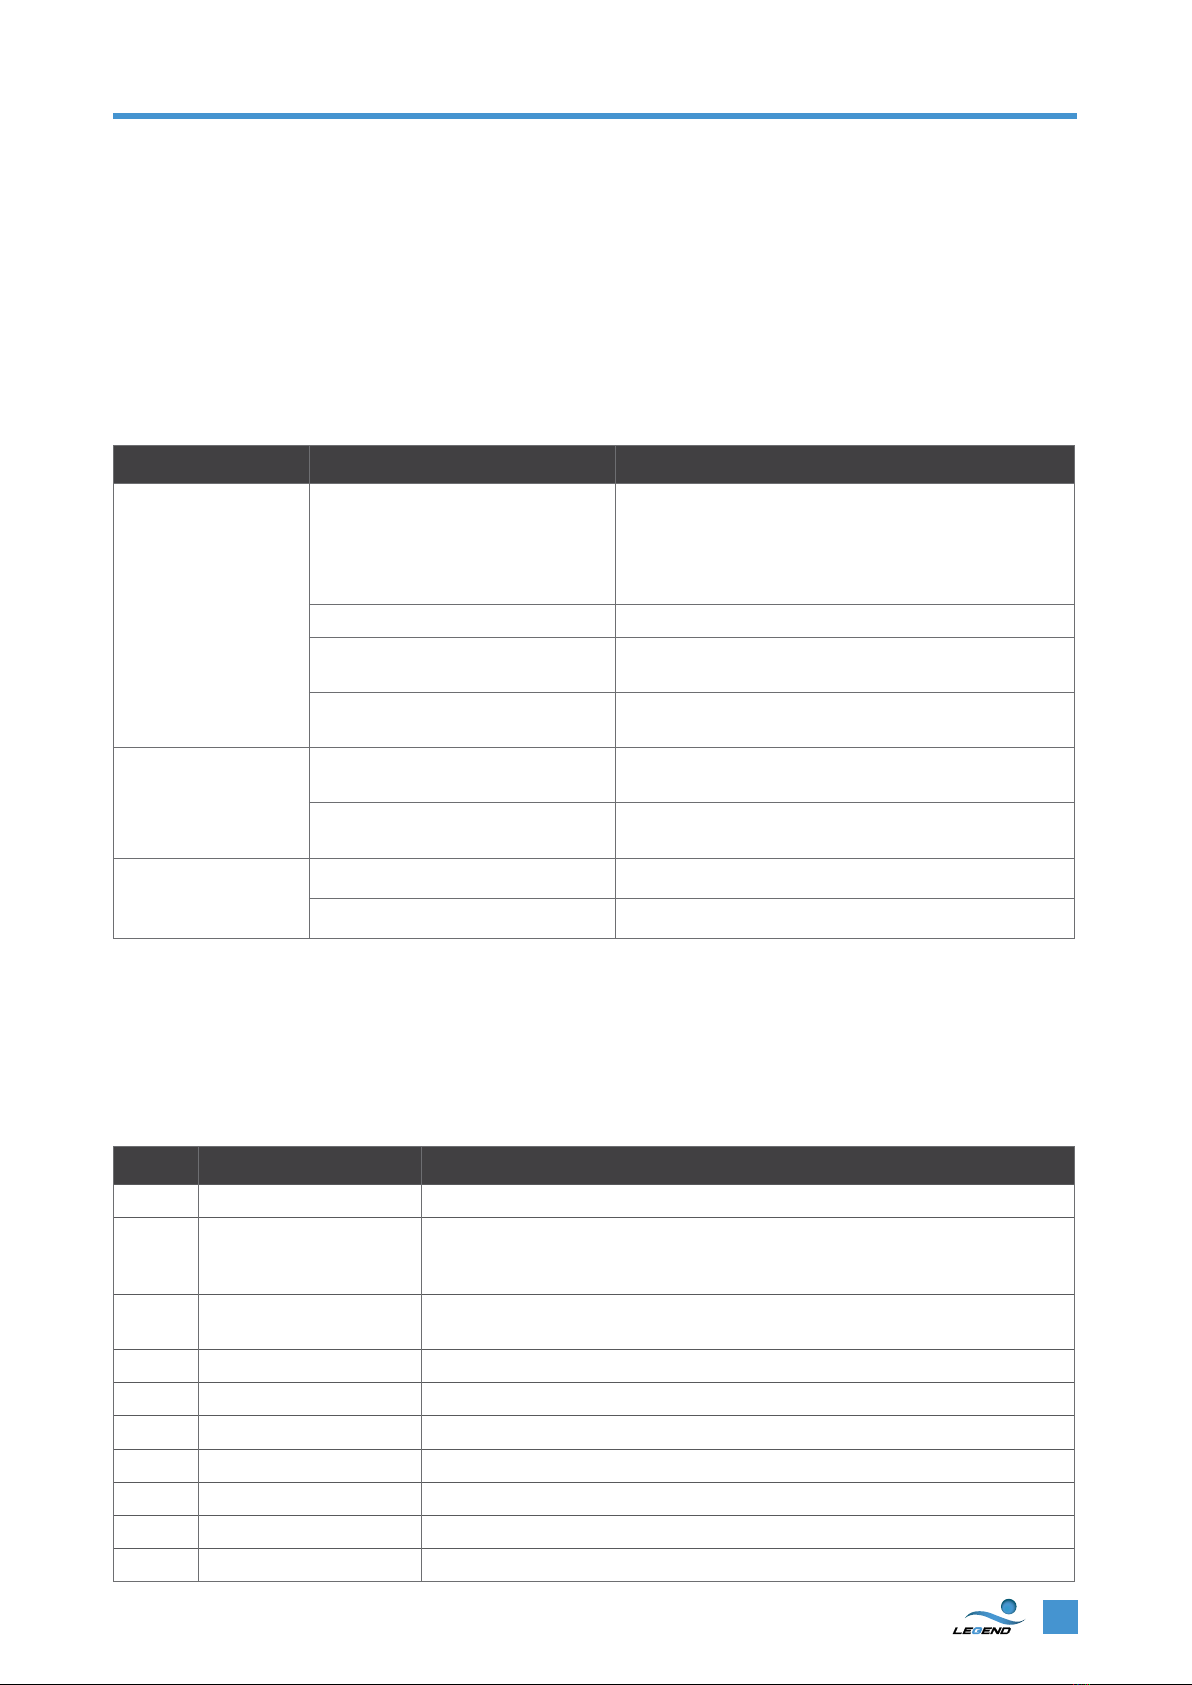
8.1 GENERAL PUMP TROUBLESHOOTING
Problem Possible Cause Corrective Action
1. Pump will not prime A. Suction air leak Make sure see-through lid and o-rings are clean and
properly positioned. Hand tighten see-through lid.
Tighten all pipes and fittings on suction side of pump.
Be sure water in pool is high enough to flow through
skimmer box.
B. No water in pump Make sure strainer tank is full of water and free of air.
C. Closed valves or blocked lines Open all valves in system. Clean skimmer and strainer
tank. Open pump and check for clogging of impeller.
D. Low voltage to motor Check voltage at motor. If low, pump will not come
up to speed
2. Motor does not turn A. No power to motor Check that all power switches are on. Be sure fuse
or circuit breaker in the power box is properly set.
B. Pump jammed With power o, turn shaft. It should spin freely.
If not, repair by an authorised repairer is required.
3. Low flow A. Dirty Filter Backwash filter or clean cartridges.
B. Suction leak See problem 1 above.
8.2 LEGEND LED SPECK VS PUMP TROUBLESHOOTING
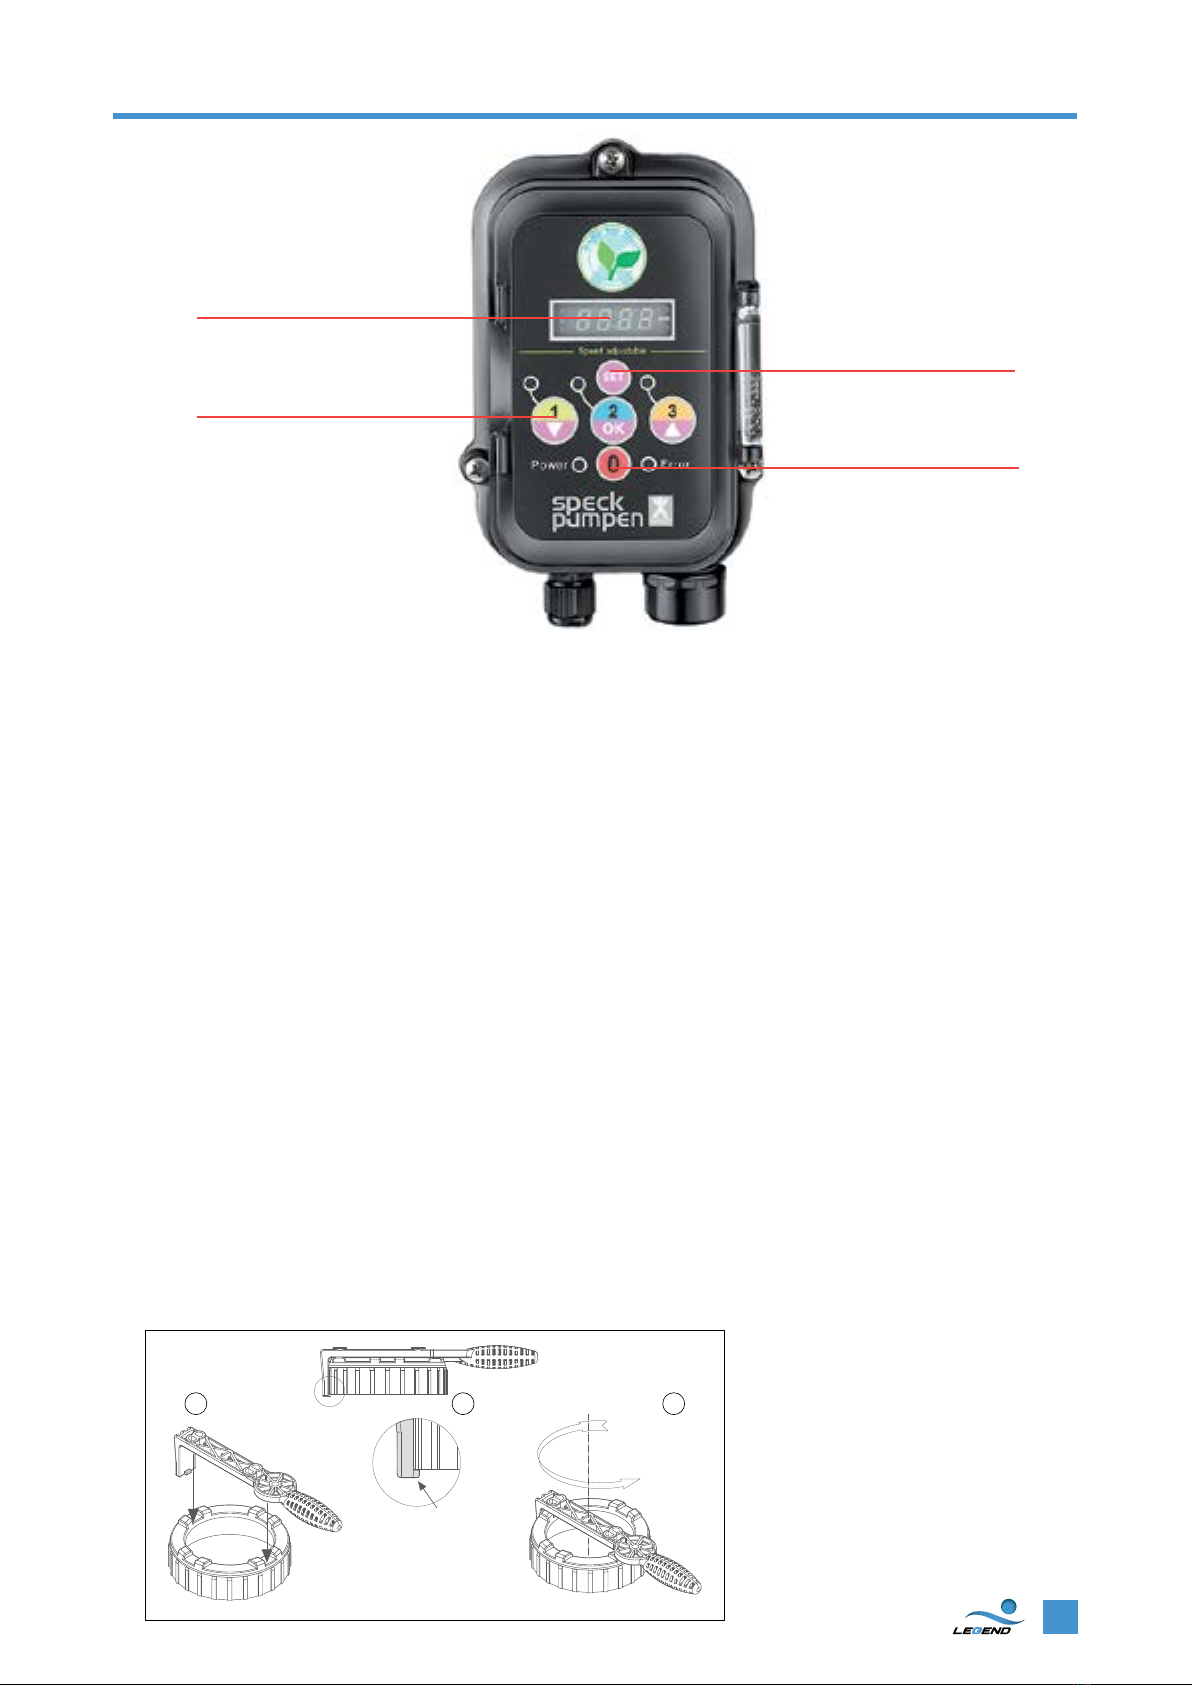
The Legend LED Speck VS Pump has an LED Error light on the control panel which flashes to indicate a
warning. If the Error light is flashing, pay attention to the number of flashes between intervals then shut the
pump down. For instance, if a “Low Voltage” situation occurs, the Error LED will blink twice, then turn o, then
blink twice. This sequence is repeated until the condition is cleared.
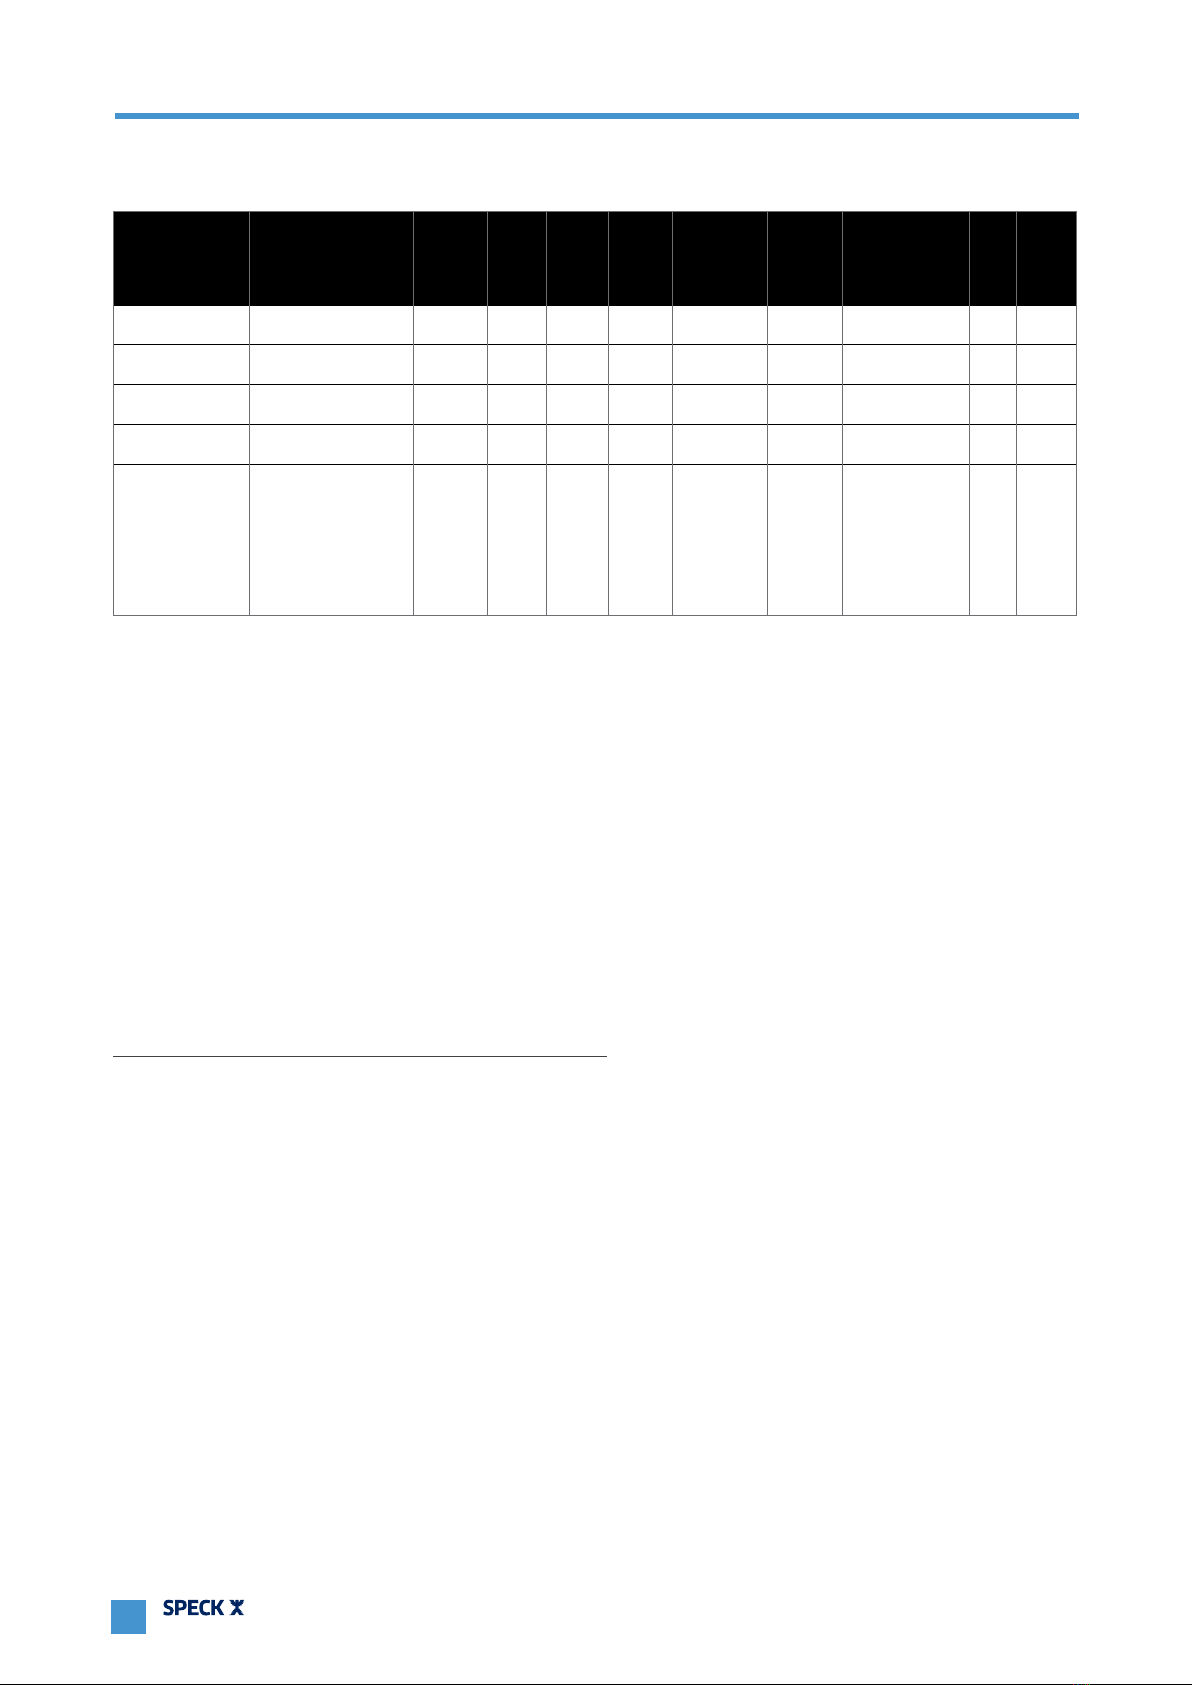
Blinks Fault Cause
1 Micro controller failure Micro controller is continually rebooting.
2 Mains under voltage The mains voltage has dropped below 180 volts AC running. Note: If this fault
is active the controller will reboot automatically after voltage comes above
209 volts AC for at least 6 seconds.
3 Temperature Over temperature (100 degrees Celsius) Under temperature
(-20 degrees Celsius)
4 Over current trip Over current protection has tripped.
5 Mains over voltage The mains voltage has risen above 269 volts AC.
6 Output shaft seized Motor failed to start. Motor was stopped.
7 Self check One or more of the self-tests failed either at start up or while running.
8 Motor fault One or more of the phases has become disconnected
10 Other fault Any fault not covered by the other codes. Presently no faults should trigger this.
None EEPROM load failure Checksum failed while loading EEPROM to memory