is is to certify that the Pilot II© wireless cadence meter is warranted by
HOIST Fitness to be free of all defects in materials and workman-
ship. is warranty does not apply to any defect caused by negligence,
misuse, accident, alteration, improper maintenance, or an
“act of God.” e Pilot II cadence meter can only be used on the Rev-
Master indoor cycling bike. Any attempts to use this meter on any other
equipment voids the warranty.
e Pilot II carries a one year warranty on the meter and transmitter.
Batteries are not warranted. Contact our Customer Service Department
to report any problems. When calling, please be prepared to provide
the customer service representative with the following information:
Your name, the serial number of the inoperable unit, and the date(s) of
purchase for the meter. If warranty replacement parts are shipped to you,
you may be required to return the inoperable part.
HOIST Fitness neither makes, assumes nor authorizes any rep-
resentative or other person to make or assume for us, any other war-
ranty whatsoever, whether expressed or implied, in connection with
the sale, service, or shipment of our products. We reserve the right to
make changes and improvements in our products without incurring any
obligation to similarly alter products previously purchased. In order to
maintain your product warranty and to ensure the safe and ecient op-
eration of your cadence meter, only authorized replacement parts can be
used. is warranty is void if parts other than those provided by HOIST
Fitness are used.
SPECIFICATIONS
Cadence Meter
Heart Rate Range: 30 to 240 bpm (beats per minute)
Heart Rate Accuracy: ± 4 bpm
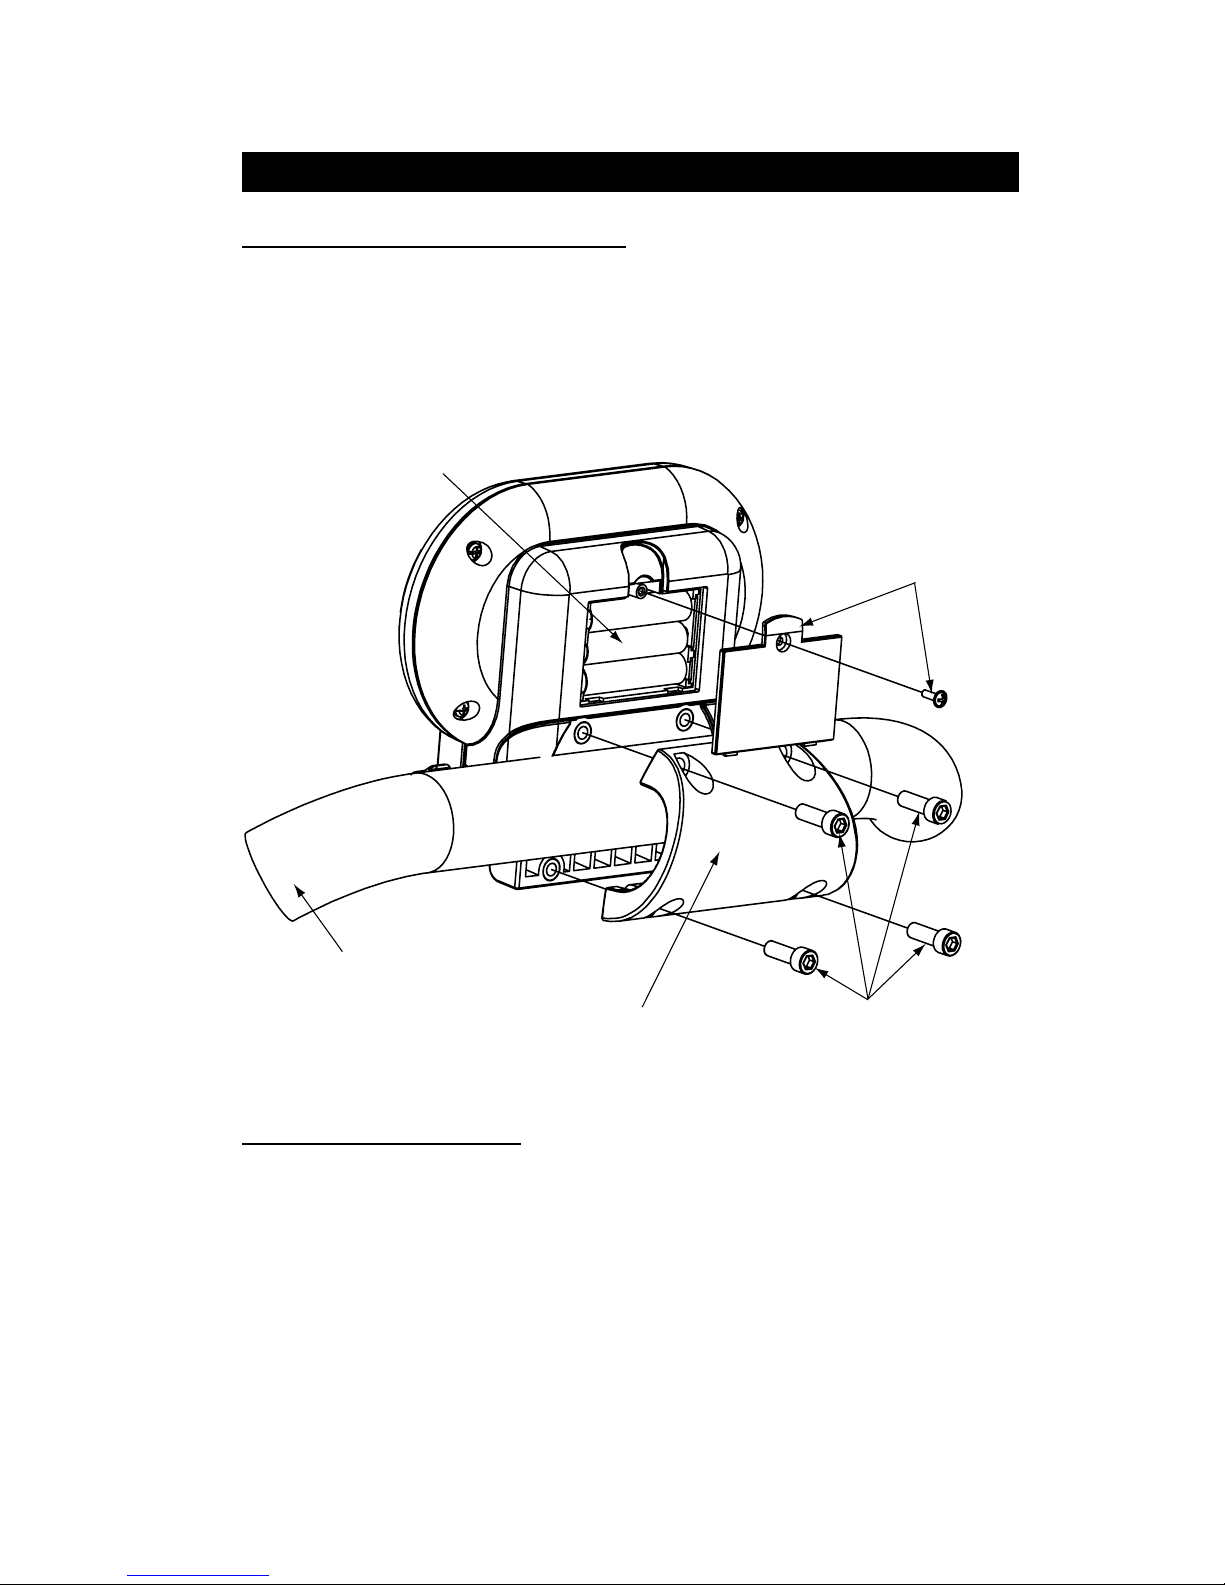
Battery: 3 AAA batteries
Battery Life: 6 months to 1 year, depending on usage
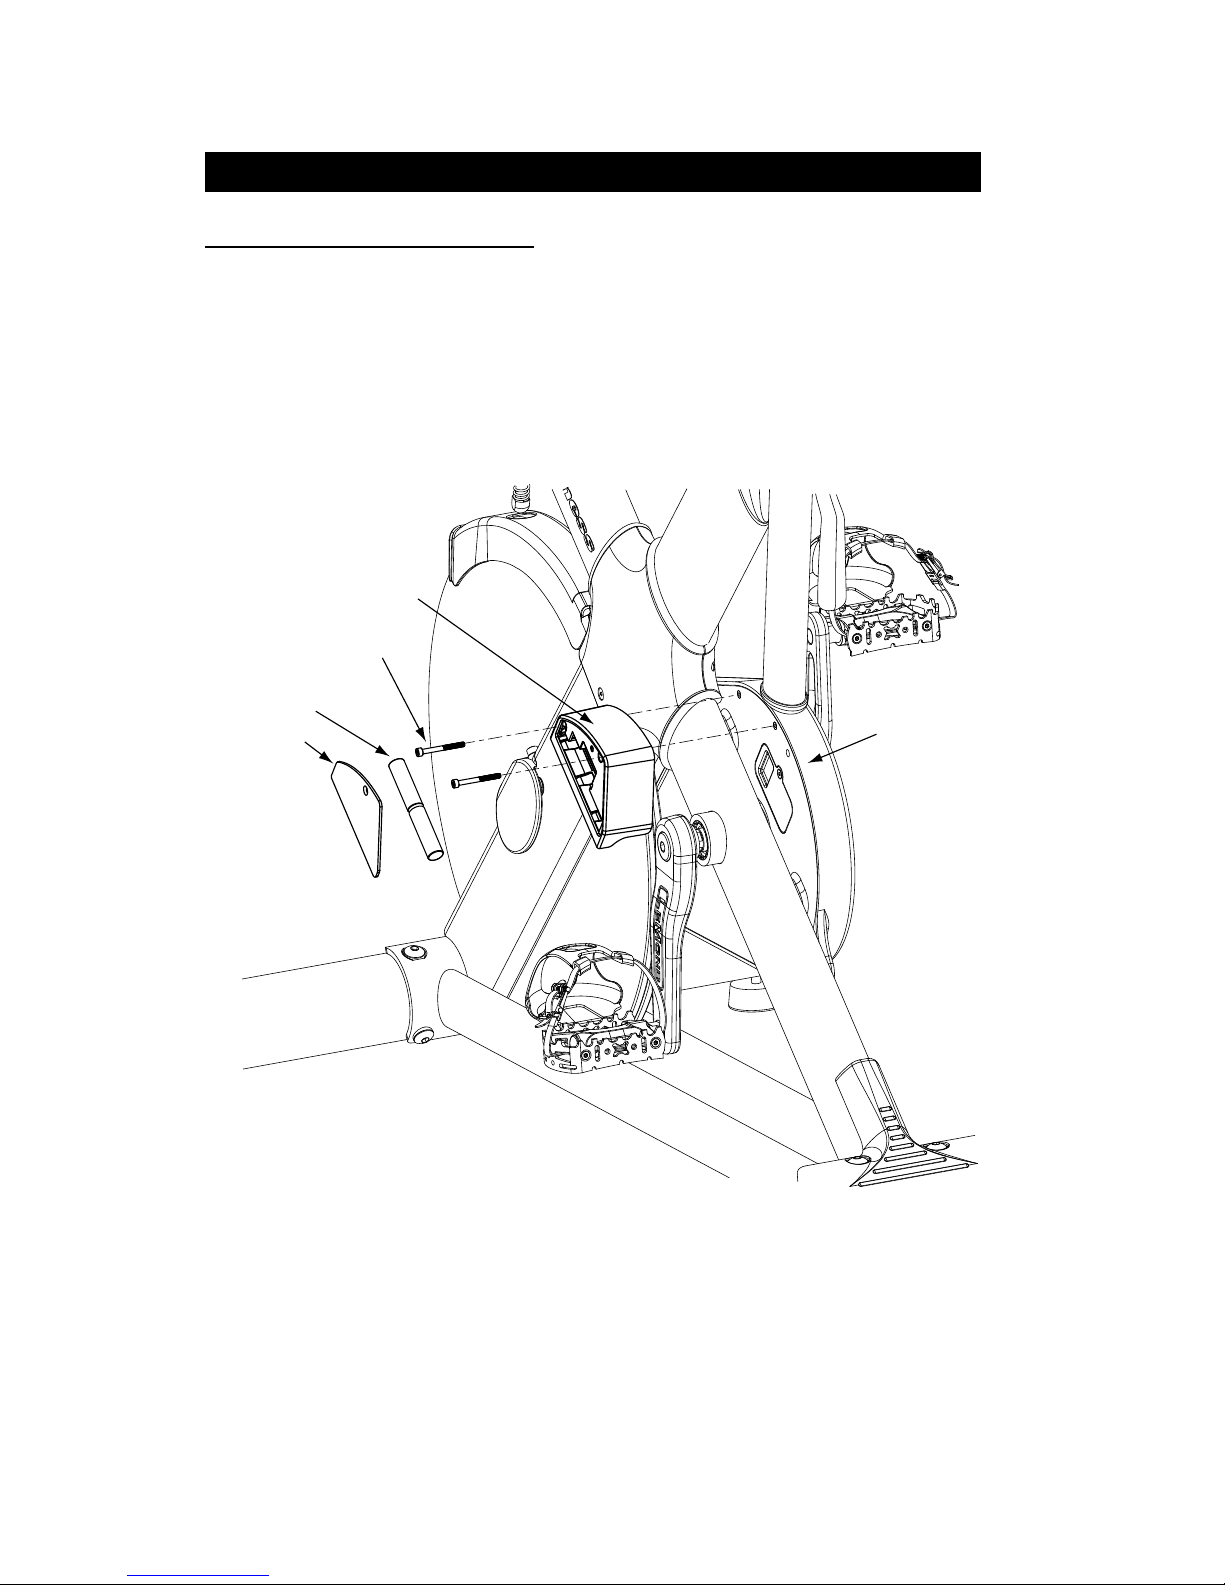
Transmitter
Emitted Signal: ANT+ Enabled
Battery: 2 AA batteries
Battery Life: 6 months to 1 year, depending on usage