LG WF-T5001(~2)PC(H/P) User manual

Washing Machine
OWNER’S MANUAL
Please read this manual carefully before operating your set.
Retain it for future reference.
Record model name and serial number of the set.
Quote this information to your dealer when you require service.
MODEL : WF-T5001(~2)PC(H/P)
WF-T5011(~2)PC(H/P)
WF-T6001(~2)TC(H/P)
WF-T6011(~2)TC(H/P)
WF-T5001(~2)PD(E/F)
WF-T5011(~2)PD(E/F)
WF-T6001(~2)TD(E/F)
WF-T6011(~2)TD(E/F)
WF-T7001(~2)TC(H/P)
WF-T7011(~2)TC(H/P)
WF-T7001(~2)TD(E/F)
WF-T7011(~2)TD(E/F)

T
P
roduct Features
Punch + 3 washing action
●
The punch action’s powerful vertical water thrust
combined with the rotating pulsator movement
improves washing performance and reduces tangles.
●
3 Spinning mini-pulsators create powerful jets of
water which move the laundry up and down in the
drum to ensure your laundry is evenly and
thoroughly washed.
The Turbo Drum washing machine does not operate with the lid open.
If the lid is opened during wash, rinse and spin cycles, the machine will stop
automatically.
Fuzzy Logic Control
●
A built-in load sensor automatically detects and measures the laundry load a
microprocessor optimizes washing conditions such as ideal water consumption
and washing time.
●
Advanced technology is built into the Electronic Control System which ensures
the best washing result.
Turbo Drum washing
●
While the "Punch + 3" pulsator rotates in one
direction, the Turbo Drum rotates in the opposite
direction. This creates an even flow of water in both
the upper and lower parts of the drum, resulting in an
enhanced washing and rinsing action.
Lint Filter
●
Lint and loose threads from laundry generated
during the washing cycle are caught by the lint filter
for a cleaner wash.
START
WASHING AUTO
POWER
OFF
SENSING
Laundry Sensor
Water Level Sensor
SETTING
Optimum
Washing
Condition
Auto Restart
●
In the event of a power failure, the washing machine will automatically resume its
interrupted cycle when power is resumed.
Applied models : WF-T5001(~2)PD(E/F), WF-T5011(~2)PD(E/F)
WF-T6001(~2)TD(E/F), WF-T6011(~2)TD(E/F)
WF-T7001(~2)TD(E/F), WF-T7011(~2)TD(E/F)

C
ontents
Introduction
Read this manual
Before Starting to Wash
Washing Programs
Additional Function
Options
Installation
Care and Maintenance
Specification
Troubleshooting
Safety Information
Identification of Parts
Function Information
Preparation Before Washing
Use of Water, Detergent, Bleach
and Softener
Function of each Button
Fuzzy Wash (Normal Wash)
Economy Wash
Jean Wash
Wool Wash
Soak Wash
Delay Start (Reservation) Wash
Option Washing
Other useful Functions
Placing and Leveling
Connecting Water Supply Hose
Connecting Drain Hose
Grounding Method
Cleaning
Troubleshooting
Specification
Inside you will find many helpful hints on how to use and maintain your washer
properly. Just a little preventive care on your part can save you a great deal of time and
money over the life of your washer. You will find many answers to common problems
in the Troubleshooting section. If you review our chart of Troubleshooting Tips first, you
may not need to call for service at all.
4
5
6
7
8
10
12
12
12
12
12
14
15
16
17
18
21
22
23
25
27

Introduction
4
S
afety information
Attention
Do not put your hands or feet under this
machine.
Do not place any rugs or heavy material
over the power cord.
Since the machine is heavy, a minimum of
two persons should move it.
Do not install the washer where it is
exposed to sunlight, wind, rain, etc.
The appliance must be positioned so that
the plug is accessible
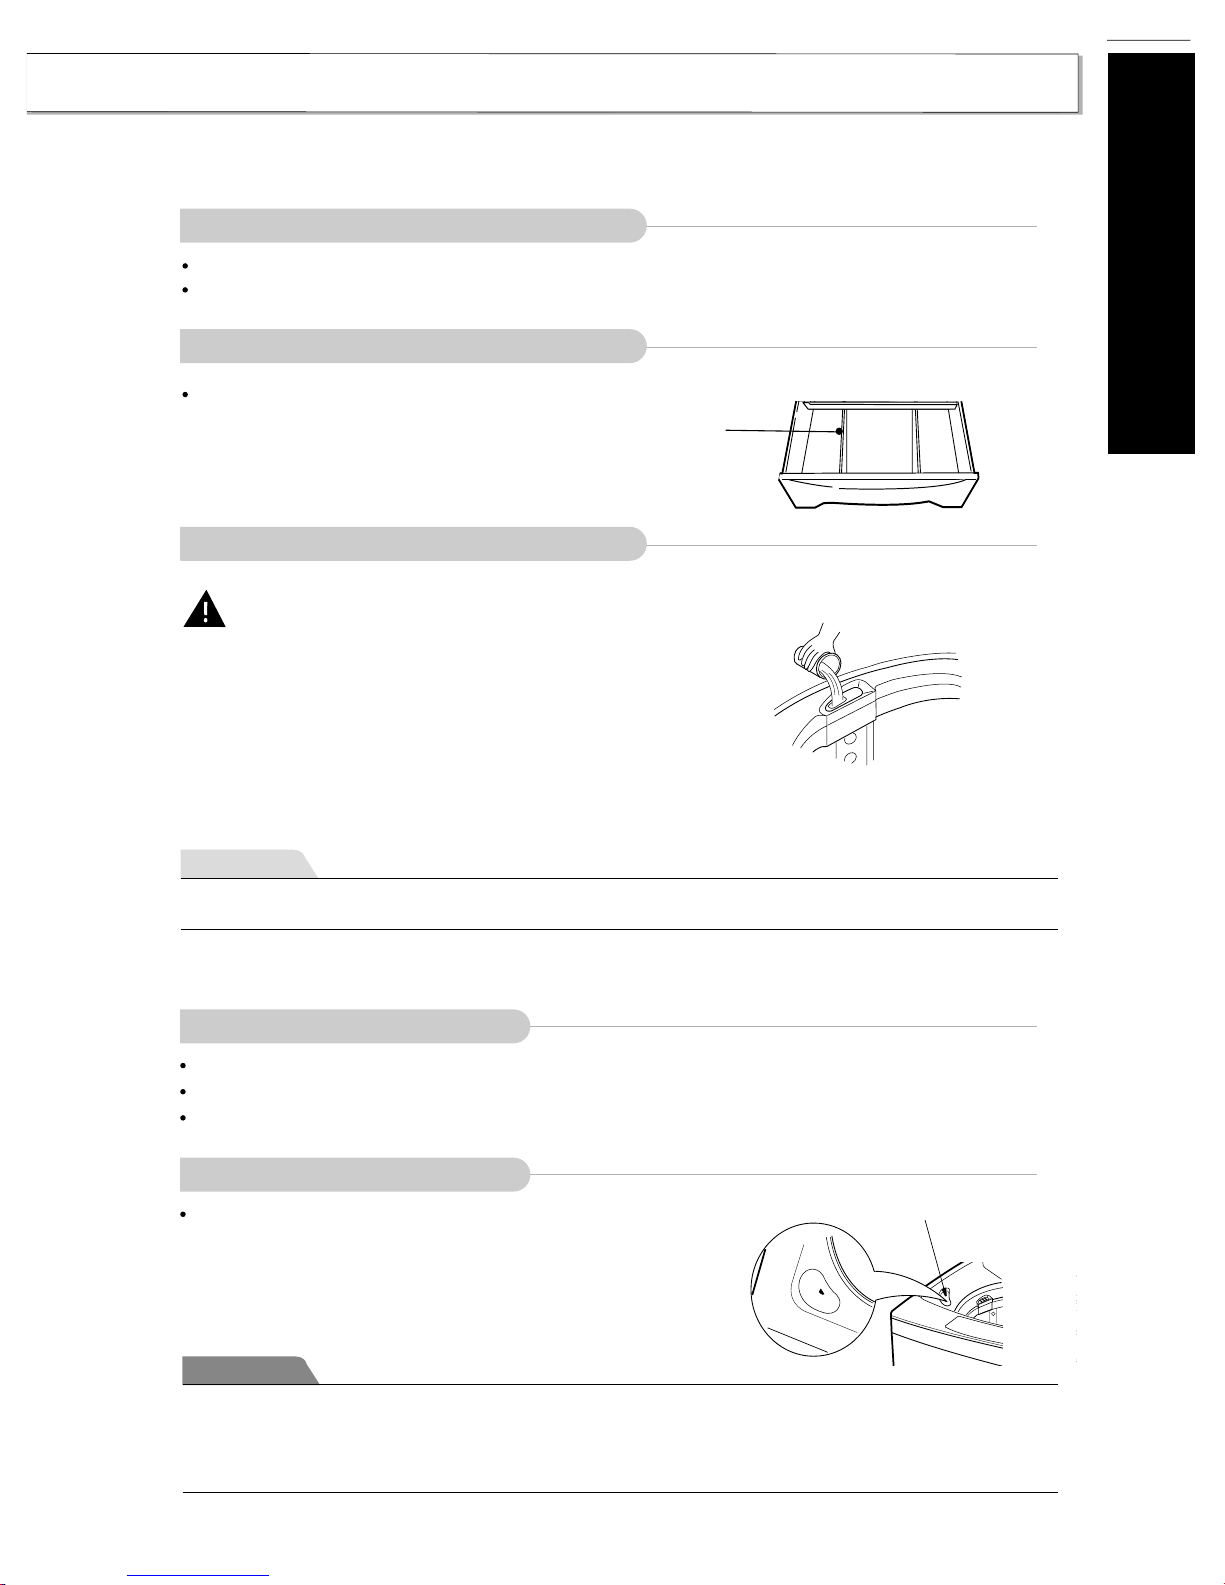
Power
Supply
cord
Installation
Maintenance
Make sure the power cord is free of dust
and plug it in properly so that the cord will
not move.
Do not touch the power cord with wet
hands.
Violation of these guidelines could result in serious or fatal injury.
For your better understanding. these precautions are separated into two categories.
We urge you to pay special attention to them in the interests of your own safety, and protection of your
machine against damage:
The appliance is not intended for use by young
children or infirm persons without supervision.
Do not install the washing machine in a damp place.
Keep the washing machine away from fire or heat
source.
Young children should be supervised to ensure that
they do not play with the appliance.
The base opening must not be obstructed by
carpeting when the washing machine is installed on
a carpeted floor.
Make sure to ground the earth wire or connect it
to a ground detector after you put the power cord
into an outlet.
When the power cord is loose, do not use it.
Do not damage the power cords.
Do not plug many cords into one outlet at the same
time.
If the power cord or fuse is damaged, it must be
replaced by the manufacturer or its service agents or
similarly qualified people in order to avoid a hazard.
If the appliance is supplied from a cord extension
set or electrical portable outlet device the cord
extension set or electrical portable outlet device
should be positioned so it is not subject to splashing
or ingress of moisture.
Following these guidelines will protect your machine against damage.
Operation
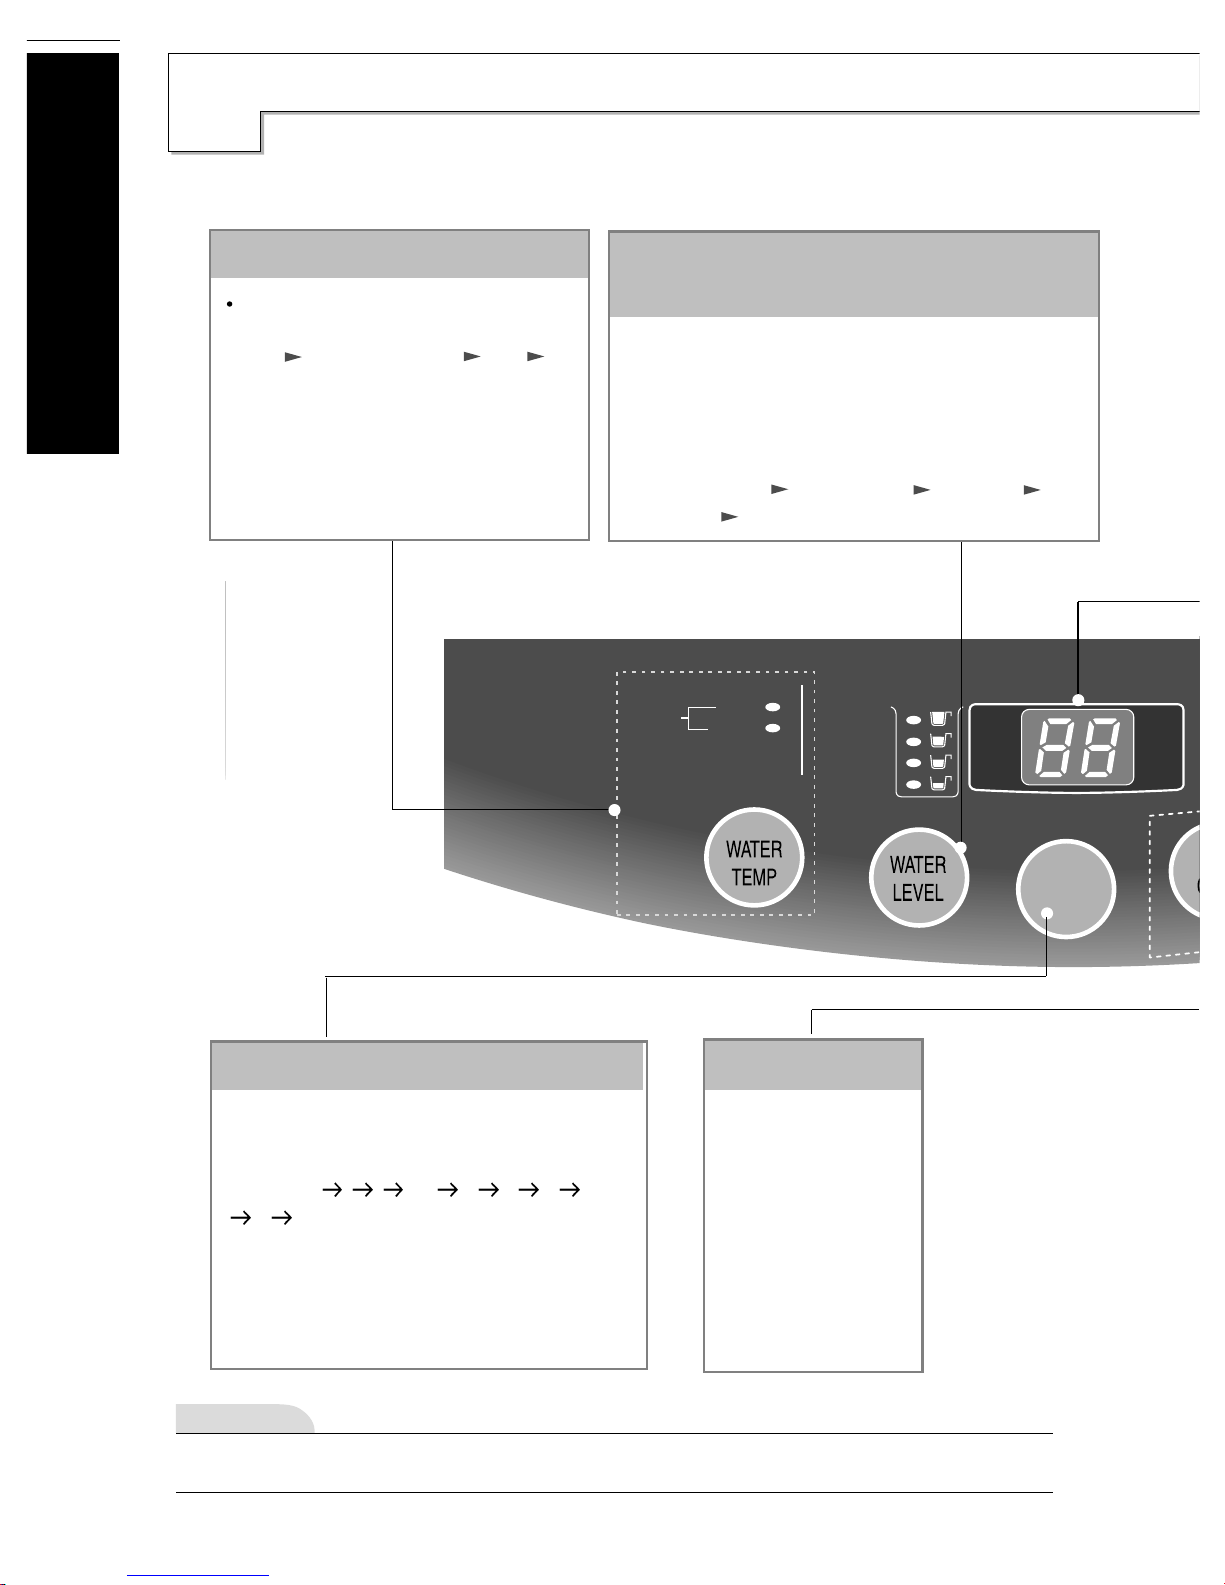
• Do not press the buttons with sharp objects.
• Check the hose connection and open the tap
before activating the machine.
• Do not pour more than 50˚C(122˚F) water
into the tub.
• Do not wash any waterproof materials.
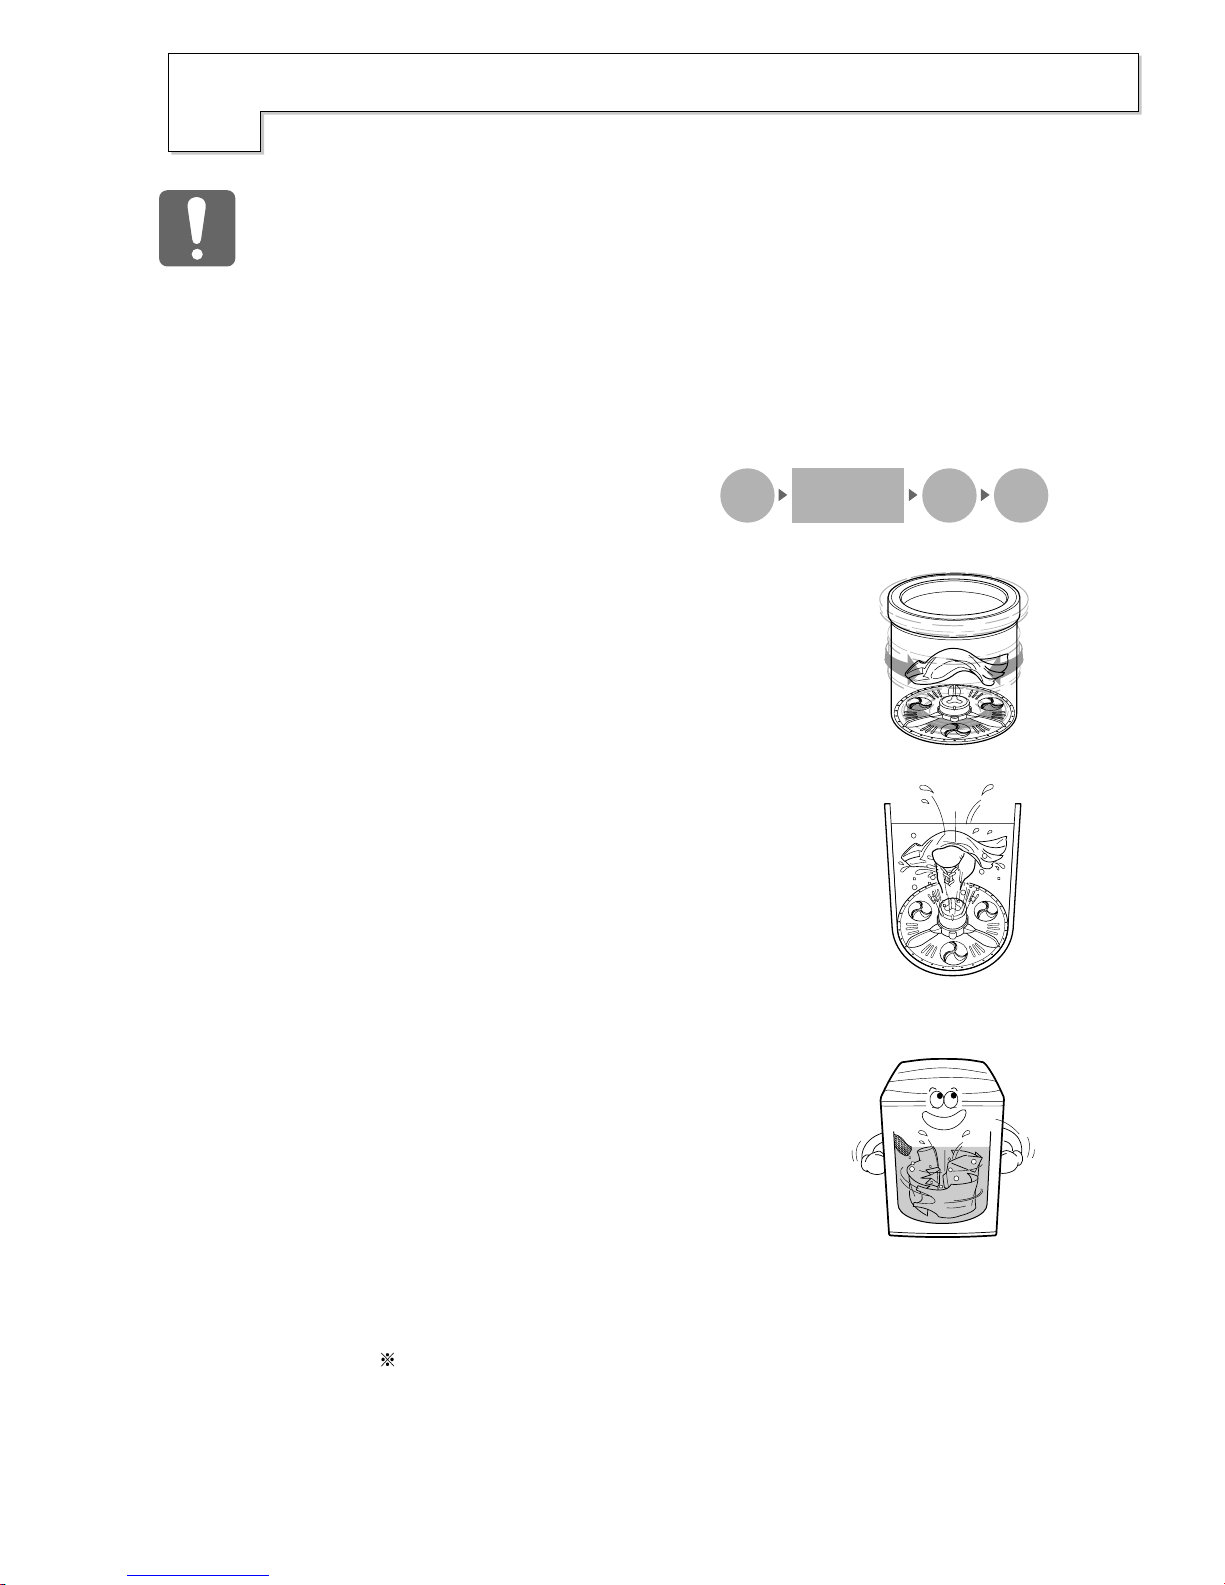
When you take out the laundry, be careful not to
fall into the washer.
Do not put hands into the rotating tub.
Do not sprinkle water over the buttons.
Make sure the lid is closed during operation of the
spin cycle.
Do not put heavy objects on the machine.
Unplug the cord when the machine is not in use. • Do not pour corrosive materials or bleach
over the washing machine. It will cause
damage to the power cord or the machine.
• Never disassemble or remodel the washer
and power cord by yourself. Only a
qualified technician should work on the
machine.
Caution
Caution
Attention
For your safety, the information in this manual must be followed to minimize the risk of fire or
explosion, electric shock, or to prevent property damage, personal injury, or loss of life.
WARNING!

Introduction
I
dentification of Parts
5
Water supply hose
(1 EA or 2EA)
Powder detergent box
Bleach dispenser
Inner tub
Control panel
Adjustable leg
Power cord
Lint filter
Drain hose
for pump model
Drain hose for
non pump model
Drain hose Anti-rat cover(option)
Water supply hoses
or or
1 Each for cold and
hot water
Body
Accessories
Part can be different according to the model.
Note

Before Starting to Wash
6
F
unction Information
Our machine provides various washing methods which suit various conditions and
types of laundry.
Other washing methods
Different types of laundry washing
Use this Program for normal clothes except for woolen clothes and lingerie.
The sensor automatically detects the quantity of laundry and selects the appropriate water level, wash
power, washing time, rinsing time and spinning time.
(refer to p12 )
Thick and heavy clothes or those which are excessively dirty like jeans or working uniforms can be washed.
(refer to p12)
Delicate clothes (lingerie, wool etc.) which may be easily damaged can be washed.
(refer to p12)
Fuzzy (Normal) Wash
Jean Wash
Wool Wash
Economy wash can be selected to wash lightly soiled clothes of less than 3.0 kg in a short time.
(refer to p12)
Economy Wash
Soak Wash can be selected to wash heavily soiled laundry by soaking in water for some time to remove dirt
and grime.
(refer to p12)
Soak Wash
Delay Start (Reservation) Wash is used to delay the finishing time of the operation.
Delayed Start washing can be set according to preference.
(refer to p14)
Delay Start (Reservation) Wash
Spin, Rinse/Spin, Rinse, Wash/Rinse, and Wash only options can selected.
(refer to p15)
Option WashOption Wash

Before Starting to Wash
P
reparation Before Washing
7
Brush a little detergent dissolved in water onto stains like collars
and cuffs to help shift dirt.
Treat stains AS SOON AS POSSIBLE. The longer they are left the
harder they are to remove.
•Check all pockets to make sure that they are empty. Things
such as nails, hairclips, matches, pens, coins and keys can damage
both your washer and your clothes.
•Close zippers, hook and strings to make sure that these items
don't snag on other clothes. .
•Mend any torn garments or loose buttons. Tears or holes may
become larger during washing.
• Remove any loose brassiere wires as they can damage your
washing machine and clothes.
• Pre-treat dirt and stains.
• Make sure the clothes are washable in water.
• Check the washing instructions.
To get the best results, different fabrics need to be washed in different ways.
SOIL (Heavy, Normal, Light) Separate clothes according to amount of soil
COLOR (Whites, Lights, Darks) Separate white fabrics from colored fabrics.
LINT (Lint producers, Collectors) Separate lint producers and lint collectors.
Use nylon nets for long, delicate items.
For laundry with long strings or long length, a net will prevent
tangling during washing.
Fasten zippers or hooks on items before washing.
Nylon net is not supplied by LG.
Clothes like downs and woollens are light weight, large and float
easily.So use a nylon net and wash them in a small amount of water.
If the laundry floats during the wash cycle, it may become damaged.
Use dissolved detergent to prevent the detergent from clumping.
WIRE
Sorting
Caring before loading
Pretreatment
Light and Large- size clothing
Long laundry item

Before Starting to Wash
8
U
se of Water, Detergent, Bleach and Softener
Water temperature
Using water
The machine sets the appropriate temperature automatically according to the wash program .
You can change the water temperature by pressing the WATER TEMP button.
Laundry Load
over
3.6kg
under
3.5 kg
under
2.0 kg
under
1.0 kg
Water Level /
Amount of Water
S 24lM 33lL 46lEx 55l
This machine detects the quantity of laundry automatically,
then sets the water level and proper amount of detergent.
When you select a wash program, the water level and amount of detergent (to be used)
will be shown on the control panel.
The following table shows the amount of water.
When the water level is automatically detected, it may differ depending on the quantity of laundry even
though the same water level is indicated on the control panel.
Amount of water
EX-LARGE
LARGE
MEDIUM
SMALL
WATER.DETERGENT
(refer to p10)
Using Detergent and Fabric Softener
Amount of detergent
Available Detergent Type
Synthetic detergents that yield a low level of foam are recommended.
When liquid detergent is used, mix it with water (1:1) and pour it into the bleach dispenser.
When you select a wash program, the water level and the amount of detergent will be
shown on the control panel. The amount of a cup in the diagram is about 40g for
concentrated detergent.
For the correct amount of detergent, refer to detergent manufacturer’s instruction .
If excessive detergent is used, the rinse will not be as clean and efficient. Also, it could cause environmental
pollution, so use it accordingly.
Attention
EX-LARGE
LARGE
MEDIUM
SMALL
WATER.DETERGENT

Before Starting to Wash
9
Attention
Available Fabric Softener Type
Available Bleach Type
Depositing Bleach
Depositing Detergent
Where you
deposit the
detergent
Powder Detergent dispenser.
Do not use concentrated fabric softener. This may cause some problems in automatic dispensing.
For more details refer to the softener products instructions for use.
Using Bleach
Open the detergent dispenser and deposit the
appropriate amount of detergent .
Use oxygenated bleach.
Powdered bleach should mixed with water and then be deposited into the tub.
For more details refer to the products instruction for use.
Separate the laundry to be bleached and deposit
liquid bleach into the Bleach dispenser.
The dispenser dilutes liquid chlorine bleach before
it reaches into your wash load.
Bleach dispenser
■Do not insert bleach or fabric softener directly onto laundry. This may affect colors or damage clothing
■Do not mix chlorine bleach with ammonia or acids such as vinegar and/or rust remover. Mixing can
produce a toxic gas which may cause death.
Depositing Fabric softener
Fabric Softener will be inserted automatically during the final rinse.
Check fabric care labels for special instructions.
Note
•Don't use softener with detergent. Use softener in last
rinse water
•When using dispenser, dilute softener(30ml) with
fresh water(30ml)
•When filling dispenser, do not splash or overfill.
It may stain clothes.
•Never pour fabric softener directly on clothes.
It may stain them
•If spotting occurs, wet and rub hand
dishwashing liquid (or mild bar soap) and rewash.

Before Starting to Wash
10
F
unction of each Button
EX-LARGE
LARGE
MEDIUM
SMALL
WATER.DETERGENT
HOURDELAY
MIN.
TIME
LEFT
HOT
COLD
WARM
DELAY
START
Note
According to the machine model, figure of control panel may be different.
Water temperature button (option)
Water level button
(indication of detergent amount)
•Use to adjust the water level as required. The appropriate
amount of detergent is shown next to the water level in
the WATER-DETERGENT diagram
•Water level is automatically selected for fuzzy (normal)
and jean programs.
The following settings are indicated as the button is
pushed LARGE EX-LARGE SMALL
MEDIUM LARGE
Use to select water temperature.
Pressing the button allows you to select
Cold Warm (Hot&Cold) Hot
Cold respectively. Default setting is Cold.
Delay Start (Reservation) button
•Use to set a delayed finishing time.
•The time increases when the button is pushed.
•The following settings are indicated as the button
is pushed 3 4 5 ...11 12 14 16 ...46
48 3 HOUR.
•To cancel delay time, turn the power switch off.
(RES=DELAY)
(refer to 14p)
Process button
•Use to select SOAK,
WASH, RINSE and
SPIN functions as
desired.

Before Starting to Wash
11
FUZZY
ECONOMY
JEAN
WOOL
SOAK
WASH
RINSE
SPIN
OUR
IN.
START
PAUSE
AUTO OFF
Time left, Delay Start (Reservation), Alarm indication
• Time left - During operation, the remaining time is indicated.
• Delay Start indication (Reservation) - When delay start (reservation)
program is selected, it indicates the finishing time. (RES.=DELAY)
• Alarm indication -When an error occurs, an error message appears to
indicate the abnormality. For example, indicates that the lid is
open.
Child lock function
Use to lock or unlock the control
buttons to prevent settings from
being changed by a child.
To lock, push the PROCESS and
PROGRAM buttons
simultaneously and to unlock
push them one more time during
the washing process.
Start/ Pause button
•Use to start or pause the
washing process.
•Repeats start and pause by
pushing the button.
•The power goes off
automatically 10 minutes
after stopping.
(refer to p 16)
AUTO OFF
(Power) button
•Use to turn the power on or
off.
•Push again and power goes
on or off
•The power goes off
automatically about 10
seconds after the wash is
finished.
Program button
•Use for selecting wash program.
•This button allows you to select 4 different programs
for different kinds of laundry and dirtiness.
•program selections light up in sequence as follows:
FUZZY (NORMAL) ECONOMY JEAN
WOOL FUZZY (NORMAL) etc. Select the desired
program by pressing the button.

Washing Programs
12
W
ashing Programs
Washing
Programs Add
the
laundry Add
the detergent
Fuzzy Washing
(Normal Wash)
Used for normal loads, this mode
automatically selects the most
appropriate conditions and
completes the sequence in one
operation. The built-in sensor
detects the size of the load and the
ideal wash power and wash, rinse
and spin times are set accordingly
Economy Wash
Use this mode when washing lightly
solided clothes for a short time. The
weight should be under 2.0kg.
Jean Wash
Use jeans program when washing
heavy, thick, and extremely dirty
laundry such as jeans and work
outfits.
Wool Wash
Use this program for washing delicate
fabrics such as lingerie and woolens.
(wash only “water washable” clothes)
Before washing your woolens check
the care label for the washing
instructions.
(wash only water washable clothes)
Soak Wash
Use this mode for washing
excessively dirty laundry by soaking
in water for some time to remove
proteins and fats. ‘SOAK’ mode can
be used with all washing programs
simultaneously except for “WOOL”
program.
AUTO OFF
1
1
1
1
1
2
5
4
5
5
6
3
3
3
4
2
2
2
2
3
Select the
ECONOMY
program on the
Control panel.
Add the appropriate
quantity of detergent as
indicated by the water
level next to WATER-
DETERGENT.
Or follow the detergent
manufacturer’s
instructions
Select the
JEAN program
on the Control
panel.
Select the
WOOL
program on
the Control
panel.
SOAK will
not work in
WOOL
Program.
Use neutral detergent
appropriate for the
laundry.
When washing
woolens use a mild
detergent recommend-
ed for washing wool.
Keep pressing the PROCESS button until the SOAK light is on and then WASH,
RINSE, SPIN lights are on simultaneously.
If necessary, select the desired washing process from
(SOAK+WASH+RINSE+SPIN), (SOAK+WASH+RINSE),
(SOAK+WASH) manually.
SOAK
WASH
RINSE
SPIN

Washing Programs
13
Close the lid Finish Caution & Note
The pulsator rotates for 8
seconds to detect the
laundry load.
Then the water level and
the amount of detergent to
be used will be shown and
water will be supplied.
Water will be supplied
for 2 minutes after the
start of the wash to
supplement the water
the laundry has
absorbed.
When the wash
program ends, the
buzzer will ring for 10
seconds before the
Power goes off
automatically.
If water is already in the tub, or putting wet
laundry into the tub before starting will
increase the water level.
With lightweight bulky loads, water level can
be set low.
Changes to water temperature (hot/cold) and
wash level are possible during operation.
(refer to p 10)
When setting the water level manually, do not
set to MEDIUM to prevent damage to
laundry.
Washing with hot water may damage the
laundry (Water is set to cold automatically).
Ensure that the load is under 2kg
In order to avoid damage to laundry,
the spin cycle may appear slow.
This also avoids wrinkles and clothing may
still contain some water. This is normal.
Soak Wash cannot be selected for the Wool
Wash program.
The water level and the
amount of detergent to be
used will be shown and
water willl be supplied.
3
5
6
7
8
7
7
6
6
6
7
4
4
5
4

Additional Function Options
14
D
elay Start (Reservation) Wash
3
AUTO OFF
Delay Start (Reservation) Wash is used to delay the finishing time of the operation.
The hours to be delayed can be set by the user accordingly.
The time on the display is the finishing time , not the start time.
When you be press the START/PAUSE button the light will
blink.
Select the program for laundry on the Control panel.
This method will not work in Wool Program.
How to set the delay time.
Example : It’s 7 a.m. now. If you’d like your wash to finish at 9
a.m. set the time as in the figure below.
When you push the button the reservation time changes 3 4 5
...12 14 16 ... 48 3repeatedly.
Press the POWER button to turn power on.
Press the PROGRAM button to select the washing program.
Add the laundry and press the START/PAUSE button.
Press the Delay Start (RESERVATION) button to set the time when the
delayed washing is to be completed.
The appropriate quantity of detergent marked next to the
water level of WATER-DETERGENT.
When the lid is open the machine will not operate, and an
alarm signal will remind you to close the lid
Add the detergent.
Water will be supplied for 2 minutes after the start of the
wash to supplement the water the laundry has absorbed.
Close the lid.
The washing will be finished according to the delayed time.
Finish
1
2
4
5
6
HOURDELAY
MIN.
TIME
LEFT
(RES.=DELAY)
To select washing program, spinning time, water level or hot/cold manually, press the Delay Start
(RESERVATION)button and select the desired option. Then press the START/PAUSE button.
When the laundry cannot be taken out immediately after the wash program ends, it is better to omit the
spinning program . (The laundry will be wrinkled if left for a long time after spinning.)
Note
If the lid is open, the machine will not work, and an alarm signal will alarm to remind you to close the lid.

Additional Function Options
O
ption Washing
15
Press the AUTO OFF (Power) button to turn power on.
Press the PROCESS button until above Option Washing
light is on. (refer to p11)
When you want to only drain, wait until the water in the
washing tub drains completely and then, turn off the
power.
Add the laundry into the washing tub.
Press the START/PAUSE button.
Press the WATER LEVEL button, to control the water level according to the
amount of laundry. If you do not choose anything, it is set the LARGE water
level automatically.
Add the detergent and close the lid.
AUTO OFF
1
2
3
4
5
6
When you only need the Wash, Wash/Rinse or Rinse cycles, these can be set
manually
Wash ,Wash+Rinse , Rinse , Rinse+Spin , Spin only options
(refer to p10)
• When a Wash, Wash/Rinse or Rinse only option is selected, after the wash is completed the water will not be
drained off, If you wish to drain the water, press the SPIN button and wait until the water in the tub has drained
completely. Then press the START/PAUSE button .
• If you do not specify the water level, then Medium will be automatically selected.
•If only Rinse is selected, the process will start from Water Supply.
Note

title
16
ther Useful Functions
O
Additional Function Options
After all washing conditions are set according to the manual.
Press the POWER button.
Press the START/PAUSE button to start washing.
Press both the PROCESS button and the PROGRAM button simultaneously.
Turn Power on.
AUTO OFF
If you want to use the washing machine without alarm signal sounds, press both the WATER LEVEL and
PROCESS buttons simultaneously.
To make buzzer work, press both the WATER LEVEL and PROCESS buttons simultaneously one more
time.
If you want to lock all the keys to prevent setting from being changed by a child, you can use the
child lock option.
If you want to unlock during wash, press both the PROCESS and the PROGRAM button simultaneously
again.
Child Lock Function
Mute Option
Although the machine will not work during a power failure or if power is interrupted, when power is resumed,
it will start again automatically from the point in the cycle when it stopped
Applied models : WF-T5001(~2)PD(E/F), WF-T5011(~2)PD(E/F)
WF-T6001(~2)TD(E/F), WF-T6011(~2)TD(E/F)
WF-T7001(~2)TD(E/F), WF-T7011(~2)TD(E/F)
Auto Restart
How to Lock
How to Unlock
In child-Lock mode, all process light will blink.
Note
2
1
3
•During the wash program, all the buttons are locked
until washing is completed or until the child- lock
function is deactivated manually.
•“”and the remaining time will be displayed
alternately in child-lock mode.

Introduction
P
lacing and Leveling
17
Installation
Caution
Top view of the machine
more than 10cm
more
than
2cm more than
10cm
Place the machine on a flat and firm surface which allows proper clearance.
We suggest a minimum clearance of 2cm to the
left sides of the machine for ease of installation.
At the rear and right side a minimum clearance of
10cm is suggested.
Check that the machine is level
Open the lid and look from above to see if it is
same as shown.
U P
Adjustable legs
Leveling the machine
Lift the front of the washing machine and twist
the Adjustable Leg until the washing machine is
placed evenly.
Installing the Anti-Rat Cover (option)
The anti-rat cover should be affixed
firmly from the back of the washer
If the power is supplied from a cord extension set or generator, the cord extension set or electrical
portable outlet device should be positioned so that it is not exposed to splashing or ingress of moisture.
1
2
3

title
18
C
Installation
Before connecting the Water Supply Hose to the water tap, check the hose type and
then choose the correct instruction here under.
Note that the Water Supply Hose supplied may vary from country to country, Make
sure to connect the blue inlet hose to the cold water tap, and the orange inlet hose to
the hot water tap.
Connecting Water Supply Hose to water tap
Rubber packing
Connector
Connector
Water Supply
Hose
screw
Untighten the screw
Untighten the screw of the connector so that the
tap can be placed in the middle.
Fixing the connector to the tap
Push the upper connector up till the rubber
packing is in tight contact with the tap. Then
tighten the 4 screws.
Attach the water supply hose connects securely
to the connector
Push the water supply hose vertically upwards so
that the rubber seal within the hose can adhere
completely to the tap.
Check the connection of water supply hose and the connector
After connecting the hose, open the tap to check
for any water leakage.
If the connection leaks, close the tap and start
again from step 1
Fixing the connector to the water supply hose
Attach the water supply hose to the connector and
then tighten it by screwing it to the right.
Normal Type
(Normal tap without thread & screw type inlet hose.)
1
2
3
4
5
onnecting Water Supply Hose

Introduction
19
Installation
Rubber packing
Rubber packing
Fixed sticker
screw
Guide plate
Connector
Connector
Fixed sticker
Middle
Connector Middle
Connector
Water Supply Hose
Pressing rod Pressing handle
Connector
Middle
connector Fixed Sticker
Pressing Handle
Pressing Rod
Water Supply Hose
Separate Middle connector from Water Supply Hose
Separate Middle connector from the Water
Supply Hose by pulling the Pressing Rod and the
Pressing Handle that is attached to the Water
Supply Hose while pressing them.
Loosen the fixed nuts to connect the connector to the tap
Untighten the screw of the connector so that the
tap can be placed in the middle.
Fixing Connectors to the Tap
Push the upper connector up till the rubber
packing is in tight contact with the tap. Then
tighten the 4 screws.
Fixing Upper Connector and Middle Connector
Remove the fixed sticker in between the Upper
and Middle Connectors. Tighten the connectors
by holding one connector and twist middle
connector to the right.
Connecting Middle Connector and Water Supply Hose
Press down the pressing rod of the Water Supply
Hose which was separated from middle connector
(refer to Step1) and then join it to the middle
connector.
Normal Type
If the tap diameter is too large or is square,
untighten the 4 screws and remove the guide
plate. Then follow step1.
In case tap is too large.
Note
Check for water leakage
After connecting the hose, open the tap to check
for any water leakage.
If the connection leaks, close the tap and start
again from step 1.
If you skip step 1, water leakage may occur.
(Normal tap without thread & one touch type inlet hose.)
1
2
3
4
5
6

title
20
onnecting Water Supply Hose
C
Installation
Attach the water supply hose to the tap.
Push the water supply hose up so that the rubber
packing within the hose can adhere completely to
the tap.
Connect the water supply hose to the tap.
Connect the water supply hose to the tap and then
tighten it by screwing it to the right.
Check water leakage.
After connecting the hose, open the tap to check
for any water leakage.
Connect the water supply hose to inlet valve of
the washing machine, and then lock it by turning
the hose connecting part.
Check to see if there is a rubber seal inside
the connector.
Screw Type
Water Supply Hose
Rubber Packing
Hose connector
Rubber seal
Water
tap
Connecting Water Supply Hose to the machine
1
2
3
This manual suits for next models
11
Table of contents
Other LG Washer manuals
Popular Washer manuals by other brands

davoline
davoline DAV 6112 W user manual

Lloyd
Lloyd LWMS65 instruction manual

Franke
Franke LP21 Installation and operating instructions

Frigidaire
Frigidaire FCCW3000FS4 Installation instructions and use and care guide

Electrolux
Electrolux EIFLS20QSW installation instructions

Electrolux
Electrolux WA SL1 E100 user manual