1312
Estimado cliente,
Felicitaciones por su compra. En Lightning Audio estamos muy complacidos porque
escogió nuestro producto.
Para obtener el mejor rendimiento le recomendamos que haga instalar su nuevo
producto Lightning Audio por un distribuidor autorizado de Lightning Audio. Por favor
lea su garantía y guarde su recibo y la caja original para usarlos en el futuro.
Visite nuestro sitio web para conseguir la última información sobre todos los productos
Lightning Audio; www.lightningaudio.com o, en los EE.UU. llame al 1-888-881-8186
o por FAX 1-800-398-3985
Si después de leer su manual, todavía tiene preguntas con respecto a este producto,
le recomendamos que consulte con su distribuidor de Lightning Audio. Si necesita
ayuda adicional, puede llamar al número directo 1-888-881-8186. Asegúrese de tener
su número de serie, número de modelo y fecha de compra disponibles cuando llame.
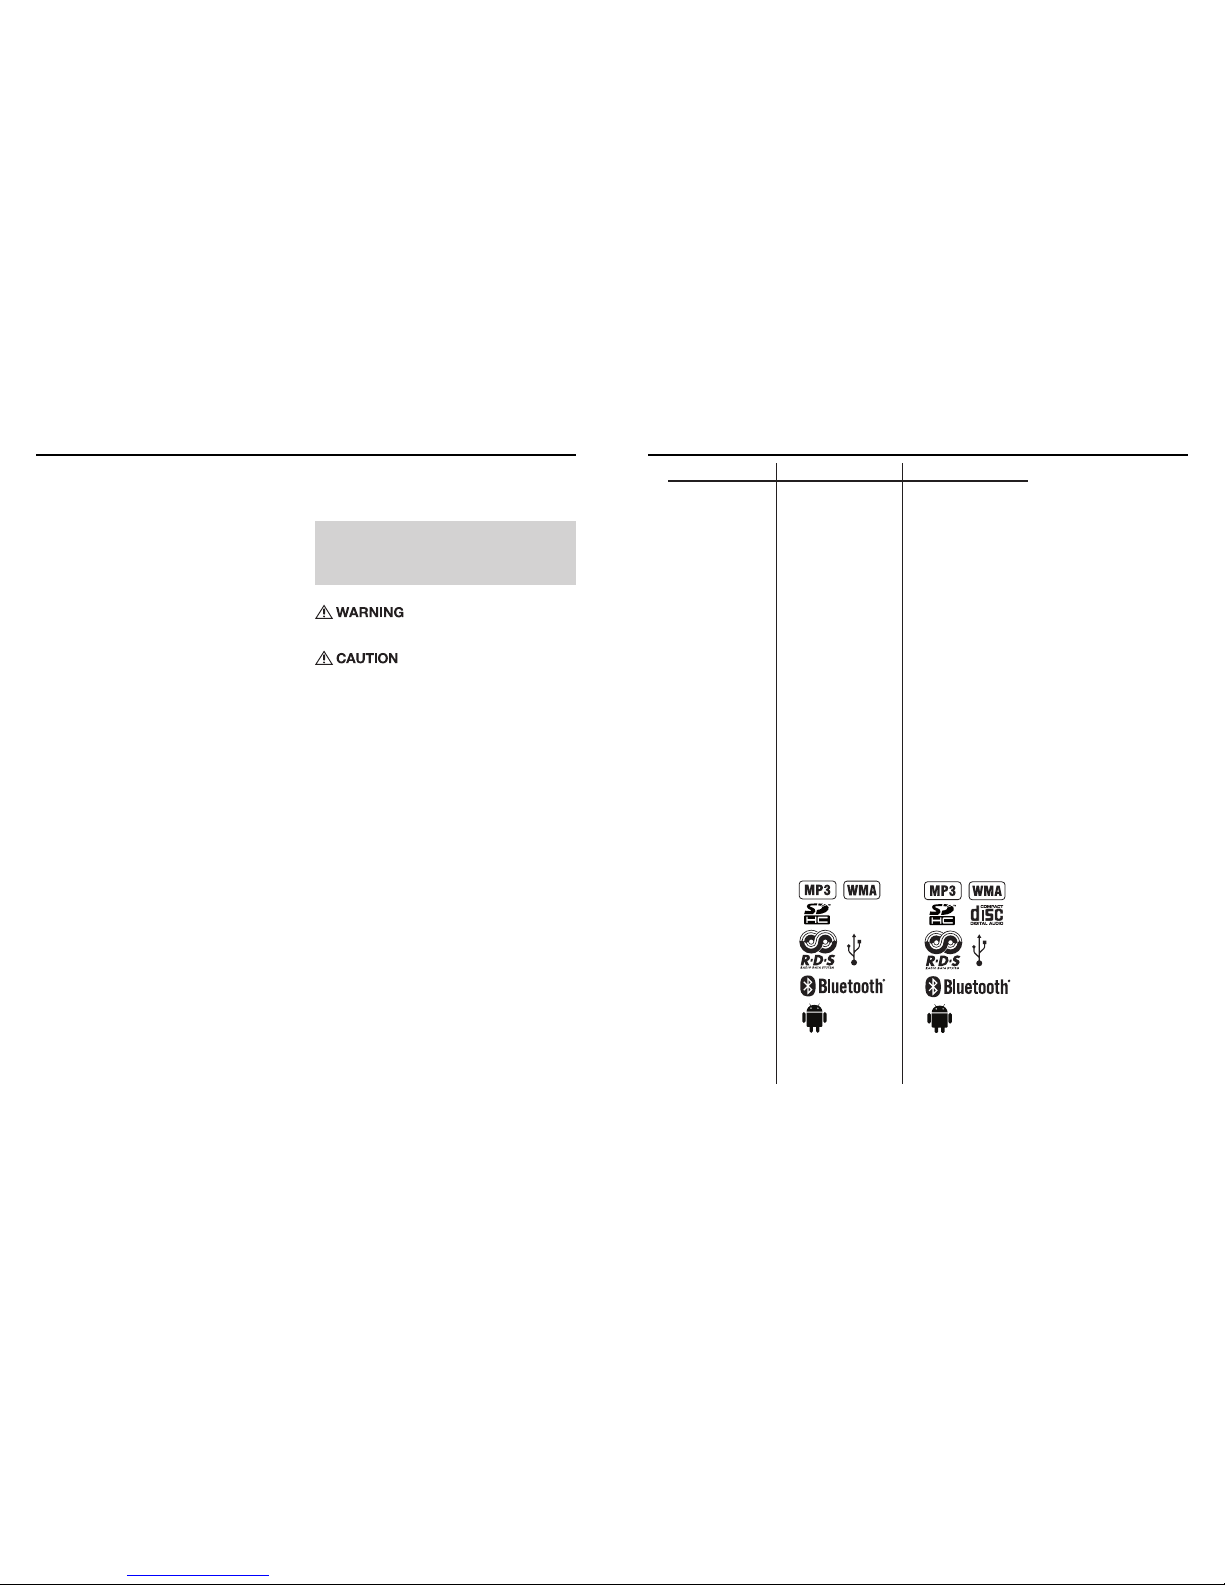
Seguridad
Este símbolo con la palabra “ADVERTENCIA” está destinado
a alertar al usuario sobre la presencia de instrucciones
importantes. No tener en cuenta estas instrucciones resultará en
lesiones graves o muerte.
Este símbolo con la palabra “PRECAUCIÓN” está destinado a
alertar al usuario sobre la presencia de instrucciones importantes.
No tener en cuenta estas instrucciones puede resultar en lesiones
o daños a la unidad.
• Para evitar lesiones y daños a la unidad, lea y siga las instrucciones de este manual. Queremos
que disfrute este sistema, no que le cause un dolor de cabeza.
• Si no está seguro si debe hacer la instalación de este sistema usted mismo, haga que lo instale
un técnico calificado.
• Antes de efectuar la instalación, desconecte el terminal negativo (-) de la batería para evitar
daños a la unidad, incendio y/o posiblemente lesiones.
Declaración de cumplimiento con la FCC
Se ha probado este equipo y se determinó que cumple con los límites de un dispositivo digital clase
B, de acuerdo a la parte 15 de las reglas de la FCC. Estos límites están diseñados para proporcionar
una protección más razonable contra la interferencia nociva en una instalación residencial.
La operación está sujeta a las dos condiciones siguientes: (1) Este dispositivo no causa interferencia
nociva y (2) el dispositivo tiene que aceptar cualquier interferencia recibida, incluida la interferencia
que puede causar el funcionamiento no deseado.
Este equipo genera, usa y puede irradiar energía de radiofrecuencia y, si no se instala y usa
correctamente de acuerdo a las instrucciones, puede causar interferencia nociva a las comunicacio-
nes radiales. Sin embargo, no se garantiza que no ocurrirá interferencia en una instalación en
particular. Si este equipo causa interferencia nociva a la recepción radial o de televisión, que
se puede determinar encendiendo y apagando el aparato, se le alienta a que trate de corregir al
interferencia usando una de estas medidas:
• Cambie la orientación o la ubicación de la antena receptora.
• Aumente la separación entre el equipo y el receptor.
• Conecte el equipo a una toma de corriente en un circuito distinto del que se usó para conectar
el euqipo.
• Consulte con el distribuidor o con un técnico de radio o televisión para conseguir ayuda.
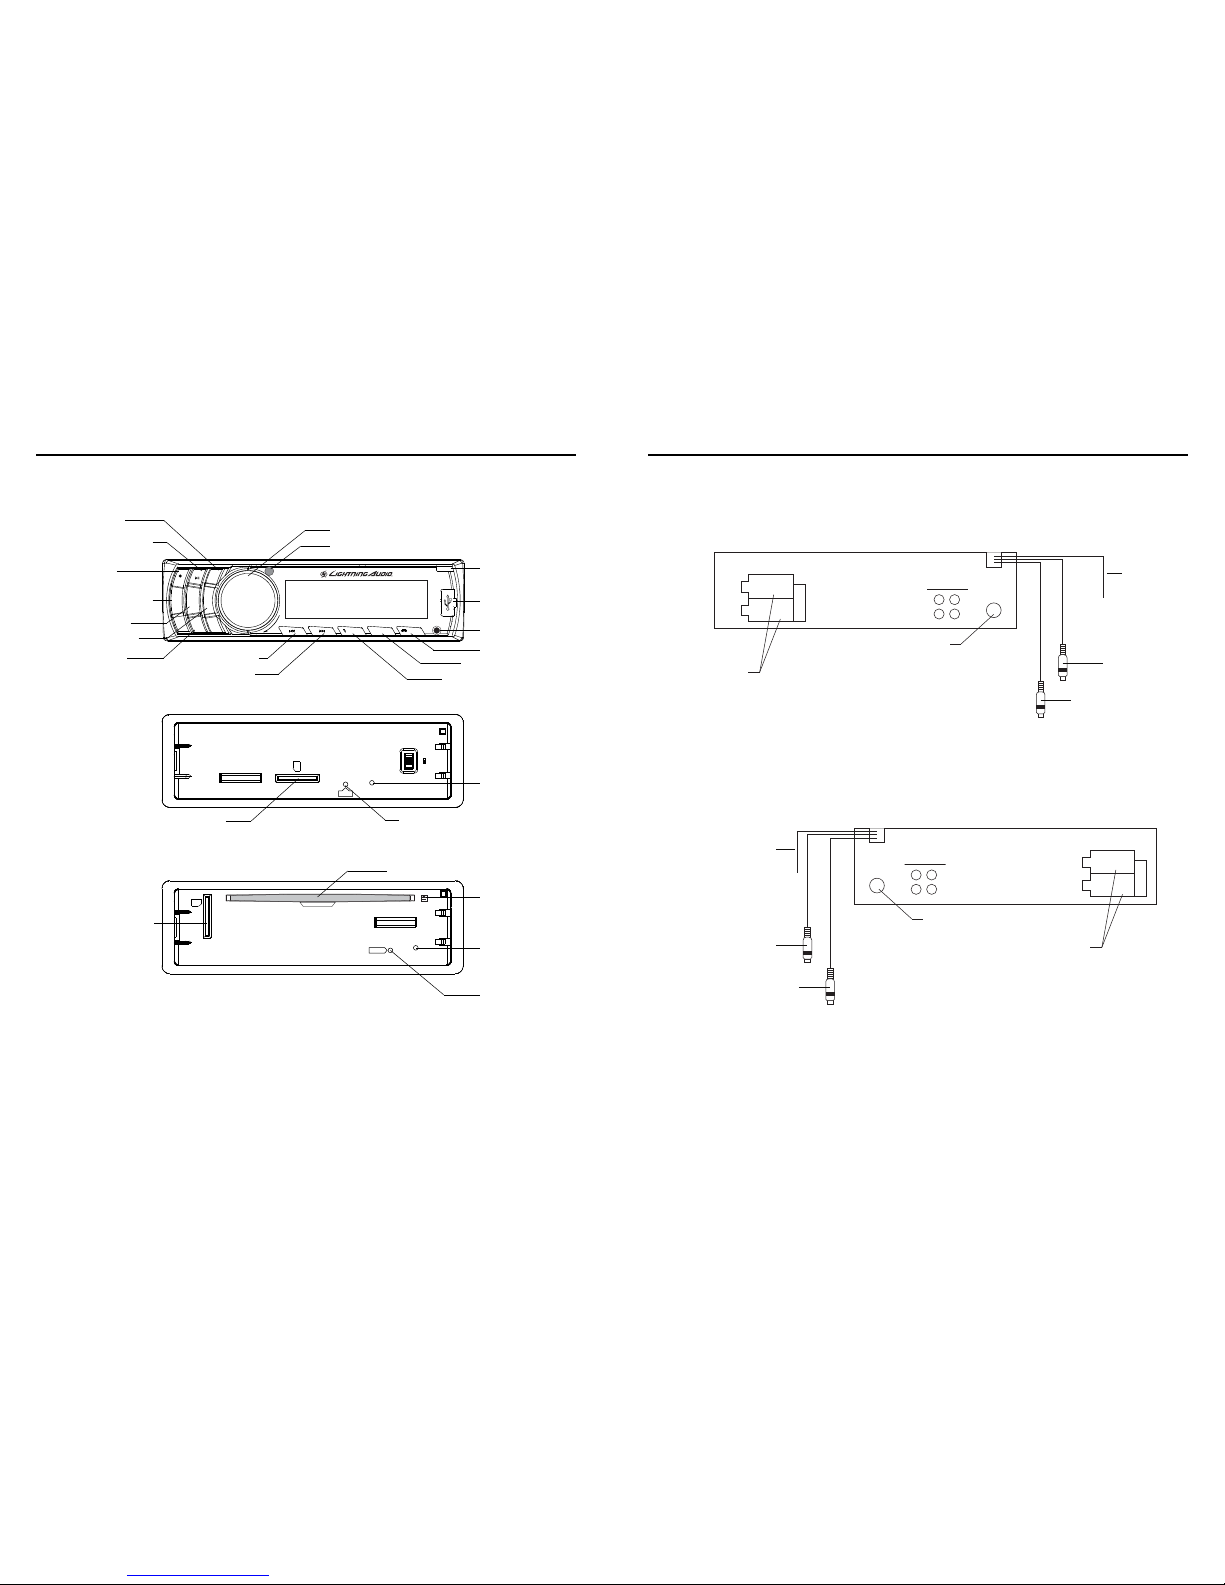
Características de Diseño - Adelante
(illus.-1.1)
Botón 2/INTRO, Botón 1/REPRODUCIR/PAUSA, MICRÓFONO incorporado, Botón de ENCENDIDO/
SILENCIAMIENTO, Botón 3/REPETIR, Botón 4/AL AZAR, Botón 5/-10, Botón VOLUMEN/
SELECCIÓN, Sensor IR remoto, Botón ABRIR, Entrada de USB, Entrada AUX., Botón APS/
TERMINAR, Botón MODO, Botón ENVIAR/BANDA, Botón RETROCESO, Botón AVANCE,
LA-1500BT-Indicador LED, Ranura para tarjeta SD, Indicador LED, LA-2300BT-Ranura para DISCO,
Botón EJECT, Indicador LED, Botón REPOSICIÓN, Ranura para tarjeta SD
(illus.-1.2)
LA-1500BT-Se incluye el arnés de cableado, Entrada de ANTENA, Antena Bluetooth, Entrada
externa de línea de MIC, Salida de línea de subwoofer, LA-2300BT-Antena Bluetooth, Entrada
externa de línea de MIC, Salida de línea de subwoofer, Entrada de ANTENA, Se incluye el arnés
de cableado
Contenido
Consideraciones para la instalación
La siguiente es una lista de herramientas necesarias para la instalación:
Esta sección se enfoca en algunas de las consideraciones de vehículos para instalar el amplificador
nuevo. Preplanear la distribución de su sistema y las rutas de cableado le ahorrará tiempo de
instalación. Cuando decida la distribución de su nuevo sistema asegúrese de que pueda acceder
fácilmente a cada componente para hacer los ajustes.
Si no está seguro si debe hacer la instalación de este sistema usted mismo, haga que lo instale un
técnico calificado.
Antes de efectuar la instalación, desconecte el terminal negativo (-) de la batería para evitar daños a
la unidad, incendio y/o posiblemente lesiones.
Antes de comenzar cualquier instalación, siga estas simples normas:
1. Asegúrese de leer cuidadosamente y de entender las instrucciones antes de tratar de instalar
la unidad.
2. Por seguridad, desconecte el conductor negativo de la batería antes de comenzar la instalación.
3. Para facilitar el montaje, sugerimos que tienda todos los cables antes de montar su unidad
en el sitio.
4. Tienda todos los cables RCA cerca unos de otros y alejados de los cables de alta corriente.
5. Utilice conectores de alta calidad para tener una instalación confiable y para reducir al mínimo
las pérdidas de señal o de potencia.
6. ¡Piense siempre antes de perforar! Tenga cuidado de no cortar ni perforar tanques de
combustible, tuberías de combustible, de frenos o hidráulicas, tuberías de vacío o cableado
eléctrico al trabajar en cualquier vehículo.
7. Nunca tienda cables abajo del vehículo. Tender los cables adentro del vehículo proporciona
la mejor protección.
8. Evite tender cables arriba o a través de bordes filosos. Use arandelas aislantes de caucho para
proteger los cables tendidos a través de metal, especialmente en la mampara cortafuegos.
9. Proteja SIEMPRE la batería y el sistema eléctrico contra daños usando los fusibles
correspondientes. Instale el portafusibles y los fusible correspondientes en el cable de +12 V
a una distancia menor de 45 cm del terminal de la batería.
10. Al conectar la tierra del chasis del vehículo raspe la pintura del metal para asegurar una
conexión buena y limpia a tierra. Las conexiones a tierra se deben hacer lo más cortas posibles
y siempre conectadas a metal que esté soldado a la carrocería o al chasis del vehículo. Nunca
se debe usar los pernos para los cinturones de seguridad para hacer conexiones a tierra.
LUGARES DE MONTAJE
La posición para fijación de la unidad fuente afectará de manera significativa el rendimiento del
Reproductor de DC para el panel de instrumentos. La unidad fuente se puede instalar en una
amplia variedad de lugares. No obstante, se debe tener cuidado para garantizar su funcionamiento
óptimo.
Panel de instrumentos
El montaje de la unidad fuente en el panel de instrumentos ofrece acceso óptimo. La unidad
se debe asegurar fijamente al “Soporte estándar” o “Soporte ISO-DIN”, para garantizar la
reproducción óptima del DC.
Panel central
El montaje de la unidad fuente en el panel central ofrece acceso óptimo. Compruebe que la
instalación no interfiera con el funcionamiento de la palanca de cambios o el freno de mano.
Guantera
El montaje de la unidad fuente dentro de la guantera es adecuado, mas no facilita el acceso.
La instalación dentro de la guantera solamente se debe hacer si el montaje en el panel de
instrumentos o el panel central no es adecuado (ejemplo, la conservación de la integridad de
vehículos más viejos cuyos paneles son metálicos.)
Debajo del tablero de instrumentos
El montaje de la unidad fuente debajo del tablero de instrumentos es adecuado, mas no facilita el
acceso. La instalación debajo del tablero de instrumentos solamente se debe hacer si el montaje
en el “panel de instrumentos”, el “panel central” o la “guantera” no es adecuado. Monte la unidad
fuente a un lado del conductor para reducir la interferencia con el freno de mano, el cambio de
engranaje o los pedales.
Nota: La unidad fuente se debe montar dentro de un ángulo de ±20° al plano horizontal.
Antes de instalar, quite los tornillos superiores en la unidad.
(LA-2300BT solamente)
USE EL SONIDO DE MANERA SEGURA
La exposición continua a niveles de presión de sonido mayores de 100 dB puede causar
la pérdida permanente de oído. Los sistemas de sonido de alta potencia de automóviles
pueden producir niveles de presión de sonido superiores a los 130dB. Use el sentido
común y use el sonido de manera segura.
Introducción
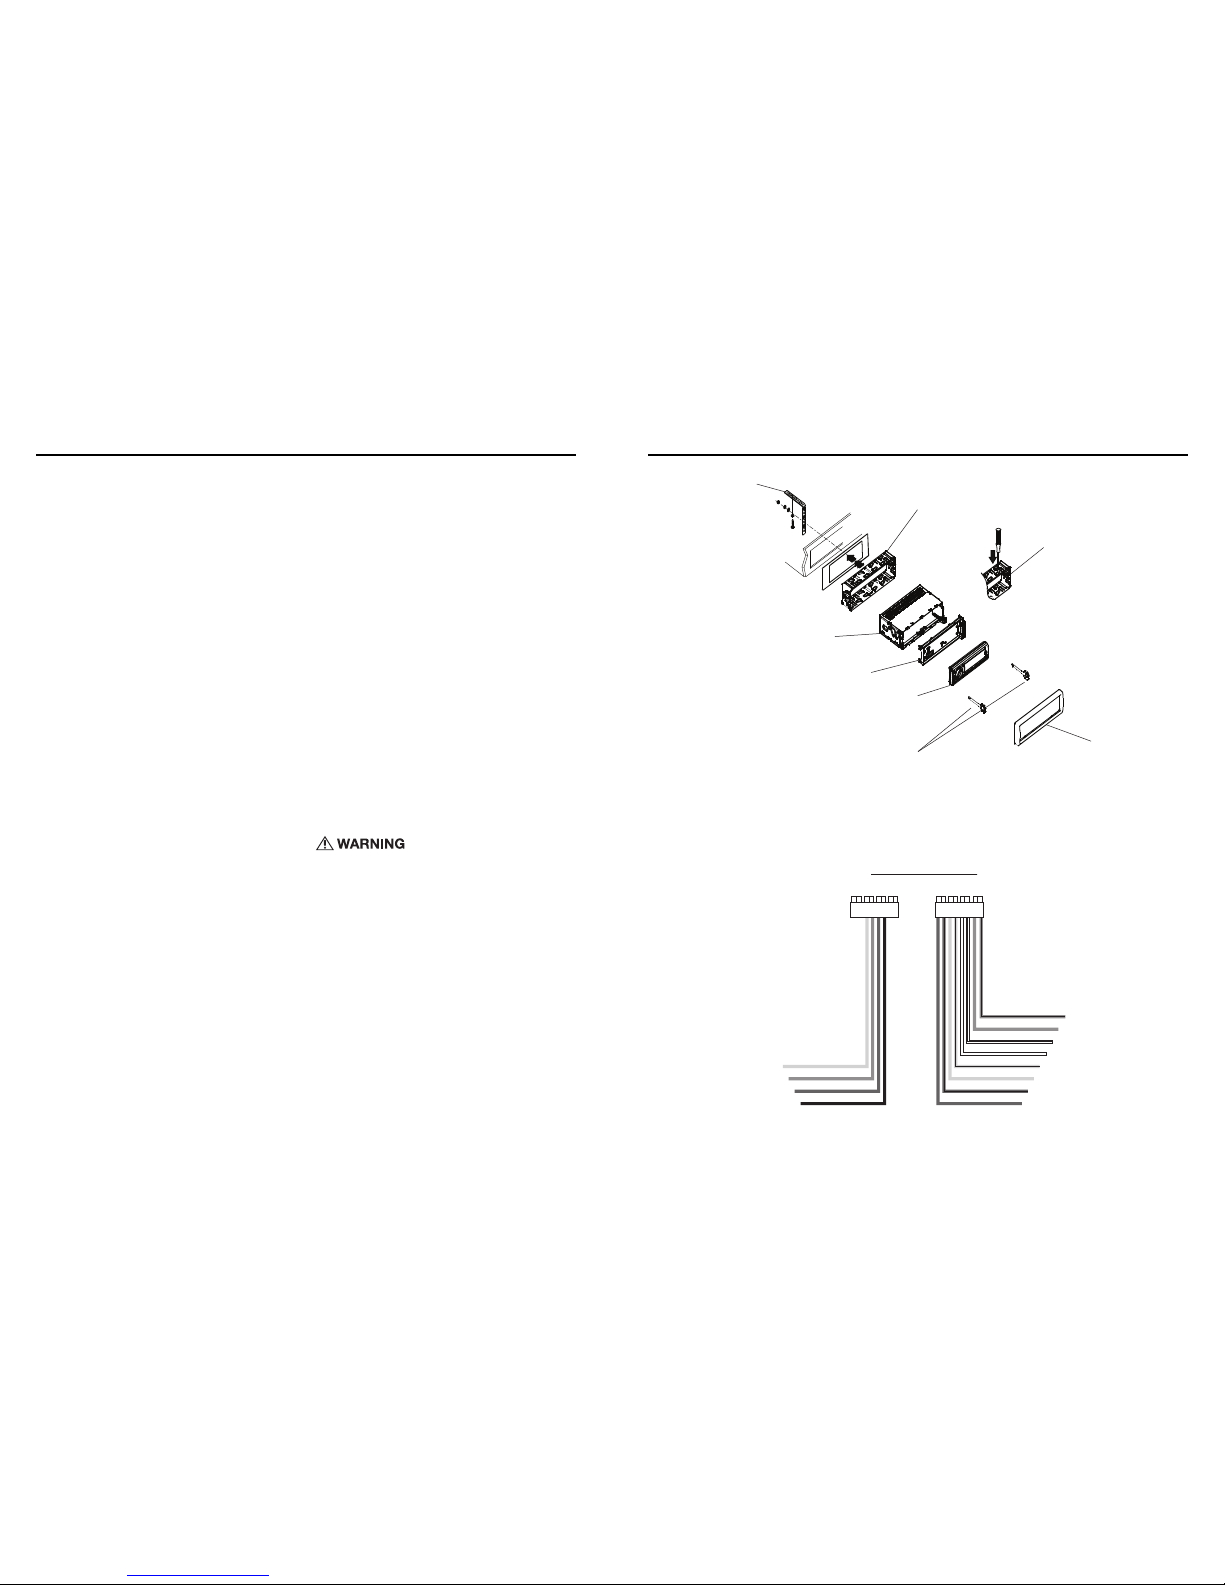
Instalación - (illus.-2.1)
Correa metálica de soporte, Funda de metal para el montaje, Doble las lengüetas contra el tablero
usando un destornillador., Anillo de plástico para acabado, Chasis de la unidad, Placa frontal
instalada, Panel delantero, Para extraer la unidad de la funda de metal para el montaje, inserte al
mismo tiempo las dos llaves suministradas en las ranuras del lado izquierdo y derecho del chasis.
Luego, tire hacia afuera del chasis sacandolo de la funda de metal como se muestra.
Arneses de cableado incluídos (illus.-2.2)
CONECTOR A - AMARILLO (Memoria +12V), AZUL (Encendido remoto), ROJO (+12V a la
ignición), NEGRO (Tierra) CONECTOR B - VERDE/NEGRO (Altavoz tras. izq.), VERDE (Altavoz
tras. izq.), BLANCO/NEGRO (Altavoz del. izq.), BLANCO (Altavoz del. izq.), GRIS/NEGRO (Altavoz
del. der.), GRIS (Altavoz del. der.), VIOLETA/NEGRO (Altavoz tras. der.), VIOLETA (Altavoz tras.
der.)
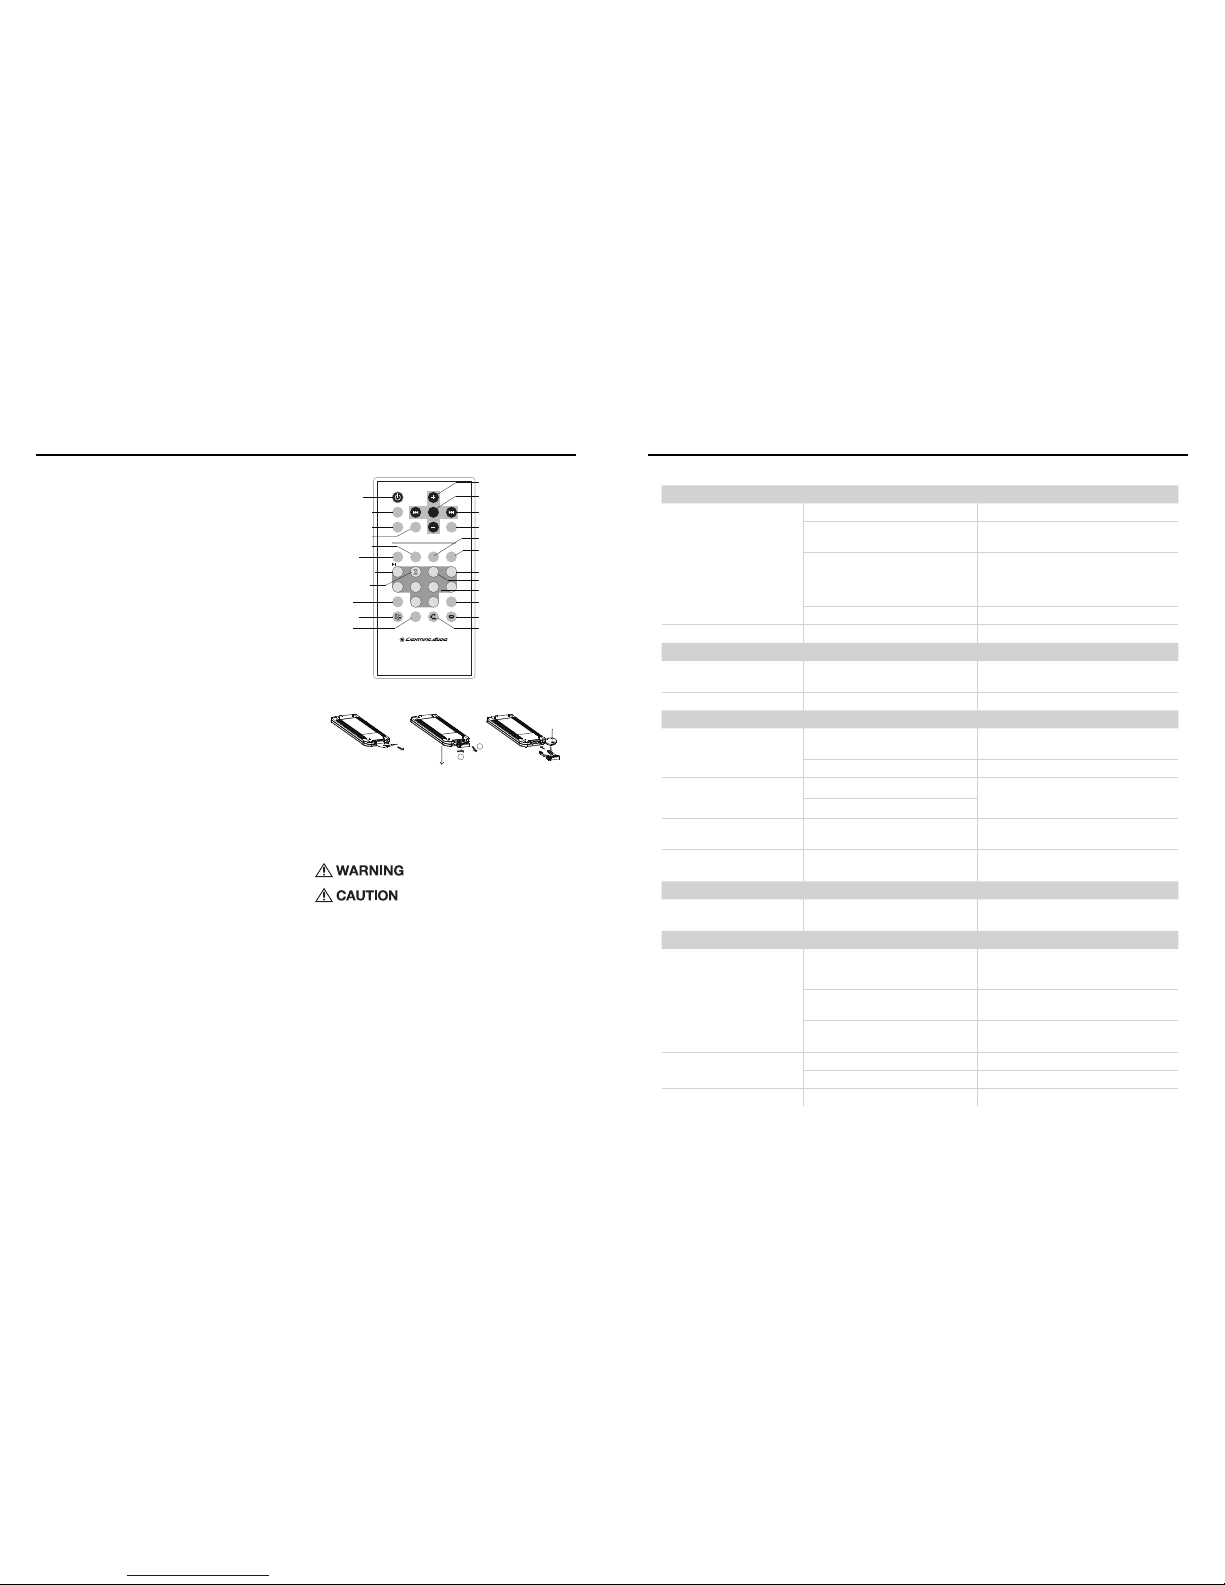
Funcionamiento básico:
Para encender y apagar la unidad (on/off)
Cuando se apaga (Off) la alimentación de la unidad, se puede encender (On) presionando
cualquier botón, excepto el botón OPEN (ABRIR). Cuando la unidad está encendida, presione
y mantenga presionado el botón POWER (encendido) durante más de 0.5 segundos para apagar
la alimentación.
Para seleccionar el modo de funcionamiento
Presione el botón MODE (modo) para cambiar el modo de funcionamiento de esta manera: -->
TUNER --> CD (si tiene)-->SD/MMC (después de insertar una tarjeta SD) --> USB (después de
insertar el dispositivo USB)-->BT AUDIO --> AUX -->
Cuando no hay medios (CD/USB/SD/BT), se omitirá·esos modos.
Para ajustar el nivel del volumen
Haga girar a la izquierda o a la derecha el botón VOL al nivel de volumen deseado.
Para silenciar o reanudar el sonido.
Presione el botón MUTE (silenciamiento) hacia adentro para eliminar o continuar inmediatamente
el sonido durante la reproducción. Para continuar inmediatamente el sonido, también puede
presionar el botón SEL o hacer girar la perilla VOL.
Para configurar el modo de sonido
Presione brevemente y repetidamente el botón SEL para seleccionar el modo de CT (tiempo
de reloj ), VOL (volumen), BASS, MID, TRE, BAL (balance) y FAD (fader) en la secuencia y
circulación. En cada modo, el tiempo de espera es de 5 segundos, y cuando transcurrió el tiempo
de espera, volverá al último modo visualizado. Después de seleccionar un modo de sonido, use el
control del volumen para ajustar el nivel del modo de sonido seleccionado.
Para configurar el menú
Presione el botón SEL y sostenga presionado durante más de 2 segundos para encender el
modo INVOL, luego presione el botón SEL brevemente y repetidamente para seleccionar el modo
CLOCK MODE (ajuste del reloj), BEEP ALL/2ND/OFF, TAVOL, EON ON/OFF, REG ON/OFF, AF
ON/OFF, TA ON/OFF,EQ ON/OFF, LOUD ON/OFF, LOC ON/OFF(en el modo de radio), STEREO/
MONO(en el modo de radio), S-WF ON/OFF, AREA(USA/EUR) en el modo de radio). Después de
seleccionar un elemento deseado, use el volumen para configurar.
Modo INVOL
Este es el volumen predeterminado inicial de la unidad con el que se reproducirá· cuando se
encienda. Haga girar a la izquierda o a la derecha la perilla VOL al nivel de volumen deseado 0-30.
RELOJ (ajuste de la hora)
Cuando se selecciona este modo, gire la perilla VOL a la izquierda o a la derecha para ajustar la
hora. Tendrá que desplazarse por los ajustes de la hora para cambiar el valor de AM/PM.
Modo CT (visualización del tiempo de reloj)
Al pulsar el botón VOL / SEL mostrará el tiempo encendido o apagado de la unidad. Al cambiar
entre las funciones de escucha, ya no se mostrará el tiempo hasta que se pulse el botón VOL / SEL
otra vez. Al pulsar el CLK en el control remoto mostara el tiempo de forma temporal.
Modo BEEP
Modo ALL: Se genera un zumbido cuando se presiona una tecla.
Modo 2ND: Se genera un zumbido cuando se presiona la tecla de opción del primer modo.
Modo OFF: El zumbido está desactivado.
Modo TAVOL (sólo RDS)
El nivel de volumen para los anuncios de tráfico cuando el modo TA está encendido (ON). Haga
girar a la izquierda o a la derecha la perilla VOL al nivel de volumen deseado 0-30.
Modo EON (sólo RDS)
Mejora de otras redes. Cuando está encendido, permite que el receptor monitoree otras redes o
estaciones por programas de tráfico y sintonizar de manera automática y temporal esa estación.
Modo REG (sólo RDS)
Esto se usa principalmente en países donde las difusoras nacionales transmiten programaciones
“específicas para regiones”. Esta funcionalidad permite que el usuario “bloquee” el receptor en
su región actual o que deje que la radio sintonice en otras programaciones específicas para una
región cuando se mueven a otra región.
Modo AF (sólo RDS)
Frecuencias alternativas. Esto permite que el receptor resintonice a una frecuencia distinta que
proporciona la misma estación cuando se debilita demasiado la primera señal.
Modo TA (sólo RDS)
Anuncios de tráfico. Cuando esta característica está encendida (ON), la unidad recibirá informes
de tráfico.
Modo EQ
La unidad tiene una configuración de EQ definida para ajustar a sus niveles para complementar
la música que se está reproduciendo. (OFF/POP/ROCK/CLASSIC/FLAT) Cuando EQ está
configurado en apagado (OFF), se usan los ajustes del usuario.
Modo Loud
Esta característica refuerza las frecuencias bajas. Es útil cuando se usan volúmenes bajos.
Modo LOC (en el modo de radio)
Dos niveles de sensibilidad para el sintonizador para buscar de manera local o distante.
Modo MONO/STEREO (en el modo de radio)
Ajusta la unidad para que reproduzca en STEREO o MONO.
Modo S--WF
Activa la línea de salida del sobwoofer en la unidad.
Modo AREA (en el modo radio)
Seleccione USA o EUR dependiendo del país en que se encuentre.
Para quitar el panel de control delantero
Presione el botón OPEN (abrir) para soltar el panel de control delantero del chasis de la unidad.
Cuando se quita el panel de control delantero, destella el indicador de LED delantero.
Para reponer la unidad
Antes de operar la unidad por primera vez, o después de reemplazar la batería del automóvil
o cambiar las conexiones; debe reponer la unidad. Para reponer la unidad, quite el panel de
control delantero, luego presione el botón RESET con una lapicera o con un clip para papel. Esta
operación borrará la configuración del reloj y el contenido almacenado.
Operación de la radio
Para seleccionar una banda de radio
Presionando brevemente y repetidamente el botón BAND se selecciona la banda de radio deseada.
La secuencia para las bandas de radio es la siguiente:
-->FM1-->FM2-->FM3-->AM1-->AM2-->
Para buscar una estación de radio manualmente o automáticamente
Presione y mantenga presionado el botón >>| para activar el modo de búsqueda MANUAL.
En el modo MANUAL: Presione brevemente el botón >>| o |<< para sintonizar manualmente hacia
arriba / abajo por la frecuencia de estación de radio deseada paso por paso.
En el modo AUTO: Presione el botón >>| o |<< para sintonizar automáticamente hacia arriba
/ abajo por la frecuencia de estación de radio. (Si está en el modo MANUAL y sin operación
adicional, la unidad va a cambiar al modo AUTO unos pocos segundos más tarde.)
Para almacenar la estación actual o encender una predeterminada.
1) Presione uno de los 6 botones de número y mantenga presionado durante más de 1 segundo
para almacenar la estación actual en el banco de memoria predeterminada del botón de número
para la banda actual. De esta manera, la unidad puede almacenar 30 estaciones preprogramadas.
2) Presione brevemente uno de los 6 botones de número para encender la estación programada en
el banco de memoria predeterminada para la banda actual.
3). Para explorar por cada estación predeterminada o para hacer una búsqueda automática de las
estaciones más fuertes.
A) Al presionar y mantener presionado el botón APS durante más de 1 segundo, la radio busca
desde la frecuencia actual y comprueba el nivel de fuerza de la señal hasta que se encuentren las 6
estaciones más fuertes. Luego se programa las 6 estaciones más fuertes con el banco numerado
de memoria programada correspondiente. Se implementa la operación de almacenamiento
automático en cada banda seleccionada. Cuando se ha terminado la operación de almacenamien-
to automático, la radio ejecuta un escaneo predeterminado.
B) Al presionar brevemente el botón APS o el botón A.P, la radio busca por cada estación
predeterminada en la banda actual y se mantiene en esa estación predeterminada durante 5
segundos mientras libera el silenciamiento, y luego busca de nuevo.
4. Para buscar estaciones con un programa PTY (PROGRAMTYPE) (sólo RDS)
Presione y lleve a cabo el MODO en unidad principal para seleccionar uno del modo de programa
del PTY. Gire el botón del volumen para enrollar los diversos tipos del programa.
NEWS--AFFAIRS--INFORMATION--SPORTS--EDUCATION--DRAMA--CULTURE--SCIENCE-
-VARIED--POP M--ROCK M--EASY M--LIGHT M--CLASSIC--OTHER M--WEATHER--
FINANCIAL--CHILDREN--SOCIAL--RELIGION--PHONE IN--TRAVEL--LEISURE--JAZZ--
COUNTRY--NATION M--OLDIES--FOLK M--DOCUMENT--TEST--ALARM
Después de seleccionar el programa PTY deseado, pulse el | << o >> | para buscar la emisora
del programa PTY. Si no se encuentra la estación deseada del programa PTY durante un ciclo de
búsqueda, NO FND se mostrará en la pantalla LCD. La unidad volverá a la emisora de radio previo
normal y el icono PTY desaparecerá.
AF [FRECUENCIAS ALTERNATIVAS] modo (sólo RDS)
Cuando se presiona brevemente, se selecciona el modo de conmutación de AF y se muestra en la
pantalla el estado de la conmutación de AF por segmento de AF.
Segmento apagado: Modo de conmutación de AF apagado.
Segmento encendido: Modo de conmutación de AF encendido y tiene información de RDS.
Segmento destellando: Modo de conmutación AF encendido, pero no se ha recibido todavía la
información de RDS.
Cuando se selecciona el modo de conmutación de AF, la radio comprueba la fuerza de la señal de
AF todo el tiempo. El intervalo del tiempo de comprobación de cada AF depende de la fuerza de
la señal de la estación actual, desde unos pocos minutos para una estación fuerte a unos pocos
segundos para una estación débil. Cada vez que una AF nueva es más fuerte que la estación
actual, conmuta a esa frecuencia por un tiempo breve, y se muestra la FRECUENCIA NUEVA
durante 1 a 2 segundos. Debido a que el tiempo de silenciamiento de las conmutación de AF o
el tiempo de comprobación es breve, es casi inaudible en un programa normal. Durante el modo
de FM, cuando AF está encendido, la función SEK, (SCAN), AUTO-MEMORY sólo puede recibir
y guardar programas RDS.
• Unidad de la fuente
• Control remoto inalámbrico
• Claves que abren
• Corchete y tornillo de la asamblea
• Funda del montaje
• Harness de potencia
• Harness del altavoz
• Portafusibles y fusible (Consulte
la capacidad de los fusibles en las
especificaciones)
• Voltio-óhmetro
• Pelacables
• Alicates de engarzar
• Pinza de corte
• Destornillador Phillips No. 2
• Llave para bornes de batería
• Taladro de mano con brocas varias
• Conectores varios
• Largo adecuado – Cable rojo de
alimentación
• Largo adecuado – Cable de encendido
remoto
• Largo adecuado – Cable negro de puesta
a tierra
Operación