manuals.online logo
Brands
  1. Home
  2. •
  3. Brands
  4. •
  5. LightPro
  6. •
  7. Outdoor Light
  8. •
  9. LightPro Motion Sensor User manual

LightPro Motion Sensor User manual

M3899-20230823
Motion Sensor
A
Geproduceerd door / Hergestellt von / Produced by / Produit par:
TECHMAR B.V. | CHOPINSTRAAT 10 | 7557 EH HENGELO | THE NETHERLANDS
+31 (0)88 43 44 517 | INFO@LIGHTPRO.NL | WWW.LIGHTPRO.NL
Gebruikershandleiding
Bedienungsanleitung
User manual
Manuel de l’utilisateur
2
4
info@techmar.nl
Spike
Base
Wall mount
12V
34
Horizontal
90°
Vertical
45°
5m
A
12
A
5
2
4
info@techmar.nl
Spike
Base
Wall mount
12V
34
Horizontal
90°
Vertical
45°
5m
A
12
A
5
2
4
info@techmar.nl
Spike
Base
Wall mount
12V
34
Horizontal
90°
Vertical
45°
5m
A
12
A
5
2
4
info@techmar.nl
Spike
Base
Wall mount
12V
34
Horizontal
90°
Vertical
45°
5m
A
12
A
5
2
4
info@techmar.nl
Spike
Base
Wall mount
12V
34
Horizontal
90°
Vertical
45°
5m
A
12
A
5
2
4
info@techmar.nl
Spike
Base
Wall mount
12V
34
Horizontal
90°
Vertical
45°
5m
A
12
A
5
SPIKE BASE
WALL
3m
90o
max. 5m
IP44
90o
max. 5m
MAX.
60W
2
4
info@techmar.nl
Spike
Base
Wall mount
12V
34
Horizontal
90°
Vertical
45°
5m
A
12
A
5
2
4
info@techmar.nl
Spike
Base
Wall mount
12V
34
Horizontal
90°
Vertical
45°
5m
A
12
A
5
2
4
info@techmar.nl
Spike
Base
Wall mount
12V
34
Horizontal
90°
Vertical
45°
5m
A
12
A
5
2
4
info@techmar.nl
Spike
Base
Wall mount
12V
34
Horizontal
90°
Vertical
45°
5m
A
12
A
5
5
3 4
138A
21
137A
138A
JUST TURN IT!
Connection to make a branch
Just twist and connect!
The system
Light sensor
Connector M [138A]
Connector M [138A]
Connector F [137A]
Motion Sensor
Gebruikershandleiding
Bedankt voor de aankoop van de Lightpro Motion Sensor.
Dit document bevat de benodigde informatie voor correct,
efficiënt en veilig gebruik van het product. Raadpleeg de
gebruikershandleiding van uw transformator voor meer
informatie over de aanleg en aansluiting van uw lichtplan
of kijk op onze website www.lightpro.nl.
Lees de informatie in deze handleiding zorgvuldig door
voor ingebruikname van het product. Bewaar deze
handleiding bij het product ter naslag in de toekomst.
PRODUCTBESCHRIJVING
Dit accessoire maakt het leven eenvoudig. Je loopt nooit
meer in het donker naar de schuur dankzij de 12 volt
bewegingsmelder.
SPECIFICATIES MOTION SENSOR
Product Motion Sensor
Artikelnummer 165A
Verbruik (max.) 1W
Aan te sluiten vermogen (max.) 60W
Afmetingen (H x B x D) 130 x 65 x 100 mm
Beschermingsklasse IP44
Input 12V AC/DC
INHOUD VAN DE VERPAKKING
[Afbeelding A]
1. Motion Sensor
2.AAA Batterijen 2x
3. Montage magneet
4. Schroeven
5. Pluggen
Controleer of alle onderdelen aanwezig zijn in de
verpakking.Voor vragen over onderdelen, service,
eventuele klachten of andere zaken kunt u altijd bij ons
terecht. E-mail: [email protected].
• Dit product alleen gebruiken voor 12V AC toepassingen.
• De Bewegingssensor kan buiten geïnstalleerd worden.
(IP44)
• Tot max.60 W kan een onbeperkt aantal 12V
toepassingen worden aangesloten
• Niet aan te bevelen in combinatie met timer en/of
afstandsbediening.Wij adviseren de bewegingssensor
op een apart circuit aan te sluiten waar altijd
stroom op staat. In combinatie met een timer of
afstandsbediening wordt de stroom juist uitgeschakeld.
AANSLUITEN VAN BEWEGINGSSENSOR
• De bewegingssensor kan overal in het 12V systeem
geplaatst worden om alle 12V toepassingen achter de
bewegingssensor te schakelen.
• Verwijder de stekker van de transformator uit het
stopcontact
• Sluit de 12V Ingangsstekker (1) van de bewegingssensor
aan op de 12V transformator of (hoofd)kabel.
• Sluit de 12V toepassingen of (hoofd)kabel aan op de 12V
uitgangsstekker (2) van de bewegingssensor.
• Bevestig de bewegingssensor zo dat de voorkant
naar het detectiegebied gericht is.Draai de
bewegingssensor horizontaal in de gewenste
hoek. Draai de stelschroef (5) los en draai de
bewegingssensor verticaal in de gewenste hoek. Hierna
de stelschroef weer vastdraaien.Detectiebereik sensor:
horizontaal 90° verticaal 45° graden tot 5m afstand.
• Steek de stekker van de transformator in het
stopcontact.
INSTELLEN BEWEGINGSSENSOR
• De bewegingssensor werkt pas bij schemer of als het
donker is.
• Stel de draaiknop (3) in om de lichtgevoeligheid in te
stellen waarbij de bewegingssensor in werking treed.
• Met de schuifknop (4) kan de tijd geregeld worden dat
de bewegingssensor ingeschakeld blijft na detectie;
instelmogelijkheden 20 sec.,1 of 5 minuten. Ga als
volgt te werk als de lampen niet branden nadat u de
bovenstaande instructies hebt doorlopen:
1. Schakel de stroom uit.
2. Controleer of alle stekkers goed zijn aangesloten.
3. Controleer de lichtbron(en) en vervang deze indien
nodig.
4. Controleer de transformator en de zekering (indien van
toepassing,en laat doormeten indien nodig).
5. Controleer of kabels beschadigd zijn.
6. Sluit de stroom weer aan.
Motion Sensor
User manual
Thank you for purchasing the Lightpro Motion Sensor.
This document contains the required information for
correct, efficient and safe use of the product. Consult the
user manual of your transformer for more information
about the installation and connection of your lighting
plan or visit our website www.lightpro.nl
Read the information in this manual carefully before
using the product. Keep this manual near the product for
consultation in the future.
PRODUCT DESCRIPTION
Accessories make life simpler. There is no need to ever
walk down to the shed in the dark again if you have a
Motion Sensor.
SPECIFICATIONS MOTION SENSOR
Product Motion Sensor
Article number 165A
Usage (max.) 1W
Maximum capacity (max.) 60W
Dimensions (H x L x W) 130 x 65 x 100 mm
Protection class IP44
Input 12V AC/DC
CONTENT OF THE PACKAGING
[Figure A]
1. Motion Sensor
2.AAA Batteries (2x)
3. Mounting magnet
4. Screws
5. Plugs
Verify whether all parts are included in the packaging.
For questions about parts, service,complaints, or other
things,you can always contact us.
Email: [email protected].
• This product should be used for 12V AC applications
only.
• The motion sensor can be installed indoors and
outdoors.(IP44)
• A maximum of 60 Watt can be connected in an
unlimited amount of 12V applications.
• Not recommended to use in combination with a timer
or remote control.We advise to connect the motion
sensor to a separate circuit,which is always powered.
In combination with a timer or remote control the
power can be shut down and then the motion sensor
will not work.
CONNECTING THE MOTION SENSOR
• The receiver can be placed anywhere in the 12V system
to serve all 12V applications behind the receiver.
• Remove the transformer plug from the power outlet.
• Connect the 12V input plug (1) to the 12V transformer or
(main) cable.
• Connect the 12V applications or (main) cable to the 12V
output plug (2) of the motion sensor.
• Mount the motion sensor such way that the front is
pointed to the detection area. Turn the motion sensor
horizontally in the desired position. Unscrew the screw
knob (5) and turn the motion sensor vertically into
the desired position. Then tighten the screw knob.
Detection area: horizontally 90° vertically 45° degrees
till 5m distance
• Put the transformer plug in the power outlet.
SETTING UP MOTION SENSOR
• The motion sensor will work from dusk till dawn.
• Turn the Turning knob light sensitivity (3) to determine
the moment the motions sensor starts working
• Slide the Slide knob for time setting (4) to determine
the time the motion sensor stays on.Possible settings:
20 sec., 1 of 5 minutes.
Motion Sensor
Benutzeranleitung
Vielen Dank, dass Sie sich für die Lightpro Motion Sensor
entschieden haben.
Dieses Dokument enthält die notwendigen Informationen
für den korrekten,effizienten und sicheren Gebrauch des
Produkts.Weitere Informationen zur Installation und zum
Anschluss Ihres Beleuchtungsplans finden Sie in Ihrer
Transformator-Benutzeranleitung oder besuchen Sie
unsere Website www.lightpro.nl.
Bitte lesen Sie die Informationen in diesem Handbuch
sorgfältig durch, bevor Sie das Produkt in Betrieb nehmen.
Bitte bewahren Sie dieses Handbuch zusammen mit dem
Produkt auf, um zukünftig nachschlagen zu können.
PRODUKTBESCHREIBUNG
Zubehör macht das Leben leicht.Dank des
Bewegungsmelders werden Sie nie wieder im Dunkeln
zum Schuppen laufen.
TECHNISCHE DATEN MOTION SENSOR
Produkt Motion Sensor
Artikelnummer 165A
Verbrauch (max.) 1 W
Anschlussleistung (max.) 60 W
Abmessungen (H x B x T) 130 x 65 x 100 mm
Schutzklasse IP44
Input 12V AC/DC
VERPACKUNGSINHALT
[Abbildung A]
1. Motion Sensor
2.AAA Batterie (2X)
3.Wand magnet
4. Schrauben
5. Stecker
Überprüfen Sie, ob alle Teile in der Verpackung
vorhanden sind.Bei Fragen zu Einzelteilen,Service,
Reklamationen oder anderen Angelegenheiten können
Sie uns jederzeit kontaktieren.
E-Mail: [email protected].
• Dieses Produkt sollte nur für 12V Wechselspannung
verwendet werden.
• Der Bewegungsmelder kann innen und außen installiert
werden.(IP44)
• Maximal können zusammen Leuchte und Geräte bis 60
Watt beeinflusst werden.
• In Kombination mit einem Timer oder einer
Fernbedienung wird vom Einsatz abgeraten.Wir
empfehlen den Bewegungsmelder und die Lampen
die von ihm beeinflusst werden sollen,an einen
eigenen Stromkreis anzuschließen der immer
eingeschaltet ist da Timer oder Fernbedienung die
Stromversorgung unterbrechen können. Dadurch
würde der Bewegungsmelder gestört und nicht mehr
funktionieren.
ANSCHLIESSEN DES BEWEGUNGSMELDERS
• Der Empfänger kann an beliebiger Stelle der 12V Anlage
eingesetzt werden. Er beeinflusst alle Lampen und
gerate die sich hinter dem Empfänger befinden.
• Nehmen sie den 12V Stecker (1) an den 12V
Transformator aus der Steckdose.
• Schließen sie den 12V Stecker (1) an den 12V
Transformator oder an einen der Anschlüsse des
Hauptkabels an.
• Mit dem 12V Ausgangstecker (2) des Bewegungsmelder
verbinden Sie die 12V Lampe oder ein (Haupt-) Kabel.
• Montieren Sie den Bewegungsmelder so, dass seine
Front zum Erkennungsbereich ausgerichtet ist.
Drehen Sie den Bewegungsmelder horizontal in
die gewünschte Position. Lösen Sie Schraube des
Drehkopfes (5) und drehen Sie den Bewegungsmelder
vertikal in die gewünschte Position.Dann ziehen
Sie die Schraube des Drehkopfes wieder an. Der
Erkennungsbereich beträgt : Horizontal 90°,Vertikal
45°, bei einer Entfernung bis zu 5 Meter.
• Jetzt stecken sie den Transformatorstecker in die
Steckdose.
EINSTELLUNG DES BEWEGUNGSMELDERS
• Der Bewegungsmelder funktioniert bei Dunkelheit.
• Drehen Sie die Drehknopf Lichtempfindlichkeit (3) biss
der Sensor bei dergewünschten Dämmerungphase
reagiert.
• Verschieben Sie den Regler für Zeiteinstellung (4) um
den Funktionszeitraum des Sensors zu bestimmen Der
Funktionszeitraum
Motion Sensor
Manuel de l’utilisateur
Nous vous remercions pour l’achat de Lightpro Motion
Sensor.
Ce document contient les informations nécessaires
pour une utilisation adéquate, efficace et sûre du
produit. Consultez le manuel de l’utilisateur de votre
transformateur pour de plus amples informations
sur l’aménagement et le raccordement de votre plan
d’éclairage ou visitez notre site Web www.lightpro.nl.
Lisez attentivement les informations sur le produit dans
ce mode d’emploi pour la mise en service du produit.
Conservez ce mode d’emploi à proximité du produit pour
pouvoir le consulter ultérieurement.
DESCRIPTION DU PRODUIT
Les accessoires vous facilitent la vie. Vous n’irez plus
jamais jusqu’à la grange dans l’obscurité grâce au
détecteur de mouvement.
SPÉCIFICATIONS MOTION SENSOR
Produit Motion Sensor
Numéro d’article 165A
Consommation (max.) 1W
Puissance à raccorder (max.) 60W
Dimensions (H x L x P) 130 x 65 x 100 mm
Classe de protection IP44
Input 12V AC/DC
CONTENU DE L’EMBALLAGE
[Illustration A]
1. Motion Sensor
2. Piles (2x)
3.Aimant mural
4.Vis
5. Chevilles
Contrôlez si tous les éléments sont bien présents dans
l’emballage.Pour toute question sur les éléments,le
service,les réclamations et autres,vous pouvez toujours
nous contacter à l’adresse e-mail suivante : info@
lightpro.nl.
• A utiliser uniquement avec 12V AC applications
• Le détecteur de mouvement peut être installé en
extérieur (IP44)
• Jusqu’a 60W un nombre illimite d’applications 12V
peuvent être connectés
• Pas recommandé en combinaison avec minuterie et
télécommande. Nous recommandons de connecter le
détecteur de mouvement sur un circuit continuellement
sous tension. En combinaison avec une minuterie ou
télécommande le circuit sera désactivé.
BRANCHEMENT DU DETECTEUR DE MOUVEMENT.
• Peut être place n’importe ou dans le système pour
piloter toutes les applications 12V derrière le détecteur
de mouvement.
• Débrancher la prise 220V du transformateur
• Connectez la prise d’entrée (1) du détecteur de
mouvement au transformateur 12V ou câble (principal)
• Connecter les applications 12V ou câble (principal) au
prise de sortie 12V (2) du détecteur de mouvement.
• Fixer le détecteur de mouvement pour que le front est
dirige vers la zone de détection. Tourner le détecteur de
mouvement horizontalement pour obtenir l’angle de
détection souhaité Desserrer le bouton de réglage (5) et
tourner le détecteur de mouvement verticalement pour
obtenir l’angle souhaité. Ensuite resserrer le bouton
de réglage Portée de détection : Horizontalement 90°
Verticalement 45° dégrées jusqu’à 5m de distance.
• Rebrancher la prise 220V du transformateur.
REGLAGE DU DETECTEUR DE MOUVEMENT
• Le détecteur de mouvement fonctionne uniquement
dans la pénombre ou lorsqu’il fait nuit.
• Tourner le bouton de réglage (3) pour définir le seuil
d’activation du détecteur
• Avec le curseur
INSTALLATIE VAN DE LAMPEN
• Plaats de producten op de gewenste plaats en
leg de kabels zodanig dat deze ruimschoots op de
transformator of kabels kunnen worden aangesloten.
• Als producten voorzien zijn van een afvoergat voor
water dan moet dit gat naar beneden worden gericht.
• Gebruik corrosievaste bevestigingsmaterialen
(standaard meegeleverd) als u de producten wilt
vastschroeven.
• Sluit de stekkers van de producten aan op de
hoofdkabel met behulp van de connector zoals
aangegeven op afbeelding op pag 5.
• Raadpleeg de handleiding van uw transformator voor
meer informatie.
VEILIGHEID
• Monteer dit product altijd zodanig dat het bereikbaar
blijft voor onderhoud. Dit product mag niet vast worden
ingegoten of ingemetseld.
• Schakel het systeem uit door de stekker van de
transformator uit de wandcontactdoos te nemen voor
het plegen van onderhoud.
• Reinig het product regelmatig met een zachte, schone
doek.Vermijd schuurmiddelen die het oppervlak
kunnen beschadigen.
• Reinig producten met RVS onderdelen eenmaal per
6 maanden met RVS reiniger.
• Gebruik geen hogedrukreiniger of agressieve
chemische reinigingsmiddelen bij het schoonmaken
van het product, dit kan onherstelbare schade aan het
product veroorzaken.
• Beschermingsklasse III: dit product mag alleen worden
aangesloten op veilgheidslaagspanning tot maximaal
12 volt.
• Dit product is bestand tegen een omgevings-
temperatuur van: -20 tot 50 °C.
• Gebruik dit product niet in ruimtes waar brandbare
gassen,dampen of vloeistoffen opgeslagen kunnen zijn.
Het product voldoet aan de eisen
van de toepasselijke EG, UK en EAEU
richtlijnen.
Voor vragen over onderdelen, service, eventuele
klachten of andere zaken kunt u altijd bij ons terecht.
E-mail: [email protected]
Afgedankte elektrische apparatuur mag niet in het
huisvuil terechtkomen.Breng,indien mogelijk, deze
apparaten naar een recyclingbedrijf. Voor informatie
over recycling kunt u terecht bij een gemeentelijk
afvalverwerkingsbedrijf of bij uw dealer.
6 jaar garantie – bezoek onze website op
lightpro.nl voor de garantievoorwaarden.
INSTALLATION DER LAMPEN
• Installieren Sie das Produkt in der gewünschten
Position und verlegen Sie die Kabel so,dass sie
einfach mit dem Transformator oder dem Hauptkabel
verbunden werden können.
• Wenn Produkte über eine Wasserablauföffnung
verfügen,muss diese nach unten zeigen.
• Wenn Sie die Produkte fest in Boden verankern
möchten,verwenden Sie dazu Befestigungsmaterial
aus nicht-rostenden Materialien (als Standard
mitgeliefert).
• Verbinden Sie die Leuchten an den Hauptkabel mit dem
Konnektor wie auf Bild auf Seite 5 gezeigt wird.
• Weitere Informationen finden Sie in Ihrer Anleitung
zum Transformator.
SICHERHEIT
• Bringen Sie dieses Produkt stets so an,dass es zu
Bedienungs- und Wartungszwecken zugänglich bleibt.
• Schalten Sie das System aus, indem Sie den
Transformator zur Wartung aus der Steckdose ziehen.
• Reinigen Sie das Produkt regelmäßig mit einem
weichen, sauberen Tuch. Vermeiden Sie Schleifmittel,
die die Oberfläche beschädigen können.
• Reinigen Sie Produkte mit Edelstahlteilen einmal alle
6 Monate mit Edelstahlreiniger.
• Verwenden Sie bei der Reinigung des Produkts
keine Hochdruckreiniger oder aggressive chemische
Reinigungsmittel,da dies zu irreparablen Schäden am
Produkt führen kann.
• Schutzklasse III: Dieses Produkt darf nur mit Schutz-
Kleinspannung bis maximal 12 Volt verbunden werden.
• Geeignet für Umgebungstemperatur ca: -20 tot 50 °C.
• Verwenden Sie diese Produkt nicht in Bereichen,in
denen brennbare Gase, Dämpfe oder Flüssigkeiten
auftreten oder gelagert werden können.
Das Produkt entsprichtden
Anforderungen der geltenden EG,
EAWU und britischen Richtlinien.
Wenn Sie Fragen zu Einzelteilen oder zum Service
haben, oder wenn Sie uns eine Beschwerde oder
andere Hinweise übermitteln möchten, können Sie
sich jederzeit an uns wenden. E-Mail: [email protected]
Entsorgen Sie elektrische Geräte nicht im Hausmüll.
Nutzen Sie die Sammelstellen in ihrer Gemeinde.
Fragen Sie Ihre Gemeindeverwaltung nach den
Standorten der Sammelstellen.
6 Jahre garantie – Besuchen Sie unsere Website
unter lightpro.nl für die Garantiebedingungen.
6
YEARS
6
YEARS
INSTALLATION OF THE LIGHTS
• Install the products in the desired position and lay the
cables so they can be comfortably connected to the
transformer or main cable.
• If products are provided with a drain hole for water, this
hole must be pointing downwards.
• Use non-corrosive fixing materials (supplied as
standard) if you want to bolt the products down.
• Connect the lights to the main cable by using the
connector as shown in figure on page 5.
• Consult the manual of your transformer for more
information.
SAFETY
• Always fit this product so that it can still be accessed
for servicing or maintenance. This product must not be
permanently embedded or bricked in.
• Turn off the system by pulling the plug of the
transformer from the socket for maintenance.
• Regularly clean the product with a soft, clean cloth.
Avoid abrasives that can damage the surface.
• Clean products with stainless steel parts with a
stainless steel cleaning agent once per six months.
• Do not use a high pressure washer or aggressive
chemical cleaning agents when cleaning the product.
This can cause irreparable damage.
• Protection class III: this product may only be connected
to safety extra-low voltage up to a maximum of 12 Volt.
• This product is suitable for outside temperatures of:
-20 to 50 °C.
• Do not use this product in areas where combustible
gases,fumes or liquids may be stored.
The product meets the
requirements of the applicable
EC,UK and EAEU guidelines.
For questions about parts, service, any complaints
or other matters,you can contact us at any time.
E-mail: [email protected]
Discarded electrical equipment must not be put in
the household waste.If possible,take it to a recycling
company. For details of recycling, contact a municipal
waste processing company or your dealer.
6 year warranty – visit our website at lightpro.nl for
warranty conditions.
INSTALLATION DES LAMPES
• Installez les produits dans la position désirée et
positionnez les câbles de telle sorte qu’ils puissent être
raccordés confortablement au transformateur ou au
câble principal.
• Si les produits sont équipés d’un orifice d’évacuation de
l’eau, orientez celui-ci vers le bas.
• Utilisez des équipements de fixation non corrosifs
(fournis en standard) si vous souhaitez visser les
produits.
• Raccordez les prises des produits au câble principal
comme indiqué dans l’image à la page 5.
• Consultez le mode d’emploi de votre transformateur
pour de plus amples informations.
SÉCURITÉ
• Installez ce produit de telle sorte qu’il soit accessible
pour la réparation ou l’entretien. Ce produit ne doit
jamais être encastré ou imbriqué de façon permanente.
• Débranchez le système en retirant la fiche de la prise de
courant murale avant d’effectuer l’entretien
• Nettoyez régulièrement le produit avec un chiffon
doux et propre. Evitez les produits abrasifs qui peuvent
endommager la surface.
• Nettoyez les produits avec des éléments en inox une
fois tous les 6 mois avec un nettoyant pour acier
inoxydable.
• N’utilisez pas de nettoyeur haute-pression ou de
nettoyants chimiques agressifs pour nettoyer le produit,
cela peut entrainer des dommages irréparables pour le
produit.
• Classe de protection III: ce produit ne peut être raccordé
qu’à une très faible tension de sécurité d’une puissance
maximale 12 Volts.
• Ce produit est adapté à une température extérieure de:
-20 à 50 °C.
• N’utilisez pas ce produit dans des lieux de stockage
de gaz inflammables,de sources d’émanations ou de
liquides.
Le produitest conforme aux
exigences des directives CE,l’EAEU
et britanniques applicables.
Pour tout renseignement concernant les pièces de
rechange et les réparations ou pour les éventuelles
plaintes et autres problèmes, n’hésitez pas à nous
contacter à l’adresse suivante: [email protected]
Ne pas jeter les équipements électriques usagés
dans la poubelle domestique. Si possible, remettez-
les à une entreprise de recyclage.Pour tout détail
concernant le recyclage,contactez un organisme
municipal de traitement des déchets ou votre
revendeur.
Garantie de 6 ans – visitez notre site Web à
lightpro.nl pour les les conditions de garantie.
6
YEARS
6
YEARS
TECHMAR B.V. | CHOPINSTRAAT 10 | 7557 EH HENGELO | THE NETHERLANDS | WWW.LIGHTPRO.NL
UK Authorised Representative
(for authorities only)
ProductIP (UK) Ltd.
8, Northumberland Av.
London WC2N 5BY

This manual suits for next models

1

Other LightPro Outdoor Light manuals

LightPro Castor 9 180S User manual

LightPro

LightPro Castor 9 180S User manual

LightPro 215A User manual

LightPro

LightPro 215A User manual

LightPro Avior User manual

LightPro

LightPro Avior User manual

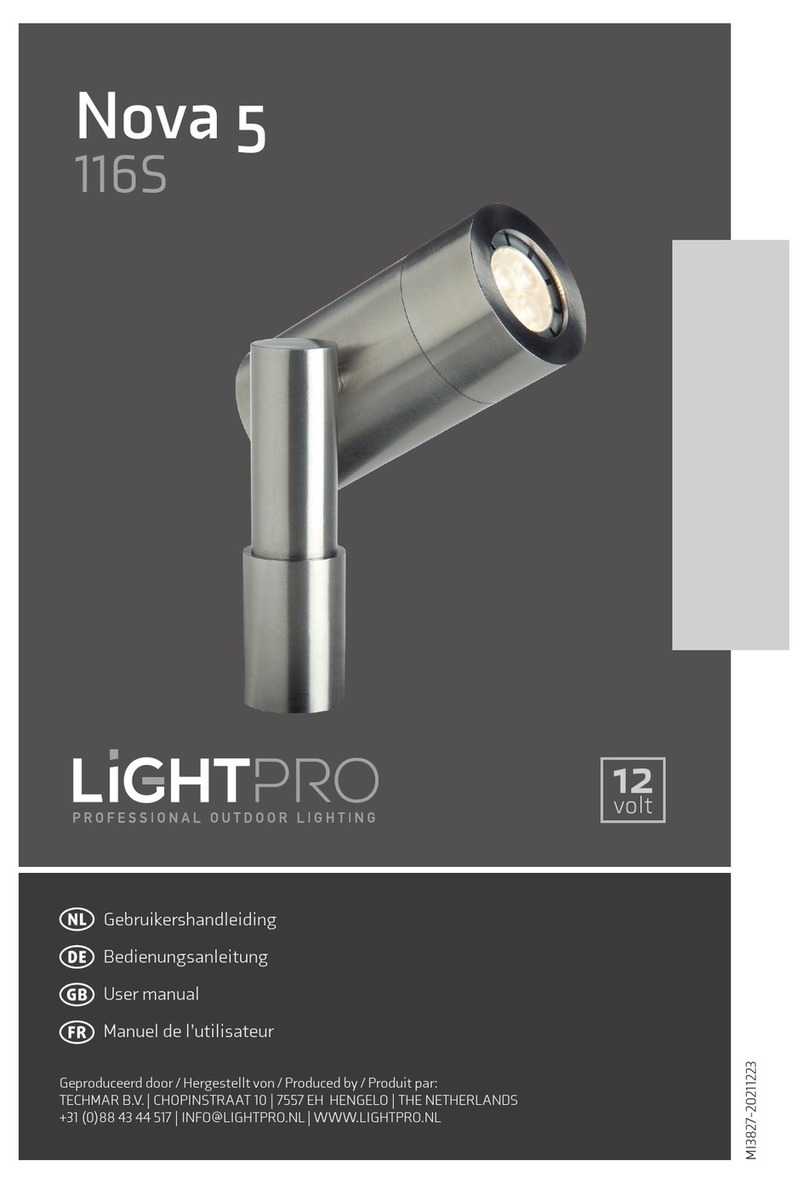
LightPro Nova 5 Operator's manual

LightPro

LightPro Nova 5 Operator's manual

LightPro Oberon Lo User manual

LightPro

LightPro Oberon Lo User manual

LightPro Azar15 Operator's manual

LightPro

LightPro Azar15 Operator's manual

LightPro Agate 102U Operator's manual

LightPro

LightPro Agate 102U Operator's manual

LightPro Emerald 5 105S Operator's manual

LightPro

LightPro Emerald 5 105S Operator's manual

LightPro Oberon Lo 190P User manual

LightPro

LightPro Oberon Lo 190P User manual

LightPro Agate 102U User manual

LightPro

LightPro Agate 102U User manual

LightPro Juno Tube User manual

LightPro

LightPro Juno Tube User manual

LightPro Polaris 185W User manual

LightPro

LightPro Polaris 185W User manual

LightPro Ruby 120P Operator's manual

LightPro

LightPro Ruby 120P Operator's manual

LightPro Opal Operator's manual

LightPro

LightPro Opal Operator's manual

LightPro Nilus 210S User manual

LightPro

LightPro Nilus 210S User manual

LightPro Castor 4 178S User manual

LightPro

LightPro Castor 4 178S User manual

LightPro Alon User manual

LightPro

LightPro Alon User manual

LightPro Nova 3 117S Operator's manual

LightPro

LightPro Nova 3 117S Operator's manual

LightPro Nomia 207U User manual

LightPro

LightPro Nomia 207U User manual

LightPro Onyx 30 R1 150D User manual

LightPro

LightPro Onyx 30 R1 150D User manual

LightPro 184W User manual

LightPro

LightPro 184W User manual

LightPro Castor 3 177S User manual

LightPro

LightPro Castor 3 177S User manual

LightPro Nova 5 User manual

LightPro

LightPro Nova 5 User manual

LightPro Avior 181S User manual

LightPro

LightPro Avior 181S User manual

Popular Outdoor Light manuals by other brands

Henn&Hart FL0022 instructions

Henn&Hart

Henn&Hart FL0022 instructions

Timberlab EYE manual

Timberlab

Timberlab EYE manual

Quoizel RNL8408WT Assembly instruction sheet

Quoizel

Quoizel RNL8408WT Assembly instruction sheet

Patriot Lighting Leonia-LG-BK installation manual

Patriot Lighting

Patriot Lighting Leonia-LG-BK installation manual

GinkGo EVARO Quick user manual

GinkGo

GinkGo EVARO Quick user manual

DS Produkte PFL-001A instruction manual

DS Produkte

DS Produkte PFL-001A instruction manual

Schrack Technik ZELDA Medium High Up/Down Series Assembly instructions

Schrack Technik

Schrack Technik ZELDA Medium High Up/Down Series Assembly instructions

LIGMAN CA-30607 installation manual

LIGMAN

LIGMAN CA-30607 installation manual

RH BECKMAN SCONCE 21 installation instructions

RH

RH BECKMAN SCONCE 21 installation instructions

Inspire kanti 7620-2C instruction manual

Inspire

Inspire kanti 7620-2C instruction manual

GEV LBO 021679 manual

GEV

GEV LBO 021679 manual

Inspire DAYTON Assembly, Use, Maintenance Manual

Inspire

Inspire DAYTON Assembly, Use, Maintenance Manual

ARC Lighting Tiny Monster Concept Series quick start guide

ARC Lighting

ARC Lighting Tiny Monster Concept Series quick start guide

L&L Intono 3.9 installation instructions

L&L

L&L Intono 3.9 installation instructions

Regent Lighting Solutions Columbia installation instructions

Regent Lighting Solutions

Regent Lighting Solutions Columbia installation instructions

eufy Security E120 user guide

eufy Security

eufy Security E120 user guide

Leader Light LL STREET PT60 user manual

Leader Light

Leader Light LL STREET PT60 user manual

Trilux Deca LED Future Series Mounting instructions

Trilux

Trilux Deca LED Future Series Mounting instructions

manuals.online logo
manuals.online logoBrands
  • About & Mission
  • Contact us
  • Privacy Policy
  • Terms and Conditions

Copyright 2025 Manuals.Online. All Rights Reserved.