Lindam LD167 User manual

IMPORTANT! KEEP FOR FUTURE REFERENCE
Please read your instructions fully before you begin to ensure you get the best out of your new monitor.
For assistance please call the Lindam careline on 0871 702 1000* or email [email protected]
(*Mon-Fri, 10am - 4pm, UK Only. Calls cost 10 pence per minute from a BT Landline. Calls from other networks and mobiles may cost more.)
Lindam Limited Hornbeam Park Harrogate HG2 8PA England www.lindam.com Model: LD167
clarity digital video monitor
GB
FR
NL
D
E
IT
p1
p14
p24
p34
p44
p54
44489-IB01-1

2
YOU SHOULD HAVE
1 x Camera
1 x Camera Stand Base
1 x Camera Stand Cradle
1 x Camera Fixing Bolt
1 x Monitor
1 x Li-ion Monitor Battery (3.7V 1000mAH)
2 x Mains Power Adaptors
FEATURES
Parent Unit
1 LCD Screen
2 Play Button
3 Skip Button
4 VOX On / Off Button
5 Power On / Off and Volume Thumb wheel
6 Power Indicator
7 Link Indicator
8 Volume Indicator LEDs
9 VOX Indicator
10 Music Indicator
11 Brightness Up / Down Buttons
12 Power Adaptor Socket
13 Battery Compartment
14 Fold Down Stand
Baby Unit
1 Power Indicator
2 Infrared Lens
3 Night Lights
4 Night Light On / Off Button
5 Power On / Off Button
6 Battery Compartment
7 Power Adaptor Socket
8 Threaded Base
9 Camera Stand Base
10 Camera Stand Cradle
11 Camera Fixing Bolt
9
11
10

3
PARENT UNIT
BABY UNIT
1
9
10
8
2
3
4
6
7
11
5
13
12
14
1
2
3
4
65
78

4
SETTING UP THE BABY UNIT
MAINS POWER
1. Plug your adaptor in to your mains socket and connect to your camera.
2. Slide the On / Off Switch to the On position. The Power Indicator will illuminate red.
WARNING! Only use the Adaptors labelled OUTPUT: 6V DC that were supplied with your monitor. The use of other power
supplies is not approved and may damage your product and will invalidate your warranty.
BATTERY POWER
The camera uses either 4 AAA batteries (alkaline battery recommended) or your Mains Adaptor.
1. Remove the small screw using a flat head screwdriver and remove the Battery Compartment Cover
2. Insert 4 AAA batteries ensuring correct polarity
3. Replace the battery compartment cover and replace the screw and gently tighten.
4. Slide the On / Off Switch to the On position. The Power Indicator will illuminate red. The Power Indicator will start blinking
when the power is low. When this occurs replace your batteries.
NOTE! Do not mix old and new batteries. Remove the batteries if you are not planning on using the monitor for long periods
to avoid corrosion in the event of a leakage. Remove the batteries when using the mains adapter.
NOTE! Check the low battery warning light regularly. We strongly recommend using only recognised brand batteries to ensure
a long battery life.

5
NIGHT LIGHT
To illuminate your night light simply press the Night Light Button once. Press it again to switch off.
CAMERA STAND
ABOUT
The camera stand has been designed to be free standing or wall mountable to ensure you can position it in the best possible
location for visibility and to pick up the best sound levels in the room.
ASSEMBLY
1. Slot the Camera Stand Cradle into the Base until it clicks into position.
2. Place the Camera Fixing Bolt through the slot in the cradle and screw it into the Threaded Base of the camera.
3. Pivot the Camera in the Cradle to the desired angle and lock its position by fully tightening the Bolt

6
WALL MOUNTING
1. Fix a suitable screw (not supplied) into an appropriate wall of your nursery. Ensure you use a suitable wall plug for your wall.
Take your base to your local hardware store if you require assistance. Leave the screw head protruding 5mm from the wall.
2. Slot the Keyhole in the base over the screw and slide down to secure the position.
WARNING! Do not choose a position where your child can reach the camera or the Mains Adaptor Cable.

7
SETTING UP THE PARENT UNIT
The monitor uses 3.7V 1000mAH Li-ion battery and the Mains Adaptor supplied
1. Slide down the Battery Compartment Cover at the rear of the Parent Unit.
2. Slot the battery in place from below ensuring the correct polarity.
3. Slide the Battery Compartment Cover back into place until it clicks.
4. Plug your Mains Power Adaptor into your mains socket and plug the other end into the Socket on your Parent Unit.
5. Roll the Thumb Wheel upwards. When it clicks power is On. Continue to roll it upwards to increase the Volume.
WARNING! Only use the Adaptors labelled OUTPUT: 6V DC that were supplied with your monitor. The use of other power
supplies is not approved and may damage your product and will invalidate your warranty.
CHARGING
Please charge the battery for 5 hours the first time it is used to ensure it’s fully charged. Thereafter a full charge should take 4
hours. Once fully charged the battery will last approximately 6 hours.
The Li-ion rechargeable battery technology is similar to that used in today’s mobile phones.
If the unit is switched Off when charging, the power light glows blue and will turn off when fully charged (no lights).
If the unit is switched On and charging, the power light glows blue and red. When fully charged the light will glow red only.
When the power is low the red light will flash as a warning.

TESTING THE CONNECTION
Place the parent and baby unit in the same room to test the connection.
Make sure the baby unit is at least 1 metre from the parent unit, otherwise you may experience audio feedback.
Switch on both units. The link light on the parent unit will turn green once a link is established. If no link is found the Link light
will flash and stay red.
LINK RESETTING PROCEDURE
Sometimes the link between the Parent Unit and Baby Unit can be lost if there is disruption between the units. If this happens
first check the power adapters are connected and the batteries are sufficiently charged. Also test the connection by following
the procedure as described above. If you still experience link problems this can be corrected by following this reset procedure.
1 Simultaneously press and hold the VOX button on the Parent Unit and the Night Light Button on the Baby Unit for 5 seconds.
‘Searching for signal’ will appear on the Parent Unit screen.
2 Once the 2 units are linked the Parent Unit screen will start to function as normal
OPERATING RANGE
The operating range of the Lindam Video monitor is 150m in open air. This distance may be reduced when inside the home
for example a brick wall could reduce the range by between 10% and 50%.
OUT OF RANGE ALERT
If the link between the parent and nursery unit is lost then and audio alarm will sound and ‘Out of range’ will be displayed on
the parent unit screen. The Link light will also flash red.
8

9
BRIGHTNESS
Press the Brightness selection button to adjust brightness.
MUSIC FUNCTION
You can play the music from the camera (three pieces of music).
1 Press the Play Button and the music will begin to play in the nursery.
2 To pause the music press the Play Button again
3 To play the next melody in the sequence press the Skip Button
NOTE! If you activate the music function, the music button LED will remain ON (red).
NOTE! If you activate the music function while in ‘AUTOMUTE On’ mode (see next page) the monitors will turn the AUTOMUTE
function off.
NIGHT VISION
The monitor will automatically switch from daylight mode (full colour) to night vision mode (black and white).

10
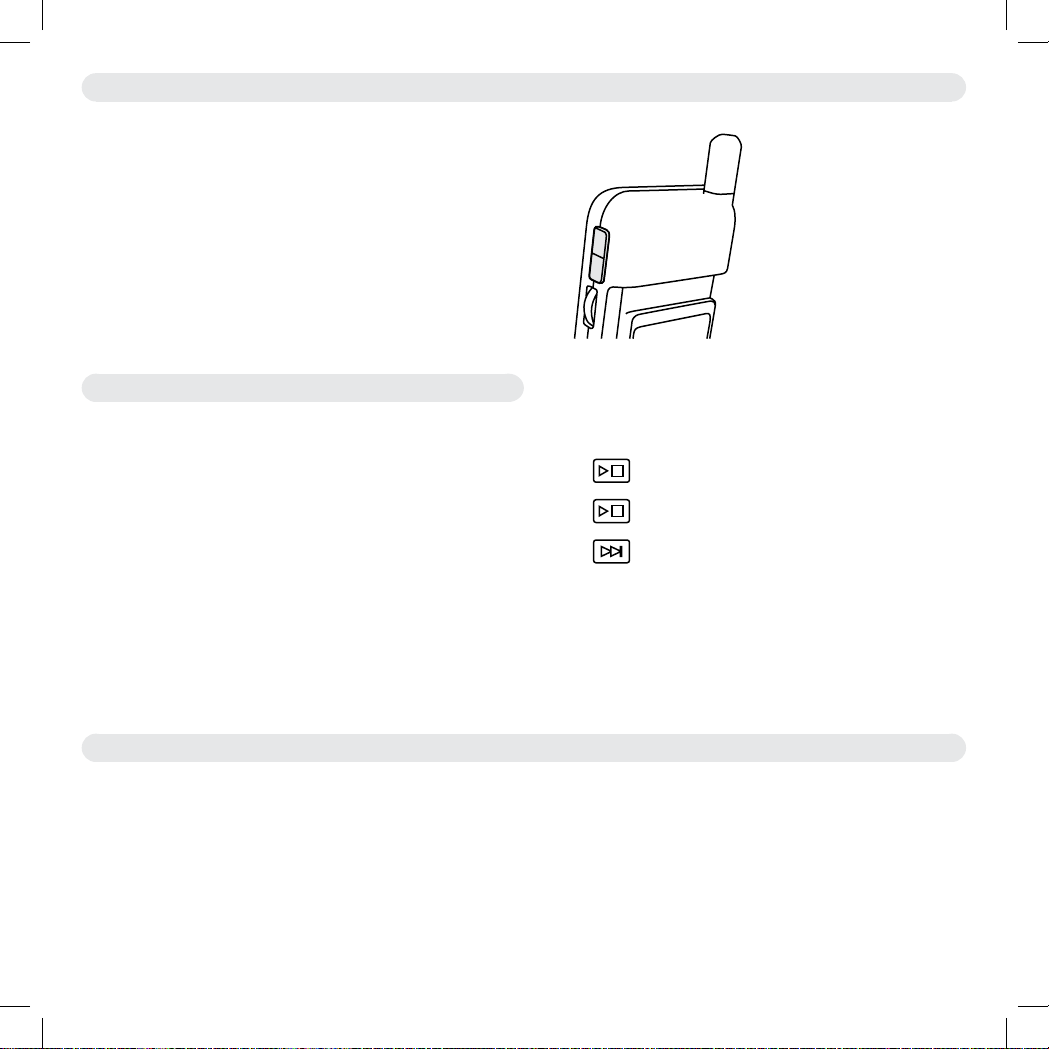
VOX (VOICE OPERATED TRANSMISSION) FUNCTION
The Clarity Video camera has 3 VOX modes, which can be
activated by the VOX button on the side of the parent unit.
By pressing the button repeatedly you can scroll through the
sequence of modes outlined below:
NOTE! The position of your camera relative to your child may have an effect on how well the built in microphone picks up their
sound. For a loud baby you may want to move the camera a little further away to reduce the sensitivity.
NOTE! The sound from the nursery is continuously monitored in all modes. The Volume Indicator LEDs show the sound levels
in the room even when the volume is turned down. These are also very useful when you need to monitor the baby where there
is background noise or in low light conditions.
NOTE! If you activate the music function while in ‘AUTOMUTE On’ mode the monitors will turn the AUTOMUTE function off.
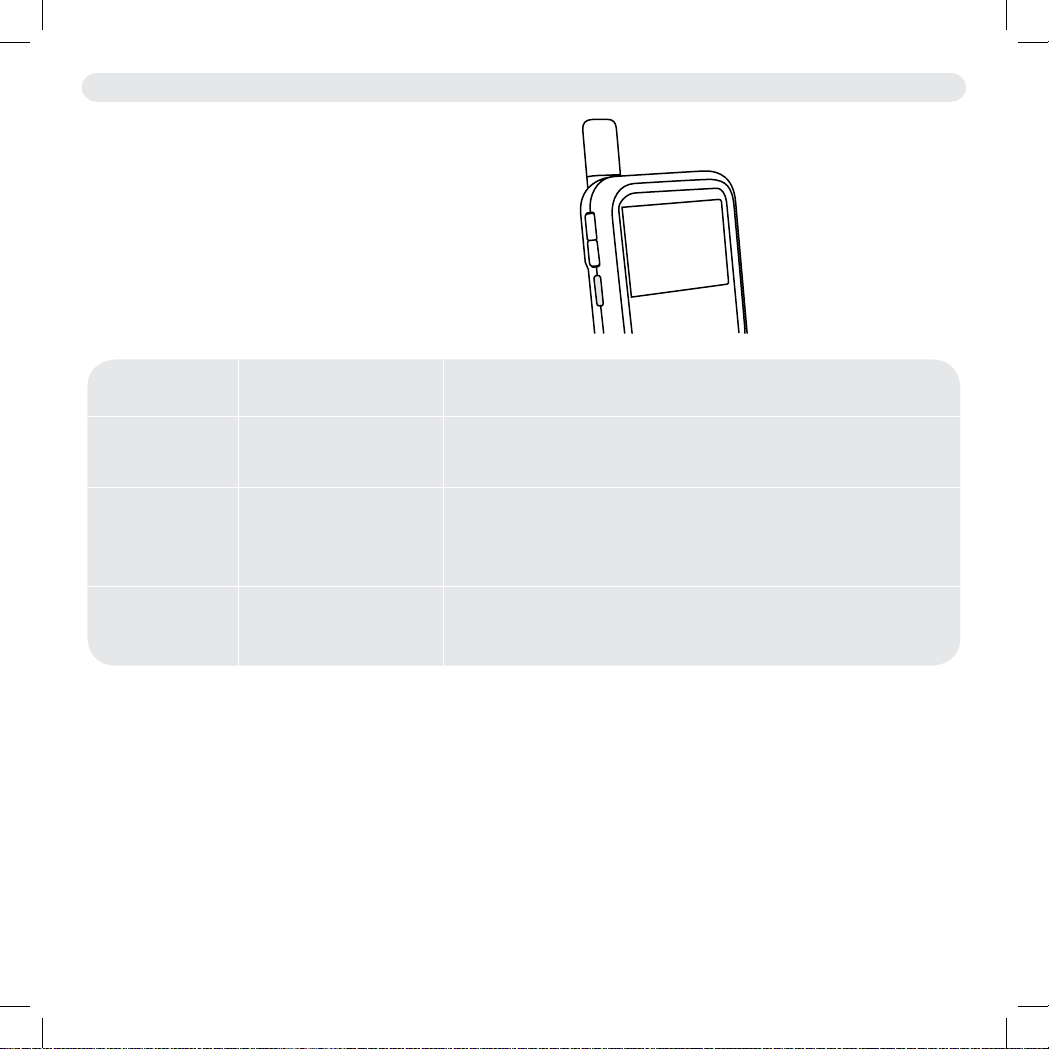
Visual indicator
LCD screen is on.
LCD screen is on.
‘AUTOMUTE’ is displayed
in the bottom of the LCD
screen
LCD Screen is off.
‘VOX’ Light is illuminated
Mode
AUTOMUTE Off
AUTOMUTE On
VOX mode
Description
The Parent Unit shows video continuously. All sound is transmitted
continuously from the nursery.
The Parent Unit shows video continuously. The Parent Unit will turn
off the speaker when there is a period of silence in the nursery and
turn the speaker back on when your child makes any noise.
The screen only activates when sounds are heard in the nursery.

11
TROUBLESHOOTING
If you are unable to receive a signal
• Make sure both the camera and monitor are switched on
• If using Mains Power ensure the plug is pushed all the way into the socket.
• If using batteries ensure they are not empty
If the signal is poor
• If there is a microwave oven in the signal path, move the microwave or switch it off.
• Make sure the Units are within range of each other (150 metres / 492 ft). Please be aware that walls and other large objects
can reduce the transmission range.
For link problems please refer back to the ‘link resetting procedure’ section earlier in this booklet.
WARNINGS
• Keep the camera lens clean using a soft dry cloth and avoid touching the lens with your fingers.
• This monitor is not a substitute for direct adult supervision. Check in on your child regularly.
• Keep all parts and accessories out of young children’s reach.
• Do not store or operate in damp, dusty or dirty areas.
• Do not expose to heat or mount the camera above a heat source.
• Do not store in cold areas. Condensation may form as the units warm back up.
• There are no user serviceable parts. Do not attempt to open your monitor’s casings.
• Avoid dropping your monitors.
• Do not use any Mains Power Adapters other than those supplied with your monitor.
• Do not use an extension cord with your Power Adapters
• Do not overload electrical outlets or extension cords as there is a risk of fire or electric shocks.
• Remember you are using public airwaves and there is a small risk that the sound and vision transmitted could be received
by other 2.4 GHz devices. To protect privacy turn the camera off when not in use.
• Do not leave exhausted batteries in your monitors. They may leak and cause corrosion.
• Dispose of exhausted batteries safely and never dispose of them in a fire.
• Never immerse any part of the baby monitor in water or any other liquid.
• Power cords should be routed so that they are not likely to be walked on or pinched.
• Only use the charger and adapter supplied. The use of third party adapters may damage your monitor.
• Your Parent Unit camera should only be mounted as instructed using the correct mounting attachment.
• Only replace rechargeable batteries with those recommended by Lindam.
• Never cover the Units with anything when in use.
• Never place the Baby Unit inside the baby’s bed or cot.
• Do not place either Unit in direct sunlight.
• Retain these instructions for future reference.
• WARNING: STRANGULATION HAZARD!-Keep out of reach of children. Do not use with extension cords.

12
SPECIFICATION
BABY UNIT
Frequency: 2.4GHz
Antenna: Dipole antenna
Transmission distance: 150 Metres
Modulation: GFSK, FHSS
Image sensor: Colour CMOS image sensor
Lens: f 3.0mm, F 2.4
IR LED: 9 pcs
Dimensions: (w) 8.9cm (h) 10.7cm (d) 8.2cm
Weight: 175g
Power: DC 6V, 800mA or 4 x AAA batteries (not supplied)
Operating temperatures: 0ºC - 40ºC (32ªF - 104ºF)
PARENT UNIT
Frequency: 2.4 GHz
Antenna: Dipole antenna
Modulation: GFSK, FHSS
Display: 2.36’ TFT LCD Full colour
Brightness control: 5 levels
VOX: Voice activation
Dimensions: (w) 6.5cm (h) 13.7cm (d) 2.7cm
Weight: 140g
Power: DC 6V, 800mA or Li-ion battery
Operating temperatures: 0ºC - 40ºC (32ªF - 104ºF)
DECLARATION OF CONFORMITY
Lindam Limited declares that the Clarity Digital Video Monitor is in compliance with the essential requirements and other
relevant provisions of Directive 1999/5/EC.

13

14
VOUS DEVRIEZ AVOIR
1 x Caméra
1 x Support de caméra
1 x Socle de caméra
1 x Boulon de fixation caméra
1 x Moniteur
1 x Pile Li-ion pour moniteur (3,7V 1000mAH)
2 x Adaptateurs alimentation secteur
CARACTÉRISTIQUES
Unité parent
1 Ecran LCD
2 Touche de lecture
3 Touche de saut
4 Touche marche/arrêt VOX
5 Molette de réglage du volume sonore et mise en marche/arrêt
6 Voyant d’alimentation
7 Voyant de liaison
8 Voyant LED du réglage du volume
9 Voyant VOX
10 Voyant Musique
11 Touches pour augmenter / baisser la luminosité
12 Prise adaptateur secteur
13 Compartiment batterie
14 Support repliable
Unité bébé
1 Voyant d’alimentation
2 Lentille infrarouge
3 Veilleuse
4 Touche marche/arrêt Veilleuse
5 Touche de mise en marche/arrêt
6 Compartiment batterie
7 Prise adaptateur secteur
8 Socle à vis
9 Support de caméra
10 Socle de caméra
11 Boulon de fixation caméra
9
11
10

15
UNITÉ PARENT
UNITÉ BÉBÉ
1
9
10
8
2
3
4
6
7
11
5
13
12
14
1
2
3
4
65
78

16
INSTALLATION DE L’UNITÉ BÉBÉ
ALIMENTATION SECTEUR
1. Branchez votre adaptateur sur la prise secteur et connectez votre caméra.
2. Glissez la touche de marche/arrêt sur la position ON. Le voyant d’alimentation s’éclaire en vert.
ATTENTION ! Utiliser uniquement les adaptateurs indiquant une tension de SORTIE de 6Vcc qui sont fournis avec votre
moniteur. L’utilisation d’autres sources d’alimentation n’est pas approuvée ; cela peut endommager votre produit et annulera
votre garantie.
ALIMENTATION BATTERIE
La caméra peut être utilisée avec 4 piles AAA (piles alcaline recommandées) ou votre adaptateur secteur.
1. Retirez la petite vis à l’aide d’un tournevis à tête plate et enlevez le couvercle du compartiment batterie
2. Insérez 4 piles AAA en vérifiant bien le sens des polarités
3. Remettez le couvercle du compartiment batterie en place, puis la vis en ne serrant pas à fond.
4. Glissez la touche de marche/arrêt sur la position ON. Le voyant d’alimentation s’éclaire en rouge. Le voyant d’alimentation
commence à clignoter quand l’alimentation est faible. Si cela se produit, remplacez les piles.
REMARQUE ! Ne pas mélanger des piles usagées avec des neuves. Retirer les piles si vous envisagez de ne pas utiliser le
moniteur pendant une période prolongée ; ceci afin d’éviter le risque de corrosion en cas de fuite
REMARQUE ! Contrôler régulièrement le témoin lumineux de batterie faible. Nous recommandons fortement d’utiliser
uniquement des piles de marques reconnues garantissant la longévité de celles-ci.

17
VEILLEUSE
Pour allumer votre veilleuse, appuyez simplement sur la touche Veilleuse. Appuyez à nouveau sur la touche pour éteindre.
SUPPORT DE CAMÉRA
À PROPOS
Le support de caméra est prévu pour une utilisation autonome ou être fixé au mur afin de pouvoir le positionner dans la pièce
selon l’angle offrant la meilleure visibilité et une qualité sonore optimale.
ASSEMBLAGE
1. Glissez le socle de la caméra dans le support jusqu’à ce qu’il soit bloqué en position.
2. Passez le boulon de fixation de la caméra à travers la fente du socle et vissez-le dans la base filetée de la caméra.
3. Faites pivoter la caméra dans le socle selon l’angle désiré et bloquez-la en position en serrant le boulon à fond.
IMPORTANT A GARDER POUR
REFERENCE ULTERIEURE

18
MONTAGE MURAL
1. Fixez une vis adaptée (non fournie) dans un mur approprié de la chambre du bébé. Assurez-vous d’utiliser une cheville
adaptée à votre mur. Amenez votre support au magasin de bricolage proche de chez vous si vous avez besoin de conseils.
Laissez la tête de vis dépasser de 5mm du mur.
2. Passez le logement de clavette du support par dessus la vis, puis faire glisser pour bien le fixer en place.
ATTENTION ! Ne pas choisir un emplacement où votre enfant peut atteindre la caméra ou le câble de l’adaptateur secteur.

19
INSTALLATION DE L’UNITÉ PARENT
Le moniteur peut être utilisé avec une pile Li-ion 3,7V 1000mAH et l’adaptateur secteur fourni.
1. Faites glisser le couvercle du compartiment batterie, à l’arrière de l’Unité parent.
2. Placez la pile en commençant par le bas.
3. Remettez le couvercle du compartiment batterie en place en le faisant glisser jusqu’à ce qu’il se bloque.
4. Branchez votre adaptateur alimentation secteur dans la prise secteur et branchez l’autre extrémité dans la prise de
votre Unité parent.
5. Tournez la molette vers le haut. Le déclic signale la mise en marche. Continuez à tourner vers le haut pour augmenter
le volume du son.
ATTENTION ! Utiliser uniquement les adaptateurs indiquant une tension de SORTIE de 6Vcc qui sont fournis avec votre
moniteur. L’utilisation d’autres sources d’alimentation n’est pas approuvée ; cela peut endommager votre produit et annulera
votre garantie.
CHARGE
Veuillez charger la batterie pendant 5 heures lors de la première utilisation pour garantir une charge complète. 4 heures
devraient ensuite suffire pour la recharger. Une fois chargée, la batterie durera environ 6 heures.
La technologie de pile rechargeable Li-ion est similaire à celle utilisée dans les téléphones mobiles modernes.
Si l’unité est éteinte pendant la charge, le voyant d’alimentation bleu s’allume. Il s’éteint lorsque celle-ci est complètement
chargée (aucun voyant).
Si l’unité est sous tension et en charge, les voyants d’alimentation bleu et rouge s’allument. Dès que l’unité est complètement
chargée, seul le voyant rouge reste allumé.
Quand la charge est faible, le voyant rouge clignote pour le signaler.

TEST DE CONNEXION
Placez les unités parent et bébé dans la même pièce pour tester la connexion.
Assurez-vous que l’unité bébé est au moins à 1 mètre de l’unité parent, de façon à éviter le retour audio.
Allumez les deux unités. Le voyant de liaison sur l’unité parent passe au vert dès que la liaison est établie. En cas d’absence de
liaison, le voyant de liaison clignote et reste rouge.
PROCÉDURE DE RÉINITIALISATION DE LA LIAISON
En cas d’interruption entre les deux unités, il peut arriver que la liaison entre l’unité parent et l’unité bébé se perde. Si cela se
produit, vérifiez d’abord que les adaptateurs secteur sont branchés et les piles suffisamment chargées. Testez également la
connexion en suivant la procédure détaillée ci-dessus. Si vous rencontrez toujours des problèmes de liaison, vous pouvez y
remédier en suivant cette procédure de réinitialisation.
1 Appuyer et maintenir la pression simultanément sur la touche VOX de l’unité parent et la touche Veilleuse de l’unité bébé
pendant 5 secondes.
‘Recherche de signal’ apparaîtra sur l’écran de l’unité parent.
2 Dès que les 2 unités sont reliées, l’écran de l’unité parent repassera en mode de fonctionnement normal
PLAGE OPÉRATIONNELLE
La plage opérationnelle du moniteur vidéo Lindam est de 150 mètres en plein air. Cette distance peut être réduite à l’intérieur
de la maison, par exemple un mur en briques pourrait réduire la portée de 10% à 50%.
ALERTE HORS DE PORTÉE
En cas de perte de liaison entre l’unité parent et celle de la chambre du bébé, une alarme audio se déclenche et le signal
‘Hors de portée’ s’affiche sur l’écran de l’unité parent. Le voyant de liaison clignote en rouge également.
20
Table of contents
Languages:
Other Lindam Baby Monitor manuals