Linton LT-9600 User manual

THANK YOU!
We are grateful you chose LINTON for your land mobile
radio applications. We believe this easy-to-use transceiver
will provide dependable and reliable communication to
personnel operating at peak efficiency.
LINTON transceivers incorporate the latest in advanced
technology. As a result, we feel strongly that you will be
pleased with the quality and features of this product!

CONTENT
FOR YOUR SAFETY ..........................................................1
UNPACKING AND CHECKING EQUIPMENT ..................... 3
Packing Lists...............................................................3
PREPARATION...................................................................4
Charging the Battery Pack.......................................... 4
Installing/Removing the Battery Pack..........................6
Attaching/Removing the Antenna................................7
Installing the Belt Clip.................................................. 8
Installing the Earphone ...............................................8
Installing Hand Strap...................................................8
GETTING ACQUAINTED.................................................... 9
Orientation ..................................................................9
Programmable Auxiliary Functions............................12
Working Band............................................................14
■Change Main Working Band...........................14
■Change Working Band.................................... 14
■Dual Frequency/Dual Display/Dual Standby(DW)
..........................................................................15
Basic Transceiver Modes..........................................16
■VFO Mode(VFO) ............................................16
■Memory Recall Mode(MR)..............................16
■Channel Display Mode(CH) ............................ 17
■Channel Name Mode(NM)..............................17
Keypad Description................................................... 18

LCD Display.............................................................. 20
BASIC OPERATION ......................................................... 23
Turning Transceiver ON/OFF....................................23
Adjusting the Volume ................................................ 23
Frequency/Channel Selection...................................23
Transmitting .............................................................. 23
Transmitting and Receiving works at the same time..... 24
Receiving ..................................................................24
MENU OPERATION.......................................................... 25
Menu Access............................................................. 25
Menu Configuration...................................................26
OPERATING THRU REPEATERS.................................... 29
Use this radio as repeater.........................................30
The condition of Enable Repeater............................. 31
When as repeater, also monitor RX signal................32
Selecting Offset Direction and Frequency................. 32
Talk Around ...............................................................33
Reverse Function......................................................34
1750 Hz Tone............................................................ 35
CTCSS/DCS...................................................................... 36
Set Receiving with CTCSS/DCS...............................36
Set Transmitting with CTCSS/DCS........................... 37
Standard CTCSS Tones Table .................................. 38
Standard DCS Codes Table......................................38
MEMORY CHANNEL........................................................ 39
Storing Data in Memory Channels ............................39

Naming Memory Channels........................................40
■Switching/Setting/Amending/Clearing Memory
Channel Name..................................................40
Channel Display Function .........................................41
Clearing Current One Memory Channel....................42
Clearing All Memory Channels..................................43
Initializing Memory ....................................................44
■Partial Initialization (VFO) ............................... 44
■Full Initialization (MR) .....................................45
SCAN................................................................................ 46
Scan Resume Method...............................................46
Scan Operation.........................................................48
Locking Out Memory Channels................................. 48
Priority Scan..............................................................49
PTT ID............................................................................... 50
Switch PTT ID On/Off when receiving....................... 50
Switch PTT ID On/Off when transmitting...................51
Transmit PTT ID directly............................................ 52
Transmit PTT ID from Memory.................................. 53
DTMF ................................................................................ 54
Switch DTMF function On/Off....................................54
Transmit a DTMF code directly................................. 55
Transmit a DTMF code from DTMF memory.............56
Remote Stun/Remote Kill..........................................56
AUXILIARY FUNCTIONS ................................................. 57

Adjusting Squelch Level............................................57
Transmit Output Selection.........................................58
Changing Frequency Step Size ................................58
Hands-Free Operated (VOX) ....................................59
FM Radio .................................................................. 60
■Switch ON/OFF FM Radio Function ...............61
■Scan FM Radio Channel................................. 61
■Set Up FM Radio Memory Channels..............62
■Recall FM Radio Memory Channel.................62
TROUBLESHOOTING...................................................... 64

1
FOR YOUR SAFETY
Read these simple guidelines. Not following them may be
dangerous or illegal. Read the complete user manual for
further information.
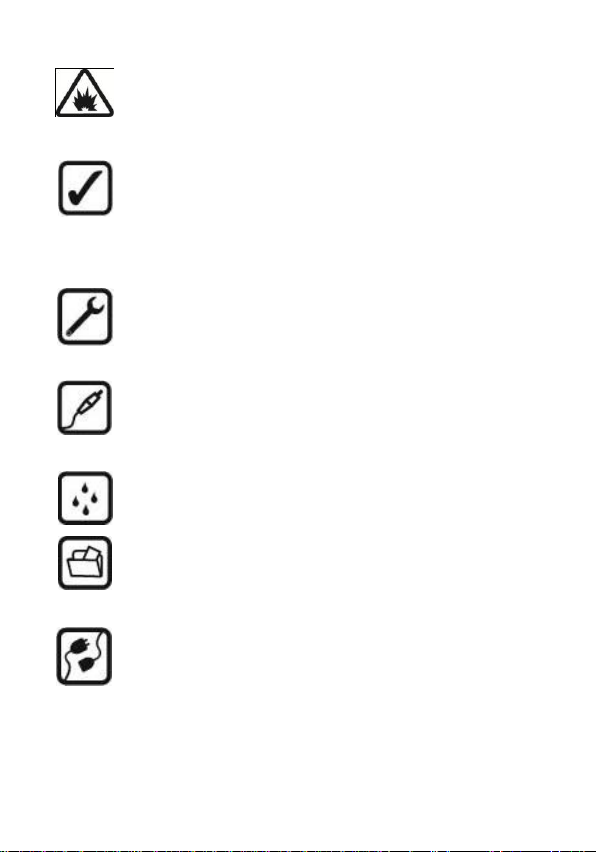
SWITCH ON SAFELY
Do not switch the device on when transceiver use is
prohibited or when it may cause interference or
danger.
ROAD SAFETY COMES FIST
Obey all local laws. Always keep your hands free to
operate the vehicle while driving. Your first
consideration while driving should be road safety.
INTERFERENCE
All wireless devices may be susceptible to
interference, which could affect performance.
SWITCH OFF IN HOSPITALS
Follow any restrictions. Switch the device off near
medical equipment.
SWITCH OFF IN AIRCRAFT
Follow any restrictions. Wireless devices can cause
interference in aircraft.
SWITCH OFF WHEN REFUELING
Do not use the device at a refueling point. Do not
use near fuel or chemicals.
2
SWITCH OFF NEAR BLASTING
Follow any restrictions. Do not use the device
where blasting is in progress.
USE SENSIBLY
Use only in the normal position as explained in the
product documentation. Do not touch the antenna
unnecessarily.
QUALIFIED SERVICE
Only qualified personnel may install or repair this
product.
ENHANCEMENTS AND BATTERIES
Use only approved enhancements and batteries.
Do not connect incompatible products.
WATER-RESISTANCE
Your device is not water-resistant. Keep it dry.
BACK-UP COPIES
Remember to make back-up copies or keep a
written record of all important information.
CONNECTING TO OTHER DEVICES
When connecting to any other device, read its user
manual for detailed safety instructions. Do not
connect incompatible products.
3
UNPACKING AND CHECKING EQUIPMENT
Carefully unpack the transceiver. We recommend that you
identify the items listed in the following table before
discarding the packing material. If any item is missing or has
been damaged during shipment, file a claim with the carrier
immediately.
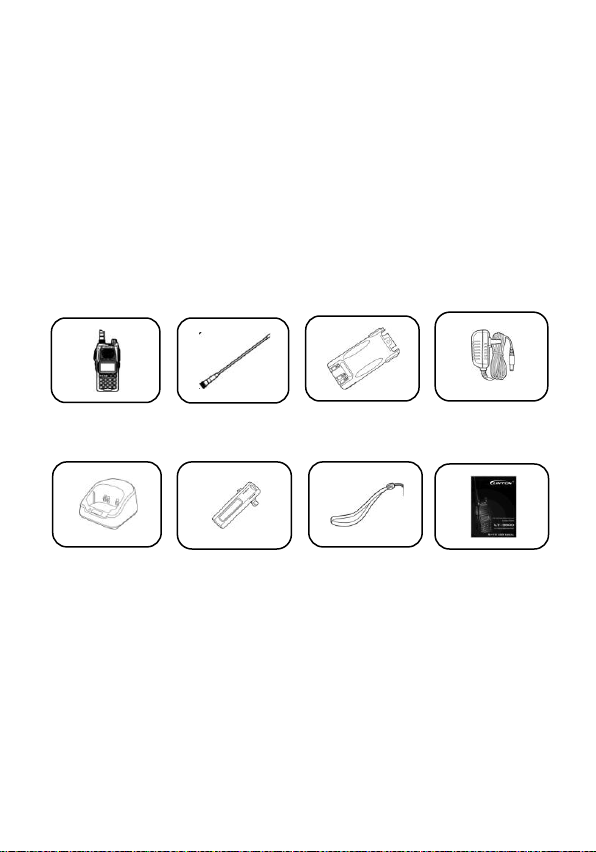
Packing Lists
Radio x1 Antenna x1 Battery Pack x1 Adapter x1
Desktop Stand x1 Belt Clip x1 Handstrap x1 User Manual x1

4
PREPARATION
Charging the Battery Pack
1. Using the Battery Pack.
The battery pack is not charged at the factory, please charge
it before use. To extend the battery pack lifetime, please
power off the transceiver and remove the battery pack when
not in use and leave the battery in hot or cold place.
2. Battery Pack Characteristics.
The battery will slowly wear out even not in use. After
charging and recharging, it's normal that the talk and
standby times are noticeably shorter than normal times. If
leaving the battery in very hot place or conditions, it will
reduce the capacity and lifetime of the battery. Overcharging
may also shorten its lifetime.
3. Charging the Battery Pack.
Please charge your battery only with approved LINTON
charger. Initially charging the battery pack after purchase or
extended storage (greater than 2 months) will not bring the
battery pack to its normal operating capacity. After repeating
the charge/discharge cycle two or three times, the operating
capacity will increase to normal level.

5
Please charge the battery pack as follows:
1. Make sure the battery pack contacts are in contact with
the charging terminals.
2. Slide the battery pack or transceiver with a battery pack
into the desktop charger.
3. The charging LED lights red and charging begins.
4. After charging about 4 hours, when the light turns to green,
it means the battery pack is fully charged.
5. Then you can take off the battery pack or transceiver with
the battery pack and use it.
6
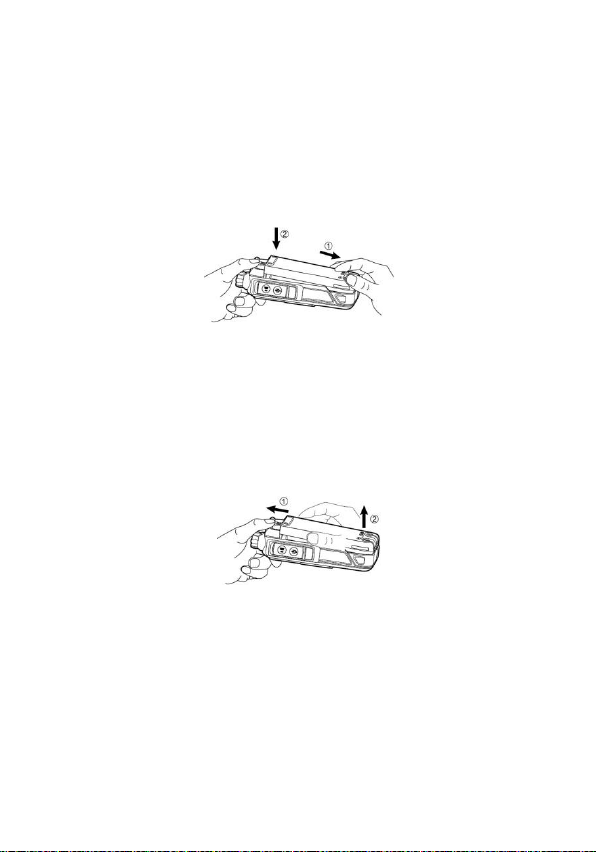
Installing/Removing the Battery Pack
To install the battery pack, Fit the extensions at the bottom of
the battery into the slots at the bottom of the transceiver’s body.
Press the top part of the battery towards the transceiver until a
“click” sound is heard.
To remove the battery pack, Slide the battery latches, on both
sides of the battery, downwards. Pull the top part of the battery
away from the transceiver’s body, and lift the battery from the
transceiver’s body.

7
Attaching/Removing the Antenna
1. Screw the antenna into the connector on the top of the
transceiver by holding the antenna at its base and turning it
clockwise until secure (Figure 1).
2. Turn the antenna counter clockwise until you can remove
it (Figure 2).
(Figure 1) (Figure 2)

8
Installing the Belt Clip
If necessary, insert the belt clip at the back of battery pack.
Installing the Earphone
Insert the speaker/ microphone plug into the speaker
/microphone jacks.
Installing Hand Strap
If necessary, you can install the hand strap in the back of
transceiver in order to easy carry.

9
GETTING ACQUAINTED
Orientation

10
1.Power Switch/Volume Control
Rotate clockwise to switch power On or to increase the
audio output level; Rotate counter-clockwise to switch
power Off or to reduce the audio output level.
2.TX/RX Indicator
Lights red while transmitting; Light green while receiving a
signal.
3.Programming Key (P1)
The default setting of long key is Emergency Alert
function. Long press to switch the emergency alert
function ON, press [PTT] to switch OFF.
The default setting of short key is Null function.
4. Antenna
Rubber antenna using for receiving or transmitting a signal.
5. Hand Strap Hook
The loop on the top of belt clip, it is facilitated to carrying
the transceiver.
6. Speaker
Output the audio.
7. Internal Microphone
Input the audio signal while you talk.
8.LCD Display
On the display you will see various indicators which show
what function you have selected.
9.Keypad
Input frequency, memory channel or function selection etc.
10.PTT Switch

11
Push and hold to transmit, release to receive.
11.Programming Key (P2)
The default setting of short key is Lamp function. Push to
light the LCD backlight, re-push to turn OFF the backlight.
The default setting of long key is Null function.
12. Programming Key (P3)
The default setting of short key is Squelch ON/OFF
function. In receiving mode, press this key to monitor the
operating frequency or memory channel.
The default setting of long key is Null function.
13.Battery Lock Button
Use to lock/unlock the battery pack
14.Earphone/ Data Cable Jack
Connects an earphone; or connects a data cable for PC
software programming.
15.Li-ion Battery Pack
Supply the power to the transceiver.

12
Programmable Auxiliary Functions
Your dealer may program the [P1]/[P2]/[P3] (long press) as
long keys and the [P1]/[P2]/[P3] (short press) as short keys
with one of the following auxiliary functions respectively.
No.
Indicator
Description
1
NONE
No function.
2
SQ OFF
Press the programmed Squelch Off
key to open noise squelches. Press
it again to close.
3
CALL
When already switch DTMF feature
ON, press and hold the programmed
Call feature key, then press one
number from 0~9 via keypad to
transmit the stored DTMF code
signaling.
4
SCN SW
Press the programmed Scan feature
key to star scanning, press any
other than [UP]/[DOWN] key to quit
scan.
5
LAMP
Press the programmed Lamp
feature key to turn ON/OFF the
background lamp of keypad or LCD
display.
6
ALARM(*)
Press the programmed Emergency
feature key to emit emergency
alarm.

13
7
1750Hz(*)
Press and hold the programmed
1750Hz feature key to transmit a
1750Hz signal; release to stop
transmitting.
8
RPT MIC(*)
When in repeater mode, press and
hold this key to transmit the current
microphone signal.
9
AUX PTT(*)
Press and hold this key to transmit
the frequency or channel of auxiliary
working band.
10
SQ MOM
Press the programmed Squelch Off
Momentary key to open noise
squelch. Release it to close.
Note:
●You can set the time of pressing long key from 0.5-2.5
seconds(default: 1 second) with programming software, when you
press anyone of [P1]/[P2]/[P3]keys, the time of pressing is over your
setting time, then it’s a long time key, otherwise, it’s a short key.
●For marked items with (*), these functions only to be programmed
when it’s a long key.
The default programmed feature:
Key
Short Press
Long Press
P1
NONE
ALARM
P2
LAMP
NONE
P3
SQ OFF
NONE

14
Working Band
There are two main working band and four working band for
selection, choose the correct working band is essential in
order to operate smoothly.
■Change Main Working Band
Press [F]+[0] key to change Band A and Band B.
●Aor Bwill appear on LCD display and show you the current main
working band.
■Change Working Band
After confirmation of main band, you can select the current
working bank. In VFO mode, press [F]+[MENU] key to
change between B1, B2, B3 and B4 orderly, press many
times to select your desired working bank.
●The current main working band and working bank will appear on
LCD display.
●You can change the working bank only in VFO mode, in
MR/CH/NM mode, you can’t change working band.
●You can’t change working band when scan function is enable, if
you would like to change working band, please press [PTT] button
to stop scan.
Band(Abbr.)
Indicator
TX(MHz)
RX(MHz)
The First Band(B1)
b-1
No
87.500~108.000
The Second Band(B2)
b-2
136.000~174.000
136.000~174.000
The Third Band(B3)
b-3
No
200.000~260.000
The Fourth Band(B4)
b-4
400.000~470.00
400.000~470.000

15
■Dual Frequency/Dual Display/Dual Standby(DW)
In order to monitor dual frequency or dual channels, you can
use DW function.
1.After confirmation of main working band, press [Menu] key
to access menu system, use [UP]/[DOWN] key to select
Menu No.13 and press [F] key to confirm selection.
●The menu appears.
2.Use [UP]/[DOWN] key to switch DW function ON/OFF.
3.Press [F] key to finish and press [PTT] button to exit setting
mode.
●When “DW”appears on LCD display, it means the DW function is
already switched ON, otherwise, the DW function is switched OFF.
Note:
When switch DW function ON, your transceiver will automatically
scan the current two working band, when detecting a signal, remains
for approximately 3 seconds, and then continues to scan.
Table of contents
Other Linton Transceiver manuals


