Linton LD-500 Instruction Manual

User Handbook (INSTRUCTION MANUAL)

UHF TRANSCEIVER
LD-500

ABOUT CE
CE Versions of the LD-500 which display the “CE” symbol on the serial
number seal ,comply with the essential requirements of the European Radio and
Telecommunication Terminal Directive 1999/5/EC.
This warning symbol indicates that this equipment operates in nonharmonised
frequency bands and /or may be subject to licensing conditions in the country of
use.Be sure to check that you have the correct version of this radio or the
correct programming of this radio,to comply with national licensing
requirement.
INSTALLATION NOTES
•SAR compliance for body-worn operations is restricted to belt-clips,
holsters or similar accessories that have no metallic component in the
assembly and must provide at least 1.5 cm separation between the
device and the user’s body."
FOREWORD
Thank you for purchasing the LD-500 FM transceiver.
READ ALL INSTRUCTIONS carefully and completely before using the
transceiver.
i

SAVE THIS INSTRUCTION MANUAL-This instruction manual contains
important operating instructions for the transceiver.
IMPORTANT
CAUTION! NEVER hold the transceiver so that the antenna is very close
to,or touching exposed parts of the body, especially the face or eyes,while
transmitting.The transceiver will perform best if the microphone is 5 to 10 cm
away from the lips and the transceiver is vertical.
CAUTION! NEVER operate the transceiver with a headset or other audio
accessories at high volume levels.
CAUTION! NEVER short the terminals of the battery pack..
DO NOT push the PTT when not actually desiring to transmit.
AVOID using or placing the transceiver in direct sunlight or in areas with
temperatures below -10 or above +50 .℃℃
The basic operations,transmission and reception of the transceiver,are
guaranteed within the specified operating temperature range (depending on
version).
DO NOT modify the transceiver for any reason.
KEEP the transceiver from the heavy rain,and Never immerse it in the water.
The transceiver construction is water resistant,not water proof.
The use of non-lcom battery packs/chargers may impair transceiver
performance and invalidate the warranty.
The device may only be used in an occupational environment
The transmitter frequencies can only be programmed in the factory
and that the user of the device cannot change the frequencies
programmed into the device
ii
Professional

TABLE OF CONTENTS
ABOUT CE.................................................................................................ⅰ
INSTALATION NOTES............................................................................ⅰ
FOREWORD.........................................................................................ⅰ-ⅱ
IMPORTANT..............................................................................................ⅱ
TABLE OF CONTENTS............................................................................ⅲ
1 ACCESSORIES........................................................... ............................1
2 PANEL DESCRIPTION.......................................................................2-3
■Switches,controls,keys and connectors....................................................3
3 BATTERY PACKS.......................................................................... .....4-7
■Battery pack replacement................................................................. ........4
■Battery cautions................................................................................. .......5
■Battery charging............................................. .................................... .....6
■Charging NOTE............................................ ..................................... ......7
4 PROGRAMMABLE FUNCTIONS............................................... .... 8-11
5 CONVENTIONAL OPERATION.................................................... 12-14
■Receiving and transmitting.................................................................. ...12
■Call procedure........................................................................ .................13
■Transmitting notes............................................................................ .......14
6 CLONING..................................................................................................15
7 OPTIONS..............................................................................................16-17
■Options................................................................... ............................16-17
iii
ACCESSORIES 1
■Accessory attachment
Supplied accessories◇
The transceiver comes supplied with the following accessories.
Flexible antenna①(may differ according to version)
Belt clip②
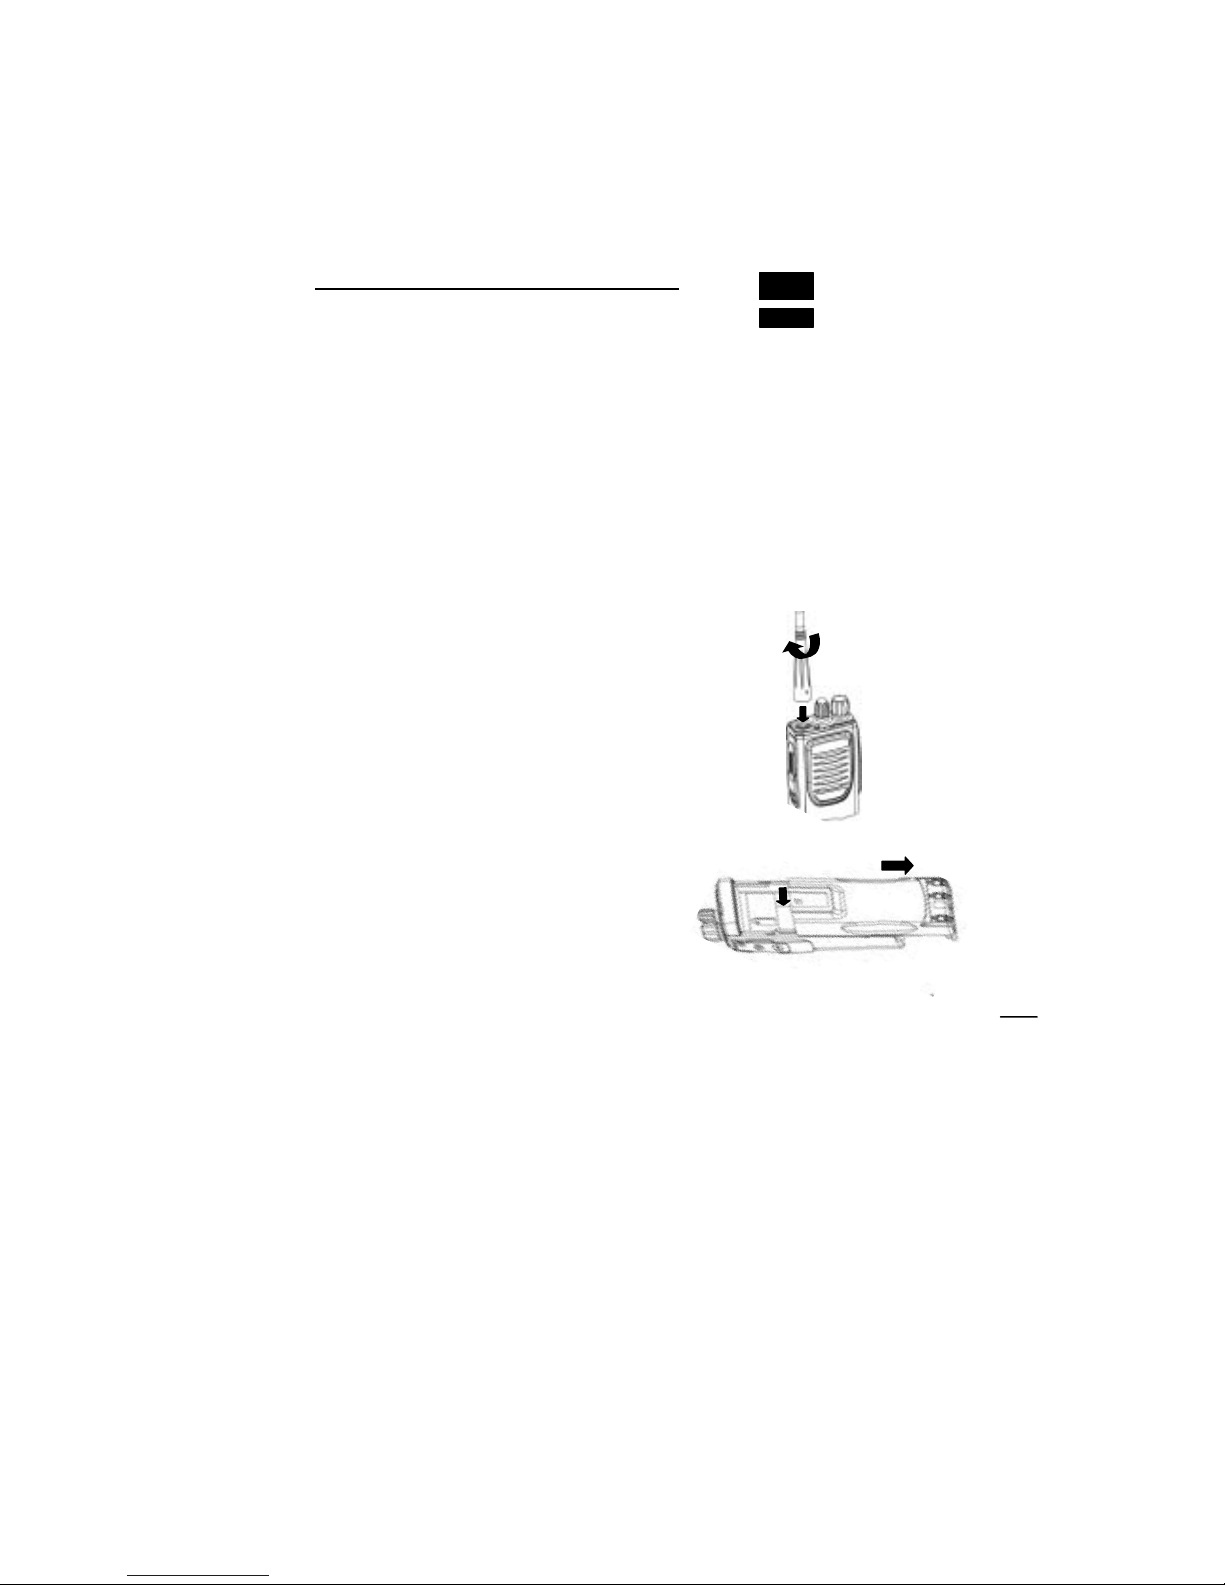
Antenna◇
The antenna screws onto the transceiver as illustrated right.
1

2PANEL DESCRIPTION
■Switches, controls,keys and connectors

PANEL DESCRIPTION 2
nROTARY SELECTOR [SEL]
Selects operating channel,or bank, depends on setting.
oDEALER-PROGRAMMABLE KEY [F0 (Red)]
pANTENNA CONNECTOR
Connects the supplied antenna.
qPTT SWITCH [PTT]
Push and hold to transmit;release to receive.
rMicrophone
sDEALER-PROGRAMMABLE KEYS [F2(Black)],[F3 (Black)]
•Push to select the operating channel.
•Can be programmed as []/[#].(SmarTrunk mode only)
tVOLUME CONTROL [VOL]
Turns power ON and adjusts the audio level.
uTRANSMIT/BUSY INDICATOR
Lights red while transmitting;lights green while receiving a signal, or
squelch is open.
vMULTI CONNECTOR
Connect optional speaker-microphone,etc..
aSpeaker
3

BATTERYPACKS 3
■Battery pack replacement
Before replacing the battery pack, the volume control MUST be rotated fully
counterclockwise, until a click is heard,to turn the power OFF.
• Slide the battery release forward,then pull the battery pack upward with the
transceiver facing you.
◇BATTERY PACKS
Charging period
Battery
pack Voltage Capacity BC-137
BC-119 or
BC-121
with AD-94
Battery life*
BP-208 Battery case for
AA(R6)X6 alkaline N/A N/A __
BP-209 7.2V 1100 mAh 15 hrs. 1.5 hrs. 7 hrs.
BP-210 7.2V 1650 mAh 15 hrs. 2.0 hrs. 11 hrs
*1Battery life is calculated under the following conditions;
Tx:Rx:standby=5:5:90
* Operating period depends on alkaline cells used.
4

3BATTERY PACKS
■Battery cautions
•CAUTION! NEVER short terminals (or charging terminals)of the battery
pack. Also,current may flow into nearby metal objects such as a necklace,so be
careful when placing battery packs (or the transceiver) in handbags, etc.
Simply carrying with or placing near metal objects such as a necklace, etc.
causes shorting .This will damage not only the battery pack, but also the
transceiver.
•NEVER incinerate used battery packs. Internal battery gas may cause an
explosion.
•NEVER immerse the battery pack in water.If the battery pack becomes wet,be
sure to wipe it dry BEFORE attaching it to the transceiver.
•Clean the battery terminals to avoid rust or miss contact.
•Keep battery contacts clean. It's a good idea to clean battery terminals once a
week.
If your battery pack seems to have no capacity even after being charged,
completely discharge it by leaving the power ON overnight.Then, fully charge
the battery pack again. If the battery pack still does not retain a charge (or only
very little charge),a new battery pack must be purchased.(p.9)
5
BATTERY PACKS 3
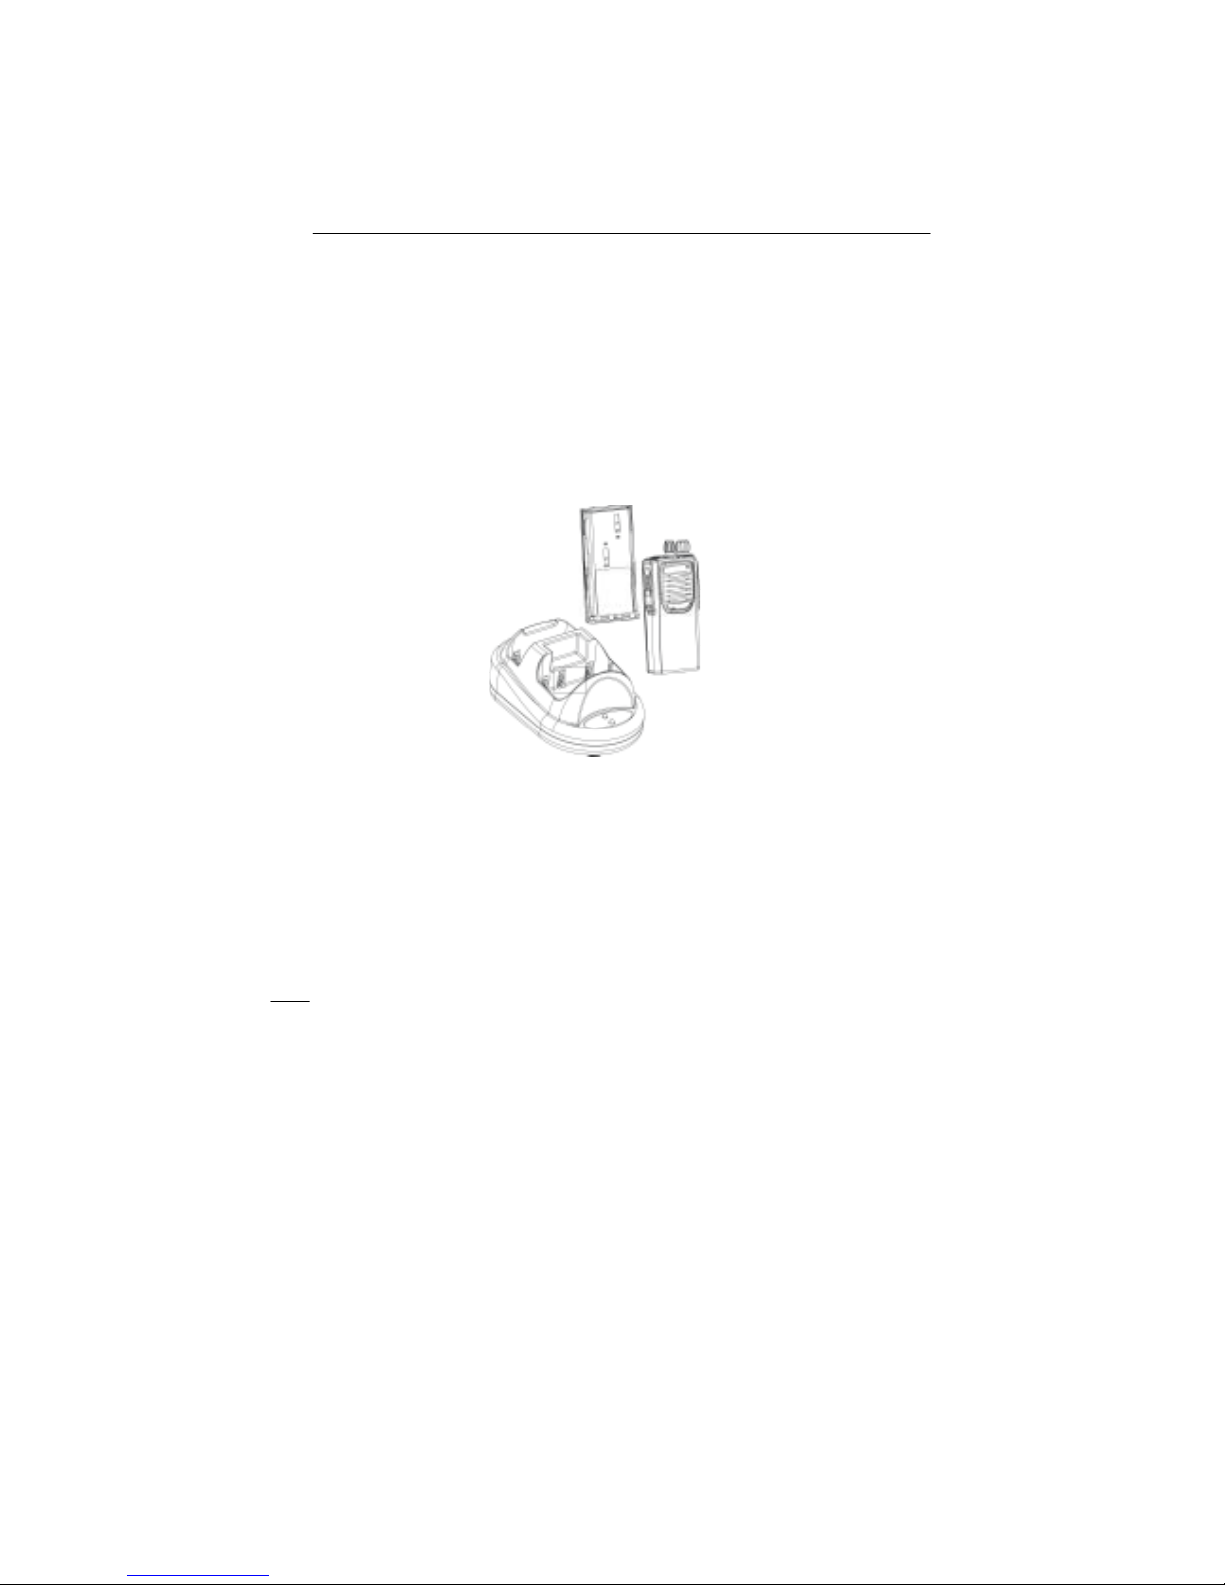
■Battery charging
Rapid charging with the LD◇-850
The optional LD-850 provides rapid charging of optional battery packs.
The following are additionally required:
•One LD-850
•An AC adapter(may be supplied with the LD-850 depending on version).
When using the LD-850 in a vehicle:If the charge indicator flashes orange, the
vehicle battery voltage is low and charging may not be performed. Check the
vehicle battery voltage in this case. If the charge indicator flashes red, there
may be a problem with the battery pack (or charger).Re-insert the battery pack
or contact your dealer.
6
Turn power
OFF.
LD-850
Check orientation for
correct charging.(Insert
together with charging
adapter.

BATTERY PACKS 3
■Charging NOTE
Prior to using the transceiver for the first time,the battery pack must be fully
charged for optimum life and operation.
•Recommended temperature range for charging:
+10 to +40 (50℃℃°F to 140°F).
•Use the supplied charger only.NEVER use other manufacturers’ chargers.
The LD-950 ba’ttery packs include rechargeable batteries and can be charged
approx. 300 times.Charge the battery pack before first operating the transceiver
or when the battery pack becomes exhausted.
If you want to charge the battery pack more than 300 times,the following points
should be observed:
•Avoid over charging. The charging period should be less than 48 hours.
•Use the battery until it becomes almost completely exhausted under normal
conditions. We recommend battery charging after transmitting becomes
impossible.
◇Battery pack life
When the operating period becomes extremely short even after charging the
battery pack fully, a new battery pack is needed.
7

PROGRAMMABLE FUNCTIONS 4
S◇CAN FUNCTION
The scan function allows you to search a pre-programmed group of channels
for signals.
Push the [Scan] switch to start/stop scan.
•Scan pauses on a channel when receiving a signal.
•Depending on programming,a message may appear while scanning.
•“Lockout SCAN”(pre-programmed list SCAN)or “Priority SCAN” can be pre-
programmed.
•when the “Power-save function”is activated,the transceiver checks all pre-
programmed channels then returns to the “Power-save function”again.
8

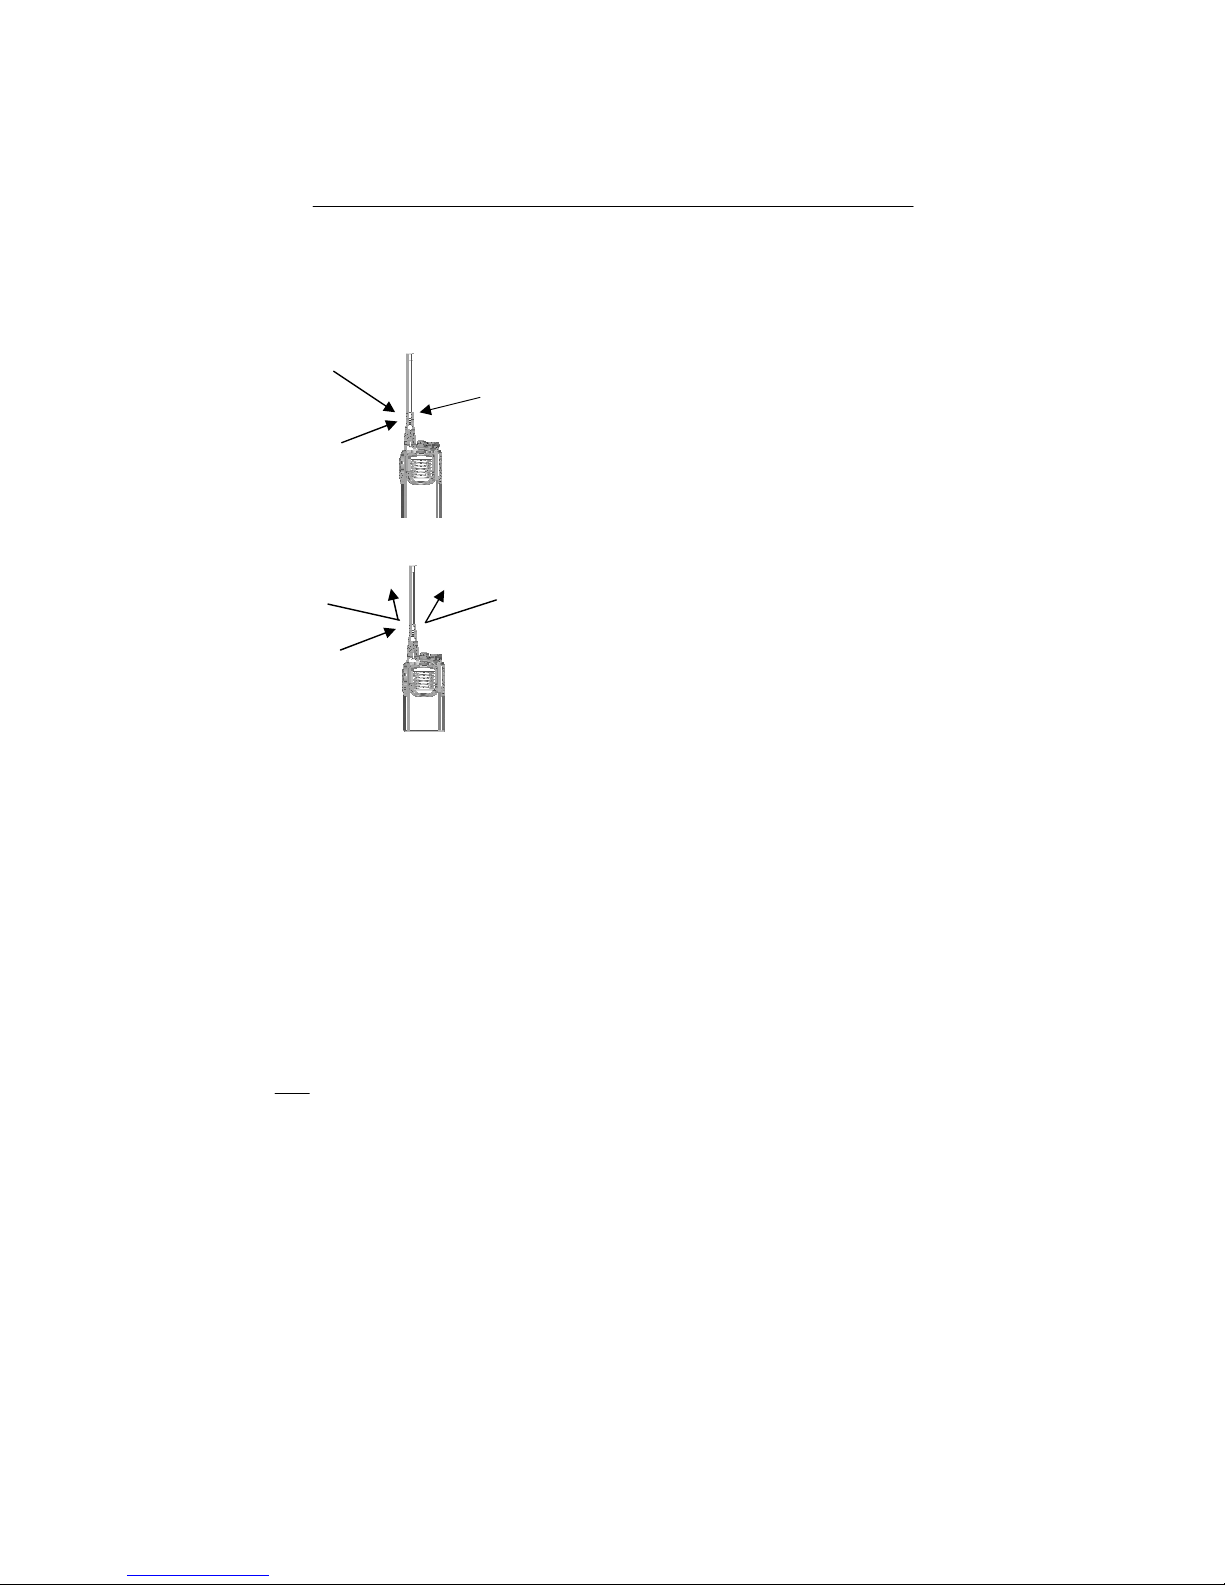
Audible condition:
This condition mutes audio ONLY when no
carrier is present. You can receive (or
monitor) any signals on a channel.
• Push and hold the [Moni(Audi)],switch to
select the audible condition.
Any audio mute functions are cancelled while
pushing the [Moni(Audi)]switch.
Inaudible condition:
This condition mutes ALL signals except
those directed to you .Therefore you should
check a channel's condition (busy or not)
with the monitor function before
transmitting.
• Push the [Moni(Audi)],switch
momentarily to select the inaudible
condition.
PROGRAMMABLE FUNCTIONS 4
◇MONITOR AUDIBLE FUNCTION
The monitor function allows you to open the transceiver’s squelch manually to
check whether a channel is busy or not. The transceiver has 2 conditions for
receive standby:
◇TALK AROUND
The talk around function changes duplex channels to simplex channels.
• Duplex allows you to contact your base station,repeaters,etc.
• Simplex allows you to contact other portable transceivers directly(portable-to-
portable contact).
Push the [Talk Around] switch to toggle the function ON and OFF.
All signals are received.
Only signals containing the
proper tone are received.
10

4 PROGRAMMABLE FUNCTIONS
◇EMERGENCY FUNCTION
The emergency function allows you to send your ID quickly and easily to your
Base Station,etc. in case of emergency.
Push and hold the [Emergency Single/Repeat] switch for 1 sec. to activate the
emergency function.
• The transceiver selects a pre-programmed channel,then sends an emergency
signal to your Base Station.
• The pre-programmed channel remains selected until a control signal is
received from the Base Station,or power is turned OFF.
• The emergency call is repeatedly transmitted at pre-programmed intervals.
11

5 CONVENTIONAL OPERATION
■Receiving and transmitting
NOTE:Transmitting without an antenna may damage the transceiver. See p.1
for antenna attachment.
Turn power ON as described on p.1.
Receiving:
①Rotate the [SEL] to select a channel.
②Listen for a transmission and adjust [VOL] to a comfortable listening level.
•When no transmission is heard,push and hold monitor while adjusting
[VOL].
The transceiver is now set to receive desired calls on the selected channel.
Transmitting:
Wait for the channel to become clear to avoid interference.
③While pushing and holding [PTT],speak into the microphone at a normal
voice level.
•When a tone signalling system is used,the call procedure described at right
may be necessary.
④Release [PTT] to return to receive.
IMPORTANT:To maximize the readability of your transmitted signal,pause a
few seconds.after pushing[PTT], hold the microphone 5 to 10
cm from your mouth and speak at a normal voice level.
12

CONVENTIONAL OPERATION 5
■Call procedure
Selective callin
g
Non-selective callin
g
13

5CONVENTIONAL OPERATION
■Transmitting notes
◇TIME-OUT TIMER
After continuous transmission for a pre-programmed period,the time-out
timer is activated,causing the transceiver to stop transmitting and
automatically select receive.
◇PENALTY TIMER
Once the time-out timer is activated,transmission is further inhibited for a
period determined by the penalty timer.
14

6CLONING
■Cloning
Cloning allows you to quickly and easily transfer the programmed contents
from one transceiver to another transceiver; or data from PC to a transceiver
using the optional CS-F30G CLONING SOFTWARE.
◇PC-to-transceiver cloning
Please refer to the HELP file that comes with the CS-F30G CLONING SOFTWARE.
CAUTION:Imprudent cloning operation causes a cloning error. In such a
case, memory contents may be lost. Cloning must then be repeated.
15
Table of contents
Other Linton Transceiver manuals


