Lloyd LT48N User manual

Gujarat:1800-2582-583 | Maharashtra:1800-1024-212
Punjab/Himachal/J & K:1800-1377-781 | South India:1800-1200-666 | Rest of India:1800-1020-666
Tower Air Conditioner

product.

CONTENTS
Safety Precautions
Parts Description
Other operations
Items of attention
Maintenance
1
2
4
4
6
10
10
12
13
15
16
16
Test running
Packing list
Installation Guide
Selection of the installing position
Installation the air-conditioner
Pipe and drain pipes connection
Wiring connection
Expelling the air
9

- 1 -
Don’ t apply the cold air to the body for a long time.It will deteriorate your physical
conditions and cause health problems.
CAUTION
Clean the air conditioner with a piece of soft and dry cloth.Don’t use these stuffs
for cleaning: chemical solvent, insecticide,inflammable spraying materials which
will damage the appearance of air conditioner .Don t sprinkle water directly on
the indoor unit.
,
WARNING
Safety Precautions
Read and understand thoroughly this safety awareness before use.
The items indicated here are very important safety precautions, which must be followed.
!
The air conditioner must be grounded .Incomplete grounding may result in
electric shocks.Do not connect the earth wire to the gas pipeline,water
pipeline,lightning rod,or telephone earth wire.After installment,earth leakage
examination must be carried on through electrifying.
An earth leakage breaker with rated capacity must be installed to avoid possible
electric shocks.
!
Don’ t install air conditioner in a place where there is flammable gas
or liquid. It may cause fire.
Don’ t put a finger, a rod or other object into the air outlet or inlet.
As a fan is rotating at a high speed, it will cause injury.
It may clamp your finger and damage the driving parts of the wind vanes.
Don’ t touch the swinging wind vanes.
Don’ t attempt to repair the air conditioner by yourself.
You may be hurt or cause further malfunctions.
In lighting storm weather, please cut off the primary power supply switch
in order to prevent the machine from damage.
Don’ t use liquid or corrosive detergent clean the appliance and don’ t
splash water or other liquid onto it , otherwise, it may damage the plastic
components, even cause electric shock.
Close the windows and doors, otherwise,
weakened.
the cooling or heating capacity will be
If the air filter is very dirty, the cooling or heating capacity will be weakened
Please clean the air filter regularly .
.
This appliance can be used by children aged from 8 years and above and
persons with reduced physical, sensory or mental capabilities or lack of
experience and knowledge if they have been given supervision or instruction
concerning use of the appliance in a safe way and understand the hazards
involved. Children shall not play with the appliance. Cleaning and user
maintenance shall not be made by children without supervision.
!
!
!
!
!
!
!
!

Indoor unit
Parts Description
Notice:
The descriptions in this user manual are text and figures may have slightly difference
to the promotion information and actual appliance. Please refer to the real appliance
purchased.Thank you.
Notice:
Don't let the child touch the air-conditioner to avoid the possible danger.
Keep the indoor unit and the remote controller dry to avoid short circuit ,even fire accident.
An all-pole disconnection device which has at least 3mm separation distance in all-pole shall
be incorporated in the fixed wiring according to the safety rule.
Children should be supervised to ensure that they do not play with the appliance.
This appliance is not intended for use by persons (including children) with reduced physical,
sensory or mental capabilities, or lack of experience and knowledge, unless they have been
given supervision or instruction concerning use of the appliance by a person responsible
for their safety.
- 2 -

- 3 -
Controlling panel
Mid

4
In order to guarantee an even diffusion of the air in the room, you can choose one way as
follows to control:
1.By pressing the button of swing you can control to move the louver alternatively from
up to down and adjust the air flow direction. The louver direction can be set as to the
sequence while you press the button each time.
Up-down-left-right Direction Lock louver Left-right Direction Lock louver
Up-down direction Lock louver.
2.You can adjust the louver direction to desired direction by pressing the
or swing button on remote controller.
Please see the remote controller buttons for function al introduced.
→ → → →
→
“ ”
“ ”
Left/Right wind
description
Other operations
NOTE :Adjusting the vertical louvers manually in automatically-controlled operation
may damage the servo-motor.
Fig. A Fig. B
Items of attention
Please read this instruction before using the air conditioner, you are strict to operate
according to the instruction. Otherwise, it may be damage to the air conditioner or to the other
person's safety and property.
carefully
Checking Before usage
★
See “air conditioner remote controller instruction”.
Remote controller usage
Wind direction adjustment
Set the suitable temperature for a comfortable environment. Don't make the room too cold
or too hot.
During the cooling operation, don't let the sunray into the room, please pull down the window
shades or veils.
Close the windows and doors. Otherwise, it decreases its cooling or heating capacity.
Optimal operation
Pay attention to the following items so as to ensure optimal operation of the system, detailed
operation see the relevant content.
Please set the scheduled operation time with the remote controller.
Make sure that air outlet and inlet are not blocked, or it may decrease the efficiency of the
air-conditioner,even stops the operation of the system.
If the air filter is blocked, the cooling or heating capacity will be affected.Please regularly
clean the air filter.
1.Make sure that the earth wire is connected safely and reliably.
2.Make sure the filter net is properly fixed.
3.Make sure that air outlet and inlet are not blocked.
4.Please clean the filter before starting the air-conditioner referring to page to 6
“Cleaning”for how to operate.
5.Check to see whether the outdoor install bracket is damage. if yes, please contact our
Service center locally.
When you electrified the A/C at the first time. The screen display full screen, the guide baffles
go to the place. Then the deflecting damper will auto-dose. In all process, Please do not more the
corner vane aud deflecting damper by hand.
★
- 4 -

★
1.Installation should always be carried out by specialist. The customers should not install
the air-conditioner by themselves. Otherwise, it may cause damage or injury.
2.In order to use the air conditioner properly, please refer to its working temperature range.
Otherwise, indoor unit automatic protection function may be activated, cooling or
heating efficiency will be weakened.
Safety tips
3.Set the suitable temperature, especially there are old people, children and patients in the
room. Generally, keep the temperature difference for 5℃ between the inside and outside.
4.In case that the unit occurs closing down due to the severe interference from outer
environments such as mobile phone, please cut off the plug and plug in to restart the
air conditioner after several seconds .
5.Never expose animals or plants to direct air flow, and adjust the air flow to avoid air
blowing directly at people.
6.It is forbidden to let the air conditioner blow wind to the cookers, or it may effect the
normal cooking and even cause danger!
The air-conditioner may can t run in normal followed under mentioned table
Cooling
Heating
Indoor
Outdoor
Indoor
Outdoor
<18℃
>43℃(A )pply to constant speed
>30℃
<-7℃(A )pply to constant speed
>32℃
>54℃(A T3)pply to
- 5 -
★Auxiliary Electric Heater and other Instruction
1:Electric Heating Tube
2:One-time Fuse
3:Resettable Protector
2
3
1
1.The Fuse type and rated value to screen the corresponding controller or insurance on the
subject.
2.Auxiliary Electric Heater assembly in the leeward surface near the indoor evaporator ,
which belongs to the tubular metal electric heating element, The nameplate data power for
air conditioner are affixed shall prevail.
3.Auxiliary electric distance between heater and the shell keep 5cm, to prevent causing
combustion.
4.Auxiliary electric heater is installed on the left and right fixed seat, electric heating tube,
a one-time fuse and The Resettable protector if damaged, should ask professional personage
to replace, and the use of the company to provide components.
5.The interconnection of the connecting method of air conditioner and power line and each of
the independent components in air conditioner, posted on the circuit diagram shall prevail.
6.All indoor machine control panel with fuse.3.15A 250V (The fuse of floor standing model
with capacity for 12000W is 5A 250V)
Note: only instructions for auxiliary heating function apparatus。

!Note : Don't repair the air-conditioner or change the power conductor by yourself to avoid
the possible danger.
Non-air-conditioner trouble
★
The normal protections of the air-conditioner
The compressor don t restart after stop operating in 3 minutes.
In the heating mode, the indoor unit won t send wind or operate in low wind ,if the heat
exchanger of indoor unit hasn't reached the stipulated temperature in the following three
states, so as to prevent the cold wind.
1.Compressor protection
Cold wind prevention (heat pump type )
①The heating operation just starts ②Frost dissolving operation
③Operating under low temperature
When the temperature is low and humidity is high outdoors, the heat exchanger of outdoor
unit may frost, which may decrease the heating capacity. In such case, the air-conditioner
will stop the heating operation and convent to automatic frost dissolving, and then resume
heating after the frost dissolving finished.
Frost dissolving operation (heat pump type )
Failure type and methods of resolution
★
In case the following situation, please immediately stop the operation of the air-conditioner and
cut off the power supply, then contact with distributor.
Failure
type
The RUN light or other display light flashes rapidly and keep flashing after the plug is
taken off and then plugged in.
The fuse blows repeatedly or the circuit breaker is activated repeatedly.
Outside object or water comes into the air-conditioner.
The remote controller doesn't work or the switch operates unusually .
Other abnormal phenomenon.
In case that following situations, please deal with it according to the following methods, if it does
not work, please contact with distributor and inform the detailed failure.
Failure
Startup
failure
Causes Methods of resolution
Power supply failure
Wait for the recovery of power supply
The power switch is released Switch on the power
The fuse is burnt Replace the fuse
The battery is exhausted
It doesn't reach the set time for start up
Replace the battery
Wait or eliminate the original setting
The wind
blowing
out, but the
cooling or
heating
effect
is bad
Mistakes in temperature setting
The air filter is blocked by dust
The air inlet or outlet of machine is blocked
Set a proper temperature, see the
methods of application
Clean the air filter
Remove the obstruction
The doors or windows are open Close the doors and windows
The wind
blowing
out, but it
doesn't
refrigerate
The air inlet or outlet of machine is blocked
Remove the obstruction, then restart it
Compressor has three minutes protection
Wait
Mistakes in temperature setting Set a proper temperature
Maintenance
- 6 -

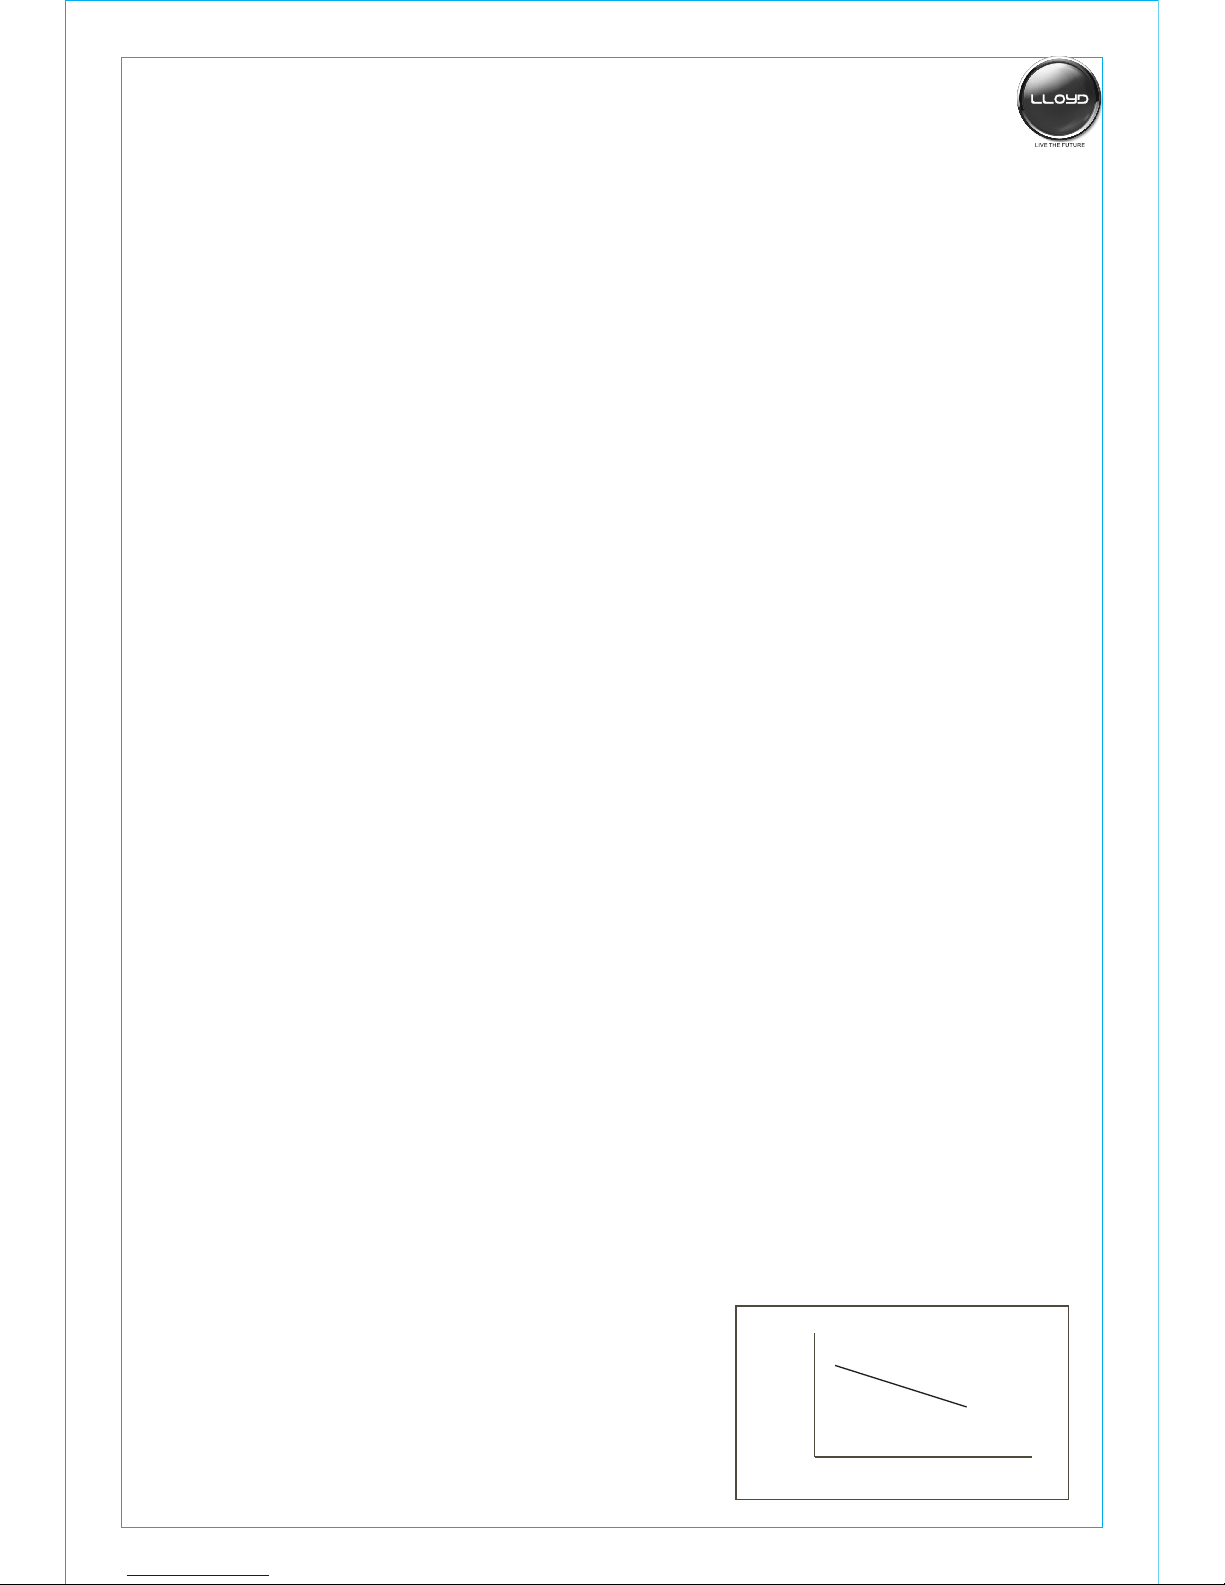
8.Heating operation (heat pump type )
During the heating operation ,the heat pump airconditioner operates with the princ iple of
absorbing heat from outdoor and release heat into indoor. When the outdoor temperature falls,
the heating capacity decrease accordingly because the heat absorbed from outdoor decreases
(See the figure on the right).At the same time, the
temperature difference between indoors and outdoors
is enlarged, so that the heating load increase accordingly.
If the air-conditioner can not reach a satisfactory effect,
it is recommended that other heating devices beused
together.
Heating capacity
High
Low High Low
Outdoor temperature
7.If you select the cooling operation in a relatively damp environment (relative humidity is higher
than 80%),dew may be formed over the surface of indoor unit and drop. In such a case, please
adjust the vertical wind vanes to its maximum ventilation Position and choose“high” to reduce
the dew.
2.White steam comes out from the indoor unit
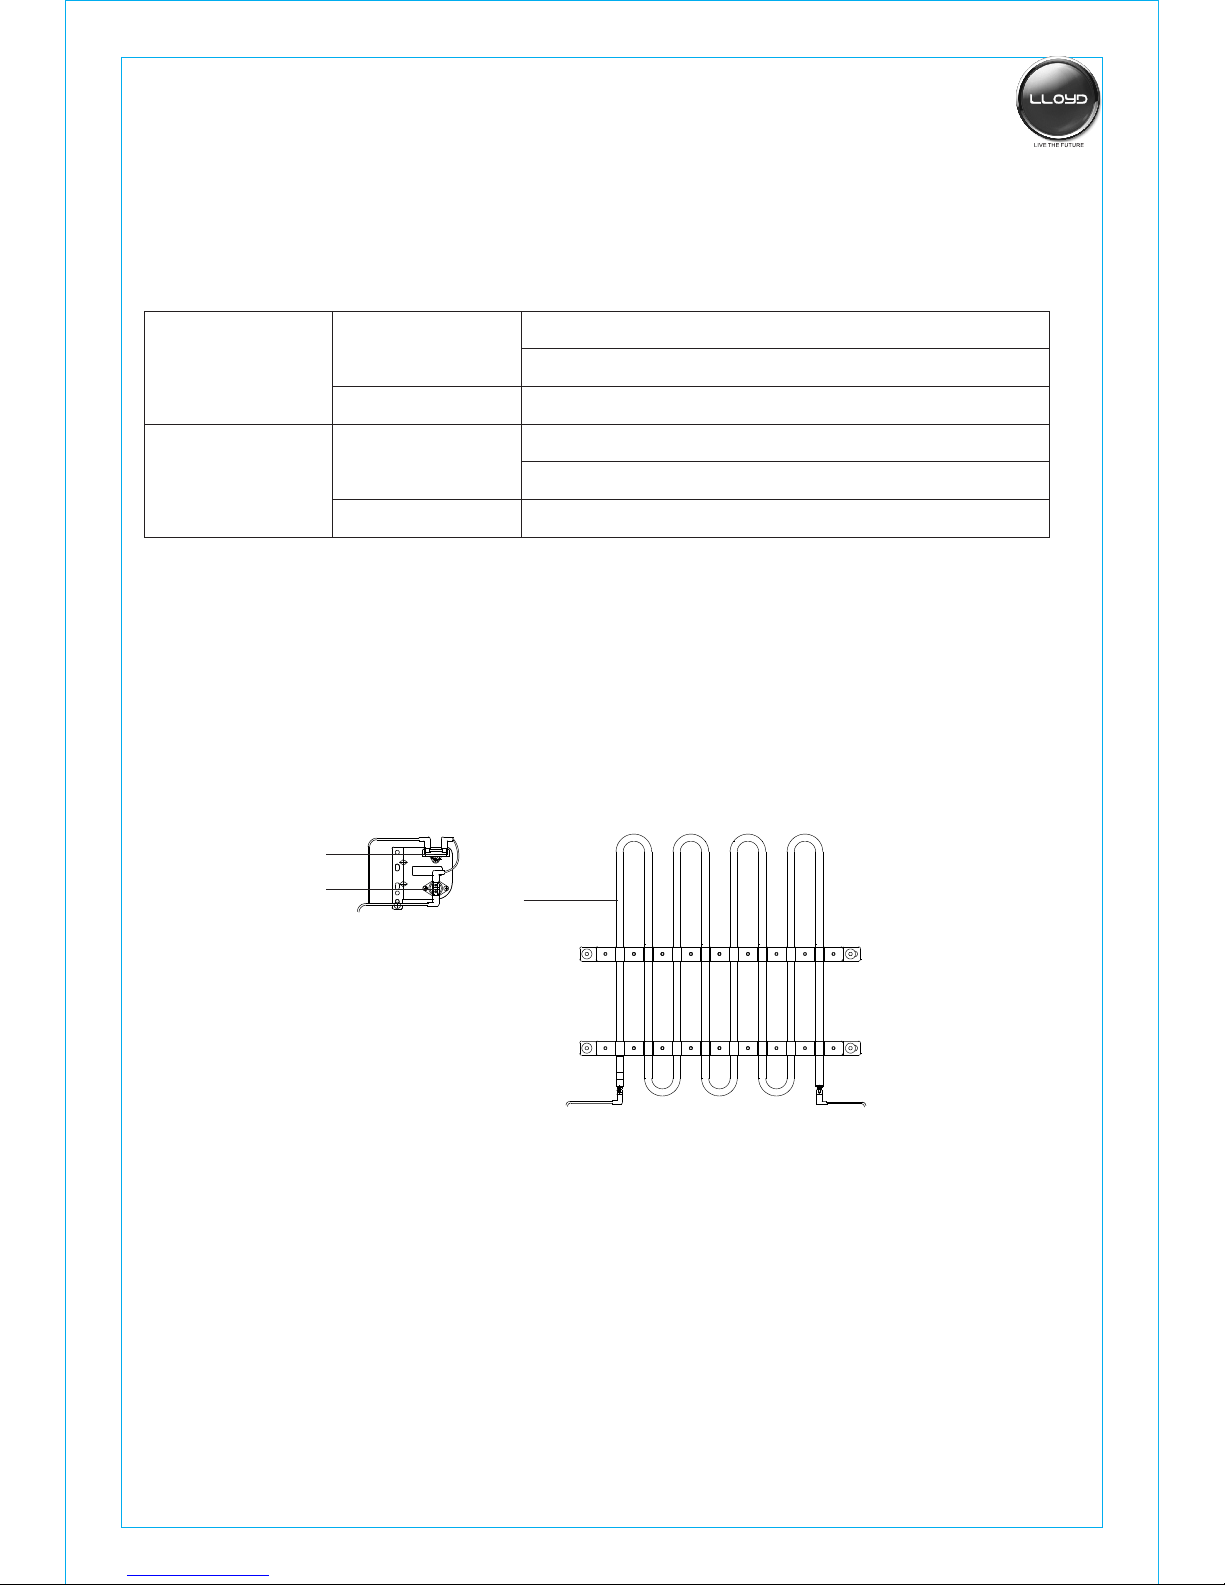
⑴ The fan of the indoor and outdoor unit will stop under frost dissolving operation.
⑵ The time for frost dissolving varies in range of 4 to 10 minutes according to the out-door
temperature and the frost extent.
⑶ It is normal phenomenon that there may be steam coming out from the outdoor unit during
the frost dissolving operation.
During the cooling operation ,under high relative humidity indoors, white steam may come out
due to the high humidity and temperature difference of air inlet and outlet. The air-conditioner
convert to heating operation after the frost dissolving, the moisture due to frost dissolving is
discharged in form of steam.
3.High noise during operation
4.Dust is blown out from the indoor unit
5.The peculiar smell emanates from indoor unit
6.Cooling /Heating (not for cold wind type) operation converts to only wind mode.
When the air-conditioner uses the first time after being left unused for a long time,the dust
inside the indoor unit will be blown out.
The s ell which absorbed from room, furniture, clothing or cigarette emanates during the
air-conditioner is operating.
m
When the indoor unit reaches the stip lated temperature, the air-conditioner will stop the
operation of compressor and convert to only wind mode. The compressor will restart cooling
or heating after the room temperature rise or drop to a certain degree.
u
When the compressor is operating or just stops running, fizzle may be heard because of the
refrigerant flow or stop flowing.
After the air-conditioner operates or stops for a while, crackle from the naturel expansion and
contraction of the plastic components may be heard because of temperature variation.
When the air-conditioner is energized for the first time, sound from friction may be heard
because of the reposition rotating of wind wave.
- 7 -

★Maintenance
1. Select “FAN”operation mode,
make the air conditioner run a
long time to dry.
2. Turn off the air conditioner and cut off
the power supply.
4. Clean air filters and other parts.
3. Take out the batteries from the remote
controller.
For the purpose of safely, please turn off the air-conditioner and cut off the
power supply before cleaning.
Cleaning the indoor unit
Clean
!WARNING:
☆
1.Wipe the indoor unit with dry cloth .
2.If the indoor unit is very dirty, please wipe with wet cloth dipped by cold water.
3.The panel of indoor machine may be taken off. Dry it after cleaning with dry cloth.
!NOTE : Don't use dedusting products by chemicals or place close to the machine.
Don't use benzine, thinner or other similar solvent.
If the air filter is covered by dust, the cooling effect will be affected. Please regularly clean the
air filter.
1.Remove the screw on the top of the inlet panel. Grasp the inlet panel and gently pull forward
to yourself, then pull out the air filter.
2.Remove the dust on the filter by patting or with a vacuum cleaner. Please wash in warm
soapy water if too dirty, rinse and shake dry.
3. Dry the filter thoroughly then replace it.
Cleaning air filter
☆
★
- 8 -

●
●
●
●
● If your air conditioner is not fitted with a supply cord and a
plug, a
●If your air conditioner is permanently connected to the fixed
wiring and have a leakage current that may exceed 10 mA,
●
The installation must be done by professional referring to
the“Installation instructions”.
The wiring must be done by qualified electrician according
to the electrical safety requirements.
The customer should have a qualified power supply which
coincides with the tag of air conditioner, the normal voltage
should be in the range of 90-110% of its rated voltage.
The air conditioner must be well grounded, the switch of the
main power of air-conditioner must be reliably grounded.
n all-pole switchmust be installed in the fixed wiring
and the distance between contacts should be no less than
3.0 mm.
leakage protector must be installed in the fixed wiring,
operating current of which shall not exceed 30 mA.
The power supply circuit should have leakage protector and
air switch of which the capacity should be more than 1.5
times of the maximum current.
Guide for customer
Notices
★
★
●
●
●
●
●
●
●
The air conditioner must be installed on well strong
supporter.
The appliance shall be installed in accordance with
national wiring regulations.
Fix the machine firmly, otherwise it will produce
abnormal noise and vibration.
Install the outdoor unit in the place where it wouldn’t
disturb your neighbour.
The method of connection of the appliance to the
electrical supply and inter connection of separate
somponents, please see the electric connection
elements shart which stick on the machine.
Is the power supply cord is damaged, it must be
replaced by the manufacture or its service agent or
a similar qualified person.
After installation, the power plug should be easily
reached.
Installation Guide
- 9 -

- 10 -
Selection of the installing position
Indoor Unit
Outdoor Unit
★
★
●
●
●
●
●
●
●
●
There is no heat or steam source near
the unit.
There is no blockage affecting air
circulation at the installation position.
Enable the air to circulate well.
Easy to drain.
Easy to take measures to
reduce noise.
Don’t near the doorway.
Enough distance between the unit and the
wall,the ceiling,decoration and other blockages.
Installation position is about 30cm from the ceiling.
●
●
●
●
If there is an awning protecting the outdoor
unit against sunshine or rainfall, be sure not
to block the condenser from dissipating heat.
Don’t keep animals or cultivate plants
on the site, because they would be
affected the cold or hot airflow coming
out of the air-conditioner.
Enough distance between the unit
and the wall, the ceiling,
decoration and other blockages.
Install at location being 100cm
above the blockages..
Installation the air-conditioner
●To make sure the installation place of the air conditioner .
●Installation behind panel before connect the pipeline and cable.
●Basis indoor outdoor units installation place, choose the suitable roof outlet bore (back right
left each one).
●Behind panel must installation, or plate parts maybe rip the wire result short, even make fire.
1.Tap the roof outlet bore.
2.Put behind panel on roof bore , revolve to the screw hole , loosen screw, then tap the middle
circle plastic panel.
NOTE:
★Indoor unit behind panel installation
More than 100cm
More than 10cm
More than 0.5cm
More than 10cm
More than 20cm
More than 100cm
More than 10cm More than 10cm
N 842/2006: If the air conditioner you bought used the refrigerant R410A, the amount
of refrigerant is in a closed cooling circuit. The coolant does have zero ozone depletion
potential, but is a so-called greenhouse gases under the Kyoto Protocol and may thus
contribute to global warming,if it is released to the atmosphere. Therefore only trained
technicians with refrigerant certificate make a filling or emptying.
GWP: R410A(R32/125:50:50):1950
Notices for R410A models
★

- 11 -
roof outlet bore
Fig 1 Fig 2 Fig 3
Mode 1
Mode 2
●
●
●
The outdoor unit must be firmly fixed to avoid falling in the the strong wind.
Install on the cement base as the drawing below.
The outdoor unit must be installed horizontally.
Length of bolt
Deeply bury
M10 bolt
Attention :
make sure of the length of the screws at
the bottom corners is 25mm.
A
B
Installation outdoor unit bolt
Outdoor Unit Size of
Shape (mm) A (mm) B (mm)
540 326
800×300×690(590)
539 287
760×260×540
606 354
900×330×860
585 376
945×340×1255
★
Less than 25mm
Outdoor unit installation

Pipe and Drain pipes Connection
Liquid pipe
Tighten rope
Shelf
Vapor pipe
Angle hole
※Select suitable position to make according to the location of indoor and outdoor units.
Position of the pipes
※Take the pipes out of the accessory case.
※Pull the pipes and cables from the holes and turn away the block things in the pipe.
※Turn away the stopper in the connection pipes of the indoor unit.
※Oiling bell-bottom of the pipe connection and the inner of sealing.
※Align the pipes, connected with the screw with a torsion wrench. The torque list in the
table below.
※Wrap the connected position of thermal insulation pipes.
Torque(N. m)
Φ6.35
Φ19.05 75~8 0
73~78
Φ15.88
Pipe connection
The size
of pipe(mm )
Φ9.52
15~25
35~40
Φ12.7 45~60
※The drain should be downwards.
※Tighten the interface.
※Wrapping from 10cm to the plug of indoor unit
with plastic belt.
※Make the pipe, cable to power and cable to signals
in order. Make sure of the streching direction and
the smoothly surface of the drain.
Side wind tube downward
Tighten tie-in
Attach:Wind pipe connection for ZV series
※
※
Through-flow
fan leaves fresh air tube
Interface Drain hose
(in the accessory case)
Thermal insulation drain pipe
Drain pipes connection
- 12 -
Indoor Unit

Outdoor unit
Pipe with
high pressure
Pipe the
low pressure
Torsion wrench
※
※Turn away the block from the pipe and the cap from
the stop valve.
※Aligning at the pipe,tighten the screw with your fingers.
※Tighten the nut with a torsion wrench until you hear
“ka-ka”from the wrench.
Make the pipe align at the center of the stop valve.
( Refer the direction to the picture )
Outdoor Unit
Wiring Connection
- 13 -
NOTE:
※Yellow and green cord should be connected point with mark.
※
※
※
※
※The connection mark should be agreed on for indoor unit and outdoor unit.
※
Don't reverse the power polarity.
The wrong connection lead to the malfunction of some electrical parts.
Must fix the screwnail of the firmly wire, then drag the wire lightly, confirmation whether it's
firmly.
Must changed if the wire slide, the self-drive screw can't used to the electric connection.
If there is a connector, connect it directly.
※If the entity is difference with this wiring diagram, please in order to
the entity which you purchase.
●
●
●
●The grounded wire connection:
1.loosen the grounded screw of board
2.Connect the grounded wire with the grounded screw then setscrew in the“ ”mark formerly.
●
●
●
Loosen the screw and dismount the input bar of the indoor unit; Loosen the screw and dismount the
electrical cover of the indoor unit.
Connect the power connection line to the terminal of controller board according to the different
number
Wrap the wires with plastic belt refer the condition to the picture.
Fix the cables to the supporting plate for foamy shell strongly with fastening piece.
Reinstall the electrical cover with the screw.
Reinstall the input bar with screw.
or colors.
Indoor Unit

- 14 -
Connector
To power source
2
1
45 N L
Heat pump Type
Yellow
/Green
2
1
45
12
N
Cold wind Type
To power source
Yellow
/Green
12
Cover
Power wire
Terminal board
Fastener for
cable connection Supporting
plate for foamy shell
Input bar
Plastic strap
N(2)
1
45 N L
Heat pump Type
To power source
Red
Yellow
/Green
Black
Blue Brown
1 N(2)
NL
L
Cold wind Type
To power source
Yellow
/Green
Red Black
L1 L2 L3 N
12000W
L1 L1L2 L2L3 L3
N N
Yellow
/Green
To power source
L1 L2 L3 N
L1 L2 L3 N
L
Outdoor Unit
★
●
●
●The grounded wire connection:
1.loosen the grounded screw of electrical shelf.
2.Connect the grounded wire with the grounded screw then setscrew in the“ ”mark formerly.
●
●
Unscrew the screw, take off the control panel cover from the unit.
Connect the cable to their terminals according to their number or colors.
Fix the cable to the terminal board with fastening piece.
Reinstall the cover with the screw.
Cover
12L
N
125
4
Fastener for cable
connection
shelf
Grounded wire
Terminal board
Interconnection cord
More than 5mm
Connector
2
1
45
Heat pump Type
Yellow
/Green
2
1
45
12
Cold wind Type
Yellow
/Green
12
Heat pump Type Cold wind Type
12000W
L1 L2 L3 N
Red
Green Brown Blue
Yellow/Green
1
N(2)
1 4 5
Red
Black
Yellow
/Green
Red
Black
Yellow
/Green
Blue
Brown
N(2)
Connector
Red
Green Brown Black
Red
Green Brown Blue
Yellow
/Green
L1 L2 L3 N
Yellow/Green
L1 L2 L3 N
Red
Green Brown Blue
Yellow/Green
L1 L2 L3 N
Yellow/Green

To indoor unit
Liquid side
Stop valve(open)
Cover
T-branch valve(open)
Hexagon wrench
Auxiliary cover
Vapor side
- 15 -
Expelling the air: humid air in the refrigerating system might cause trouble of compressor.
●Take off the cover from the stop valve and T-branch
valve.
●Take off the auxiliary cover from the T-branch valve.
●Turn the stop valve rod anti-clock wise to an angle of
90 degree, keep it open for 8 seconds and close the valve.
●Check whether there is air leakage at all connection
parts of pipes.
●Push the top rod of T-branch valve by hexagon wrench
to expel air.
●Repeat the third and fifth steps.
●Open the stop and T-branch valve with a hexagon
wrench to make the unit operate.
●There is no leakage allowed, please check all the
piping connection parts. You must test the leakage,
generally, it can be tested by soap water.
A
B
C
D
Packed valve Half union
Refrigerant
Outdoor unit Indoor unit
Gas side
Liquid side
Manifold valve
Compound meter Pressure gauge
-76cmHg
Handle Lo
Charge hose
Low pressure valve
Vacuum pump
Charge hose
Handle Hi
Expelling the air
discharge air and moisture remaining in
the refrigerant system with a vacuum pump. (For method of using a manifold valve,
refer to its operation manual.)
●Completely tighten the flare nuts, A, B, C, D, connect the manifold valve charge hose to a
charge port of the low-pressure valve on the gas pipe side.
●Connect the charge hose connection to the vacuum pump.
●Fully open the handle Lo of the manifold valve.
●Operate the vacuum pump to evacuate. After starting
evacuation, slightly loose the flare mut of the Lo valve
on the gas pipe side and check that the air is entering. (Operation noise of the vacuum pump
changes and a compound meter indicates 0 instead of minus.)
●After the evacuation is complete, fully close the handle Lo of the manifold valve and stop
the operation of the vacuum pump. Make evacuation for 15 minutes or more and check that
compound meter indicates -76cmHg(-1×10 Pa).
●Turn the stem of the packed valve B about 45
counter clock wise for 6~7 seconds after the
gas coming out, then tighten the flare nut again.
Make suer the pressure display in the pressure
indicator is a little higher than the atmosphere
pressure.
●Remove the charge hose from the Low pressure
charge hose.
●Fully open the packed valve stems B and A.
●Securely tighten the cap of the packed valve.
※If the A/C is filled with R410a, make sure to

● Make sure that pipes and wires are connected.
● Make sure that liquid side valve and air side valve both are completely open.
1. The connection of power source
● Connect the wire to independent power source socket.
● Preparation of remote controller.
● Run the air-conditioner in cooling operation mode for 30 minutes or longer.
2. Performance evaluation
● Test the out and in air temperature.
● ℃ 。Make sure whether the outlet air temperature subtract from inlet s gives more than 10
Test running
Packing list
●
care of it.
●Please refer to the real appliance purchased.Thank you.
Please check the following attach carefully, if part attach isn t useful, please take
Packing list of the indoor unit
Packing list of the outdoor unit
- 16 -
N0. Name
1
2
3
1
Size/Model Unit Remark
Indoor Unit Set
Quantity
PC
Drain pipe
1
1
2
Remote Controller
Batteries PC
7#
PC
1
1
Instructions PC
PC
Certificate
4
5
6
7
8
fresh air tube PC
1
1
Pipe Protection Ring PC
Only for ZV series
Only for ZV series
1
Outdoor Unit Set
Certificate PC 1
N0. Name
1
2
3
4
5
6
7
1
1
1
1
Size/Model Unit Remark
PC
Plastic Strap
Isolation Strap
Pipe Protection Ring
Luting (putty) 160g
Quantity
ROLL
ROLL
PC
PACKET
High pressure
connection pipe
Low pressure
connection pipe
1
PC 1
8

TWELVE
Table of contents
Other Lloyd Air Conditioner manuals
Popular Air Conditioner manuals by other brands

Mitsubishi Electric
Mitsubishi Electric Mr.SLIM SUZ-KA09 installation manual

Quipon
Quipon GRH085DA-K3NA2B owner's manual

Toshiba
Toshiba RAS-10SAV-A Service manual

GE
GE AGM14 Owner's manual and installation instructions

Johnson Controls
Johnson Controls ZY Series installation manual

Hyundai
Hyundai HYD18KPACWA user manual