◆ Connecting with WLAN(for Windows)
◆ Connecting with WLAN (for Mac PC)
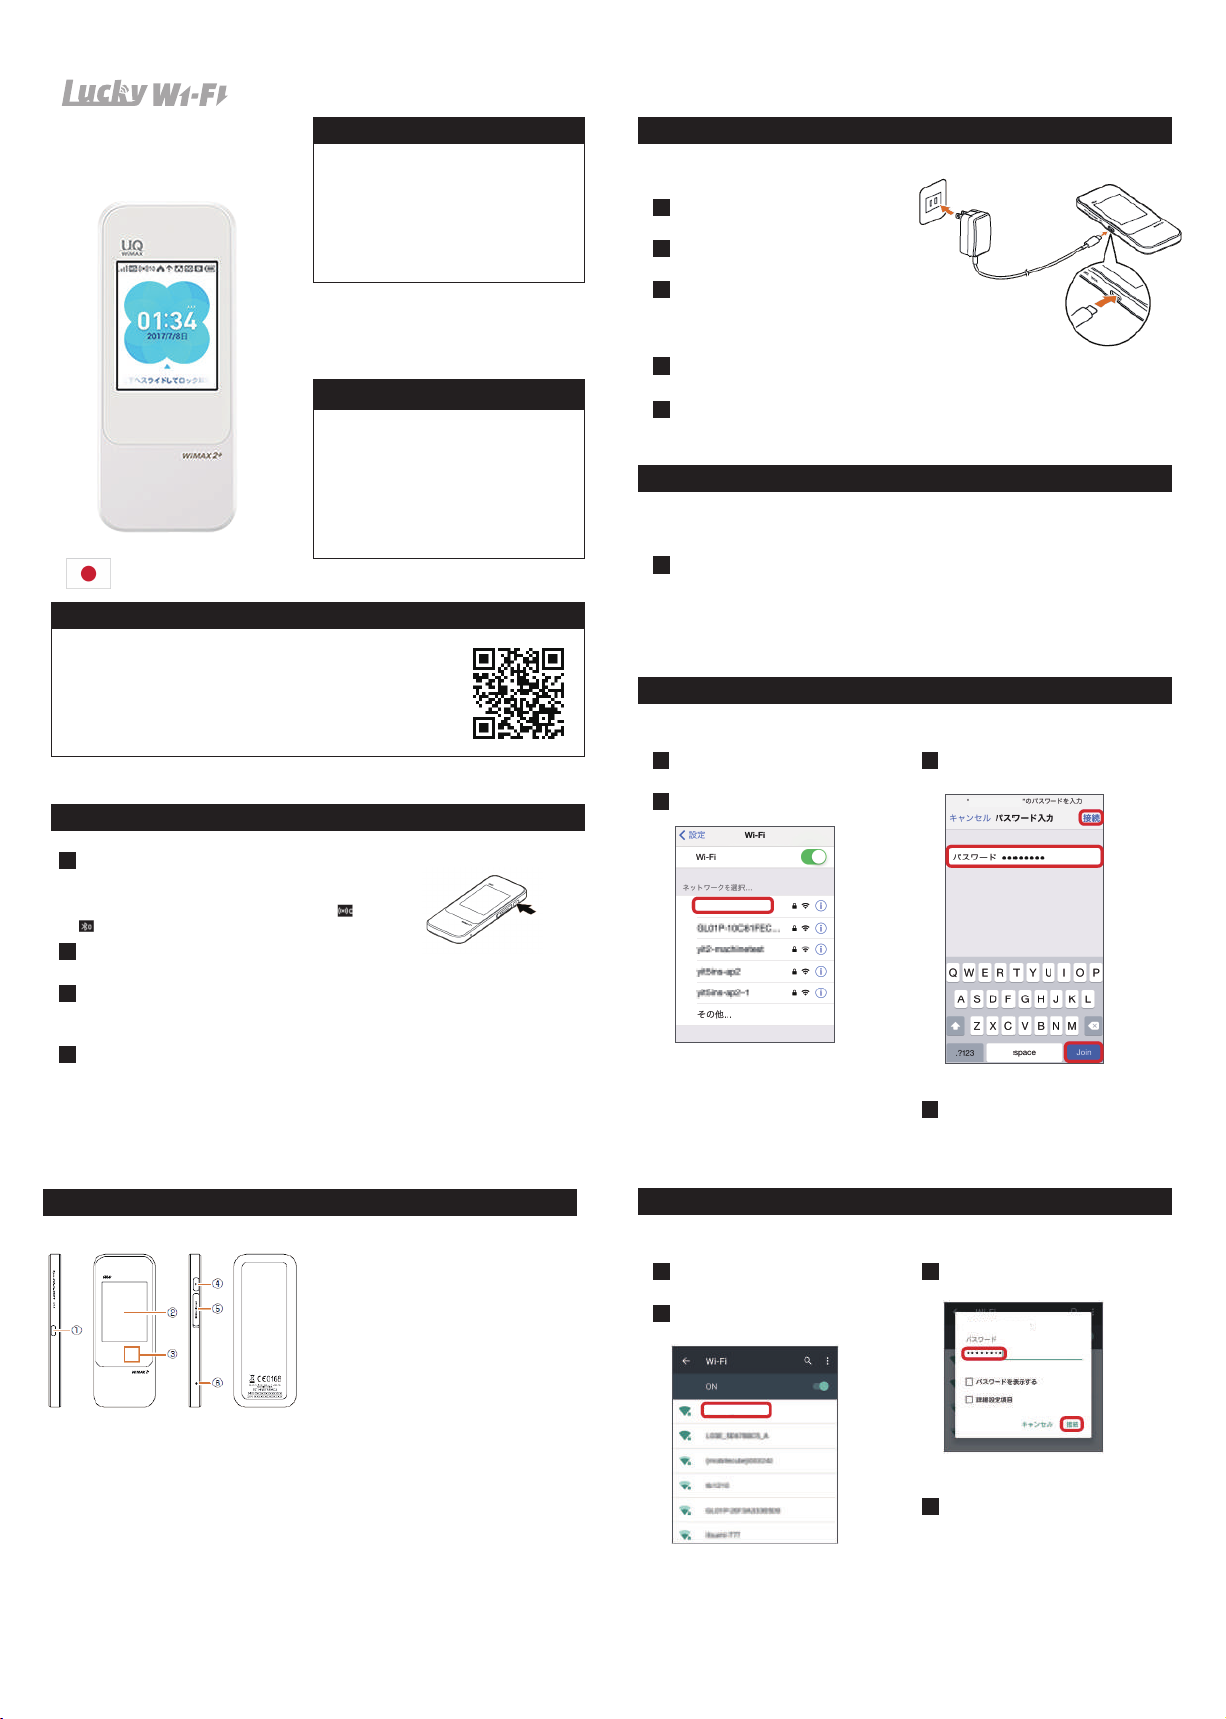
Turn on wireless LAN function on a wireless LAN device.
1
Turn on wireless LAN (Wi-Fi) function on a wireless LAN (Wi-Fi) device
1
Select SSID of the product from the
displayed network list etc.
2
Select SSID of the product from the pulldown list of network names.
2
Enter the seurity Key (password)
3
Enter the security key (password)
3
*Please check Wi-Fi LAN connecting completed.
■Windows10
“Start”→” setting”→” NetworkandInternet”→TurnonWi-Fi
■Windows8.1
Swipefromtherightendofdesktopscreen(formouseoperation,pointatthe
upperrightofthescreen)→” setting”→SelecttheWi-Fiicon→TurnonWi-Fi
■Windows8
Swipefromtherightendofdesktopscreen(formouseoperation,pointatthe
upperrightofthescreen)→” setting”→ChangePCsettings→” Wireless”→Turn
onawirelessdevice
■Windows7
Fromthestartmenu,selectControlpanel,thenselect“NetworkandInternet”→” Network
andsharingcenter”→” Connecttoanetwork”
FromtheApplemenu,“Systempreferences”→” Network”→” Wi-Fi”→” TurnWi-Fion”
W04XXXXXXXXXXX
◆ Connecting with USB cable (for Windows)
◆ Connectin with USB cable (for Mac)
*Pleasemakesurethatthisproductispoweronbeforeconnecting.
*Pleasemakesurethatthisproductispoweronbeforeconnecting.
Connect the included cable to the external connection terminal of the
product.
1
Connect the other connector of the included cable to the USB port of the
personal computer.
2
Click and install “AutoRun.exe execution.”
3
If “User Account Control” screen appears, select “Yes.”
4
Insertitstrate.Firmlyinsertitalltheway.
*Ifitisnotdisplayed,inWindows10,Pleaseselect“Start”menu→” Explorer”→” CDdrive(X:)SpeedWi-Fi
Next”→” AutoRun.exe.”InWindows8/8.1,Pleaseselect“DesktopMode”→” Explorer”icononthetaskbar→”
Computer(PC)”→” CDdrive(X:)SpeedWi-FiNext”→” AutoRun.exe.”Windows7/Vista,Pleaseselect
“Computer”→” CDdrive(X:)SpeedWi-FiNext”→” AutoRun.exe.”
*For windows Vista User→” Select “Continue”
*The install will begin. When “Speed Wi-fi Next setting tool”
*For windows Vista User→” Select “Continue”
*The install will begin. When “Speed Wi-fi Next setting tool”
Thecomputerrecognizesthisproduct
(Dependingonyourcomputer,itmay
taketime.)Messagetoconfirmthe
operationoftheCDdriveisdisplayed.
Connect the included cable to the external connection terminal of the
product.
1
Connect the other connector of the included cable to the USB port of the
personal computer.
2
Click and install “AutoRun.exe execitopm”
3
If “User Account Control” screen appears, select “Yes.”
4
*Insertitstraight.Firmlyinsertitalltheway.
*If it is not displayed, select ■ and open the Finder→” Device”→” Speed Wi-Fi Next”
◆ Trouble shooting
*Pleaseconfirmbeforeinquiry.
*Forsecuritykey,pleaseread “SSIDandpassword.”
*Forsecuritykey,pleaseread “SSIDandpassword.”
Thecomputerrecognizesthisproduct
(Dependingonyourcomputer,itmay
taketime)“SpeedWi-FiNext”Iconand
“SpeedWi-FiNext”screenappearonthe
desktop.
【Wi-Fi router is not working, Unable to charge, connect】
Pleaserestarttherouter.
【Unable to connect Internet Wi-Fi】
PleasebesureWi-Firouterfunctionisturnedon.
Pleasebesure,youenteredpasswordcorrectly.
【Internet connection fails】
Ifsignalreceptionispoororfails,movetowheresignalisstrong,thenrecconect.Alsoplease
restarttherouterandconnectingdevices.
*Accesspointcangetbusyatcertaintime.Waitawhileandtryagain.