manuals.online logo
Brands
  1. Home
  2. •
  3. Brands
  4. •
  5. Magnavox
  6. •
  7. TV
  8. •
  9. Magnavox TS2777 User manual

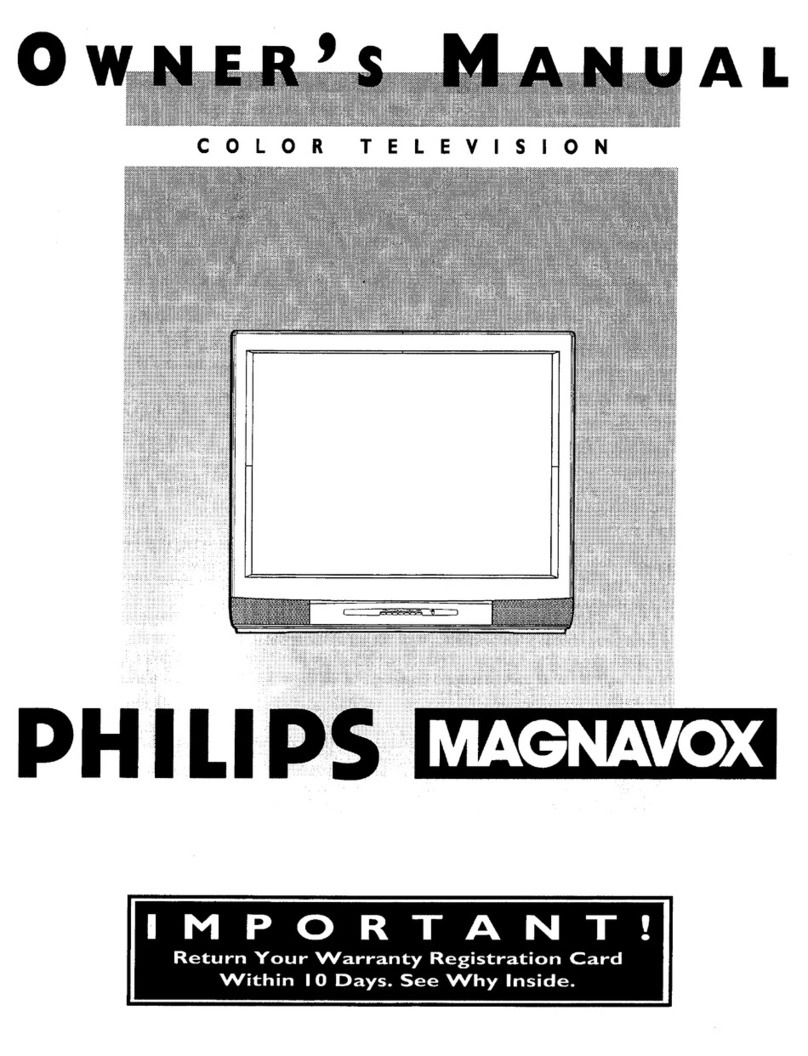
Magnavox TS2777 User manual

Color Television
Owner's Manual
o :
NO
IMAGE
AVAI
SAFETYINSTRUCTIONS- Readbeforeoperatingequipment
This product was designedand manufactured to meet strict quality,and
safety standards. There are, however, some installation and operation
precautionswhich you should be particularly awareof.
1. Read Instructions -All the safety and operating instructions should
be read beforethe appliance isoperated.
2. Retain Instructions -The safety and operating instructions should
be retainedfor future reference.
3. Heed Warnings- All warningson theapplianceand in the operating
instructions should beadheredto.
4. Follow Instructions - All operating and use instructions should be
followed.
5. Water and Moisture - Tt:e appliance should not be used near water
- for example,neara bathtub, washbowl, kitchen sink, laundry tub,
in a wet basementor near a swimming pool,etc.
6. Cartsand Stands-The applianceshould beused only witha cart or
standthat is recommended bythe manufacturer.
6A. _ An applianceand cart, combination should be moved
with care. Quick stops, excessive force, and uneven
surfaces may cause the appliance and cart combination
to overturn.
7. Wall or Ceiling Mounting - The appliance should be mounted to a
wall or ceiling only as recommended bythe manufacturer.
8. Ventilation- Theappliance should besituated so that its location or
position does not interfere with its proper ventilation. For example,
the appliance should not be situated on a bed, sofa, rug, or simitar
surface that may block the ventilation openings; or, placed in a
built-in installation, such as a bookcaseor cabinet thatmay impede
the flow of air through the ventilation openings.
9. Heat -The appliance should be situated away from hear sources
such as radiators, heat registers, stoves, or other appliances
(including amplifiers) that produce heat.
10. Power Sources - The appliance should be connected to a power
supply only of the type described in the operating instructions or as
markedon the appliance.
11. Power-Cord Protection - Power supply cords should be routed so
that they are not likely to be walked on or pinched by items placed
upon or against them, paying particuiar attention to cords and
plugs, convenience receptacles, and the point where they exit from
the appliance.
12. Cleaning- The appliance should be cleaned only as recommended
bythe manufacturer.
13. Power Lines - An outdoor antenna should be located away from
power lines.
14. OutdoorAntennaGrounding- If an outside antenna is conne_ed to
the receiver, be sure the antenna system is grounded so as to
provide some protection against voltage surges and built up static
charges.
Section 810 of the NationalElectric Code,ANSI/NFPANo.70-1984,
provides informationwith respect to proper grounding of the mats
and supporting structure grounding of the lead-in wire to an
antenna discharge unit, size of grounding connectors,location of
antenna-discharge unit. connection to grounding electrodes and
requirements for the grounding electrode. See Fig. below.
15. Non-use Periods - The power cord of the appliance should be
unplugged from the outlet when left unused for a long period of
time.
16. Objectand Liquid Entry - Care should be taken so that objects do
not fall and liquids are not spilled into the enclosure through
openings.
17. Damage Requiring Service- The appliance should be serviced by
qualified service personnel when:
A. The power supply cord or theplug has beendamaged;or
B. Objects have fallen, or liquid has been spilled into the
appliance;or
C. Theappliance has beenexposedto rain; or
D. The appliance does not appear to operate normally or exhibits
a markedchange in performance;or
EThe appliance hasbeen dropped, orthe enclosuredamaged.
18. Servicing - The user should not attempt to service the appliance
beyond that described in the operating instructions. All other
servicing shouid be referred to qualified service personnel.
NotetotheCATVsysteminstaller:Thisreminderisprovidedtocallthe
CATVsysteminstallersattention1oArticle 820-40 of theNEC that
providesguidelinesfor propergroundingand,in particular,specifiesthat
the cableground shall be connectedto the groundingsystemof the
building,asclosetothepointof cableentryaspractical.
EXAMPLE OF ANTENNA GROUNDING AS PER NATIONAL ELECTRICAL CODE (NEC)
ExampleofAntennaGrounding
as perNEC-National ElectricCode
ANTENNALEADINWIRE
ANTENNADISCHARGEUNIT(NECSet.ONs_O-_)
GROUNDINGCONDUCTORS(_ SE_tOealo-Zlt
GROUNDCLAMPS
]
---'-__POWERSERVICEGROUNDINGELECTRODESYSTEM(N{c_z,Jo,PARTH)
ELECTRICSERVICEEQUIPMENT
3
Introduction
Welcome/Registration of Your TV ............................ 2
Satety/Precautions ..................................................... 3
Table of Contents ....................................................... 4
Features ...................................................................... 4
On-Screen (MENU) Features
+Setting the TV for Cable TV Operation .............. 5
+Adding Channels in Memory. (Automatically) ...6
+Adding Channels in Memory (Manually) ........... 7
+How to Set the "IVfor Closed Captioning ......... 8
+Setting the TV for Stereo Programs .................... 9
+Using the Sound Image Control ........................ 10
,:'Using the TV Volume Bar Control ................... 11
,:-Setting the Surf/Smart Surf Control .................. 12
+Setting the "IV Sleep Timer Control ................. 13
+Adjusting the T_' Picture .................................. 14
+Using the On-Screen Language Option ............ 14
+Using the Audio Out Jacks (with TV Speaker
On/Off Control) ................................................ 15
+Using the TV's Audio/Video Input Jacks .... 16-17
Remote Control Oaeration
Using the Remote Locator Feature ....... 18-19
Using the Smart Picture Control .............................. 20
Using the Smart Sound Control ............................... 21
Setting the T'v" Remote to Work VCRs .............. 22-23
Setting the TV Remote to Work
Cable "IV Converters .......................................... 24-25
Setting the TV Remofe to Work VCRs or Cable
Converters - Search Method .................................... 26
Using the Rerrlote's VCR Buttons ............................ 27
MC.reneral Information
Tips if Something Isn't Working ............... 28
Glossary of TV Terms ............................................. 29
Index ........................................................................ 29
Factor 3' Service Locations .................................. 30-3 !
Warranty .................................................................. 32
Use the simple Set-Up Guide (supplied with
your TV information packet) for details on:
•Antenna Hook-ups
•First Time Set-Up
(Automatic Settings)
• Basic TV and Remote
Control Operation
• On-Screen Menu Use
Infrared Remote Control works your TV set and a
variety of wireless remote control VCRs and Cable
Converters. A special "'Locator" feature can also help
you find the remote when it has been stuck out of
sight or misplaced.
Standard broadcast (VHF/UItF) or Cable TV
(CATV) channel capability.
Stereo Ready TV with built-in audio amplifier and
twin speaker system for receiving TV programs
broadcast in stereo sound.
Closed Captioning allows the viewer to read "iv"
program dialogue or voice conversations as on-screen
text.
Automatic Programming of Channels for quick
and easy selection of favorite stations available in
your area.
On-Screen Features (in either English, French, or
Spanish) show helpful messages for setting of TV
controls.
Audio/Video Jackpanel for direct connections with
VCRs (or other video accessories) providing quality
TV picture and sound playback.
Smart Button for the contro! of TV Sound and
Picture levels. Use the Smart Button on the remote to
quickly adjust Smart Sound (to keep volume levels
consistent during program changes or commercial
breaks), or Smart Picture (for automatic picture
adjustments on a variety of pro_am sources).
Sleep-Timer automatically turns the TV OFF at
preset times.
Copyright © 1996 Phitips Consumer Electronics Company. All rights reserved.
TOrE:llyouwen,through
[ .L • Setup (in your Quick Use
[Guide), this task has already been
compteted for you.
|You need to make sure that the TV
]is set to pick up either Cable TV
[stations or Antenna signals. In
[other words, the 73/needs to know
|whether you have connected a
[Cable TV signal or a normal
[antenna to i_NA plug.
'-,_ Press the MENU (M) button
on the remote, then/.he MENU •
or • buttons to select the word
CABLE with the TV's on-screen
arrow.
%_ Press the (+) button (on the
TV or the remote) to select either.
YES- If you DO have Cable TV
connected to the TV.
Channels 1-125 can be
selected.
NO- If you have an Antenna
connected to the TV.
Channels 2-69 can be
selected.
<,,_ Press STATUS to clear the
Try it out. Press
CttANNEL •• buttons
and scan the channels.
Remember, the TV has been set at
the factory, to select certain
channel numbers. See the
following page on how to set the
"IV to select the channels in your
area.
OseTE: If you went through
tup (in your Quick Use
Guide), this task has already been
completed for you.
Your TV can automatically set
itself for local area (or Cable TV)
channels. This makes it easy for
you to select only the TV stations
in your area when the CH(annel)
• Y buttons are pressed.
j<;.....
<,_,,> Press the MENU (M) button
on the remote, then press the
MENU •or • buttons to select
the word PROGRAM with the
TV's on-screen arrow.
_2_ Press the (+) button (on the T'V
or the remote) to PROGRAM.
___ Press the (+) button to
again
start the TV search forarea
channels.
Flashing channel numbers will
count upward on the screen as the
TV looks for channels to "ADD".
Press any button (on the TV or
remote) to stop the channel search
a,:any time. When the channel
search is completed the TV will
return to the last viewed channel.
_,, Press STATUS button to clear
l the screen
TL it out. Press
CHANNEL AY buttons and
see which channels have been added.
Remember. if you want to drop any
unwanted channels from the TV's
memoD', see the next page on how to
"Manually" add and delete channels.
Note: As the TV searches for
channels to "ADD" into memory"the
on-screen display may move (or
jitter slightly). This is normal
operation and does not indicate a
need for service.
"'RED" channel ,numbers have been
added to the TV+s rnemor).'.
"'WHITE" channe! numbers arc ,",,m
ptesenl it, the TV's program memo,')'.
!!
L
AUTO..PRO_RAMMING INPROCESS
AUTO-PROGRAMMING IHPROCESS
JThe T%: screen will be blocked off J
i undi _he se'_ch for chan_ls is [
j done.
-- Auto Programming (see previous
Zlpage) adds all the channels it
can find (on your Antenna or Cable
TV system) into the TV's memory.
Add/Delete Channels makes it easy
for you to add other channels, or
drop unwanted channels, from the
list of channels in the TV's memo_'.
"/1,_ Press the MENU (M) button
on the remote, then press the
MENU • or • buttons to select
the word CHAN.'NEL with the
TV's on-screen arrow.
_,_ Press the CHANNEL • or •
buttons (or Channel Number
buttons on the remote) to select the
channel you want to SAVE (or
DELETE.)
_,_ Press the (+) button to SAVE
the selected channel number into
memory.
Press the (-) button to DELETE
a channel from memory..
_) Press the STATUS button to
clear the screen after adding all the
channels you want.
Try it ore. Press the
_ CHANNEL•• buttons.
The channels you SAVED should
appear. Th_ channels you
DELETED should not appear.
Remember, you can also add the
VC_'AUX mode (see page !6)
into the TV's channel memory'.
Then by pressing the CH • •
buttons you can quickly select the
Audio/Video Input jacks on the
rear of the "IV. Just "'SAVE" the
VCP,/AUX mode (located between
the lowest and highest channe!
numbers) into the TV's memory.
U
7
OSed Captioning allows you to
ad the voice content of
television programs on the TV
screen. Designed to help the
hearing impaired this feature uses
on-screen "text boxes" to show
dialogue and conversations while
the TV program is in progress.
_,_ Press the MENU (M) button on
the remote, then press the MENU
• or • buttons to select the word
CAPTION with the TV's on-screen
arrOW.
_z,,_ Press the (+) button to select
the desired Closed Caption (CC)
mode - For Example: CAPTION I.
CAPTION 1, 2, 3, or 4 mode:
dialogue (and descriptions)
for the action on the captioned
TV pro_am shows on-screen.
(See important note on this
page.)
TEXT 1, 2, 3, or 4 mode:
often used for channel guide,
schedules, or bulletin board
information for CC programs.
Note: Usually "'CAPTION" 1 is the
most used mode to view captioned
material.
A
"-_,,_ Press the STATUS button after
making your Caption mode
selection.
The TV display will cle_,- and
Captioning ma_rial (if available on
the currently selected TV program)
wii! appear on fineTV screen.
To cancel, set the CAPTION
feature to OFF when finished
viewing.
Remember, broadcast
stations will often use
spelling abbreviations, symbols,
dropouts and other grammatical
shortcuts in order to keep pace with
the on-screen action. These tyw
factors var), upon the source of the
captioned text material and do not
indicate a need for service on the
part of _e TV.
NOTE: Not all TV programs and product commercials are made for broadcast
with Closed Caption (CC) information included. Neither are all Closed Caption
modes (CAPTION 1-4, or TEXT 1-4)) necessarily being used by abroadcast
station during the transmission of aclosed caption progam. Refer to your area's
TV pro_am listings for the stations and times of Closed Cap.tion shows.
'i_!ii_iiii!i!ili_iiii.liiiiiii_._.
I
/J] NOTE: The "CC1 W/MUTE" _tfing
automatically swtiches the TV io the Closed
Caption I mode whenever the MUTE button (on
_he remote control) is pressed. The Cloud Caption
I rr',c,d¢will turn OFF when the TV sound is
I returnedor unmuted.
CAPTION mode
Example Dispiay
k
TEXT mode
Ex_'n, pie Display
q'_" xcreen will be blocked from viewing
6
This symbol will appear with
channels that contain Closed
Captioning materia!.
8
our TV can receive broadcast
tereo TV programs. The TV
has both an amplifier and twin
speakers through which the stereo
sound can be heard.
<_ Press the MENU (M) button
on the remote, then press the
MENU • or •buttons to select
the word STEREO with the TV's
on-screen arrow.
_,_ Press the (+) button to turn the
STEREO MODE ON.
4> Press STATUS to clear the
screen.
',emember, stereo is
not present on a selected
sho_vand the "IV is placed in the
STEREO mode, the sound coming
from the set will remain monaural
(mono.)
SAP is an additional part of the
stereo broadcast system. Sent as a
third audio chanr_l SAP can be
heard apart from the current TV
program sound. TV stations are
free to usetSAP for any number of
purposes, but many experts
believe it will be used for foreign
language translations of TV
shows (or for weather and news
bulletins.)
If a SAP signal is not present
with aselected program, the SAP
option cannot be selected. Also, if
SAP is selected on achannel
(with SAP) and you select another
channel, when you return to the
origina! channel SAP will be OFF
(and you will have to reselect the
SAP feature.)
STEREO
9
mm Und Image can be used to add
rearer depth and dimension to
both monaural (MONO) and stereo
TV sound. With the control turned
ON the TV's speakers can add even
wider sound separation to normal
broadcasts.
,I,Q,_ Press the MENU (M) button
on the remote, then press the
ME.N_U• or • buttons to select
the word SOUND IMAGE with the
TV's on-screen arrow.
€,,_ Press the (+) button to turn the
SOUN'D IMAGE control ON.
€,,,_ Press STATUS button to clear
the screen.
:iL
_!_!ziii:i:i;
iil
lO
m T],se the Volume Bar control to see
IJ the TV's volume level settings
on the TV screen. Once set the
Volume Bar a4l! be seen each time
the VOLUME buttons (on the TV or
remote) are pressed.
<,,_ Press the MENU (M) button on
the remote, then press the MENU •
or •but'tons to select the word
VOL.BAR with the TV's on-screen
alTOW.
<,_ Press the (+) button to turn the
VOL BAR control ON.
<,_ Press STATUS button to clear
the screen.
'_ it Press the
T_ out.
_ VOLA• buttons. The
VOLUME BAR should appear at the
bottom of the screen.
i
VOLUME I_- ......
11
A"list" or series of previously
viewed channels can be selected
with the SURF button on your remote
control. With this feature you can
easily switch between different TV
programs that currently interest you.
The Smart Surf control allows you to
set up to 10 channels in its quick
viewing "'list".
_1_ Press the MENU (M) button on
the remote, then press the MENU •
or • buttons to select the word
SURF with the TV's on-screen
arrow.
_-,,_ Press the (+) button to select
either 2-Channel Surf or Smart Surf.
(See explanation of Surf options with
the illustration on this page.)
_-,_ Press STATUS button to clear
the screen.
_1_ With the Smart Surf control
ON (see above), select adesired
channel for viewing. You can use the
number buttons on the remote (or the
Channel • or • buttons).
_---,,_ Press the SUI_ button on the
remote. (Some channel numbers may
already appear within the Surf
channel Ii_t.)
_,_,_ Press the Menu button to
"'ADD" the selected channel to the
Surf, list.
Select the next desired channel and
repeat steps 2 and 3. Continue until
all desired channels are on the Surf
list.
_-"_ Press the SURF button on the
remote to quickly review current
action on channels contained within
the Surf lisT_
!i !
i i
2CHANNEL SURF -
Current and one previous
eherrtve.!.
SMART SURF -
Current and up lo .nine
additional ¢"h_nnels
available.
Note: The Channel Surf,
€_n be used with fewer
t "ha.nten channels. In this
way the number of Surf
channels can match or fit
your pr_,e:'It vle_.'int
i imeres_s.
__ • L
To Use 2-
Channel Surf:
With the 2-ChanneI
Surf control ON,
select the two
desired channels for
viewing with the
number buttons on
the remote control.
Press the SURF
button on the
remote to "'toggle"
between the two
selected channels.
When using Smart
Surf:
A "SURF MENU
TABLE FULL"
message will appear
when the maximum
of 10 channels has
been added to the
Smart Surf list.
22
113
2$
PRESSMENUTOADD
i
t
PRESS MENU TO DELETE
Note: To Delete a channel from the Surf
list .just press the SURF bulton to select
the desired ch_mnel. Then press the
MENU button and the channel will be
immediately dropped from the on
screen Surf lis_.
E
!
Veyou ever fallen asleep in
nt of the TV only to have
it wake you up at two in the
morning with a test pattern
screeching in your ears? Welt.
your TV can save you all that
trouble by automatically turning
itself off.
@Press the SLEEP button on
the remote, or press the MENU
• or V button to select the word
SLEEP with the TV's on-screen
arrow.
¢,,Z_ Press the SLEEP button
repeatedly to pick the amount of
time (15 minutes to 2 hours
ahead) before the TV will turn
itself off.
The (+), (-) buttons can also be
used to set the amount of time.
Press the STATUS button to
clear the screen after you have set
the time for the TV to turn off.
A few seconds before the TV is
to shut off a message will come
on the screen telling you GOOD
NIGHT.
'_._ ,Remember, to see how
N many minutes are left
before the TV shuts itself off,
press the STATUS button on the
remote.
To stop a SLEEP TIMER setting.
reset the timer back to OFF.
(Turning the "IV off and on, or
pressing a button during the last
minute of a timer setting, will also
cancel a setting.)
13
Zc o adjust your 73/picture
ontrols, select a channel and
follow the steps shown below:
_-_ Press the MENU (M) button on
the remote, then press the MENU •
or • buttons until the desired control
shows on-screen.
<_ Press the (+) and (-) buttons to
I adjust the selected color control.
_ Press the STATUS button to
clear the screen when picture
adjustments are completed.
_m
Remember. when
the bar scale is centered,
tl).econtrol settings are at
normal mid-range levels.
BRI(_HTNE_;_; Press (-)
or (+) until darkest parts of
the picture are as bright as
you prefer.
PICTURE Press (-) or
(+) until lightest parts of
the picture show good
detail.
COLOR Press (-) or (+)
to add or eliminate color.
TINT Press (-) or (+) to
obtain natural skin tones.
SHARPNESS Press (-) or
(+) to improve detail in the
picture.
or our French and Spanish
speaking 73/owners an on-
screen LANGUAGE option is
present. With the LANGUAGE
control you can set the TV's on-
screen features to be shown in
either English, French, or Spanish
text.
<_,_ Press the MENU (M) button
on the remote, then press _'ae
MENU • or • buttons to select
the word LANGUAGE with the
TV's on-screen arrow.
_Press the (+) button to select
either the English, French
(FRANCAIS), or Spanish
(ESPANOL) language option.
Text for the on-screen Menu will
change to the selected language.
'_ Press STATUS to clear the
screen.
1/1
Remember,
If you went through
Setup (in your
Quick Use Guide),
this task has already
been completed for
you.
The Language
control only makes
the TV's on-screen
(MENU) items
appear in French or
Spmnish text. It does
not ch_mge the
language of other
on-screen text
features such as
Closed Captioned
(CC) TV shows.
opuldyou like to hear TV
rograms through your audio
hi-fi system? The TV's Audio
Output jacks and TV Speaker
On!Off control work together to
offer you this TV sound option.
1_,_ Connect the and
R(ight)
L(eft) AUDIO OUT jacks on the
TV to the R and L Audio Input
jacks on your amplifier or sound
system.
Set the audio system's volume to
normal listening level.
_Turn the TV and audio system
ON. You can now adjust the sound
level coming from the audio
system with the Volume • or •
buttons on the TV or remote.
<,<52 To hear the TV sound from
only the audio system speakers.
select the TV's SPEAKER on-
screen control.
Press the MENU (M) button on
the remote, then press the MENU."
• or • buttons to select the word
SPEAKER with the TV's on-
screen arrow.
_> Press the (+) button to turn the
TV's internal speakers OFF.
You should now only hear "1"%;
sound coming from the audio
system speakers.
Press the STATUS button to
clear the screen.
AUDIO SYSTEM
_'/ Remember. the audio
-_system may have to be in
AUX(iliary) mode to play sound
from the "Iv'.
15
movucan view the playback of
CR tapes (Video Disc
Players, camcorders, etc). by
using the AUDIO and VIDEO
INPUT jacks (on the rear of the
TV).
For example: to view the
playback of a VCR tape:
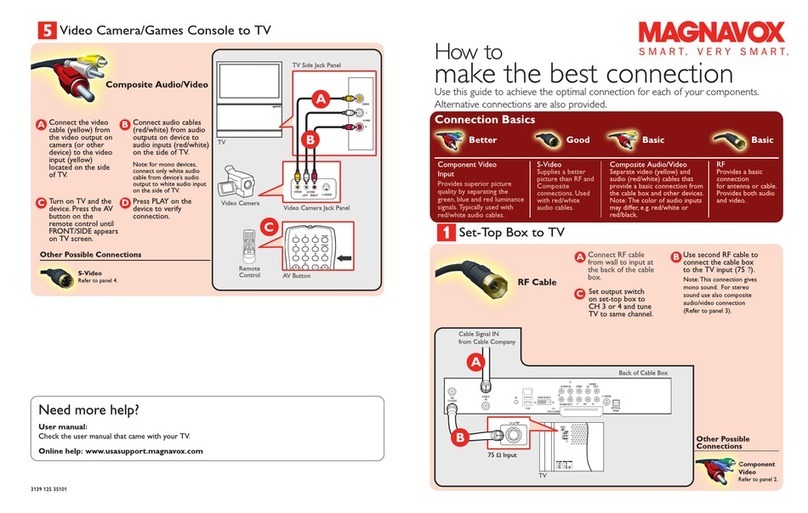
_'_ Connect the VIDEO and
AUDIO IN(put) jacks on the
TV to the AUDIO and VIDEO
OUT(put) jacks on the VCR.
_,,_ Press the MENU (M) button
on the remote, then press the
MENU • or • buttons to select
the word INPUT with the TV's
on-screen arrow.
Note: You can press the
CHANNELA• buttons to select
"VCR!AUX'" (if it has been
added to the TV's channel
memory..) See page 7 for details.
K,_ Press the (+) button to select
the VCR/AUX(iliary) INPUTS
onthe rear of the "iv'.
<@ Turn the VCR ON and PLAY
the VCR tape to be viewed on the
TV.
Remember, when you're
ithrough using the A/V
INPUT Jacks, return the INPUT
display screen on the TV to
ANTENNA. If you leave the TV
in the VCR/AUX INPUT mode
and there is no signal source
connected to the jacks, you will be
seeing only a blank screen on the
T_V ""
NOTE: If you have a mono (single
audio OUTPUT) VCR, "Y"
Connectors are available (from
your dealer or Parts Information
Center 1 800 292-6066) to connect
to the audio inputs on the "IV.
PICTURE AND SOUND FROM
PLAYBACK OF vCR TAPE
DINPUT
VIDEO IN
(YELLOW)
NOTE: THE 'q"V/VCR" BUTTON
CAN ALSO BE USED TO PLACE
THE TV IN VCR;AUX MODE (AS
WELL AS SELECT CHANNELS 3
OR 43
_-'.!-JJ RCA PHONO PLUG
./ CABLES (NOT
SUPPLIED)
l AUDIO IN I
L RED!WHITE) [
¢-.o
VCR
(EQUIPPED WITH VIDEO AND
AUDIO OUTPUT JACKS)
l
!
16
he S(uper)-Video connection
n the rear of the TV is used
for the playback of S-VHS VCR
tapes. Video Discs, or Compact
Disc Interactive (cd-i) discs.
Better picture detail and clarity
is possible with the S-Video
playback as compared to the
picture from a normal antenna
(RF) connection.
_ Connect the S-VIDEO IN
Jack on the TV to the S-VHS
Out(put) jack on a S-VHS VCR.
The S-VHS connecting cable
will be supplied with the S-VHS
VCR (or Video Disc player.)
Also connect the AUDIO
IN(put) jacks from the TV to the
AUDIO OUT jacks on the VCR.
-,,_ Press MENU (M)
the button
on the remote, then press the
MENU • or • buttons to select
the word INPUT with the TV's
on-screen arrow.
<_' Press (+) button to select the
S-VHS INPUT on the rear of the
"IV.
_Turn the VCR ON and place
it in the S-VIDEO or S-VHS
mode. Insert a S-VHS cassette
tape and PLAY the VCR in a
normal manner.
PICTURE AND SOUND FROM
PLAYBACK OF S-VHS VCR TAPE
Ij
k!..L ii!_;
RCA PFIONO
PLUG CABLES
(NOT SUPPL]ED)
S-VHS VCR
(EQUIPPED WITH S-VIDEO
OUTPL-I- .lACK)
NOTE: THE '"]%'iVCR" BU'I'I'ON
CAN ALSO BE USED TO PLACE
THE TV IN EITHER S-VIDEO OR
VCRIAUX MODES (AS WELL AS
SELECT CHANN'ELS"" 3 OR 4.)
_//_ Remember, when youYe
_throueh using the S-VIDEO
h-N(put)jack return the INPUT
control on the TV to A2NTE_A. If
you leave the TV in the S-VIDEO
mode and there is no signal source
connected to the jack, you will be
seeing only a blank screen on the
TV.
17
m
i<
ave you ever played hide and
eek with your remote
control? Are you tired of tearing
the house apart trying tofind if
someone has stuffed the remote
_nder the couch, put it on the
shelves, or hid it in the desk? Well.
your TV remote can save you all
that looking by automatically
signaling its location to you.
Etere's how it works:
\'- Press the POWER button on
the set to turn the TV ON.
Note: Normally you can press any
button on the front of the TV to
turn the set ON. But for the remote
locator to work you need to be sure
to use the Power button at the TV.
"LOCATING REMOTE" shows on
the TV screen.
_- Within a few seconds a
chirping or beeping sound will
begin to come from the remote
control hand unit.
"lhe remote will continue to signal
its location for around 30 seconds.
Normal TV program sound wilt not
be heard while the remote locator is
working.
_,,_ Once you find the remote just
press any button on the remote and
the beeping sound will stop.
The remote is now ready for
normal TV feature d_e.
Remember., the remote
locator may not properly
receive its "homing" signal from
the TV if it has been placed on a
metal shelf or counter material.
Adso, since there's a special type
of radio frequency "homing"
signal receiver inside the remote
we are required to notify you that
any changes or modifications not
expressly approved by Philips
Consumer Electronics Company
could void the user's authority to
operate the remote equipment.
..i:i:!:
Remote Locator "homing"
range is around 30 Feet.
! • l ll• • flit•-• A+ PI]IA
18
|
See the above information on
how to use :he Loca_or Code
ButtonforProgr_-nmlng.
<
For most homes this step would
not be needed but for your
information:
Up to 9 different remote locator
address codes can be set on which the
TV can send out its "homing" signal.
This is done in case there is more than
one TV (with a remote locator)
present, and you want only one
specific remote to be signaled when the
TV is turned OAt.*
To se: a Locator Address Code:
> With TV turned ON, press the TV
System button first and then the
LOCATOR CODE button on the
remo_e.
You will need a pencil or pen to press
the recessed button.
The .'FVshows the present Remote
Loca:or Code.
,_ Press number button (0-9)any on
the remote to set or change the Locator
Code.
"Fne remote will beepto let you know
it has received the new Locator Code
and then return to its normal operating
mode.
Remember, if batteries are replaced the
Locator Code will need to be
reentered.
When setting the Locator Code if any
button, other than the number buttons.
are pressed the remote will return to its
nomaa! operation mode.
*For owners who live in an apartment
(townhouse or condominium)
complex, this task may be n_essary
since the remote locatofs signal can be
sent and detected directly through
adjoining walls.
19
ether you're watching a movie
r a video game your TV has
automatic video control settings
matched for your current program
source or content. The Smart Picture
feature quickly resets your TV's video
controls for a number of different
types of programs and viewing
conditions you may have in your
home. Each Smart Picture setting is
preset at the factory to automatically
adjust the TV's Picture, Color, and
Sharpness viewing control levels.
_Press the Smart button on the
remote.
Press the Menu • or • button to
select the desired Smart Menu
feature (highlighted with the arrow).
_,_ With the Smart Picture control
selected, press the (+) or (-) button
repeatedly to select any of the preset
viewing categories (Example: Video
Games, Movies, etc.).
/x_ Press STATUS button to clear
the screen.
Remember, the video
control settings for the Smart
-Picture categories are
memorized intoghe TV at the
factory and can only be reset by field
and service technicizus.
2O

Other Magnavox TV manuals

Magnavox 37MF437B - LCD TV - 1080p User manual

Magnavox

Magnavox 37MF437B - LCD TV - 1080p User manual

Magnavox iL01-2K3 User manual

Magnavox

Magnavox iL01-2K3 User manual

Magnavox PR1312C221 User manual

Magnavox

Magnavox PR1312C221 User manual

Magnavox TS3262 User manual

Magnavox

Magnavox TS3262 User manual

Magnavox 42MF437B - 42" Digital Lcd Hdtv User manual

Magnavox

Magnavox 42MF437B - 42" Digital Lcd Hdtv User manual

Magnavox MS2730C - 27i Color Tv Manual

Magnavox

Magnavox MS2730C - 27i Color Tv Manual

Magnavox MT1340B User manual

Magnavox

Magnavox MT1340B User manual

Magnavox 20MS3442/17OM User manual

Magnavox

Magnavox 20MS3442/17OM User manual

Magnavox 27C550 User manual

Magnavox

Magnavox 27C550 User manual

Magnavox 42MF231D - Hook Up Guide Technical manual

Magnavox

Magnavox 42MF231D - Hook Up Guide Technical manual

Magnavox 47MF439B - 47" LCD TV User manual

Magnavox

Magnavox 47MF439B - 47" LCD TV User manual

Magnavox \ User manual

Magnavox

Magnavox \ User manual

Magnavox 27MT3305/17 User manual

Magnavox

Magnavox 27MT3305/17 User manual

Magnavox 55MV376Y User manual

Magnavox

Magnavox 55MV376Y User manual

Magnavox 47MF439B - 47" LCD TV User manual

Magnavox

Magnavox 47MF439B - 47" LCD TV User manual

Magnavox \ User manual

Magnavox

Magnavox \ User manual

Magnavox 27MT5405/17 User manual

Magnavox

Magnavox 27MT5405/17 User manual

Magnavox PS1952 User manual

Magnavox

Magnavox PS1952 User manual

Magnavox TS2754C101 User manual

Magnavox

Magnavox TS2754C101 User manual

Magnavox MD301B series User manual

Magnavox

Magnavox MD301B series User manual

Magnavox \ User manual

Magnavox

Magnavox \ User manual

Magnavox 14MT2136 User manual

Magnavox

Magnavox 14MT2136 User manual

Magnavox PR1308B User manual

Magnavox

Magnavox PR1308B User manual

Magnavox 27MS343S User manual

Magnavox

Magnavox 27MS343S User manual

Popular TV manuals by other brands

Toshiba CX35F60 owner's manual

Toshiba

Toshiba CX35F60 owner's manual

LG 21FS4RLX Service manual

LG

LG 21FS4RLX Service manual

JVC AV-32H35SAE instructions

JVC

JVC AV-32H35SAE instructions

Polaroid TK2450 operating manual

Polaroid

Polaroid TK2450 operating manual

Emerson Hello Kitty HKTV13 Service manual

Emerson

Emerson Hello Kitty HKTV13 Service manual

Skyvue OBX-32000-L owner's manual

Skyvue

Skyvue OBX-32000-L owner's manual

Sony BRAVIA KD-75S9005B reference guide

Sony

Sony BRAVIA KD-75S9005B reference guide

Samsung TXM2796HFX/XAA Service manual

Samsung

Samsung TXM2796HFX/XAA Service manual

SUPER//FLUO ALPHA BRIONVEGA manual

SUPER//FLUO

SUPER//FLUO ALPHA BRIONVEGA manual

Sony KV-29FA350 Service manual

Sony

Sony KV-29FA350 Service manual

Sony TRINITRON KV-PG14P70 Service manual

Sony

Sony TRINITRON KV-PG14P70 Service manual

Sceptre X370BV-FHD quick start guide

Sceptre

Sceptre X370BV-FHD quick start guide

Panasonic TX-32PX20P operating instructions

Panasonic

Panasonic TX-32PX20P operating instructions

Loewe Spheros R 32 HD+ operating instructions

Loewe

Loewe Spheros R 32 HD+ operating instructions

TECHWOOD T32PLD12 operating instructions

TECHWOOD

TECHWOOD T32PLD12 operating instructions

Panasonic PRISM W1 Series operating instructions

Panasonic

Panasonic PRISM W1 Series operating instructions

Toshiba 43U6763DAT operating instructions

Toshiba

Toshiba 43U6763DAT operating instructions

Samsung TU43CU7175U C Series user manual

Samsung

Samsung TU43CU7175U C Series user manual

manuals.online logo
manuals.online logoBrands
  • About & Mission
  • Contact us
  • Privacy Policy
  • Terms and Conditions

Copyright 2025 Manuals.Online. All Rights Reserved.