MAJORITY Neptune User manual

Majority Neptune
Docking Speaker
BLK/WHT
User Guide
Video step-by-step guidance also available online at www.majoritytech.co.uk

IMPORTANT
CONTENTS
1
1. Contents
2. Controls and Functions
3. Remote Control Functions
4. Display Screen Icons
5. “What’s in the box?” and Basic Operation
6. FM Radio
7. Bluetooth and Phone Connection
8. Aux-In Port, USB Port and iPhone/iPod Docking
9. Clock and Sleep Setting
10. Brightness and Alarm Setting
11. Technical Specifications and Warranty
12. Important Safety Information

IMPORTANT
Controls and Functions
2
1.Display screen
2.Snooze/Dimmer
3.Dock
4.Volume -
5.Skip Back
6.Play/Pause/Scan/Call
7.Skip Forward
8.Volume +
9.Power button
10.Sleep
11.Set mode
12.Alarm 1
13.Alarm 2
14.USB Out 1 jack
15.Aux-in-jack
16.Time
17.Volume -
18.Volume +
19.Antenna
20.DC 5V In
1.
2.
3.
4.5.6.7.8.
910 11 12 13
14. 15. 16. 17. 18.
19.
20.

IMPORTANT
Remote Control Functions
3
1 2
3
8
5
6
913
10
12
14
15
16
17
1. Power On/Off
2. Mode Selection/Alarm ring source selection
3. Time setting
4. Sleep time setting
5. Dimmer
6. Skip back
7. Skip forward
8. Play/Pause
9. Alarm 1
10.Alarm 2
11.Tune up +, hold and press to auto-scan
12.Tune down -, hold and press to auto-scan
13.Volume +
14.Volume –
15.Snooze
16.Auto-scan
17.Mute
7
4
11

IMPORTANT
Display Screen Icons
4
1. iPhone/iPod Docking Mode
2. USB Mode
3. Bluetooth Mode
4. Aux-In Mode
5. FM Radio Mode
6. Alarm 1 On
7. Alarm 2 On
8. Alarm Time
9. Sleep Timer On

IMPORTANT
“What’s in the box?”/ Basic Operation
5
“What’s in the box?”
•Majority Neptune Radio
•Remote Control
Please note all (Ref.) refer to Page 2 Controls and Functions mapping guide.
Basic Operation
•Plug the 5v adapter connector into the back of the system labelled DC 5v (Ref.20) and the power supply into the mains.
•Press the ‘Power ’ button to turn on the unit (Ref.9), “On” will be displayed on the screen.
•To select a mode press the ‘Set Mode’ button (Ref.11). Press multiple times until your required option is selected which will
show on the display screen, see page 4. There are five options:
Standby
To place the music system back on standby, press the ‘Power’ button (Ref.9). The front display will show “Off” and then go into
standby, showing the time. To turn off fully, switch off at the mains. The cord must be out of reach of children.
•UK Standard Plug DC 5v Power Supply
•Aux-In Jack Cable
•Instructions Guide
iPod/iPhone Connection
USB Playing Mode
Bluetooth
Aux In Playing Mode
FM - FM Radio

IMPORTANT
FM Radio
6
FM Radio
•To select FM Radio mode, press through your choices using the ‘Set Mode’ button (Ref.11). Your choices will be displayed on the
front display screen (Ref.1) – choose the following icon for “FM Radio”.
•Move the antenna so that you get the best signal you can (Ref.19).
•Press and hold ‘Scan’ (Ref.6) and the music system will automatically save all stations that have a good signal.
•To select saved stations use the ‘Skip Bk’ (Ref.5) or ‘Skip Fwd’(Ref.7) buttons.
•To fine tune, use the ‘Tun+’ (Ref.11) and ‘Tun-’ (Ref.12) buttons to tune a frequency, hold the button to scan quickly.
How to play a preset station
•Once all stations have been stored automatically, you can select your choice using the ‘Skip Bk’ (Ref.5) or ‘Skip Fwd’(Ref.7).
IMPORTANT NOTE: PLEASE MAKE SURE YOU HAVE EXTENDED THE ANTENNA TO ITS FULL LENGTH (Ref.19).
THIS WILL ENABLE YOU TO GET THE BEST SIGNAL.

IMPORTANT
Bluetooth Phone and Connection
7
Bluetooth Playing Mode
•To select Bluetooth and Phone mode, press the ‘Set Mode’ button (Ref.11) to highlight your choice. The choices will be displayed
on the front display screen (Ref.1) – choose the following icon for “Bluetooth”.
•Turn on Bluetooth on your phone and “Majority Neptune” will appear, click on this to connect.
•The unit will beep when connected and the Bluetooth icon will stop flashing on the display.
•To select music you will need to select the album or playlist from your phone. Once this is playing you can use the ‘Skip Bk’(Ref.5)
or ‘Skip Fwd’(Ref.7) buttons to select previous or next tracks.
•You can also use the ‘Play’ (Ref.6) or ‘Pause’ (Ref. 6) buttons to play or pause a track.
•Tip: Ensure the volume is switched up higher when using Bluetooth or Aux-in to ensure you have sound.
Call Connection
•To answer a call, press the ‘Play/Pause/Scan/Call’ button (Ref.6).
•To hang up on a call, press the ‘Play/Pause/Scan/Call’ button (Ref.6).
•To play music after the call, press the ‘Play/Pause/Scan/Call’ button again (Ref.6).

IMPORTANT
Aux-In Port, USB Ports and iPhone/iPod Docking
8
Aux-In Port
•You can connect your phone or tablet with an Aux 3.5mm cable that connects to the Aux-in jack (Ref.15).
•Insert the audio cable. To select the mode press the ‘Set Mode’ button (Ref.11). Scroll through your choices which will be
displayed on the front display screen (Ref.1) – choose the following icon for “Aux-in”.
USB Port –Charging your phone
•When connected via a USB lead in the USB port (Ref.14) the system will charge your phone and play your music via the USB.
•To select this mode, press the ‘Set Mode’ button (Ref.11). Scroll through your choices which will be displayed on the front display
screen (Ref.1) and choose the following icon “USB Mode”.
iPhone/iPod Docking
•To select this mode, scroll through your choices using the ‘Set Mode’ button (Ref.11). Your choices will be displayed on the front
display screen (Ref.1) – choose the following icon “iPod ”.
•Insert iPhone/iPod onto the dock (Ref.3).
•The iPhone or iPod has the phone stand to support it.
•To choose music you will need to select the album or playlist from your phone, but once selected you can then use the ‘Skip Bk’
(Ref.5) or ‘Skip Fwd’ (Ref.7) buttons to select previous or next tracks.
•The remote control can also be used for various functions, see page 3.

IMPORTANT
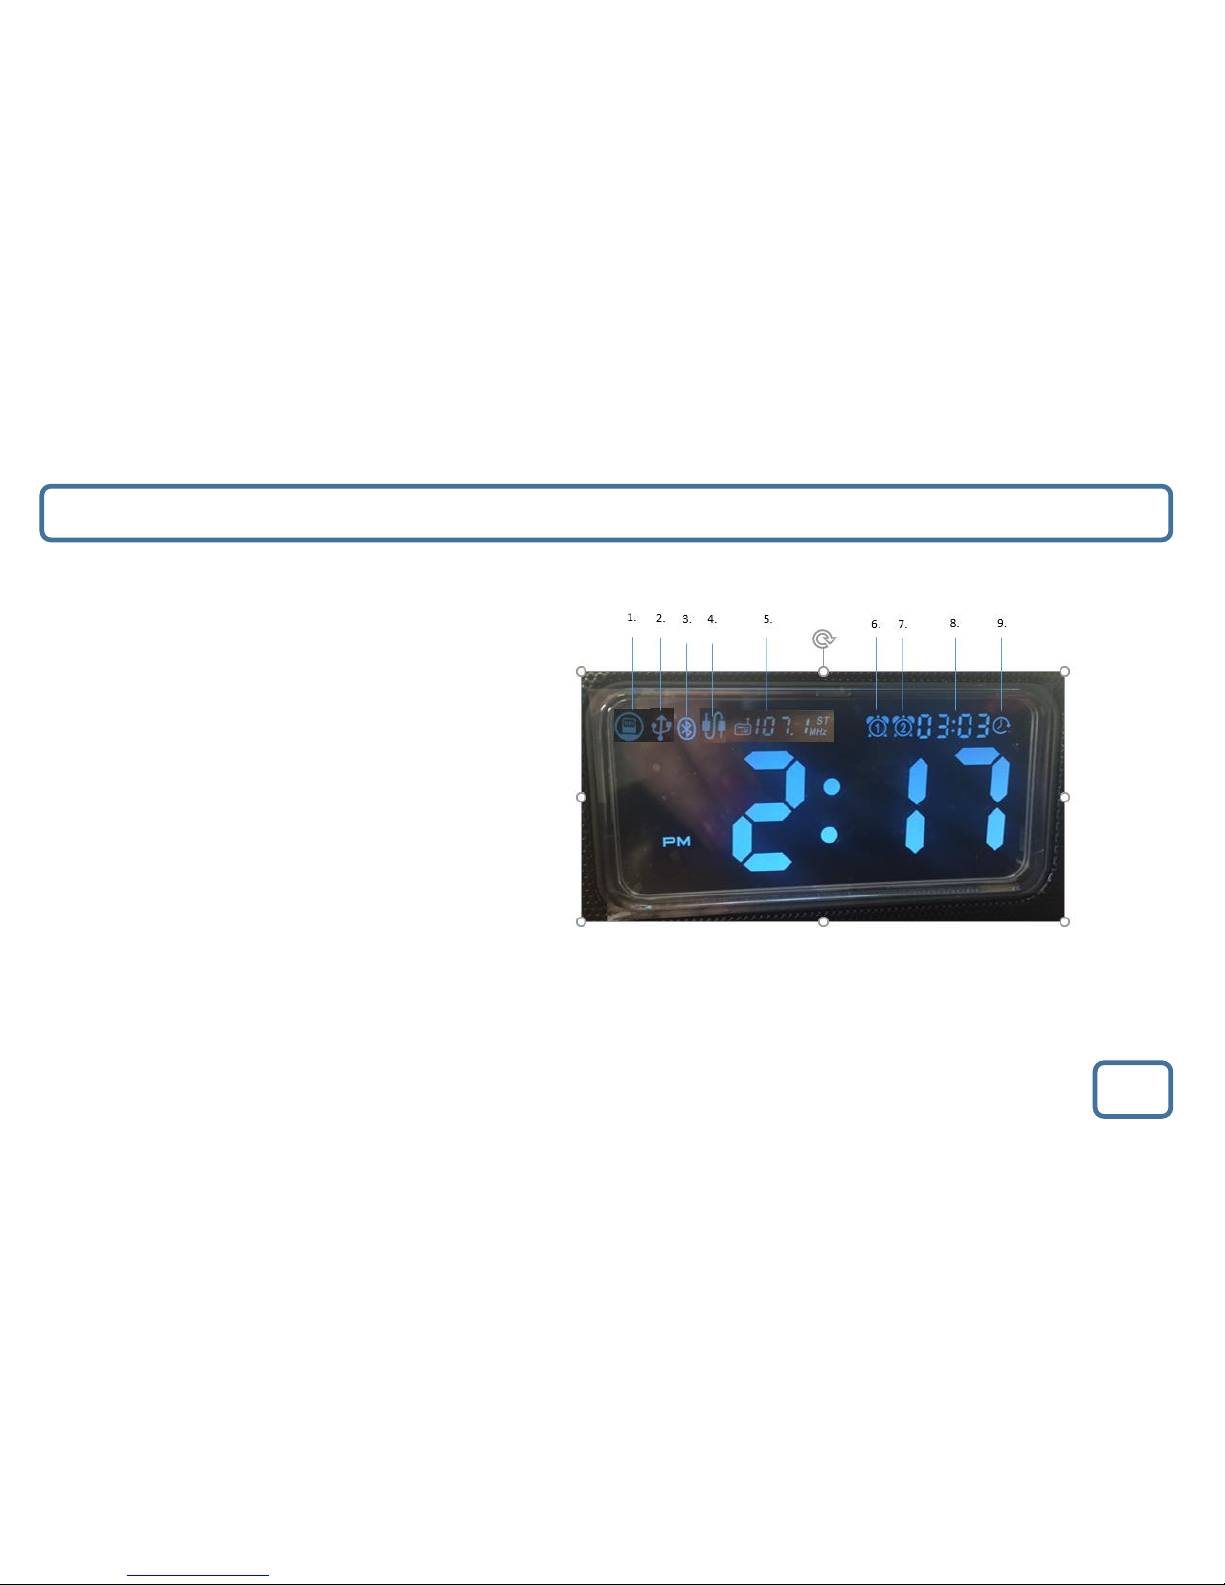
Clock and Sleep Timer Setting
9
The time will automatically set once you have docked your iPhone into the unit and will show when system is in Standby. To manually
set, follow the below instructions:
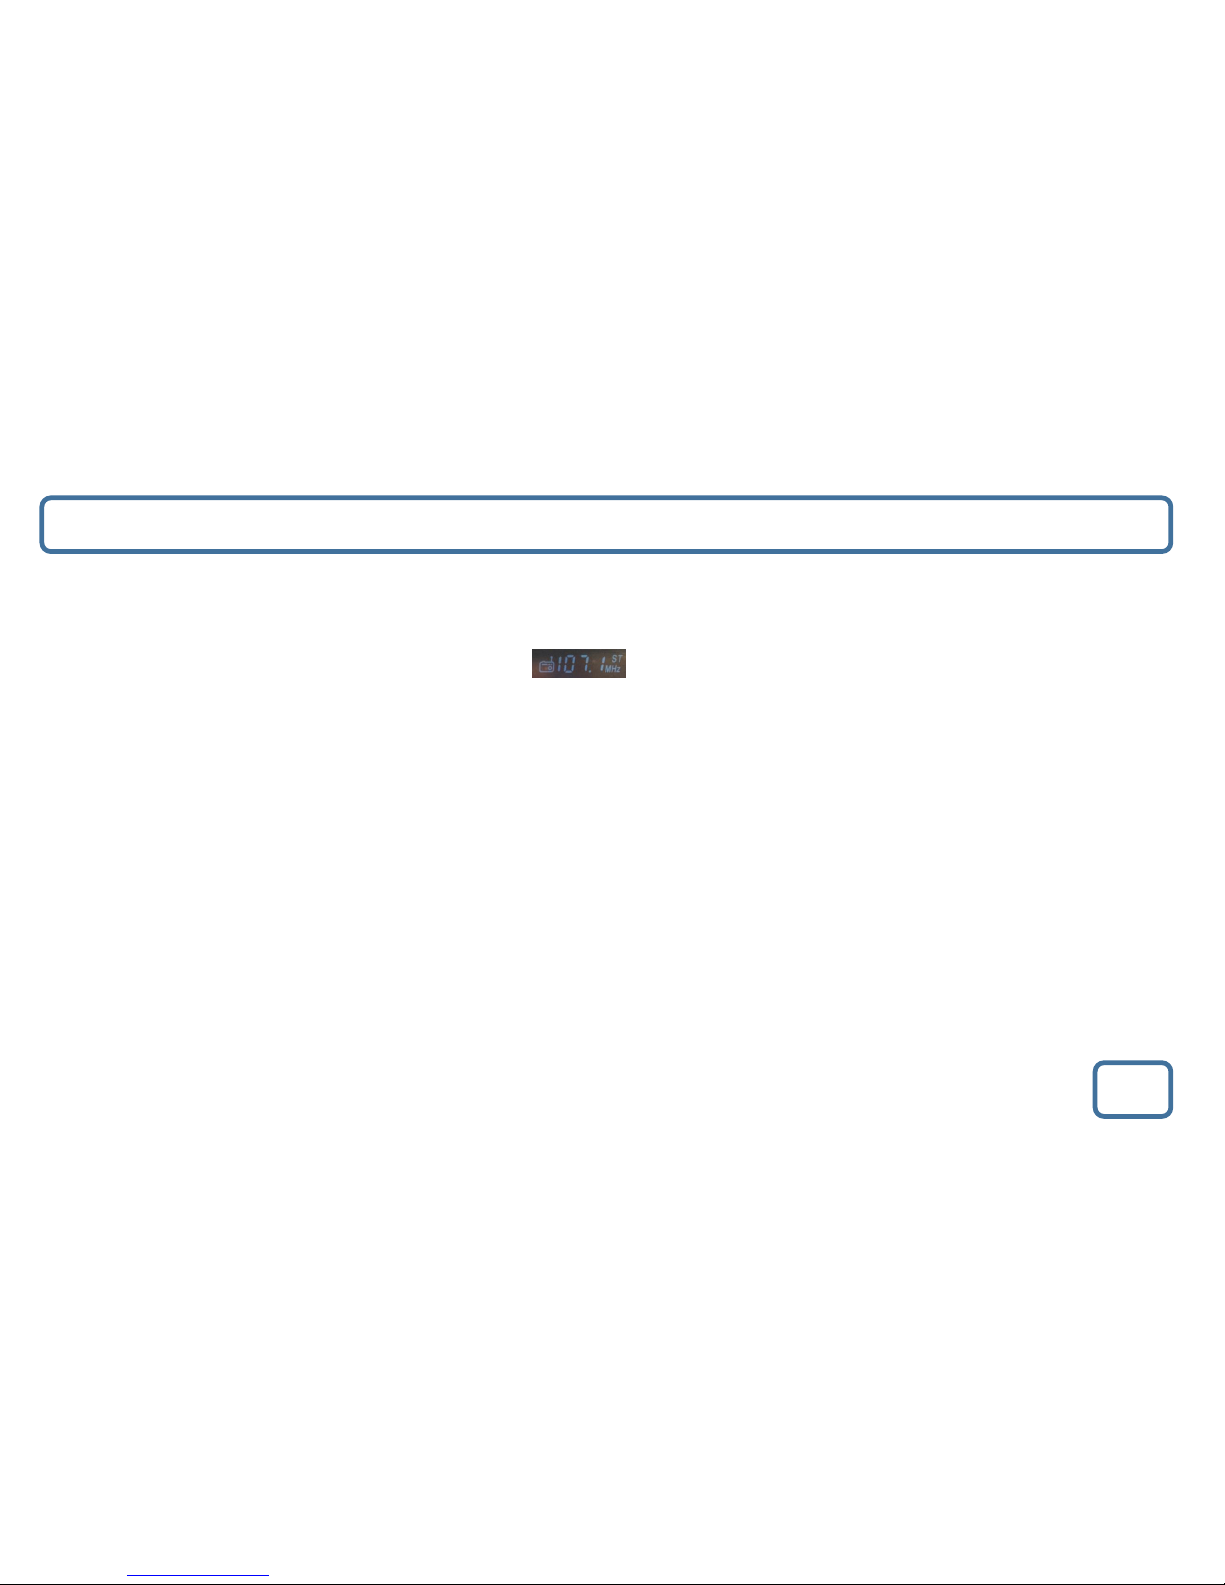
Manually setting the time
•Press and hold the ‘Time’ button (No. 16) for 1 second to display options.
•Select your option using the ‘-’ (Ref.4) and ‘+’ buttons (Ref.8).
•Using the ‘-’ (Ref.4) and ‘+’ (Ref.8) buttons, select <12 HOUR / 24 HOUR> , then press the ‘Time’ button to confirm your option.
•The hour will flash and you can change it using the ‘-’ (Ref.4) and ‘+’(Ref.8) buttons, then press the ‘Time’ button to confirm your
option.
•Then the minutes will flash and you can change them using the ‘-’ (Ref.4) and ‘+’(Ref.8) buttons. Press the ‘Time’ button to confirm
your option. The time is now set.
Sleep Setting
Sleep Setting enables you to programme the music system to switch off at a set time –up to 90 minutes.
•Press the ‘Sleep’ button (Ref.10).
•Select your time option by pressing the ‘Sleep’ button (Ref.10) multiple times.
The options are ‘90/80/70/60/50/40/30/20/10 or Off’.
•The sleep icon will appear in the top right of the display screen. To see how many minutes you have left before the unit
automatically switches off press the ‘Sleep’ button (Ref.10).
•To turn the function off, follow the above instructions and choose “OFF”.

IMPORTANT
Brightness and Alarm Setting
10
Brightness Setting
•To change the display screen brightness, use the remote control ‘Dimmer’ button (Ref.5) or the ‘Dimmer’ button (Ref.2) on the
unit.
•There are 4 different levels to choose from including turning the brightness off completely.
Alarm1 Setting/Alarm2 Setting –both alarms are set up in the same way.
•Press the ‘Alarm 1’ button (Ref.12) or the ‘Alarm 2’ button (Ref.13).
•The alarm icon 1 or 2 will appear on the display screen.
•There are 4 sound options to select from. Press the ‘Alarm1/2’ button multiple times to choose -“iPod/Radio/Buzzer/Off”.
•Press ‘Set Mode’ button (Ref.11) to set the hour using the ‘-’ (Ref.4) and ‘+’(Ref.8) buttons, press ‘Set Mode’ button (Ref.11) to
confirm.
•To set the minutes use the ‘-’ (Ref.4) and ‘+’(Ref.8) buttons, press ‘Set Mode’ button (Ref.11) to confirm.
Alarm Function
•When alarm sounds the alarm icon will flash on the display.
•The alarm will sound from low to high volume.
•Press the ‘Snooze/Dimmer’ button (Ref.2) to snooze for another 9 minutes. You can keep snoozing for up to 30 minutes.
•To turn alarm off press the ‘Power’ button (Ref.9) or ‘Alarm 1/2’ button (Ref.12/13).
•Alarm 1 will need to be reset on every use but Alarm 2 will sound daily once set unless the setting is changed to ‘Off’.
When setting the alarms using the remote control, press the ‘Set’ button (Ref.3) and use the ‘Skip Back’ (Ref.6) or ‘
Skip Fwd’ (Ref.7) buttons to choose your hour and minutes. Press the ‘Set’ button (Ref.3) when confirming your options.

IMPORTANT
Technical Specification and Warranty
11
Technical Specification
Input 100 –240V 50/60Hz, 1.2A
Output 5V 3A
Radio FM 87.5-108MHz
Batteries
•Underneath the unit is a battery compartment that includes a 3V cell button battery which
memorizes the clock time for when there is no power supply. It does not support the LCD display.
•The remote control also uses a 3V cell button battery and the compartment can be found on the
back of the controller.
Warranty
All products come with a standard 12 month warranty. All items must be registered on www.majoritytech.co.uk for
the warranty to be valid. Once on the web page use the menu to find “register your product”. You will also be given
the chance to extend your warranty for an additional 24 months free of charge.

IMPORTANT
IMPORTANT SAFETY INFORMATION
12
IMPORTANT
IMPORTANT: Please read all instructions carefully before use and keep for future reference
1.Read these instructions.
2.Keep these instructions. Instructions are also
available for download at www.majoritytech.co.uk
3.Heed all Warnings.
4.Follow all instructions.
5.Do not clean the apparatus near or with water.
6.Clean only with a dry cloth.
7.Do not block any ventilation openings.
Install in accordance with the manufacturer’s
instructions.
8.Do not install near any heat sources such as
radiators, heat registers, stoves, or other
apparatus (including amplifiers) that produce
heat.
9.Protect the power cord from being walked on
or pinched particularly at plugs, convenience
receptacles, and the point where they exit from
the apparatus.
10.Only use attachments/accessories specified
by the manufacturer.
11.Unplug this apparatus during light storms
or when unused for long periods of time.
12.Refer all servicing to qualified service personnel.
Servicing is required when the apparatus has
been damaged in any way, such as power-
supply cord or plug is damaged, liquid has
been spilled or objects have fallen into the
apparatus, the apparatus has been exposed
to rain or moisture, does not operate normally
or has been dropped.
13.No naked flame sources, such as lit candles,
should be placed on the apparatus.
14.Dispose of used electrical products and batteries
safely according to your local authority and regulations.
ADDITIONAL WARNINGS
•The apparatus shall not be exposed to dripping or
splashing and no objects filled with liquid, such as
vases, shall be placed on apparatus.
•Main plug is used to disconnect device and it should
remain readily operable during intended use. In order
to disconnect the apparatus from the main mains
completely, the mains plug should be disconnected
from the main socket outlet completely.
•Battery shall not be exposed to excessive heat such as
sunshine, fire or the like.
RECYCLING ELECTRICAL PRODUCTS
You should now recycle your waste electrical goods and
in doing so help the environment.
This symbol means an electrical product should not be
disposed of with normal household waste. Please ensure
it is taken to a suitable facility for disposal when finished
with.
Other manuals for Neptune
1
Table of contents
Other MAJORITY Docking Speakers manuals