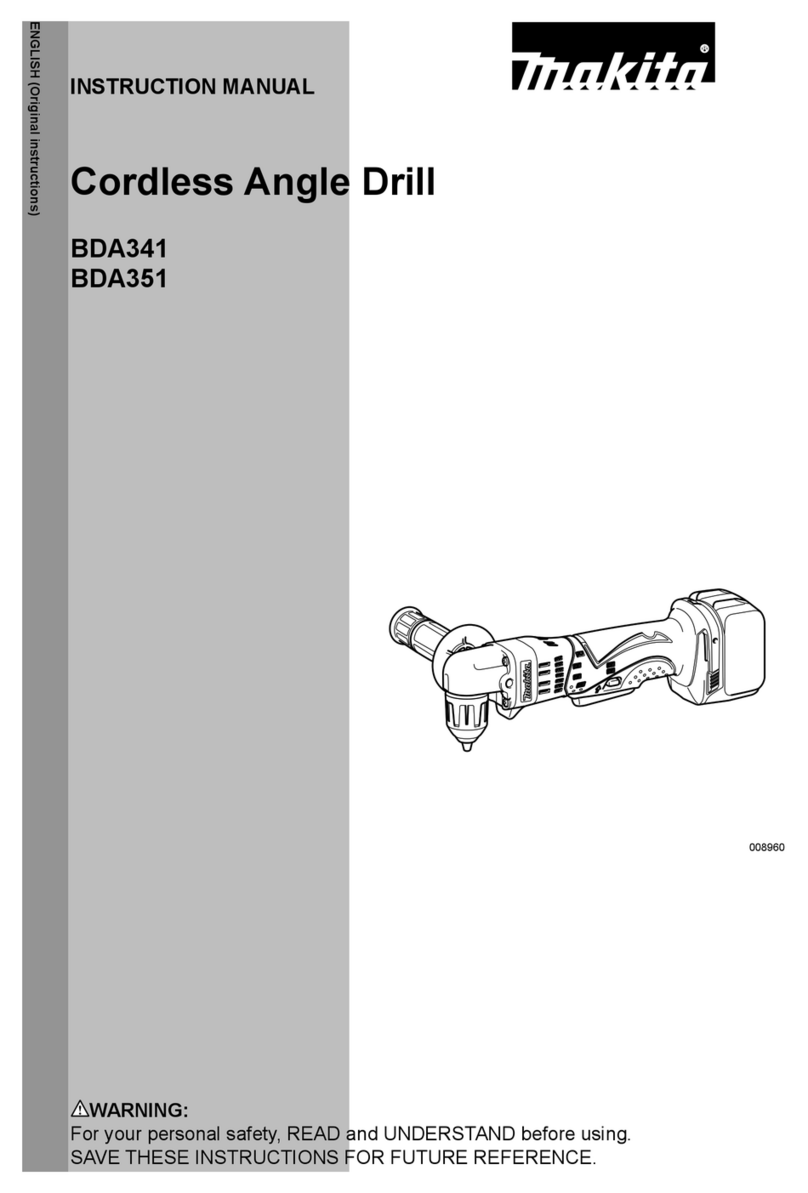
Makita DA332D User manual

DA332D
DA333D
EN Cordless Angle Drill INSTRUCTION MANUAL 4
SV Sladdlös vinkelborrmaskin BRUKSANVISNING 9
NO Batteridrevet
vinkelboremaskin BRUKSANVISNING 14
FI Akkukulmaporakone KÄYTTÖOHJE 19
LV Bezvada leņķa urbmašīna LIETOŠANAS INSTRUKCIJA 24
LT Akumuliatorinis kampinis
grąžtas NAUDOJIMO INSTRUKCIJA 29
ET Juhtmeta nurktrell KASUTUSJUHEND 34
RU Аккумуляторная угловая
дрель
РУКОВОДСТВО ПО
ЭКСПЛУАТАЦИИ 39

3
1
2
Fig.1
1
2
Fig.2
1
Fig.3
1
Fig.4
1
Fig.5
A
B1
1
Fig.6
1
Fig.7
1
Fig.8
2

3
2
1
Fig.9
2
1
Fig.10
Fig.11
Fig.12
3

4ENGLISH
ENGLISH (Original instructions)
SPECIFICATIONS
Model: DA332D DA333D
Drilling capacities Steel 10 mm
Wood 12 mm
No load speed 0 - 1,100 min-1
Overall length 313 mm - 332 mm
Rated voltage D.C. 10.8 V - 12 V max
Battery cartridge BL1015 / BL1016 / BL1020B / BL1021B / BL1040B / BL1041B
Net weight 1.2 - 1.3 kg 1.2 - 1.4 kg
• Duetoourcontinuingprogramofresearchanddevelopment,thespecicationshereinaresubjecttochange
withoutnotice.
• Specicationsandbatterycartridgemaydifferfromcountrytocountry.
• Theweightmaydifferdependingontheattachment(s),includingthebatterycartridge.Thelightestandheavi-
estcombination,accordingtoEPTA-Procedure01/2014,areshowninthetable.
Intended use
Thetoolisintendedfordrillinginwood,metaland
plastic.
Noise
ThetypicalA-weightednoiseleveldeterminedaccord-
ingtoEN60745:
Model DA332D
Soundpressurelevel(LpA):70dB(A)orless
Uncertainty(K):3dB(A)
Model DA333D
Soundpressurelevel(LpA):70dB(A)orless
Uncertainty(K):3dB(A)
Thenoiselevelunderworkingmayexceed80dB(A).
WARNING: Wear ear protection.
Vibration
Thevibrationtotalvalue(tri-axialvectorsum)deter-
minedaccordingtoEN60745:
Model DA332D
Workmode:drillingintometal
Vibrationemission(ah,D):2.5m/s2or less
Uncertainty(K):1.5m/s2
Model DA333D
Workmode:drillingintometal
Vibrationemission(ah,D):3.0m/s2
Uncertainty(K):1.5m/s2
NOTE:Thedeclaredvibrationemissionvaluehas
beenmeasuredinaccordancewiththestandardtest
methodandmaybeusedforcomparingonetoolwith
another.
NOTE:Thedeclaredvibrationemissionvalue
mayalsobeusedinapreliminaryassessmentof
exposure.
WARNING:Thevibrationemissionduringactual
useofthepowertoolcandifferfromthedeclared
emissionvaluedependingonthewaysinwhichthe
toolisused.
WARNING:Besuretoidentifysafetymeasures
toprotecttheoperatorthatarebasedonanestima-
tionofexposureintheactualconditionsofuse(taking
accountofallpartsoftheoperatingcyclesuchas
thetimeswhenthetoolisswitchedoffandwhenitis
runningidleinadditiontothetriggertime).
EC Declaration of Conformity
For European countries only
TheECdeclarationofconformityisincludedasAnnexA
tothisinstructionmanual.
SAFETY WARNINGS
General power tool safety warnings
WARNING: Read all safety warnings, instruc-
tions, illustrations and specications provided
with this power tool.Failuretofollowallinstructions
listedbelowmayresultinelectricshock,reand/or
seriousinjury.
Save all warnings and instruc-
tions for future reference.
Theterm"powertool"inthewarningsreferstoyour
mains-operated(corded)powertoolorbattery-operated
(cordless)powertool.

5ENGLISH
Cordless drill safety warnings
1. Use auxiliary handle(s), if supplied with the
tool.Lossofcontrolcancausepersonalinjury.
2. Hold power tool by insulated gripping sur-
faces, when performing an operation where
the cutting accessory may contact hidden
wiring.Cuttingaccessorycontactinga"live"
wiremaymakeexposedmetalpartsofthepower
tool"live"andcouldgivetheoperatoranelectric
shock.
3. Always be sure you have a rm footing. Be
sure no one is below when using the tool in
high locations.
4. Hold the tool rmly.
5. Keep hands away from rotating parts.
6. Do not leave the tool running. Operate the tool
only when hand-held.
7. Do not touch the drill bit or the workpiece
immediately after operation; they may be
extremely hot and could burn your skin.
8. Some material contains chemicals which may
be toxic. Take caution to prevent dust inhala-
tion and skin contact. Follow material supplier
safety data.
9. If the drill bit cannot be loosened even you
open the jaws, use pliers to pull it out.Insucha
case,pullingoutthedrillbitbyhandmayresultin
injurybyitssharpedge.
SAVE THESE INSTRUCTIONS.
WARNING: DO NOT let comfort or familiarity
with product (gained from repeated use) replace
strict adherence to safety rules for the subject
product. MISUSE or failure to follow the safety
rules stated in this instruction manual may cause
serious personal injury.
Important safety instructions for
battery cartridge
1. Before using battery cartridge, read all instruc-
tions and cautionary markings on (1) battery
charger, (2) battery, and (3) product using
battery.
2. Do not disassemble battery cartridge.
3. If operating time has become excessively
shorter, stop operating immediately. It may
result in a risk of overheating, possible burns
and even an explosion.
4. If electrolyte gets into your eyes, rinse them
out with clear water and seek medical atten-
tion right away. It may result in loss of your
eyesight.
5. Do not short the battery cartridge:
(1) Do not touch the terminals with any con-
ductive material.
(2) Avoid storing battery cartridge in a con-
tainer with other metal objects such as
nails, coins, etc.
(3) Do not expose battery cartridge to water
or rain.
A battery short can cause a large current
ow, overheating, possible burns and even a
breakdown.
6. Do not store the tool and battery cartridge in
locations where the temperature may reach or
exceed 50 °C (122 °F).
7. Do not incinerate the battery cartridge even if
it is severely damaged or is completely worn
out. The battery cartridge can explode in a re.
8. Be careful not to drop or strike battery.
9. Do not use a damaged battery.
10. The contained lithium-ion batteries are subject
to the Dangerous Goods Legislation require-
ments.
Forcommercialtransportse.g.bythirdparties,
forwardingagents,specialrequirementonpack-
agingandlabelingmustbeobserved.
Forpreparationoftheitembeingshipped,consult-
inganexpertforhazardousmaterialisrequired.
Pleasealsoobservepossiblymoredetailed
nationalregulations.
Tapeormaskoffopencontactsandpackupthe
batteryinsuchamannerthatitcannotmove
aroundinthepackaging.
11. Follow your local regulations relating to dis-
posal of battery.
SAVE THESE INSTRUCTIONS.
CAUTION: Only use genuine Makita batteries.
Useofnon-genuineMakitabatteries,orbatteriesthat
havebeenaltered,mayresultinthebatterybursting
causingres,personalinjuryanddamage.Itwill
alsovoidtheMakitawarrantyfortheMakitatooland
charger.
Tips for maintaining maximum
battery life
1. Charge the battery cartridge before completely
discharged. Always stop tool operation and
charge the battery cartridge when you notice
less tool power.
2. Never recharge a fully charged battery car-
tridge. Overcharging shortens the battery
service life.
3. Charge the battery cartridge with room tem-
perature at 10 °C - 40 °C (50 °F - 104 °F). Let
a hot battery cartridge cool down before
charging it.

6ENGLISH
FUNCTIONAL
DESCRIPTION
CAUTION: Always be sure that the tool is
switched off and the battery cartridge is removed
before adjusting or checking function on the tool.
Installing or removing battery
cartridge
CAUTION: Always switch off the tool before
installing or removing of the battery cartridge.
CAUTION: Hold the tool and the battery car-
tridge rmly when installing or removing battery
cartridge.Failuretoholdthetoolandthebattery
cartridgermlymaycausethemtoslipoffyourhands
andresultindamagetothetoolandbatterycartridge
andapersonalinjury.
►Fig.1: 1. Red indicator 2.Button3. Battery cartridge
Toremovethebatterycartridge,slideitfromthetool
whileslidingthebuttononthefrontofthecartridge.
Toinstallthebatterycartridge,alignthetongueonthe
batterycartridgewiththegrooveinthehousingandslip
itintoplace.Insertitallthewayuntilitlocksinplace
withalittleclick.Ifyoucanseetheredindicatoronthe
uppersideofthebutton,itisnotlockedcompletely.
CAUTION: Always install the battery cartridge
fully until the red indicator cannot be seen.Ifnot,
itmayaccidentallyfalloutofthetool,causinginjuryto
youorsomeonearoundyou.
CAUTION: Do not install the battery cartridge
forcibly.Ifthecartridgedoesnotslideineasily,itis
notbeinginsertedcorrectly.
Indicating the remaining battery
capacity
Only for battery cartridges with the indicator
►Fig.2: 1. Indicator lamps 2.Checkbutton
Pressthecheckbuttononthebatterycartridgetoindi-
catetheremainingbatterycapacity.Theindicatorlamps
lightupforafewseconds.
Indicator lamps Remaining
capacity
Lighted Off
75%to100%
50%to75%
25%to50%
0%to25%
NOTE:Dependingontheconditionsofuseandthe
ambienttemperature,theindicationmaydifferslightly
fromtheactualcapacity.
Battery protection system
Thetoolisequippedwithabatteryprotectionsystem.
Thissystemautomaticallycutsoffpowertothemotorto
extendbatterylife.
Thetoolwillautomaticallystopduringoperationifthe
tooland/orbatteryareplacedunderoneofthefollowing
conditions:
Overloaded:
Thetoolisoperatedinamannerthatcausesittodraw
anabnormallyhighcurrent.
Inthissituation,turnthetooloffandstoptheapplication
thatcausedthetooltobecomeoverloaded.Thenturn
the tool on to restart.
Ifthetooldoesnotstart,thebatteryisoverheated.In
thissituation,letthebatterycoolbeforeturningthetool
on again.
Low battery voltage:
Theremainingbatterycapacityistoolowandthetool
willnotoperate.Ifyouturnthetoolon,themotordoes
notrunorthemotorrunsagainbutstopssoon.Inthis
situation,removeandrechargethebattery.
Switch action
CAUTION: Before installing the battery car-
tridge into the tool, always check to see that the
switch lever actuates properly and returns to the
"OFF" position when released.
CAUTION: Be sure to hold the tool rmly
before the tool is switched off.
►Fig.3: 1. Switch lever
Tostartthetool,simplypulltheswitchlever.Toolspeed
isincreasedbyincreasingpressureontheswitchlever.
Release the switch lever to stop.
Lighting up the front lamp
CAUTION: Do not look in the light or see the
source of light directly.
For model DA332D
►Fig.4: 1. Lamp
For model DA333D
►Fig.5: 1. Lamp
Pulltheswitchlevertolightupthelamp.Thelamp
keepsonlightingwhiletheswitchleverisbeingpulled.
Thelightautomaticallygoesoutapproximately10sec-
ondsaftertheswitchleverisreleased.
NOTE:Useadryclothtowipethedirtoffthelensof
thelamp.Becarefulnottoscratchthelensoflamp,or
itmaylowertheillumination.

7ENGLISH
Reversing switch action
►Fig.6: 1. Reversing switch lever
CAUTION: Always check the direction of
rotation before operation.
CAUTION: Use the reversing switch only after
the tool comes to a complete stop. Changing the
directionofrotationbeforethetoolstopsmaydam-
age the tool.
CAUTION: When not operating the tool,
always set the reversing switch lever to the neu-
tral position.
Thistoolhasareversingswitchtochangethedirection
ofrotation.Depressthereversingswitchleverfromthe
AsideforclockwiserotationorfromtheBsideforcoun-
terclockwise rotation.
Whenthereversingswitchleverisintheneutralposi-
tion,theswitchlevercannotbepulled.
ASSEMBLY
CAUTION: Always be sure that the tool is
switched off and the battery cartridge is removed
before carrying out any work on the tool.
Installing or removing drill bit
Optional accessory
For model DA332D
►Fig.7: 1.Chuckkey
Toinstallthedrillbit,placeitinthechuckasfarasitwill
go.Tightenthechuckbyhand.Placethechuckkeyin
eachofthethreeholesandtightenclockwise.Besure
totightenallthreechuckholesevenly.
Toremovethedrillbit,turnthechuckkeycounterclock-
wiseinjustonehole,thenloosenthechuckbyhand.
Afteruse,returnthechuckkeytothestoragecavityon
the tool.
For model DA333D
►Fig.8: 1. Sleeve
Holdthetoolrmlyandturnthesleevecounterclock-
wisetoopenthechuckjaws.Placethedrillbitinthe
chuckasfarasitwillgo.Holdthetoolrmlyturnthe
sleeveclockwisetotightenthechuck.
Toremovethedrillbit,holdthetoolrmlyturnthe
sleevecounterclockwise.
Installing hook
►Fig.9: 1. Groove 2. Hook 3. Screw
Thehookisconvenientfortemporarilyhangingthetool.
Thiscanbeinstalledoneithersideofthetool.Toinstall
thehook,insertitintoagrooveinthetoolhousingon
eithersideandthensecureitwithascrew.Toremove,
loosenthescrewandthentakeitout.
Chuck key holder
For model DA332D only (optional accessory)
►Fig.10: 1.Chuckkeyholder2. Screw
Toinstallthechuckkeyholder,xittotheconvexpor-
tionofthetoolhousingoneithersideandthensecure
itwithascrew.Toremove,loosenthescrewandthen
takeitout.
OPERATION
CAUTION: Always insert the battery cartridge
all the way until it locks in place.Ifyoucanseethe
redindicatorontheuppersideofthebutton,itisnot
lockedcompletely.Insertitfullyuntiltheredindicator
cannotbeseen.Ifnot,itmayaccidentallyfalloutof
thetool,causinginjurytoyouorsomeonearound
you.
CAUTION: When the speed comes down
extremely, reduce the load or stop the tool to
avoid the tool damage.
CAUTION: Hold the tool rmly with one hand
on the gripping part of the tool when operating
the tool.
For model DA332D
►Fig.11
For model DA333D
►Fig.12
Drilling operation
Drilling in wood
Whendrillinginwood,thebestresultsareobtained
withwooddrillsequippedwithaguidescrew.Theguide
screwmakesdrillingeasierbypullingthedrillbitinto
the workpiece.
Drilling in metal
Topreventthedrillbitfromslippingwhenstartinga
hole,makeanindentationwithacenter-punchand
hammeratthepointtobedrilled.Placethepointofthe
drillbitintheindentationandstartdrilling.
Useacuttinglubricantwhendrillingmetals.Theexcep-
tionsareironandbrasswhichshouldbedrilleddry.

8ENGLISH
CAUTION:
Pressing excessively on the tool will
not speed up the drilling.Infact,thisexcessivepressure
willonlyservetodamagethetipofyourdrillbit,decrease
thetoolperformanceandshortentheservicelifeofthetool.
CAUTION: Hold the tool rmly and exert care
when the drill bit begins to break through the
workpiece.Thereisatremendousforceexertedon
thetool/drillbitatthetimeofholebreakthrough.
CAUTION: A stuck drill bit can be removed
simply by setting the reversing switch to reverse
rotation in order to back out. However, the tool
may back out abruptly if you do not hold it rmly.
CAUTION: Always secure workpieces in a
vise or similar hold-down device.
CAUTION: If the tool is operated continuously
until the battery cartridge has discharged, allow
the tool to rest for 15 minutes before proceeding
with a fresh battery.
MAINTENANCE
CAUTION: Always be sure that the tool is
switched off and the battery cartridge is removed
before attempting to perform inspection or
maintenance.
NOTICE: Never use gasoline, benzine, thinner,
alcohol or the like. Discoloration, deformation or
cracks may result.
TomaintainproductSAFETYandRELIABILITY,
repairs,anyothermaintenanceoradjustmentshould
beperformedbyMakitaAuthorizedorFactoryService
Centers,alwaysusingMakitareplacementparts.
OPTIONAL
ACCESSORIES
CAUTION: These accessories or attachments
are recommended for use with your Makita tool
specied in this manual.Theuseofanyother
accessoriesorattachmentsmightpresentariskof
injurytopersons.Onlyuseaccessoryorattachment
foritsstatedpurpose.
Ifyouneedanyassistanceformoredetailsregarding
theseaccessories,askyourlocalMakitaServiceCenter.
• Drillbits
• Chuckkey
• Chuckkeyholder
• Hook
• Plasticcarryingcase
• Makitagenuinebatteryandcharger
NOTE:Someitemsinthelistmaybeincludedinthe
toolpackageasstandardaccessories.Theymay
differfromcountrytocountry.
Other manuals for DA332D
5
Table of contents
Other Makita Drill manuals

Makita
Makita DA3010 User manual

Makita
Makita 6013B User manual

Makita
Makita 6260DWPE User manual

Makita
Makita DHP343 User manual

Makita
Makita 6207D User manual

Makita
Makita 6300-4 User manual

Makita
Makita BDA341 User manual

Makita
Makita DA4030 User manual

Makita
Makita 8443D User manual

Makita
Makita DA391D User manual

Makita
Makita DHP483RMJ User manual

Makita
Makita DDF483RFJ User manual

Makita
Makita DF002G User manual

Makita
Makita HP332D User manual

Makita
Makita DA333D User manual

Makita
Makita DHP480RMJ User manual

Makita
Makita HP330D User manual

Makita
Makita 6305 User manual

Makita
Makita DF010D Manual

Makita
Makita DHP480 User manual