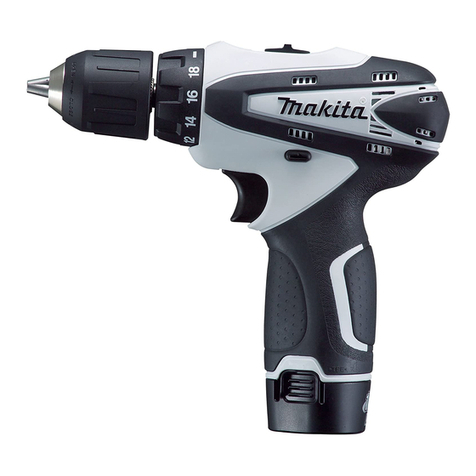
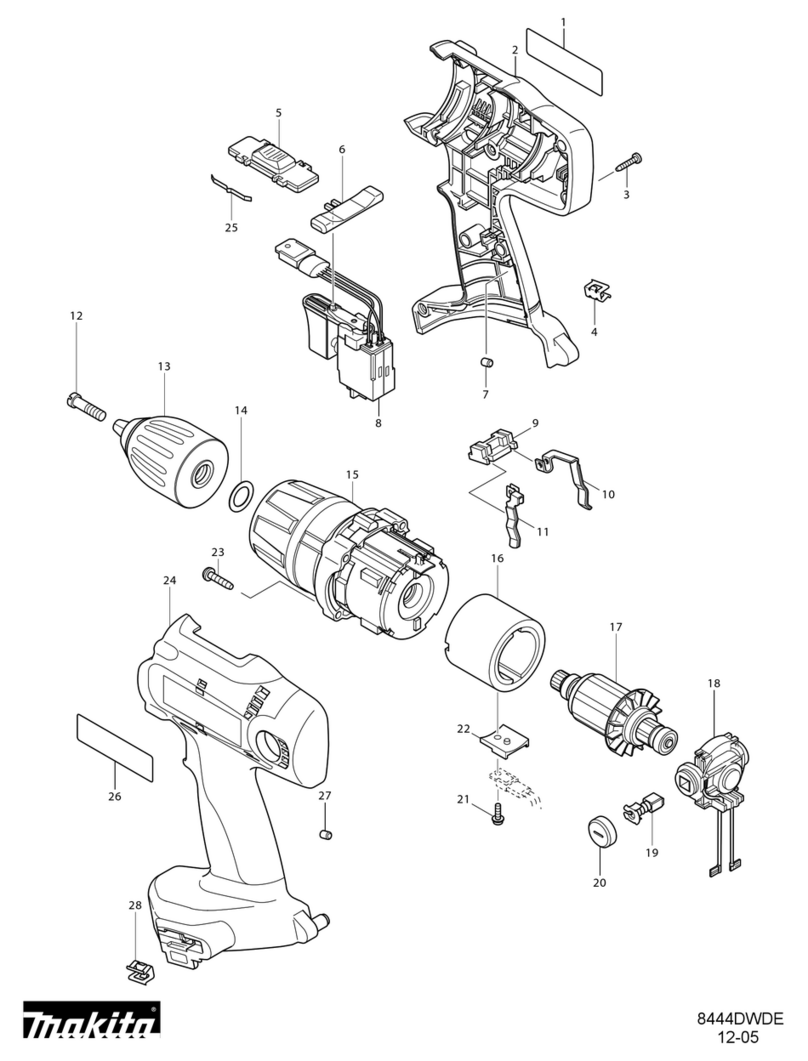
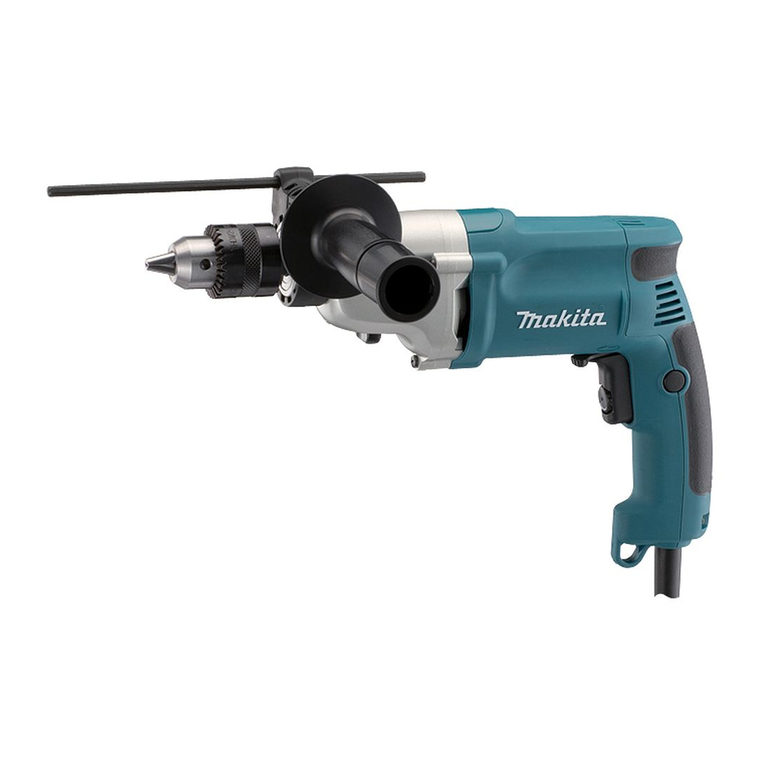
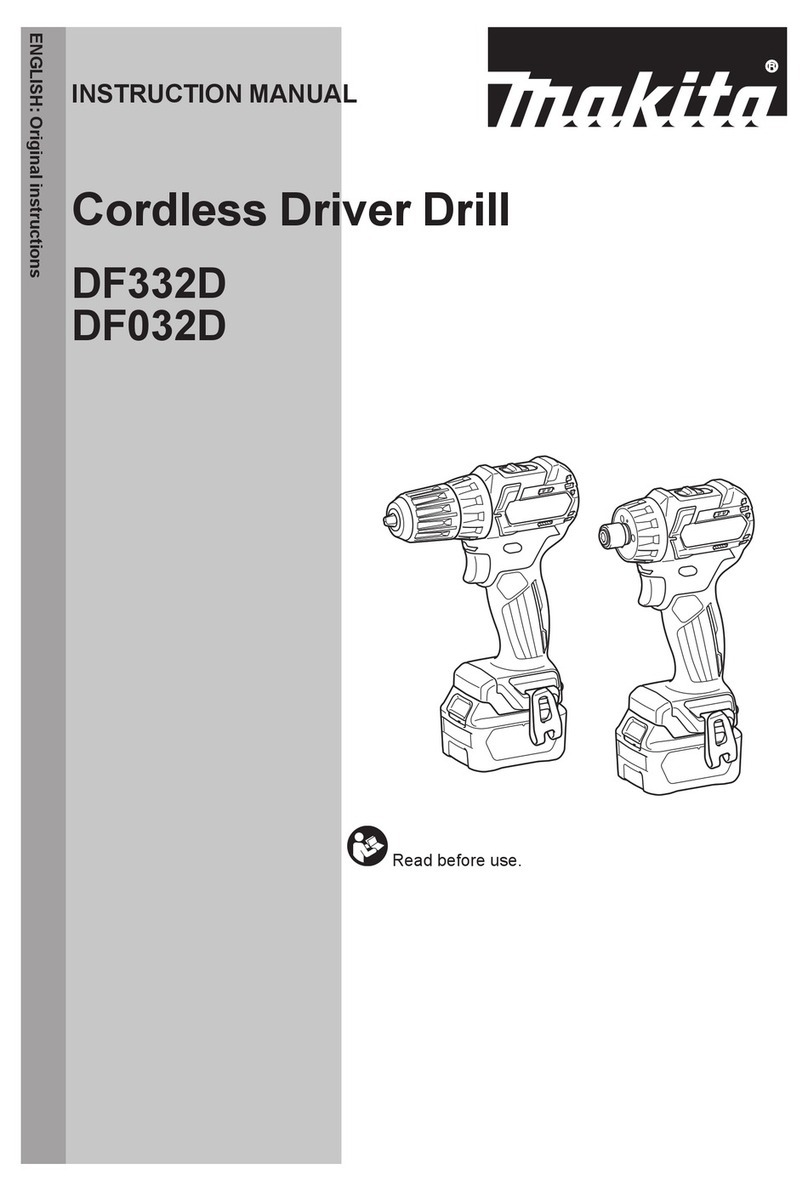
Makita DDF485RFJ User manual

DDF485
EN Cordless Driver Drill INSTRUCTION MANUAL 4
FR Perceuse-Visseuse sans Fil MANUEL D’INSTRUCTIONS 9
DE Akku-Bohrschrauber BETRIEBSANLEITUNG 15
IT Trapano avvitatore a batteria ISTRUZIONI PER L’USO 21
NL Accuschroefboormachine GEBRUIKSAANWIJZING 27
ES Atornillador Taladro
Inalámbrico
MANUAL DE
INSTRUCCIONES 33
PT Parafusadeira/Furadeira a
Bateria MANUAL DE INSTRUÇÕES 39
DA Akku skrue-/boremaskine BRUGSANVISNING 45
EL Δραπανοκατσάβιδο
μπαταρίας ΕΓΧΕΙΡΙΔΙΟ ΟΔΗΓΙΩΝ 50
TR Akülü Matkap Tornavida KULLANMA KILAVUZU 56

1
2
3
Fig.1
1
2
Fig.2
1
Fig.3
1
Fig.4
1
AB
Fig.5
1
Fig.6
1
2
3
Fig.7
1
2
3
Fig.8
2

3
2
1
Fig.9
2
1
Fig.10
Fig.11
1
1
Fig.12
3

4ENGLISH
ENGLISH (Original instructions)
SPECIFICATIONS
Model: DDF485
Drilling capacities Steel 13 mm
Wood 38 mm
Fastening capacities Wood screw 6 mm x 75 mm
Machine screw M6
No load speed High (2) 0 - 1,900 min-1
Low (1) 0 - 500 min-1
Overall length 169 mm
Rated voltage D.C. 18 V
Net weight 1.4 - 1.7 kg
• Duetoourcontinuingprogramofresearchanddevelopment,thespecicationshereinaresubjecttochange
without notice.
• Specicationsmaydifferfromcountrytocountry.
• Theweightmaydifferdependingontheattachment(s),includingthebatterycartridge.Thelightestandheavi-
estcombination,accordingtoEPTA-Procedure01/2014,areshowninthetable.
Applicable battery cartridge
BL1815N/BL1820/BL1820B/BL1830/BL1830B/BL1840/BL1840B/BL1850/BL1850B/BL1860B
• Someofthebatterycartridgeslistedabovemaynotbeavailabledependingonyourregionofresidence.
WARNING: Only use the battery cartridges listed above.Useofanyotherbatterycartridgesmaycause
injuryand/orre.
Intended use
The tool is intended for drilling and screw driving in
wood, metal and plastic.
Noise
ThetypicalA-weightednoiseleveldeterminedaccord-
ingtoEN60745-2-1:
Sound pressure level (LpA):74dB(A)
Uncertainty(K):3dB(A)
Thenoiselevelunderworkingmayexceed80dB(A).
WARNING: Wear ear protection.
Vibration
Thevibrationtotalvalue(tri-axialvectorsum)deter-
minedaccordingtoEN60745-2-1:
Workmode:drillingintometal
Vibrationemission(ah,D):2.5m/s2or less
Uncertainty(K):1.5m/s2
NOTE:Thedeclaredvibrationemissionvaluehas
beenmeasuredinaccordancewiththestandardtest
methodandmaybeusedforcomparingonetoolwith
another.
NOTE:Thedeclaredvibrationemissionvalue
mayalsobeusedinapreliminaryassessmentof
exposure.
WARNING:Thevibrationemissionduringactual
use of the power tool can differ from the declared
emissionvaluedependingonthewaysinwhichthe
tool is used.
WARNING:Besuretoidentifysafetymeasures
toprotecttheoperatorthatarebasedonanestima-
tion of exposure in the actual conditions of use (taking
accountofallpartsoftheoperatingcyclesuchas
the times when the tool is switched off and when it is
running idle in addition to the trigger time).
EC Declaration of Conformity
For European countries only
TheECdeclarationofconformityisincludedasAnnexA
to this instruction manual.
SAFETY WARNINGS
General power tool safety warnings
WARNING: Read all safety warnings, instruc-
tions, illustrations and specications provided
with this power tool. Failure to follow all instructions
listedbelowmayresultinelectricshock,reand/or
seriousinjury.

5ENGLISH
Save all warnings and instruc-
tions for future reference.
Theterm"powertool"inthewarningsreferstoyour
mains-operated(corded)powertoolorbattery-operated
(cordless) power tool.
Cordless driver drill safety warnings
1. Use auxiliary handle(s), if supplied with the
tool.Lossofcontrolcancausepersonalinjury.
2.
Hold power tool by insulated gripping sur-
faces, when performing an operation where the
cutting accessory may contact hidden wiring.
Cuttingaccessorycontactinga"live"wiremay
make exposed metal parts of the power tool "live"
and could give the operator an electric shock.
3. Hold power tool by insulated gripping sur-
faces, when performing an operation where
the fastener may contact hidden wiring.
Fastenerscontactinga"live"wiremaymake
exposed metal parts of the power tool "live" and
could give the operator an electric shock.
4.
Always be sure you have a rm footing. Be sure no
one is below when using the tool in high locations.
5. Hold the tool rmly.
6. Keep hands away from rotating parts.
7. Do not leave the tool running. Operate the tool
only when hand-held.
8. Do not touch the drill bit or the workpiece
immediately after operation; they may be
extremely hot and could burn your skin.
9.
Some material contains chemicals which may be
toxic. Take caution to prevent dust inhalation and
skin contact. Follow material supplier safety data.
10. If the drill bit cannot be loosened even you
open the jaws, use pliers to pull it out. In such a
case,pullingoutthedrillbitbyhandmayresultin
injurybyitssharpedge.
SAVE THESE INSTRUCTIONS.
WARNING: DO NOT let comfort or familiarity
with product (gained from repeated use) replace
strict adherence to safety rules for the subject
product. MISUSE or failure to follow the safety
rules stated in this instruction manual may cause
serious personal injury.
Important safety instructions for
battery cartridge
1. Before using battery cartridge, read all instruc-
tions and cautionary markings on (1) battery
charger, (2) battery, and (3) product using
battery.
2. Do not disassemble battery cartridge.
3. If operating time has become excessively
shorter, stop operating immediately. It may
result in a risk of overheating, possible burns
and even an explosion.
4. If electrolyte gets into your eyes, rinse them
out with clear water and seek medical atten-
tion right away. It may result in loss of your
eyesight.
5. Do not short the battery cartridge:
(1) Do not touch the terminals with any con-
ductive material.
(2) Avoid storing battery cartridge in a con-
tainer with other metal objects such as
nails, coins, etc.
(3) Do not expose battery cartridge to water
or rain.
A battery short can cause a large current
ow, overheating, possible burns and even a
breakdown.
6. Do not store the tool and battery cartridge in
locations where the temperature may reach or
exceed 50 °C (122 °F).
7. Do not incinerate the battery cartridge even if
it is severely damaged or is completely worn
out. The battery cartridge can explode in a re.
8. Be careful not to drop or strike battery.
9. Do not use a damaged battery.
10. The contained lithium-ion batteries are subject
to the Dangerous Goods Legislation require-
ments.
Forcommercialtransportse.g.bythirdparties,
forwarding agents, special requirement on pack-
agingandlabelingmustbeobserved.
Forpreparationoftheitembeingshipped,consult-
ing an expert for hazardous material is required.
Pleasealsoobservepossiblymoredetailed
national regulations.
Tape or mask off open contacts and pack up the
batteryinsuchamannerthatitcannotmove
around in the packaging.
11. Follow your local regulations relating to dis-
posal of battery.
12. Use the batteries only with the products
specied by Makita.Installingthebatteriesto
non-compliantproductsmayresultinare,exces-
siveheat,explosion,orleakofelectrolyte.
SAVE THESE INSTRUCTIONS.
CAUTION: Only use genuine Makita batteries.
Useofnon-genuineMakitabatteries,orbatteriesthat
havebeenaltered,mayresultinthebatterybursting
causingres,personalinjuryanddamage.Itwill
alsovoidtheMakitawarrantyfortheMakitatooland
charger.
Tips for maintaining maximum
battery life
1. Charge the battery cartridge before completely
discharged. Always stop tool operation and
charge the battery cartridge when you notice
less tool power.
2. Never recharge a fully charged battery car-
tridge. Overcharging shortens the battery
service life.
3. Charge the battery cartridge with room tem-
perature at 10 °C - 40 °C (50 °F - 104 °F). Let
a hot battery cartridge cool down before
charging it.
4. Charge the battery cartridge if you do not use
it for a long period (more than six months).
6ENGLISH
FUNCTIONAL DESCRIPTION
CAUTION: Always be sure that the tool is
switched off and the battery cartridge is removed
before adjusting or checking function on the tool.
Installing or removing battery cartridge
CAUTION: Always switch off the tool before
installing or removing of the battery cartridge.
CAUTION: Hold the tool and the battery car-
tridge rmly when installing or removing battery
cartridge.Failuretoholdthetoolandthebattery
cartridgermlymaycausethemtoslipoffyourhands
andresultindamagetothetoolandbatterycartridge
andapersonalinjury.
►Fig.1: 1. Red indicator 2. Button 3.Batterycartridge
Toremovethebatterycartridge,slideitfromthetool
whileslidingthebuttononthefrontofthecartridge.
Toinstallthebatterycartridge,alignthetongueonthe
batterycartridgewiththegrooveinthehousingandslip
itintoplace.Insertitallthewayuntilitlocksinplace
withalittleclick.Ifyoucanseetheredindicatoronthe
uppersideofthebutton,itisnotlockedcompletely.
CAUTION: Always install the battery cartridge
fully until the red indicator cannot be seen. If not,
itmayaccidentallyfalloutofthetool,causinginjuryto
youorsomeonearoundyou.
CAUTION: Do not install the battery cartridge
forcibly.Ifthecartridgedoesnotslideineasily,itis
notbeinginsertedcorrectly.
Indicating the remaining battery capacity
Only for battery cartridges with the indicator
►Fig.2: 1. Indicator lamps 2.Checkbutton
Pressthecheckbuttononthebatterycartridgetoindi-
catetheremainingbatterycapacity.Theindicatorlamps
light up for a few seconds.
Indicator lamps Remaining
capacity
Lighted Off Blinking
75% to 100%
50% to 75%
25% to 50%
0% to 25%
Charge the
battery.
Thebattery
mayhave
malfunctioned.
NOTE: Depending on the conditions of use and the
ambienttemperature,theindicationmaydifferslightly
fromtheactualcapacity.
Tool / battery protection system
Thetoolisequippedwithatool/batteryprotectionsys-
tem.Thissystemautomaticallycutsoffpowertothe
motortoextendtoolandbatterylife.Thetoolwillauto-
maticallystopduringoperationifthetoolorbatteryis
placedunderoneofthefollowingconditions:
Overload protection
Whenthetool/batteryisoperatedinamannerthat
causesittodrawanabnormallyhighcurrent,thetool
stopsautomatically.Inthissituation,turnthetooloff
andstoptheapplicationthatcausedthetooltobecome
overloaded. Then turn the tool on to restart.
Overheat protection
Whenthetool/batteryisoverheated,thetoolstops
automatically.Inthissituation,letthetool/batterycool
beforeturningthetoolonagain.
Overdischarge protection
Whenthebatterycapacityisnotenough,thetoolstops
automatically.Inthiscase,removethebatteryfromthe
toolandchargethebattery.
Switch action
►Fig.3: 1. Switch trigger
CAUTION: Before installing the battery car-
tridge into the tool, always check to see that the
switch trigger actuates properly and returns to
the "OFF" position when released.
Tostartthetool,simplypulltheswitchtrigger.Tool
speedisincreasedbyincreasingpressureontheswitch
trigger. Release the switch trigger to stop.
NOTE:Thetoolautomaticallystopsifyoukeeppull-
ingtheswitchtriggerforabout6minutes.
Lighting up the front lamp
►Fig.4: 1. Lamp
CAUTION: Do not look in the light or see the
source of light directly.
Pulltheswitchtriggertolightupthelamp.Thelamp
keepsonlightingwhiletheswitchtriggerisbeingpulled.
Thelampgoesoutapproximately10secondsafter
releasing the switch trigger.
NOTE: When the tool is overheated, the tool stops
automaticallyandthelampstartsashing.Inthis
case, release the switch trigger. The lamp turns off in
one minute.
NOTE:Useadryclothtowipethedirtoffthelensof
the lamp. Be careful not to scratch the lens of lamp, or
itmaylowertheillumination.

7ENGLISH
Reversing switch action
►Fig.5: 1. Reversing switch lever
CAUTION: Always check the direction of
rotation before operation.
CAUTION: Use the reversing switch only after
the tool comes to a complete stop. Changing the
directionofrotationbeforethetoolstopsmaydam-
age the tool.
CAUTION: When not operating the tool,
always set the reversing switch lever to the neu-
tral position.
This tool has a reversing switch to change the direction
of rotation. Depress the reversing switch lever from the
AsideforclockwiserotationorfromtheBsideforcoun-
terclockwise rotation.
When the reversing switch lever is in the neutral posi-
tion,theswitchtriggercannotbepulled.
Speed change
►Fig.6: 1. Speed change lever
CAUTION:
Always set the speed change lever
fully to the correct position.Ifyouoperatethetoolwith
thespeedchangeleverpositionedhalfwaybetweenthe
"1"sideand"2"side,thetoolmaybedamaged.
CAUTION: Do not use the speed change lever
while the tool is running.Thetoolmaybedamaged.
Displayed
Number
Speed Torque Applicable
operation
1Low High Heavyload-
ing operation
2High Low Light loading
operation
Tochangethespeed,switchoffthetoolrst.Pushthe
speedchangelevertodisplay"2"forhighspeedor"1"for
lowspeedbuthightorque.Besurethatthespeedchange
leverissettothecorrectpositionbeforeoperation.
Ifthetoolspeediscomingdownextremelyduringtheoperationwith
display"2",pushthelevertodisplay"1"andrestarttheoperation.
Adjusting the fastening torque
►Fig.7: 1.Adjustingring2. Graduation 3.Arrow
Thefasteningtorquecanbeadjustedin22levelsbyturningtheadjustingring.Alignthegraduationswiththearrow
onthetoolbody.Youcangettheminimumfasteningtorqueat1andmaximumtorqueat marking.
Theclutchwillslipatvarioustorquelevelswhensetatthenumber1to21.Theclutchdoesnotworkatthe marking.
Beforeactualoperation,driveatrialscrewintoyourmaterialorapieceofduplicatematerialtodeterminewhich
torque level is required for a particular application.
Thefollowingshowstheroughguideoftherelationshipbetweenthescrewsizeandgraduation.
Graduation 12345678910 11 12 13 14 15 16 17 18 19 20 21
Machine screw M4 M5 M6
Wood
screw
Soft wood
(e.g. pine)
–ɸ3.5 x 22 ɸ4.1x 38 –
Hard wood
(e.g. lauan)
–ɸ3.5 x 22 ɸ4.1x 38 –
ASSEMBLY
CAUTION: Always be sure that the tool is
switched off and the battery cartridge is removed
before carrying out any work on the tool.
Installing or removing driver bit/
drill bit
►Fig.8: 1. Sleeve 2. Close 3. Open
Turn the sleeve counterclockwise to open the chuck
jaws.Placethedriverbit/drillbitinthechuckasfar
as it will go. Turn the sleeve clockwise to tighten the
chuck.Toremovethedriverbit/drillbit,turnthesleeve
counterclockwise.
Installing hook
CAUTION:
When installing the hook, always
secure it with the screw rmly.Ifnot,thehookmay
comeofffromthetoolandresultinthepersonalinjury.
►Fig.9: 1. Groove 2. Hook 3. Screw
Thehookisconvenientfortemporarilyhangingthetool.Thiscan
beinstalledoneithersideofthetool.Toinstallthehook,insertit
into a groove in the tool housing on either side and then secure it
with a screw. To remove, loosen the screw and then take it out.
Installing driver bit holder
Optional accessory
►Fig.10: 1.Driverbitholder2.Driverbit
Fitthedriverbitholderintotheprotrusionatthetoolfoot
on either right or left side and secure it with a screw.
Whennotusingthedriverbit,keepitinthedriverbit
holders.Driverbits45mm-longcanbekeptthere.

8ENGLISH
OPERATION
CAUTION: Always insert the battery cartridge
all the way until it locks in place.Ifyoucanseethe
redindicatorontheuppersideofthebutton,itisnot
lockedcompletely.Insertitfullyuntiltheredindicator
cannotbeseen.Ifnot,itmayaccidentallyfalloutof
thetool,causinginjurytoyouorsomeonearound
you.
CAUTION: When the speed comes down
extremely, reduce the load or stop the tool to
avoid the tool damage.
Holdthetoolrmlywithonehandonthegripandthe
otherhandonthebottomofthebatterycartridgeto
control the twisting action.
►Fig.11
NOTICE:Donotcovervents,oritmaycauseover-
heating and damage to the tool.
►Fig.12: 1. Vent
Screwdriving operation
CAUTION: Adjust the adjusting ring to the
proper torque level for your work.
CAUTION: Make sure that the driver bit is
inserted straight in the screw head, or the screw
and/or driver bit may be damaged.
Placethepointofthedriverbitinthescrewheadand
applypressuretothetool.Startthetoolslowlyandthen
increasethespeedgradually.Releasetheswitchtrigger
as soon as the clutch cuts in.
NOTE: When driving wood screw, pre-drill a pilot hole
2/3thediameterofthescrew.Itmakesdrivingeasier
and prevents splitting of the workpiece.
Drilling operation
First,turntheadjustingringsothatthearrowpointsto
the marking. Then proceed as follows.
Drilling in wood
Whendrillinginwood,thebestresultsareobtained
with wood drills equipped with a guide screw. The guide
screwmakesdrillingeasierbypullingthedrillbitinto
the workpiece.
Drilling in metal
Topreventthedrillbitfromslippingwhenstartinga
hole, make an indentation with a center-punch and
hammeratthepointtobedrilled.Placethepointofthe
drillbitintheindentationandstartdrilling.
Useacuttinglubricantwhendrillingmetals.Theexcep-
tionsareironandbrasswhichshouldbedrilleddry.
CAUTION: Pressing excessively on the tool
will not speed up the drilling. In fact, this excessive
pressurewillonlyservetodamagethetipofyourdrill
bit,decreasethetoolperformanceandshortenthe
service life of the tool.
CAUTION: Hold the tool rmly and exert care
when the drill bit begins to break through the
workpiece. There is a tremendous force exerted on
thetool/drillbitatthetimeofholebreakthrough.
CAUTION: A stuck drill bit can be removed
simply by setting the reversing switch to reverse
rotation in order to back out. However, the tool
may back out abruptly if you do not hold it rmly.
CAUTION: Always secure workpieces in a
vise or similar hold-down device.
CAUTION: If the tool is operated continuously
until the battery cartridge has discharged, allow
the tool to rest for 15 minutes before proceeding
with a fresh battery.
MAINTENANCE
CAUTION: Always be sure that the tool is
switched off and the battery cartridge is removed
before attempting to perform inspection or
maintenance.
NOTICE: Never use gasoline, benzine, thinner,
alcohol or the like. Discoloration, deformation or
cracks may result.
TomaintainproductSAFETYandRELIABILITY,
repairs,anyothermaintenanceoradjustmentshould
beperformedbyMakitaAuthorizedorFactoryService
Centers,alwaysusingMakitareplacementparts.
OPTIONAL ACCESSORIES
CAUTION: These accessories or attachments
are recommended for use with your Makita tool
specied in this manual.Theuseofanyother
accessories or attachments might present a risk of
injurytopersons.Onlyuseaccessoryorattachment
for its stated purpose.
Ifyouneedanyassistanceformoredetailsregard-
ingtheseaccessories,askyourlocalMakitaService
Center.
• Drillbits
• Driverbits
• Driverbitholder
• Hook
• Tool hanger
• Makitagenuinebatteryandcharger
NOTE:Someitemsinthelistmaybeincludedinthe
toolpackageasstandardaccessories.Theymay
differfromcountrytocountry.

27 NEDERLANDS
NEDERLANDS (Originele instructies)
TECHNISCHE GEGEVENS
Model: DDF485
Boorcapaciteiten Staal 13 mm
Hout 38 mm
Bevestigingscapaciteiten Houtschroef 6 mm x 75 mm
Kolomschroef M6
Nullasttoerental Hoog (2) 0 - 1.900 min-1
Laag (1) 0 - 500 min-1
Totale lengte 169 mm
Nominale spanning 18Vgelijkspanning
Nettogewicht 1,4 - 1,7 kg
• Inverbandmetononderbrokenresearchenontwikkeling,behoudenwijonshetrechtvoordebovenstaande
technischegegevenszondervoorafgaandekennisgevingtewijzigen.
• De technische gegevens kunnen van land tot land verschillen.
• Hetgewichtkanverschillenafhankelijkvandehulpstukken,waaronderdeaccu.Delichtsteenzwaarstecom-
binatie,overeenkomstigdeEPTA-procedure01/2014,wordengetoondindetabel.
Toepasselijke accu’s
BL1815N/BL1820/BL1820B/BL1830/BL1830B/BL1840/BL1840B/BL1850/BL1850B/BL1860B
• Sommigevandehierbovenvermeldeaccu’szijnmogelijknietleverbaarafhankelijkvanwaaruwoont.
WAARSCHUWING: Gebruik uitsluitend de accu’s die hierboven worden genoemd.Gebruikvanenige
andereaccukanleidentotletselen/ofbrand.
Gebruiksdoeleinden
Ditgereedschapisbestemdvoorhetborenenschroe-
ven in hout, metaal en plastic.
Geluidsniveau
Detypische,A-gewogengeluidsniveauszijngemeten
volgensEN60745-2-1:
Geluidsdrukniveau (LpA):74dB(A)
Onzekerheid(K):3dB(A)
Hetgeluidsniveaukantijdensgebruikhogerworden
dan80dB(A).
WAARSCHUWING: Draag
gehoorbescherming.
Trilling
De totale trillingswaarde (triaxiale vectorsom) zoals
vastgesteldvolgensEN60745-2-1:
Gebruikstoepassing:boreninmetaal
Trillingsemissie (ah,D):2,5m/s2of lager
Onzekerheid(K):1,5m/s2
OPMERKING: De opgegeven trillingsemissiewaarde
is gemeten volgens de standaardtestmethode en kan
wordengebruiktomditgereedschaptevergelijken
met andere gereedschappen.
OPMERKING: De opgegeven trillingsemissiewaarde
kanookwordengebruiktvooreenbeoordelingvooraf
vandeblootstelling.
WAARSCHUWING:Detrillingsemissietijdens
hetgebruikvanhetelektrischgereedschapinde
praktijkkanverschillenvandeopgegeventrilling-
semissiewaardeafhankelijkvandemanierwaarop
hetgereedschapwordtgebruikt.
WAARSCHUWING:Zorgervoordatveilig-
heidsmaatregelenwordengetroffenterbescherming
vandeoperatordiezijngebaseerdopeenschatting
vandeblootstellingonderpraktijkomstandigheden
(rekeninghoudendmetallefasenvandebedrijfscy-
clus,zoalsdetijdsduurgedurendewelkehetgereed-
schap is uitgeschakeld en stationair draait, naast de
ingeschakeldetijdsduur).
EG-verklaring van conformiteit
Alleen voor Europese landen
DeEG-verklaringvanconformiteitisbijgevoegdals
BijlageAbijdezegebruiksaanwijzing.

28 NEDERLANDS
VEILIGHEIDSWAAR-
SCHUWINGEN
Algemene
veiligheidswaarschuwingen voor
elektrisch gereedschap
WAARSCHUWING: Lees alle veiligheids-
waarschuwingen, aanwijzingen, afbeeldingen en
technische gegevens behorend bij dit elektrische
gereedschap aandachtig door.Alsunietalleonder-
staandeaanwijzingennaleeft,kandatresulterenin
brand,elektrischeschokkenen/ofernstigletsel.
Bewaar alle waarschuwingen en
instructies om in de toekomst te
kunnen raadplegen.
De term "elektrisch gereedschap" in de veiligheidsvoor-
schriften duidt op gereedschappen die op stroom van
het lichtnet werken (met snoer) of gereedschappen met
een accu (snoerloos).
Veiligheidswaarschuwingen voor
een accuschroefboormachine
1. Gebruik hulphandgreep (hulphandgrepen),
indien bij het gereedschap geleverd. Verliezen
van de macht over het gereedschap kan letsel
veroorzaken.
2. Houd elektrisch gereedschap alleen vast aan
de geïsoleerde handgrepen wanneer de kans
bestaat dat het werktuig in aanraking komt met
verborgen bedrading.Wanneerboor-/snijhulp-
middelen in aanraking komen met onder spanning
staande draden, zullen de niet-geïsoleerde meta-
len delen van het gereedschap onder spanning
komentestaanzodatdegebruikereenelektrische
schokkankrijgen.
3. Houd elektrisch gereedschap alleen vast aan
de geïsoleerde handgrepen, wanneer u werkt
op plaatsen waar het bevestigingsmateriaal
met verborgen bedrading in aanraking kan
komen.Wanneerbevestigingsmaterialenin
aanraking komen met onder spanning staande
draden, zullen de niet-geïsoleerde metalen delen
van het gereedschap onder spanning komen te
staanzodatdegebruikereenelektrischeschok
kankrijgen.
4. Zorg ook altijd dat u stevig op een solide
bodem staat. Let bij het werken op hoge
plaatsen op dat er zich niemand recht onder u
bevindt.
5. Houd het gereedschap stevig vast.
6. Houd uw handen uit de buurt van draaiende
onderdelen.
7. Laat het gereedschap niet draaiend achter.
Schakel het gereedschap alleen in wanneer u
het stevig vasthoudt.
8. Raak direct na uw werk het boorbit of het werk-
stuk niet aan. Zij kunnen bijzonder heet zijn en
brandwonden op uw huid veroorzaken.
9. Bepaalde materialen kunnen giftige chemica-
liën bevatten. Vermijd contact met uw huid en
zorg dat u geen stof inademt. Volg de veilig-
heidsvoorschriften van de fabrikant van het
materiaal.
10. Als het boorbit niet kan worden losgemaakt
ondanks dat de klauwen geopend zijn,
gebruikt u een tang om het eruit te trekken. In
dat geval kan met de hand eruit trekken leiden tot
letselvanwegezijnscherperand.
BEWAAR DEZE
VOORSCHRIFTEN.
WAARSCHUWING: Laat u NIET misleiden
door een vals gevoel van comfort en bekendheid
met het gereedschap (na veelvuldig gebruik)
en neem alle veiligheidsvoorschriften van het
betreffende gereedschap altijd strikt in acht.
VERKEERD GEBRUIK of het niet naleven van de
veiligheidsvoorschriften in deze gebruiksaanwij-
zing kan leiden tot ernstig letsel.
Belangrijke veiligheidsinstructies
voor een accu
1. Lees alle voorschriften en waarschuwingen op
(1) de acculader, (2) de accu, en (3) het product
waarvoor de accu wordt gebruikt, alvorens de
accu in gebruik te nemen.
2. Neem de accu niet uit elkaar.
3. Als de gebruikstijd van een opgeladen accu
aanzienlijk korter is geworden, moet u het
gebruik ervan onmiddellijk stopzetten.
Voortgezet gebruik kan oververhitting, brand-
wonden en zelfs een ontplofng veroorzaken.
4. Als elektrolyt in uw ogen is terechtgeko-
men, spoelt u uw ogen met schoon water
en roept u onmiddellijk de hulp van een
dokter in. Elektrolyt in de ogen kan blindheid
veroorzaken.
5. Voorkom kortsluiting van de accu:
(1) Raak de accuklemmen nooit aan met een
geleidend materiaal.
(2) Bewaar de accu niet in een bak waarin
andere metalen voorwerpen zoals spij-
kers, munten e.d. worden bewaard.
(3) Stel de accu niet bloot aan water of regen.
Kortsluiting van de accu kan oorzaak zijn van
een grote stroomafgifte, oververhitting, brand-
wonden, en zelfs defecten.
6. Bewaar het gereedschap en de accu niet op
plaatsen waar de temperatuur kan oplopen tot
50°C of hoger.
7. Werp de accu nooit in het vuur, ook niet wan-
neer hij zwaar beschadigd of volledig versleten
is. De accu kan ontploffen in het vuur.
8. Wees voorzichtig dat u de accu niet laat vallen
en hem niet blootstelt aan schokken of stoten.
9. Gebruik nooit een beschadigde accu.

29 NEDERLANDS
10. De bijgeleverde lithium-ionbatterijen zijn
onderhevig aan de vereisten in de wetgeving
omtrent gevaarlijke stoffen.
Voorcommercieeltransportendergelijkedoor
derden en transporteurs moeten speciale vereis-
ten ten aanzien van verpakking en etikettering
worden nageleefd.
Alsvoorbereidingvanhetartikeldatwordt
getransporteerdishetnoodzakelijkeenexpertop
hetgebiedvangevaarlijkestoffenteraadplegen.
Houdutevensaanmogelijkstrengerenationale
regelgeving.
Blootliggende contactpunten moeten worden
afgedekt met tape en de accu moet zodanig
wordenverpaktdatdezenietkanbewegeninde
verpakking.
11. Volg bij het weggooien van de accu de plaatse-
lijke voorschriften.
12. Gebruik de accu’s uitsluitend met de gereed-
schappen die door Makita zijn aanbevolen.Als
deaccu’swordenaangebrachtinniet-compatibele
gereedschappen,kandatleidentotbrand,bui-
tensporige warmteontwikkeling, een explosie of
lekkagevanelektrolyt.
BEWAAR DEZE INSTRUCTIES.
LET OP: Gebruik uitsluitend originele Makita
accu’s.Hetgebruikvanniet-origineleaccu’s,of
accu’sdiezijngewijzigd,kanertoeleidendatdeaccu
ontploftenbrand,persoonlijkletselenschadeveroor-
zaakt. Ook vervalt daarmee de garantie van Makita
op het gereedschap en de lader van Makita.
Tips voor een maximale levens-
duur van de accu
1. Laad de accu op voordat hij volledig ontladen
is. Stop het gebruik van het gereedschap en
laad de accu op telkens wanneer u vaststelt
dat het vermogen van het gereedschap is
afgenomen.
2. Laad een volledig opgeladen accu nooit
opnieuw op. Te lang opladen verkort de
levensduur van de accu.
3. Laad de accu op bij een omgevingstempe-
ratuur tussen 10°C en 40°C. Laat een warme
accu afkoelen alvorens hem op te laden.
4. Laad de accu op als u deze gedurende een
lange tijd (meer dan zes maanden) niet gaat
gebruiken.
BESCHRIJVING VAN DE
FUNCTIES
LET OP:
Zorg altijd dat het gereedschap is uitge-
schakeld en de accu ervan is verwijderd alvorens de
functies op het gereedschap af te stellen of te controleren.
De accu aanbrengen en verwijderen
LET OP: Schakel het gereedschap altijd uit
voordat u de accu aanbrengt of verwijdert.
LET OP:
Houd het gereedschap en de accu stevig
vast tijdens het aanbrengen of verwijderen van de accu.
Alsuhetgereedschapendeaccunietstevigvasthoudt,kun-
nen deze uit uw handen glippen en het gereedschap of de accu
beschadigen,ofkanpersoonlijkletselwordenveroorzaakt.
►Fig.1: 1. Rood deel 2.Knop3.Accu
Omdeaccuteverwijderenverschuiftudeknopaandevoorkant
vandeaccuenschuiftutegelijkertijddeaccuuithetgereedschap.
Omdeaccuaantebrengenlijntudelipopdeaccuuitmet
degroefindebehuizingenduwtudeaccuopzijnplaats.
Steekdeaccuzovermogelijkinhetgereedschaptotu
eenklikgeluidhoort.Alsuhetrodedeelaandebovenkant
vandeknopkuntzien,isdeaccunietgoedaangebracht.
LET OP:
Breng de accu altijd helemaal aan
totdat het rode deel niet meer zichtbaar is.Alsudit
niet doet, kan de accu per ongeluk uit het gereedschap
vallen en u of anderen in uw omgeving verwonden.
LET OP:
Breng de accu niet met kracht aan.
Alsdeaccunietgemakkelijkinhetgereedschapkan
wordengeschoven,wordtdezenietgoedaangebracht.
De resterende acculading controleren
Alleen voor accu’s met indicatorlampjes
►Fig.2: 1.Indicatorlampjes2. Testknop
Druk op de testknop op de accu om de resterende acculading te
zien.Deindicatorlampjesbrandengedurendeenkeleseconden.
Indicatorlampjes Resterende
acculading
Brandt Uit Knippert
75% tot 100%
50% tot 75%
25% tot 50%
0% tot 25%
Laad de accu
op.
Erkaneen
storingzijn
opgetreden in
de accu.

30 NEDERLANDS
OPMERKING:Afhankelijkvandegebruiksomstan-
digheden en de omgevingstemperatuur, is het moge-
lijkdatdeaangegevenacculadingverschiltvande
werkelijkeacculading.
Gereedschap-/
accubeveiligingssysteem
Hetgereedschapisvoorzienvaneengereedschap-/
accubeveiligingssysteem.Ditsysteemschakeltauto-
matisch de voeding naar de motor uit om de levensduur
van het gereedschap en de accu te verlengen. Het
gereedschapkantijdenshetgebruikautomatischstop-
pen als het gereedschap of de accu aan één van de
volgendeomstandighedenwordtblootgesteld:
Overbelastingsbeveiliging
Wanneerhetgereedschap/deaccuwordtbediendop
eenmanierwaaropeenabnormaalhogestroomsterkte
wordt getrokken, stopt het gereedschap automatisch.
Wanneerdatgebeurt,schakeltuhetgereedschap
uit en stopt u de toepassing die ertoe leidde dat het
gereedschap oververhit raakte. Schakel vervolgens het
gereedschap in om het weer te starten.
Oververhittingsbeveiliging
Wanneerhetgereedschap/deaccuoververhitis,stopt
het gereedschap automatisch. Laat in deze situatie het
gereedschap/deaccuafkoelenvoordatuhetgereed-
schap weer inschakelt.
Beveiliging tegen te ver ontladen
Alsdeacculadingonvoldoendeis,stopthetgereed-
schapautomatisch.Indithetgevalverwijdertudeaccu
vanaf het gereedschap en laadt u de accu op.
De trekkerschakelaar gebruiken
►Fig.3: 1. Trekkerschakelaar
LET OP: Alvorens de accu in het gereed-
schap te plaatsen, moet u altijd controleren of de
trekkerschakelaar goed werkt en bij het loslaten
terugkeert naar de stand “OFF”.
Omhetgereedschaptestarten,knijptugewoonde
trekkerschakelaar in. Hoe harder u de trekkerschakelaar
inknijpt,hoesnellerhetgereedschapdraait.Laatde
trekkerschakelaar los om het gereedschap te stoppen.
OPMERKING: Het gereedschap stopt automatisch
wanneer u de trekkerschakelaar gedurende ongeveer
6 minuten ingeknepen houdt.
De lamp op de voorkant gebruiken
►Fig.4: 1. Lamp
LET OP: Kijk niet direct in het lamplicht of in
de lichtbron.
Knijpdetrekkerschakelaarinomdelampinteschake-
len.Delampblijftbrandenzolangdetrekkerschakelaar
wordt ingeknepen. Ongeveer 10 seconden nadat u de
trekkerschakelaarhebtlosgelaten,gaatdelampuit.
OPMERKING: Wanneer het gereedschap oververhit
is,stopthetgereedschapautomatischenbegintde
lamp te knipperen. Laat in dat geval de trekkerscha-
kelaar los. De lamp gaat na één minuut uit.
OPMERKING:Gebruikeendrogedoekomvuilvan
de lens van de lamp af te vegen. Wees voorzichtig
datudelensvandelampnietbekrastomdatdande
verlichting minder wordt.
De omkeerschakelaar bedienen
►Fig.5: 1. Omkeerschakelaar
LET OP: Controleer altijd de draairichting
alvorens het gereedschap te starten.
LET OP: Verander de stand van de omkeer-
schakelaar alleen nadat het gereedschap volledig
tot stilstand is gekomen.Alsudedraairichting
verandertterwijlhetgereedschapnogdraait,kanhet
gereedschapbeschadigdraken.
LET OP: Zet de omkeerschakelaar altijd in de
neutrale stand wanneer u het gereedschap niet
gebruikt.
Dit gereedschap heeft een omkeerschakelaar voor het
veranderen van de draairichting. Druk de omkeerscha-
kelaarinvanafkantAvoordedraairichtingrechtsom,of
vanaf kant B voor de draairichting linksom.
Wanneer de omkeerschakelaar in de neutrale
stand staat, kan de trekkerschakelaar niet worden
ingeknepen.
Snelheidskeuze
►Fig.6: 1. Snelheidskeuzeknop
LET OP: Zet de snelheidskeuzeknop altijd
volledig in de juiste stand.Alsuhetgereedschap
gebruiktmetdesnelheidskeuzeknophalverwege
tussen de standen "1" en "2", kan het gereedschap
beschadigdworden.
LET OP: Verander de instelling van de snel-
heidskeuzeknop niet terwijl het gereedschap
draait.Datkanhetgereedschapbeschadigen.
Afgebeeld
nummer
Snelheid Koppel Toepassing
1Laag Hoog Zware
belasting
2Hoog Laag Lichte
belasting
Om de snelheid te veranderen, schakelt u eerst het
gereedschap uit. Verschuif de snelheidskeuzeknop om
“2”aftebeeldenvooreenhogedraaisnelheidof“1”
voor een lage draaisnelheid maar een hoog koppel.
Verzeker u ervan dat de snelheidskeuzeknop in de
juistestandstaatvoordatuhetgereedschapbedient.
Alsdedraaisnelheidvanhetgereedschaptijdens
gebruiksterkdaaltinstand“2”,verschuiftudeknop
zodat“1”wordtafgebeeldenhervatudebediening.

31 NEDERLANDS
Het aandraaikoppel instellen
►Fig.7: 1. Instelring 2.Koppelaanduiding3.Pijlteken
Doordeinstelringtedraaien,kanhetaandraaikoppelwordeningesteldop22niveaus.Lijndekoppelaanduidinguit
methetpijltekenophetgereedschapshuis.Voorhetminimumaandraaikoppelkiestu1envoorhetmaximumaan-
draaikoppel kiest u .
Dekoppelingsliptdooropdebetreffendekoppelniveausbijdeinstellingen1totenmet21.Dekoppelingwerktniet
op de instelling .
Alvorensmetheteigenlijkewerktebeginnen,draaitueersteentestschroefinuwwerkstukofeenstukidentiek
materiaal,omtebepalenwelkaandraaikoppelhetmeestgeschiktisvooreenbepaaldetoepassing.
Hierondervolgteengroverichtlijnvoorderelatietussendeschroefmaatendekoppelaanduiding.
Koppelaanduiding 12345678910 11 12 13 14 15 16 17 18 19 20 21
Kolomschroef M4 M5 M6
Houtschroef
Zachthout
(bijv.
naaldhout)
–ɸ3,5 x 22 ɸ4,1 x 38 –
Hardhout
(bijv.
meranti)
–ɸ3,5 x 22 ɸ4,1 x 38 –
MONTAGE
LET OP:
Zorg altijd dat het gereedschap is
uitgeschakeld en de accu ervan is verwijderd alvo-
rens enig werk aan het gereedschap uit te voeren.
Het schroefbit/boorbit aanbrengen
of verwijderen
►Fig.8: 1. Bus 2. Dicht 3. Open
Draaideklembuslinksomlosomdeklauwenteope-
nen.Plaatshetschroefbit/boorbitzovermogelijkinde
spankop.Draaideklembusrechtsomomhetbitinde
spankopvasttezetten.Omhetschroefbit/boorbitte
verwijderen,draaitudeklembuslinksom.
De haak aanbrengen
LET OP: Als u de haak aanbrengt, bevestigt u
deze altijd stevig met de schroef.Alsuditnietdoet,
kandehaaklosrakenentotpersoonlijkletselleiden.
►Fig.9: 1. Gleuf 2. Haak 3. Schroef
Dehaakishandigomhetgereedschaptijdelijkoptehangen.De
haakkanaaniederezijkantvanhetgereedschapwordenbeves-
tigd.Omdehaaktebevestigen,steektudezeineengleufop
eenzijkantenzetuhemvastmetdeschroef.Omdehaakerafte
halen, draait u de schroef los en haalt u de haak eraf.
De schroefbithouder aanbrengen
Optioneel accessoire
►Fig.10: 1.Schroefbithouder2.Schroefbit
Pasdeschroefbithouderopdeuitstekendenokaan
de voet van het gereedschapshuis, links of rechts naar
keuze,enzetdebithoudervastmeteenschroef.
Wanneeruhetschroefbitnietgebruikt,kuntuhetinde
schroefbithoudersopbergen.Schroefbitsvan45mm
lengtekunnenhierwordenbewaard.
BEDIENING
LET OP:
Druk de accu altijd stevig aan totdat die op
zijn plaats vastklikt.Wanneerhetrodedeelaandebovenkant
vandeknopnogzichtbaaris,zitdeaccuernogniethelemaal
in. Schuif hem er helemaal in totdat het rode deel niet meer
zichtbaaris.Alsuditnalaat,zoudeaccuuithetgereedschap
kunnen vallen en uzelf of anderen kunnen verwonden.
LET OP:
Wanneer de snelheid sterk afneemt,
verlaagt u de belasting of stopt u het gereedschap om
te voorkomen dat het gereedschap wordt beschadigd.
Houd het gereedschap stevig vast met één hand aan de
handgreep en de andere aan de onderkant van de accu
omwringkrachtengoedtekunnenbeheersen.
►Fig.11
KENNISGEVING: Bedek de ventilatieopeningen
niet omdat anders het gereedschap oververhit en
beschadigdkanraken.
►Fig.12: 1. Ventilatieopening
Gebruik als schroevendraaier
LET OP: Stel de koppelinstelring in op het
juiste koppel voor uw werkstuk.
LET OP: Zorg dat het schroefbit recht in de
schroefkop steekt, anders kunnen de schroef en/
of het schroefbit beschadigd worden.
Plaatsdepuntvanhetschroefbitindeschroefkop
en oefen wat druk uit op het gereedschap. Start het
gereedschaplangzaamenverhoogdangeleidelijkde
snelheid.Zodradekoppelingaangrijpt,laatudetrek-
kerschakelaaronmiddellijklos.
OPMERKING: Voor het vastdraaien van houtschroe-
vendientueenboorgatvan2/3dediametervande
schroefvoorteboren.Ditvergemakkelijkthetvast-
draaienenvoorkomtdathetwerkstukkansplijten.

32 NEDERLANDS
Gebruik als boormachine
Draaieerstdeinstelringzodathetpijltekennaarde
markering wijst.Gadaarnaalsvolgttewerk.
Boren in hout
Bijhetboreninhoutverkrijgtudebesteresultatenmet
houtboortjesvoorzienvaneengeleideschroefpunt.
Dezegeleideschroefpuntvergemakkelijkthetboren,
doorhetboorbithetwerkstukintetrekken.
Boren in metaal
Omtevoorkomendathetboorbitbijhetbeginvanhet
borenzijdelingswegglijdt,maaktumeteenhameren
eencenterponseenputjepreciesopdeplaatswaar
uwiltboren.Plaatsdandepuntvanhetboorbitinhet
putjeenbeginmetboren.
Gebruikbijhetboreninmetaaleensmeermiddel.
Uitzonderingenhierbijzijnijzerenkoper,diedroog
geboordmoetenworden.
LET OP: Het boren zal niet sneller verlopen
als u hard op het gereedschap drukt. In feite
zaldergelijkharddrukkenalleenmaarleidentot
beschadigingvanhetboorbit,lagereprestatiesvan
het gereedschap en een kortere levensduur van het
gereedschap.
LET OP: Houd het gereedschap stevig vast en
let vooral goed op wanneer het boorbit door het
werkstuk heen breekt.Ophetmomentdathetboor-
gatdoorbreektwordteenenormewringendekracht
uitgeoefendophetgereedschap/boorbit.
LET OP: Een vastgelopen boorbit kan een-
voudig verwijderd worden door de draairichting te
veranderen met de omkeerschakelaar, om zo het
boorbit eruit te draaien. Houd het gereedschap
daarbij wel stevig vast, want er is kans op een
plotselinge terugslag.
LET OP: Zet het werkstuk altijd vast in een
bankschroef of soortgelijke klemvoorziening.
LET OP: Als het gereedschap continu wordt
bediend totdat de accu leeg is, laat u het gereed-
schap gedurende 15 minuten liggen alvorens
verder te werken met een volle accu.
ONDERHOUD
LET OP: Zorg altijd dat het gereedschap is
uitgeschakeld en de accu ervan is verwijderd
alvorens te beginnen met onderhoud of inspectie.
KENNISGEVING: Gebruik nooit benzine, was-
benzine, thinner, alcohol en dergelijke. Hierdoor
kunnen verkleuring, vervormingen en barsten
worden veroorzaakt.
OmdeVEILIGHEIDenBETROUWBAARHEIDvan
het gereedschap te handhaven, dienen alle reparaties,
onderhoudofafstellingentewordenuitgevoerdbijeen
erkendMakita-servicecentrumofdeMakita-fabriek,en
altijdmetgebruikvanMakita-vervangingsonderdelen.
OPTIONELE
ACCESSOIRES
LET OP: Deze accessoires of hulpstukken
worden aanbevolen voor gebruik met het Makita
gereedschap dat in deze gebruiksaanwijzing is
beschreven.Bijgebruikvanandereaccessoiresof
hulpstukkenbestaathetgevaarvanpersoonlijkelet-
sel.Gebruikdeaccessoiresofhulpstukkenuitsluitend
voorhunbestemdedoel.
Wenstumeerbijzonderhedenoverdezeacces-
soires,neemdancontactopmethetplaatselijke
Makita-servicecentrum.
• Boorbits
• Schroefbits
• Schroefbithouder
• Haak
• Gereedschapshaak
• Originele Makita accu’s en acculaders
OPMERKING:Sommigeitemsopdelijstkunnen
zijninbegrepenindedoosvanhetgereedschapals
standaardtoebehoren.Dezekunnenvanlandtotland
verschillen.

www.makita.com
Makita Europe N.V.
Makita Corporation
3-11-8, Sumiyoshi-cho,
Anjo, Aichi 446-8502 Japa
n
Jan-Baptist Vinkstraat 2,
3070 Kortenberg, Belgium
885654-999
EN,FR,DE,IT,NL,
ES,PT,DA,EL,TR
20180402
This manual suits for next models
1
Table of contents
Languages:
Other Makita Drill manuals

Makita
Makita MAKDA3010F User manual

Makita
Makita DF002G User manual

Makita
Makita DDA450 User manual

Makita
Makita HR3541FC Manual

Makita
Makita 6018D User manual

Makita
Makita DHP481RMJ User manual

Makita
Makita DHP485 User manual

Makita
Makita HP332D User manual

Makita
Makita DP3002 User manual

Makita
Makita HP2032 User manual

Makita
Makita BDF451 Quick start guide

Makita
Makita HP1641 User manual

Makita
Makita DP4010 User manual

Makita
Makita BHP460 User manual

Makita
Makita HP330D User manual

Makita
Makita BHP456 User manual

Makita
Makita HP1620 User manual

Makita
Makita M8103 User manual

Makita
Makita DDF482 User manual

Makita
Makita DF0300 User manual