Makita PLM4630N2 User manual

GB Petrol Lawn Mower Original instruction manual
CS 汽油草坪机 原厂指导手册
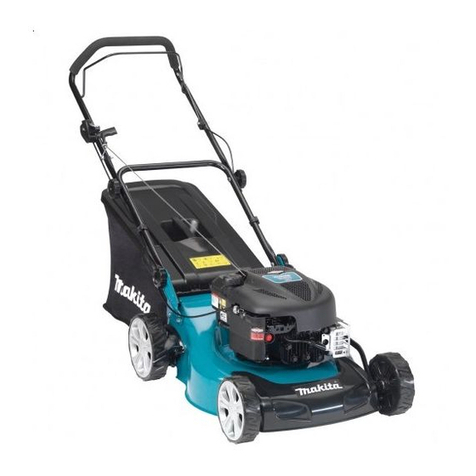
ID Mesin Pemotong Rumput Petunjuk penggunaan asli
Berbahan Bakar Bensin
VI Maùy Caét Coû Daïng Ñaåy Taøi lieäu höôùng daãn goác
TH รถเข็นตัดหญาแบบใชน้ํามัน คูมือใชงานตนฉบับ
PLM5130NPLM4632NPLM4631N2PLM4630N2

2
1 PLM5130N
2 PLM4630N2
1
34
6
5
7
9
11 12
13
33
14
15
16
17
18
21
19 11 20 A
10
8
2

3
3 PLM4631N2
4 PLM4632N

4
56
78
910
22
23
24
25

5
11 12
13 14
15 16
17 18
26
27

6
19 20A
20B 21
22 23
16
PLM5130N/
PLM4632N

7
24 25
26 27
28 29
16
PLM4630N2/
PLM4631N2
28
29
30

8
30 31
32 33
34 35
21
31
PLM5130N/PLM4632N

9
36 37
32
PLM4631N2/PLM4630N2

10
CONTENTS
ENGLISH ..................................................................................................................11
简体中文 ...................................................................................................................19
BAHASA INDONESIA ..............................................................................................26
TIEÁNG VIEÄT ............................................................................................................34
ภาษาไทย....................................................................................................................42

11
ENGLISH
Explanation of general view
WARNING:
For your own safety please read this manual before
attempting to operate your new unit. Failure to follow
instructions can result in serious personal injury. Spend a
few moments to familiarize yourself with your mower
before each use. Keep this manual in a safe place, so that
the information is available at all times. If you give the
equipment to any other person, hand over these operating
instructions and safety regulations as well.
Intended use
The equipment may only be used for the tasks it is
designed to handle. Any other use is deemed to be a case
of misuse. The user/operator and not the manufacturer
will be liable for any damage or injuries of any kind caused
as a result of this.
The petrol lawn mower is intended for private use i.e. for
use in home and gardening environments.
Private use of the lawn mower refers an annual operating
time generally not exceeding that of 50 hours, during
which time the machine is primarily used to maintain
small-scale, residential lawns and home/hobby gardens.
Public facilities, sporting halls, and agricultural/forestry
applications are excluded.
Please note that our equipment has not been designed for
use in commercial, trade or industrial applications. Our
warranty will be voided if the machine is used in
commercial, trade or industrial businesses or for
equivalent purposes.
The operating instructions as supplied by the
manufacturer must be kept and referred to in order to
ensure that the lawn mower is properly used and
maintained. The instructions contain valuable information
on operating, maintenance and servicing conditions.
Important! Due to the high risk of bodily injury to the user,
the lawn mower may not be used to trim bushes, hedges
or shrubs, to cut scaling vegetation, planted roofs, or
balcony-grown grass, to clean (suck up) dirt and debris off
walkways, or to chop up tree or hedge clippings.
Moreover, the lawn mower may not be used as a power
cultivator to level out high areas such as molehills.
For safety reasons, the lawn mower may not be used as a
drive unit for other work tools or tool kits of any kind.
1. SYMBOLS MARKED ON THE
PRODUCT (ON THE REAR
COVER)
1. Brake control handle
2. Upper handle
3. Self-drive control handle
4. Throttle choke lever
5. Starter handle
6. Rope guide
7. Locking lever
8. Lower handle
9. Grass catcher
10. Height adjustment lever
11. Side discharge channel
12. Sideward flap
13. Deck
14. Spark plug
15. Oil cap
16. Fuel cap
17. Cable clamp
18. Cable fixing ring
19. Speed adjustment lever
20. Mulching wedge
21. Level indicator
22. Bolt
23. Washer
24. Locking knob
25. Lock nut
26. The angle adjusting gear
27. Button
28. Oil cap/dipstick
29. Max: upper limit
30. Min: lower limit
31. Screw
32. Tab
33. Locking mechanism
Read operator’s manual.
Keep bystanders away.
Pay more attention to the operator’s hands
and feet to avoid injury.
Fuel is flammable, keep fire away. Do not add
fuel with running machine.
Toxic fumes; don’t operate inside house.
When mowing, please wear the glasses and
ear plugs to defend the operator himself.
When repairing, please pick up the spark
plug, and then repair it according to the
operational manual.
Caution: Engine hot.

12
2. GENERAL SAFETY RULES
WARNING: When using petrol tools, basic safety
precautions, including the following, should always be
followed to reduce the risk of serious personal injury and/
or damage to the unit. Read all these instructions before
operating this product and retain these instructions for
future reference.
WARNING: This machine produces an
electromagnetic field during operation. This field may
under some circumstances interfere with active or passive
medical implants. To reduce the risk of serious or fatal
injury, we recommend persons with medical implants to
consult their physician and the medical implant
manufacturer before operating this machine.
Training
• Read the instructions carefully. Be familiar with the
controls and the proper use of the equipment.
Learn how to stop the engine quickly.
• Only use the lawn mower for the purpose for which it
was designed, i.e. for cutting and collecting grass. Any
other use can be hazardous, causing damage to the
machine. Examples of improper use may include, but
are not limited to:
- transport of people, children or animals on the
machine;
- being transported by the machine;
- using the machine to tow or push loads;
- using the machine for leaf or debris collection;
- using the machine to trim hedges, or for cutting
vegetation other than grass;
- use of the machine by more than one person;
- using the blade on surfaces other than grass.
• Never allow children or people unfamiliar with these
instructions to use the lawn mower. Local regulations
can restrict the age of the operator.
• Never use the lawn mower:
- when people, especially children, or pets are
nearby;
- if the operator has taken medicine or substances
that can affect his ability to react and concentrate.
• Keep in mind that the operator or user is responsible
for accidents or hazards occurring to other people or
their property.
• The operators must receive proper training in the use,
adjustment and operation of the machine, including
prohibited operations.
Preparation
• While mowing, always wear substantial footwear and
long trousers. Do not operate the equipment when
barefoot or wearing open sandals.
• Thoroughly inspect the area where the equipment is to
be used and remove all objects, such as stones, toys,
sticks and wires, which can be thrown by the machine.
• WARNING- Petrol is highly flammable.
- store fuel in containers specifically designed for this
purpose;
- refuel outdoors only and do not smoke while
refueling;
- add fuel before starting the engine. Never remove
the cap of the fuel tank or add petrol while the
engine is running or when the engine is hot;
- if petrol is spilled, do not attempt to start the engine
but move the machine away from the area of
spillage and avoid creating any source of ignition
until petrol vapors have dissipated;
- replace all fuel tank and container caps securely.
• Replace faulty silencers.
• Before using, always visually inspect to see that the
blades, blade bolts and cutter assembly are not worn or
damaged. Replace worn or damaged blades and bolts
in sets to preserve balance.
• Check regularly to ensure that all starting interlocks
and operator presence controls are properly
functioning.
Operation
• Do not operate the engine in a confined space where
dangerous carbon monoxide fumes can collect.
• Do not use the machine while being tired, ill or under
influence of alcohol or other drugs.
• Warning! Do not use the lawn mower when there is a
risk for lighting.
• It is recommended to limit the duration of operation, in
order to minimize the risks from noise and vibration.
• Be careful when using the lawn mower in slopes and
near drop-offs, ditches or embankments.
• Mow only in daylight or in good artificial light.
• Avoid operating the equipment in wet grass, where
feasible.
• Always be sure of your footing on slopes.
• Walk, never run.
• For wheeled rotary machines, mow across the face of
slopes, never up and down.
• Exercise extreme caution when changing direction on
slopes.
• Do not mow excessively on steep slopes.
• Use extreme caution when reversing or pulling the
lawn mower towards you.
• Stop the blade(s) if the lawn mower has to be tilted for
transportation when crossing surfaces other than
grass, and when transporting the lawn mower to and
from the area to be mowed.
• Never operate the lawn mower with defective guards,
or without safety devices, for example deflectors and/or
grass catchers, in place.
• Caution: The lawn mower shall not be operated without
either the entire grass catcher or self-closing discharge
opening guard in place.
• Do not change the engine governor settings or
overspeed the engine.
• Do not alter or tamper with any sealed adjustment for
the engine speed control.
• The lawn mower safety systems or features shall not
be tampered with or disabled.
• Disengage all blades and drive clutches before starting
the engine.
• Start the engine carefully according to instructions and
with feet well away from the blade(s).
• Do not tilt the lawn mower when starting the engine.

13
• Do not start the engine when standing in front of the
discharge chute.
• Do not put hands or feet near or under rotating parts.
Keep clear of the discharge opening at all times.
• Never pick up or carry a lawn mower while the engine
is running.
• Stop the engine and disconnect the spark plug wire,
make sure that all moving parts have come to a
complete stop and, where a key is fitted remove the
key:
- before clearing blockages or unclogging chute;
- before checking, cleaning or working on the lawn
mower;
- after striking a foreign object. Inspect the lawn
mower for damage and make repairs before
restarting and operating the lawn mower;
- if lawn mower starts to vibrate abnormally (check
immediately).
• Stop the engine and disconnect the spark plug wire,
make sure that all moving parts have come to a
complete stop and, where a key is fitted remove the
key:
- whenever you leave the lawn mower;
- before refueling.
• Reduce the throttle setting during engine shut down
and, if the engine is provided with a shut-off valve, turn
the fuel off at the conclusion of mowing.
• Only use the lawn mower for the purpose for which it is
designed, for cutting and collecting grass. Any other
use can be hazardous, causing damage to the
machine.
Maintenance and storage
• Keep all nuts, bolts and screws tight to be sure the
equipment are in safe working condition.
• Never store the equipment with petrol in the tank inside
a building where fumes can reach an open flame or
spark.
• Allow the engine to cool before storing in any
enclosure; Clean and maintain the lawn mower before
storage.
• To reduce the fire hazard, keep the engine, silencer,
battery compartment and petrol storage area free of
grass, leaves, or excessive grease.
• Check the grass catcher frequently for wear or
deterioration.
• Replace worn or damaged parts for safety.
• If the fuel tank has to be drained, this should be done
outdoors.
• Improper maintenance, use of non-conforming
replacement components, or the removal or
modification of safety components can damage the
lawn mower and injure the operators seriously.
• Only use the recommended blades and spare parts by
the manufacturer. The use of non-genuine parts can
damage the machine and injure the operators. Keep
the lawn mower in good working condition.
• If the blade stopping device doesn't work, please
contact service center for help.
Transportation and handling
• Whenever the machine is to be handled, raised,
transported or tilted you must:
- wear strong working gloves;
- grasp the machine at the points that offer a safe grip,
taking account of the weight and its distribution;
- use an appropriate number of people for the weight
of the machine and the characteristics of the vehicle
or the place where it has to be placed or collected.
• During transport, fasten the machine securely with
ropes or chains.
WARNING: Do not touch rotating blade.
WARNING: Refuel in a well ventilated area with
the engine stopped.
3. PARTS DESCRIPTION (Fig. 1,
Fig. 2, Fig. 3, Fig. 4)
Including
A: Spark plug wrench
4. TECHNICAL DATA
Model PLM4630N2 PLM4631N2 PLM4632N PLM5130N
Engine type B&S 675EXi Series,
ReadyStart
B&S 675EXi Series,
ReadyStart
B&S 750EX Series,
ReadyStart
B&S 750EX Series,
ReadyStart
Self-propelled No Yes Yes Yes
Engine displacement 163 cm3163 cm3161 cm3161 cm3
Nominal Power 2.6 kW 2.6 kW 2.5 kW 2.5 kW
Blade width 460 mm 460 mm 460 mm 510 mm
Rated speed 2,800/min 2,800/min 2,800/min 2,800/min
Fuel tank capacity 1.0 L 1.0 L 1.0 L 1.0 L
Oil tank capacity 0.47 L 0.47 L 0.6 L 0.6 L
Grass catcher capacity 60 L 60 L 60 L 65 L
Net weight 30 kg 32.5 kg 35 kg 38 kg
Height adjustment 25 – 70 mm,
8 adjustment
25 – 70 mm,
8 adjustment
25 – 70 mm,
8 adjustment
25 – 70 mm,
8 adjustment

14
5. ASSEMBLY
5-1 ASSEMBLING THE FOLDING
HANDLE
1. Fix the lower handlebar onto the handle bracket with
bolt, washer and locking knob. (Fig. 5)
2. Lift the two locking levers to connect the upper and
lower handle. (Fig. 6)
3. Push the locking lever closed to lock the handlebars in
the operating position. (Fig. 7)
4. Adjust the tension by turning the lock nut with a
suitable spanner. (Fig. 8)
5. Position the cable over the handle shaft. Clamp it
around the middle of lower handle by the cable clamp
and make sure the cable is fixed around the outside of
the handle. (Fig. 9, Fig. 10) Otherwise the cable may
be pinched by opening/closing the rear cover.
5-2 ADJUSTMENT FOR AN
APPROPRIATE ANGLE
1) Pull the locking lever opening.
2) Rotating the upper handle centered of the angle
adjusting gear for adjusting an appropriate angle into
the scope -15º to 15º (3 position: -15º/0º/15º) as the
Fig. 11 shown.
3) Push the locking lever closed to connect the lower
handle and the upper handle.
5-3 MOUNTING AND DISMOUNTING THE
GRASS CATCHER
1. To fit: Raise the rear cover and hitch the grass catcher
on rear of mower. (Fig. 12, Fig. 13, Fig. 14)
2. To remove: Grasp and lift rear cover, remove grass
catcher.
5-4 STARTER HANDLE
Move the starter handle from the engine to the rope guide.
(Fig. 15)
5-5 HEIGHT OF CUT
Apply outward pressure to disengage lever from rack.
Move lever forward or back to adjust height. (Fig. 16 and
see clause 7-9)
6. FUNCTION
These lawn mowers can be retrofitted from its normal
function, based on the application purpose:
From lawn mower with rear collection to:
1. Mulching mower or as
2. Side-discharge mower.
What is mulching?
When mulching, the grass is cut in one working step, then
finely chopped and returned to the grass strip as natural
fertilizer.
Hints for mulch-mowing:
- Regular cut-back by max. 2 cm from 6 cm to 4 cm
grass height.
- Use a sharp cutting knife.
- Do not mow wet grass.
- Set max. engine speed.
- Only move at working pace.
- Regularly clean mulching wedge, housing inner side
and mowing blade.
Starting Operation
6-1 Retrofitting for mulching mower
WARNING: Only with a stopped engine and
standstill cutter.
1. Raise the rear cover and remove the grass catcher.
2. Push the mulching wedge into the deck. Lock the
mulching wedge with the button into the opening on
the deck. (Fig. 17, Fig. 18)
3. Lower the rear cover again. (Fig. 19)
4. Lift sideward flap and remove the side discharge
channel.
6-2 Resetting for side-discharge mowing
Only when engine and cutting are at
standstill!
1. Lift the rear cover and remove the grass catcher.
2. Mount the mulching wedge.
3. Unlock the locking mechanism. (Fig. 20A)
4. Lift sideward flap for side discharge. (Fig. 20B)
5. Mount the side discharge channel for side discharge
on the support pin of the sideward flap. (Fig. 21)
6. Lower the sideward flap- the flap lies on the side
discharge channel. (Fig. 22)
6-3 Mowing with the grass catcher
WARNING: Only with a stopped engine and
standstill cutter.
For mowing with the grass catcher, remove the mulching
wedge and discharge channel for side discharge and
mount the grass catcher.
1. Removing the mulching wedge.
- Lift rear cover and remove the mulching wedge.
2. Removing the side discharge channel for side
discharge.
- Lift sideward flap and remove the side discharge
channel.
- The sideward flap automatically closes the
discharge opening on the housing by mean of spring
force.
- Regularly clean the sideward flap and discharge
opening forms of grass rest and stuck dirt.
3. Mount the grass catcher.
- To fit: Raise the rear cover and hitch the grass
catcher on rear of mower.
- To remove: Grasp and lift the rear cover, remove
grass catcher.
7. OPERATING INSTRUCTIONS
7-1 BEFORE STARTING
Service the engine with gasoline and oil as instructed in
the separate engine manual packed in your mower. Read
instructions carefully. (Fig. 23, Fig. 24, Fig. 25, Fig. 26)

15
WARNING: Petrol is highly flammable.
Store fuel in containers specifically designed for this
purpose.
Refuel outdoors only, before starting the engine and do
not smoke while refueling or handling fuel.
Never remove the cap of the fuel tank or add petrol while
the engine is running or when the engine is hot.
If petrol is spilled, do not attempt to start the engine but
move the machine away from the area of spillage and
avoid creating any source of ignition until petrol vapors
have dissipated.
Replace all fuel tanks and container caps securely.
Before tipping the lawn mower to maintain the blade or
drain oil, remove fuel from tank.
WARNING: Never fill fuel tank indoors, with
engine running or until the engine has been allowed to
cool for at least 15 minutes after running.
7-2 TO START ENGINE AND ENGAGE
BLADE
1. The unit is equipped with a rubber boot over the end of
the spark plug, make certain the metal loop on the end
of the spark plug wire (inside the rubber boot) is
fastened securely over the metal tip on the spark plug.
2. When starting cool or warm engine, turn throttle choke
lever at anywhere between “ ” position and “ ”
position. When operating, turn throttle choke lever to
“ ” position. (Fig. 27)
3. Standing behind the unit, grasp the brake control
handle and hold it against the upper handle as shown
in Fig. 28.
4. Grasp the starter handle as shown in Fig. 28 and pull
up rapidly. Return it slowly to the rope guide bolt after
engine starts.
Release the brake control handle to stop the engine and
blade.
Start the engine carefully according to
instructions and with feet well away from the
blade.
Do not tilt the lawn mower when starting the
engine. Start the mower on a level surface, free
of high grass or obstacles.
Keep hands and feet away from the rotating
parts. Do not start the engine when standing in
front of the discharge opening.
7-3 OPERATION PROCEDURES
During operation, tightly hold the brake handle with both
hands.
NOTE: During operation, when the brake handle
is released, the engine will stop and thus stopping the
lawn mower from operating.
WARNING: In order to avoid any unintentional
start-ups of the lawn mower, it comes equipped with an
engine brake which must be pulled back before the
engine can be started. When the engine control lever is
released it must return to its initial position, at which point
the engine automatically switches off.
NOTE: Engine brake (brake handle): Use the
lever to stop the engine. When you release the lever the
engine and the blade stop automatically. To mow, hold the
lever in the working position. Before you start to mow,
check the start/stop lever several times to be sure that it is
working properly. Ensure that the tension cable can be
smoothly operated (i.e. is not catching or kinking in any
way).
7-4 TO STOP ENGINE
CAUTION: The blade continues to rotate for a
few seconds after the engine is shut off.
1. Release the brake control handle to stop the engine
and blade. (Fig. 29)
2. Disconnect and ground the spark plug wire as
instructed in the separate engine manual to prevent
accidental starting while equipment is unattended.
7-5 CONNECTION FOR AUTO MOVE
For PLM4631N2
Grip the self-drive control handle, the lawn mower will
move forward automatically with about 3.6 km/h (Fig. 30),
release the self-drive handle, the lawn mower will stop
move.
For PLM4632N, PLM5130N
The mower is equipped with a speed adjusting system
which can adjust 3 speeds from 3.0 km/h to 4.5 km/h.
Position “ ”: the slowest position; Position “ ”: the
fastest position. (Fig. 31)
The step as below:
1. Release the self-drive control handle until the lawn
mower does not go forward.
2. Adjust the appropriate speed which you want.
(Fig. 31)
3. Grasp the self-drive control handle to go on mowing.
(Fig. 30)
CAUTION: Your mower is designed to cut normal
residential grass of a height no more than 250 mm.
Do not attempt to mow through unusually tall dry or wet
grass (e.g., pasture) or piles of dry leaves. Debris may
build up on the mower deck or contact the engine exhaust
presenting a potential fire hazard.
7-6 FOR THE BEST RESULTS WHEN
MOWING
Clear lawn of debris. Be sure that the lawn is clear of
stones, sticks, wire or other foreign objects which could be
accidentally thrown out by the mower in any direction and
cause serious personal injury to the operator and others
as well as damage to property and surrounding objects.
Do not cut wet grass. For effective mowing do not cut wet
grass because it tends to stick to the underside of the
deck preventing proper mowing of the grass clippings. Cut
no more than 1/3 the length of the grass. The

16
recommended cut for mowing is 1/3 the length of the
grass. Ground speed will need to be adjusted so the
clippings can be dispersed evenly into the lawn. For
especially heavy cutting in thick grass it may be
necessary to use one of the slowest speeds in order to get
a clean well mowed cut. When mowing long grass you
may have to cut the lawn in two passes, lowering the
blade another 1/3 of the length for the second cut and
perhaps cutting in a different pattern than was used the
first time. Overlapping the cut a little on each pass will
also help to clean up any stray clippings left on the lawn.
The mower should always be operated at full throttle to
get the best cut and allow it to do the most effective job of
mowing. Clean underside of deck. Be certain to clean the
underside of the cutting deck after each use to avoid a
build-up of grass, which would prevent proper mulching.
Mowing leaves. The mowing of leaves can also be
beneficial to your lawn. When mowing leaves make sure
they are dry and are not laying too thick on the lawn. Do
not wait for all the leaves to be off the trees before you
mow.
WARNING: If you strike a foreign object, stop the
engine. Remove wire from spark plug, thoroughly inspect
the mower for any damage and repair the damage before
restarting and operating the mower. Extensive vibration of
the mower during operation is an indication of damage.
The unit should be promptly inspected and repaired.
7-7 GRASS CATCHER
There is a level indicator on the top of the grass catcher
that shows whether the catcher is empty or full (Fig. 32,
Fig. 33):
- The level indicator inflates if the catcher is not full
during the moving. (Fig. 33)
- If the catcher is full, the indicator collapses; once this
happens, stop moving immediately and empty the
catcher, make sure it is clean and ensure its meshwork
is ventilated. (Fig. 32)
IMPORTANT
If the position of indicator opening is very dirty, the
indicator will not inflate-in this case, clean the position of
indicator opening immediately.
7-8 DECK
The underside of the mower deck should be cleaned after
each use to prevent a buildup of grass clippings, leaves,
dirt or other matter. If this debris is allowed to accumulate,
it will invite rust and corrosion, and may prevent proper
mulching. The deck may be cleaned by tilting the mower
and scraping clean with a suitable tool (make certain the
spark plug wire is disconnected).
7-9 HEIGHT ADJUSTMENT
INSTRUCTIONS
CAUTION: Do not at any time make any
adjustment to lawn mower without first stopping the
engine and disconnecting the spark plug wire.
CAUTION: Before changing mowing height, stop
mower and disconnect spark plug cable.
Your mower is equipped with a central height
adjustment lever offering 8 height positions.
The height (the blade to the ground) can be adjusted from
25 mm to 70 mm (8 height positions). (Fig. 34)
The lowest adjustment: 25 mm (position 1), the highest
adjustment: 70 mm (position 8).
1. Stop mower and disconnect spark plug cable before
changing mower cutting height.
2. The central height adjustment lever offers you 8
different height positions. (Fig. 34)
To change the height of cut, squeeze adjustment lever
toward the wheel, moving up or down to selected height.
8. MAINTENANCE
INSTRUCTIONS
SPARK PLUG
Use only original replacement spark plug. For best results,
replace the spark plug every 100 hours of use.
BRAKE PADS
Check and/or replace the engine brake pads in service
agent regularly, only original parts can be used as
replacement.
9. LUBRICATION INSTRUCTIONS
CAUTION: DISCONNECT SPARK PLUG
BEFORE SERVICING.
1. WHEELS-Lubricate the ball bearings in each wheel at
least once a season with a light oil.
2. ENGINE-Follow engine manual for lubrication
instructions.
10. CLEANING
CAUTION: Do not hose engine. Water can
damage engine or contaminate the fuel system.
1. Wipe deck with dry cloth.
2. Hose under deck by tilting the mower so that the spark
plug is up.
10-1 ENGINE AIR CLEANER
CAUTION: Do not allow dirt or dust to clog the air
filter foam element. The engine air cleaner element must
be serviced (cleaned) after 25 hours normal mowing. The
foam element must be serviced regularly if the mower is
used in dry dusty conditions.
TO CLEAN AIR FILTER
1. Remove the screw. (Fig. 35 for PLM4632N and
PLM5130N)
2. Lift the tab on the filter cover. (Fig. 36 for PLM4630N2
and PLM4631N2)
3. Remove the filter cover.
4. Wash filter element in soap water. DO NOT USE
GASOLINE!

17
5. Air dry filter element.
6. Place a few drops of SAE30 oil on the foam filter and
squeeze tightly to remove any excess oil.
7. Reinstall filter.
8. Close the filter cover.
NOTE: Replace filter if frayed, torn, damaged or
unable to be cleaned.
10-2 CUTTING BLADE
CAUTION: Be sure to disconnect and ground the
spark plug wire before working on the cutting blade to
prevent accidental engine starting. Protect hands by using
heavy gloves or a rag to grasp the cutting blades. Tip
mower as specified in separate engine manual. Remove
the hex bolt and washer which hold the blade and blade
adapter to the engine crankshaft. Remove the blade and
adapter from the crankshaft.
WARNING: Periodically inspect the blade
adapter for cracks, especially if you strike a foreign object.
Replace when necessary.
For best results your blade should be sharp. The blade
may be resharpened by removing it and either grinding or
filing the cutting edge keeping as close to the original
bevel as possible. It is extremely important that each
cutting edge receives an equal amount of grinding to
prevent an unbalanced blade. Improper blade balance will
result in excessive vibration causing eventual damage to
the engine and mower. Be sure to carefully balance blade
after sharpening. The blade can be tested for balance by
balancing it on a round shaft screwdriver. Remove metal
from the heavy side until it balances evenly. (Fig. 37)
Before reassembling the blade and the blade adapter to
the unit, lubricate the engine crankshaft and the inner
surface of the blade adapter with light oil. Install the blade
adapter on the crankshaft. Refer to Fig. 37. Place the
blade with the part number facing away from the adapter.
Align the washer over the blade and insert the hex bolt.
Tighten the hex bolt to the torque listed below.
10-3 BLADE MOUNTING TORQUE
Center bolt 40 Nm - 50 Nm, to insure safe operation of
your unit. All nuts and bolts must be checked periodically
for correct tightness.
After prolonged use, especially in sandy soil conditions,
the blade will become worn and lose some of the original
shape. Cutting efficiency will be reduced and the blade
should be replaced. Replace with an approved factory
replacement blade only. Possible damage resulting from
blade unbalance condition is not the responsibility of the
manufacturer.
When you change the blade, must use the original type
marked on the blade (MAKITA 263001451 for
PLM4630N2/PLM4631N2/PLM4632N, MAKITA
263002552 for PLM5130N) (for order the blade, pls.
contact your local dealer or call our company, see cover
page).
10-4 ENGINE
Refer to the separate engine manual for engine
maintenance instructions.
Maintain engine oil as instructed in the separate engine
manual packed with your unit. Read and follow
instructions carefully.
Service air cleaner as per separate engine manual under
normal conditions.
Clean every few hours under extremely dusty conditions.
Poor engine performance and flooding usually indicates
that the air cleaner should be serviced.
To service the air cleaner, refer to the separate engine
manual packed with your unit.
The spark plug should be cleaned and the gap reset once
a season. Spark plug replacement is recommended at the
start of each mowing season; check engine manual for
correct plug type and gap specifications.
Clean the engine regularly with a cloth or brush. Keep the
cooling system (blower housing area) clean to permit
proper air circulation which is essential to engine
performance and life. Be certain to remove all grass, dirt
and combustible debris from muffler area.
11. STORAGE INSTRUCTIONS
(OFF SEASON)
The following steps should be taken to prepare lawn
mower for storage.
1. Empty the tank after the last mowing of the season.
a) Empty the petrol tank with a suction pump.
CAUTION: Do not drain the petrol in closed
rooms, in close proximity of open fire, etc. Do not smoke!
Petrol fumes can cause explosion or fire.
b) Start the engine and let it run until it has used up all
remaining petrol and stalls.
c) Remove the spark plug. Use an oilcan to fill approx.
20 ml oil into the combustion chamber. Operate the
starter to evenly distribute the oil in the combustion
chamber. Replace the spark plug.
2. Clean and grease the lawn mower carefully as
described above under “LUBRICATION
INSTRUCTIONS”.
3. Slightly grease the cutter to avoid corrosion.
4. Store the lawn mower in a dry, clean and frost-
protected place, out of reach of unauthorized persons.
CAUTION: The engine must have completely
cooled down before storing the lawn mower.
NOTE:
- When storing any type of power equipment in an
unventilated or material storage shed.
- Care should be taken to rust-proof the equipment.
Using a light oil or silicone, coat the equipment,
especially cables and all moving parts.
- Be careful not to bend or kink cables.
- If the starter rope becomes disconnected from rope
guide on handle, disconnect and ground the spark plug
wire, depress the blade control handle and pull the
starter rope out from engine slowly. Slip the starter rope
into the rope guide bolt on handle.

18
Transport
Turn the engine off and allow the engine to cool down.
Then disconnect the spark plug wire and empty the fuel
tank according to the instructions in the engine manual.
Ensure not to bend or damage the cutter when pushing
the lawn mower over obstacles.
12. TROUBLESHOOTING
13. ENVIRONMENT
Should your machine need replacement after extended
use, do not put it in the domestic waste but dispose of it in
an environmentally safe way.
PROBLEM PROBABLE CAUSE CORRECTIVE ACTION
Engine does not start.
Throttle choke not in the correct
position for the prevailing conditions. Move throttle choke to correct position.
Fuel tank is empty. Fill tank with fuel: refer to ENGINE OWNERS
MANUAL.
Air cleaner element is dirty. Clean air cleaner element: refer to ENGINE
OWNERS MANUAL.
Spark plug loose. Tighten spark plug to 25-30 Nm.
Spark plug wire loose or
disconnected from plug. Install spark plug wire on spark plug.
Spark plug gap is incorrect. Set gap between electrodes at 0.7 to 0.8 mm.
Spark plug is defective. Install new, correctly gapped plug: refer to
ENGINE OWNERS MANUAL.
Carburetor is flooded with fuel.
Remove air cleaner element and pull starter rope
continuously until carburetor clears itself and
install air cleaner element.
Faulty ignition module. Contact the service agent.
Engine difficult to start or
loses power.
Dirt, water, or stale fuel tank. Drain fuel and clean tank. Fill tank with clean, fresh
fuel.
Vent hole in fuel tank cap is plugged. Clean or replace fuel tank cap.
Air cleaner element is dirty. Clean air cleaner element.
Engine operates erratically.
Spark plug is defective. Install new, correctly gapped plug: refer to
ENGINE OWNERS MANUAL.
Spark plug gap is incorrect. Set gap between electrodes at 0.7 to 0.8 mm.
Air cleaner element is dirty. Clean air cleaner element: refer to ENGINE
OWNERS MANUAL.
Engine idles poorly.
Air cleaner element is dirty. Clean air cleaner element: refer to ENGINE
OWNERS MANUAL.
Air slots in engine shroud are
blocked. Remove debris from slots.
Cooling fins and air passages under
engine blower housing are blocked. Remove debris from cooling fins and air passages.
Engine skips at high speed. Gap between electrodes of spark
plug is too close. Set gap between electrodes at 0.7 to 0.8 mm.
Engine overheats.
Cooling air flow is restricted. Remove any debris from slots in shroud, blower
housing, air passages.
Incorrect spark plug. Install original spark plug and cooling fins on
engine.
Mower vibrates abnormally. Cutting assembly is loose. Tighten blade.
Cutting assembly is unbalanced. Balance blade.

19
简体中文
总图说明
警告:
为了您的自身安全,请在尝试操作新机器之前阅读本手
册。未能遵守这些指导可能会导致严重人身伤害。每次使
用之前,请花点时间让自己熟悉草坪机。请妥善保管本手
册,以便随时备用。如果您将机器交给其他任何人,请同
时给出这些操作指导和安全规定。
用途
仅可将本机器用于设计的用途。用于任何其他用途均被视
为误用。因误用而造成任何损坏或伤害,要由用户 / 操作
人员负责,制造商不负责。
本汽油草坪机用于私人用途,即用于家中和园艺环境。
草坪机私人用途是指年运转时间一般不超过 50 小时,在此
时间内机器主要被用来维护小型、居所草坪和家庭 / 业余
花园。不包括公共设施、体育场和农业 / 林业应用。
请注意,我们的机器未设计用于商业、贸易或工业用途。
如果将机器用于商业、贸易、工业或类似用途,则保修将
失效。
为确保正确使用和维护草坪机,必须保管和参考制造商提
供的操作手册。手册中包含有关操作、维护和维修的宝贵
信息。
重要!因很有可能会对用户造成人身伤害,不能将草坪机
用于修剪草丛、树篱或灌木,切割藤类植物、屋顶植物或
阳台上生长的草,清理 (吸掉)过道的灰尘和碎屑,或砍
削树木或篱笆片。此外,不能将草坪机用作耕耘机来耘平
鼹鼠丘等高区。
为了安全,不能将草坪机用作其他工具或任何工具套件的
驱动装置。
1. 产品上标记的符号 (在后盖上)
2. 一般安全规则
警告:使用汽油工具时,必须遵守基本安全注意
事项 (包括以下内容)以减少严重的人员受伤和 / 或机器
损坏的危险。 操作本产品前请仔细阅读这些指导并妥善保
存这些指导以备日后参考。
警告:本机器在工作期间将产生电磁场。 该电磁
场在某些情况下可能主动或被动干扰医疗植入物。 为减少
严重或致命受伤的危险,我们建议带有医疗植入物的人员
在操作本机器前咨询其医生和医疗植入物制造商。
1. 制动控制把手
2. 上把手
3. 自驱动控制把手
4. 气门阀杆
5. 起动手柄
6. 导绳器
7. 锁杆
8. 下把手
9. 集草器
10. 高度调节杆
11. 侧边卸料槽
12. 侧边翻门
13. 甲板
14. 火花塞
15. 机油盖
16. 燃油盖
17. 电缆夹
18. 电缆固定环
19. 速度调节杆
20. 遮覆楔
21. 草位指示器
22. 螺栓
23. 垫圈
24. 锁紧旋钮
25. 锁紧螺母
26. 角度调节齿轮
27. 按钮
28. 机油盖 / 量油尺
29. 最大:上限
30. 最小:下限
31. 螺钉
32. 弹片
33. 锁定机构
请阅读操作员手册。
请让旁观者远离。
请注意操作人员的手和脚,避免受伤。
燃油是易燃的,请远离火源。 请勿往运转的
机器中添加燃油。
有毒烟气;请勿在室内操作。
除草时,请佩戴眼镜和耳塞,保护操作人员。
修理时,请拿起火花塞并按照操作手册进行修
理。
注意:发动机热。

20
训练
•请仔细阅读手册。熟悉控件和机器的正确使用。学会如
何迅速停止发动机。
•请仅将草坪机用于其设计的用途,即切割和收集草。用
于任何其他用途都有隐患,造成机器损坏。不正确使用
的例子包括但不限于:
- 在机器上运人、小孩或动物;
- 用机器装运;
- 使用机器来拉或推重物;
- 使用机器收集树叶或碎屑 ;
- 使用机器来修剪树篱,或用于切割草以外的植物;
- 由一个以上的人使用机器;
- 在草以外的表面上使用刀具。
•切勿让不熟悉这些指导的小孩或成人使用草坪机。地方
规定可能限制操作人员的年龄。
•在以下情况时切勿使用草坪机:
- 当附近有人时,特别是小孩,或宠物时;
- 如果操作人员服了会影响其反应和注意力的药物或物
质。
•要记得,发生对他人或其财产造成损失的意外或事故,
操作人员或用户是要负责的。
•操作人员必须接受机器的使用、调节和操作的适当训
练,包括禁止的操作。
准备
•割草时,总是穿厚底鞋和长裤。 光脚或穿凉鞋时请勿操
作设备。
•请彻底检查要使用机器的区域并移除所有物体,包括石
头、玩具、树枝和电线,它们可能被机器甩开。
•警告 - 汽油是高度易燃的。
- 请将燃油存放在专门用于此目的的容器中;
- 仅限在室外加燃油,加燃油时请勿吸烟;
- 起动发动机前先添加燃油。 发动机运行或发动机热
时禁止取下燃油箱的盖子或添加汽油;
- 如果汽油溅出,请勿试图起动发动机,但可将机器移
至远离溢出区域的地方,避免形成易燃源,直至汽油
蒸汽完全挥发了;
- 更换所有燃油箱和容器盖并扣紧。
•更换故障的消音器。
•使用前,总是目视检查刀片、刀片螺栓和刀具总成有无
磨损或损坏。 成套更换磨损或损坏的刀片以保持平衡。
•请时常检查以确保所有起动互锁和操作人员存在控件都
能正常工作。
操作
•请勿在有可能聚集有害一氧化碳烟气的密闭空间中操作
发动机。
•在疲劳、生病或受酒精或其他药物影响下时,请勿使用
机器。
•警告!在有雷电危险时不要使用草坪机。
•为使噪声和振动危险最小化,建议限制操作时长。
•在斜坡上和陡坡、沟渠或河堤附近使用草坪机时要小
心。
•仅在白天或人工光线良好的情况下割草。
•避免在可能有湿草的地方操作机器。
•斜坡时,务必注意您的脚。
•步行,禁止跑动。
•对于轮子旋转的机器,在坡面上割草时,禁止上下动。
•在斜坡上改变方向时,请特别注意。
•请勿在陡坡上割草。
•转向或将草坪机朝自己拉时请特别小心。
•当草坪机接触非草的表面时和将草坪机搬运至 / 从要割
草的地方搬运时,如果为了搬运倾斜了草坪机,请停止
刀片。
•禁止在草坪机的护板有问题或没有安全设备 (如导向板
和 / 或集草器)就位时操作草坪机。
•注意:未装上整个集草器或自关闭卸料槽护板,不可操
作草坪机。
•请勿更改发动机调速器的设置或让发动机超速。
•请勿改造或窜改发动机速度控制的任何密封调节。
•不可窜改或禁用草坪机的安全系统或功能。
•起动发动机前,松开所有刀片和传动离合器。
•根据指导小心起动发动机,脚远离刀片。
•起动发动机时,请勿倾斜草坪机。
•站在卸料槽前时请勿起动发动机。
•请勿将手或脚靠近或在旋转部件下。 总是保持出料口的
清洁。
•发动机运行时,请勿拿起或搬运草坪机。
•停止发动机,断开火花塞线的连接,确保所有移动部件
已经完全停止,如果钥匙还插着取下钥匙:
- 清洁堵塞或清理卸料槽前;
- 检查、清洁草坪机或在草坪机上工作前;
- 击打到异物后。 检查草坪机有无损坏,重启和操作
草坪机前先进行修理;
- 如果草坪机启动异常振动 (立即检查)。
•停止发动机,断开火花塞线的连接,确保所有移动部件
已经完全停止,如果钥匙还插着取下钥匙:
- 任何时候离开草坪机时;
- 加燃油前。
•发动机关机时减少油门设置,如果发动机配有切断阀,
在除草结束时关闭燃油。
•请仅将草坪机用于其设计的用途,即切割和收集草。用
于任何其他用途都有隐患,造成机器损坏。
维护和存放
•保持所有螺母、螺栓和螺钉拧紧,确保设备处于安全工
作条件下。
•禁止将油箱中有汽油的机器存放在烟气能接触到明火或
火花的建筑物内。
•在存储于任何围栏中之前,请让发动机冷却;存储之前
请清洁并维护草坪机。
•为减少火灾危险,请保持发动机、消音器、电池舱和汽
油存放区域无草、树叶或过多的润滑脂。
•经常检查集草器有无磨损或退化。
•为了安全起见,更换磨损或损坏的部件。
•如果燃油箱必须排放,这应在室外进行。
•维护不正确、使用不符的更换部件,或卸下或改造安全
部件会损坏草坪机并严重伤害操作人员。
•请仅使用制造商推荐的刀片和备用件。使用非正宗部件
会损坏机器并损坏操作人员。请使草坪机保持在良好的
工作状况。
•如果刀片止动装置不能工作,请联系维修中心寻求帮
助。
运输和搬运
•在要搬运、抬起、运输或倾斜机器时,您必须:
- 戴上牢固的工作手套;
- 抓住机器上牢靠的握位,顾及重量及其分布;
- 考虑机器的重量和车子的特性或要放置或收集的位
置,使用适当数目的人工。
•装运时,请用绳索或铁链固定机器。
This manual suits for next models
3
Table of contents
Languages:
Other Makita Lawn Mower manuals

Makita
Makita DLM480 User manual

Makita
Makita DLM534 User manual

Makita
Makita LM2350 User manual

Makita
Makita PLM5600N2 User guide

Makita
Makita LM001C User manual

Makita
Makita DLM463 User manual

Makita
Makita DLM330SM User manual

Makita
Makita XML02 User manual

Makita
Makita LM001CX3 User manual

Makita
Makita DLM465 User manual

Makita
Makita PLM4620N User guide

Makita
Makita DLM380 User manual

Makita
Makita ELM4110 User guide

Makita
Makita LM001G User manual

Makita
Makita PLM4120N User guide

Makita
Makita DLM431Z User manual

Makita
Makita PLM4630N User guide

Makita
Makita UM40LDW User manual

Makita
Makita BLM381 User manual

Makita
Makita DLM330 User manual