Makita DLM480 User manual

DLM480
DLM481
DLM538
DLM539
EN Cordless Lawn Mower INSTRUCTION MANUAL 10
FR Tondeuse Sans Fil MANUEL D’ INSTRUCTIONS 22
DE Akku Rasenmäher BETRIEBSANLEITUNG 36
IT Tosaerba a batteria ISTRUZ IONI PER L’ USO 51
NL Accugrasmaaier GEBRUIKSAANW IJZ ING 65
ES Cortadora de Cesped MANUAL DE
INSTRUCCIONES 79
PT Cortadora de Grama a Bateria MANUAL DE INSTRUÇÕ ES 93
DA Akku-plæneklipper BRUGSANVISNING 107
EL Μηχανή γκαζόν με μπαταρία ΕΓΕΙΙΔΙ ΔΗΓΙΝ 120
TR Akülü m Bme Maknas KULLANMA KILAVUZ U 135

2
1 32
4
Fig.1
1 32
4
Fig.2
1
Fig.3
1
Fig.4
1
Fig.5

3
1
Fig.6
1
Fig.7
Fig.8
Fig.9
1
1
1
Fig.10
1
Fig.11
3
2
1
Fig.12

4
1
2
Fig.13
1
2
Fig.14
1
2
Fig.15
1
Fig.16
1
Fig.17
1
Fig.18
1
2
Fig.19
1
2
Fig.20

5
12
Fig.21
1
Fig.22
1 2
Fig.23
1
Fig.24
1
2
Fig.25
1
Fig.26
1
Fig.27
2
1
Fig.28

6
1
Fig.29
1
Fig.30
1
2
Fig.31
Fig.32
Fig.33
12 3
Fig.34
Fig.35

7
Fig.36
1
3
2
Fig.37
1
Fig.38
Fig.39
1
2
Fig.40
1
Fig.41

8
1
Fig.42
1
Fig.43
2
1
Fig.44
1
Fig.45
1
Fig.46
2
1
3
Fig.47

9
3
2
4
1
Fig.48

10 ENGLISH
ENGLISH (Original instructions)
SPECIFICATIONS
Model: DLM480 DLM481 DLM538 DLM539
M o w i n g w i d t h ( b l a d e d i a m e t e r ) 4 80 m m 53 4 m m
N o l o a d s p e e d 3 , 100 m i n - 1 3 , 000 m i n - 1
P a r t n u m b e r o f r e p l a c e m e n t
m o w e r b l a d e
S t r a i g h t m o w e r b l a d e 191V 97- 3 191V 96 - 5 / 191W 87- 2
M u l c h i n g b l a d e 191Y 6 4 - 6 191Y 6 5- 4
Di m e n s i o n s
( L x W x H )
d u r i n g o p e r a t i o n L : 1, 6 90 m m t o 1, 74 0 m m
W : 53 0 m m
H : 93 0 m m t o 1, 06 0 m m
L : 1, 810 m m t o 1, 870 m m
W : 580 m m
H : 920 m m t o 1, 04 0 m m
w h e n s t o r e d
( w i t h o u t g r a s s b a s k e t )
580 m m x 53 0 m m x 870 m m 6 10 m m x 580 m m x 925 m m
T r a v e l i n g s p e e d –2.5 - 5.0 k m / h –2.5 - 5.0 k m / h
R a t e d v o l t a g e D.C . 3 6 V
N e t w e i g h t 24 .5 - 26 .8 k g 27.0 - 29.3 k g 25.5 - 28.0 k g 27.9 - 3 0.4 k g
P r o t e c t i o n d e g r e e IP X 4
•
-
e s t c o m b i n a t i o n , a c c o r d i n g t o EP T A- P r o c e d u r e 01/ 2014 , a r e s h o w n i n t h e t a b l e .
Applicable battery cartridge and charger
B L 1815N / B L 1820B / B L 183 0B / B L 184 0B / B L 1850B / B L 186 0B
C harger DC 18R C / DC 18R D / DC 18R E / DC 18S D / DC 18S E / DC 18S F /
DC 18S H / DC 18W C
•
WARNING: Only use the battery cartridges and chargers listed above.
WARNING: Do not use a corded power supply such as battery adapter or portable power pack with
this machine.
Symbols
m e a n i n g b e f o r e u s e .
T a k e p a r t i c u l a r c a r e a n d a t t e n t i o n .
R e a d i n s t r u c t i o n m a n u a l .
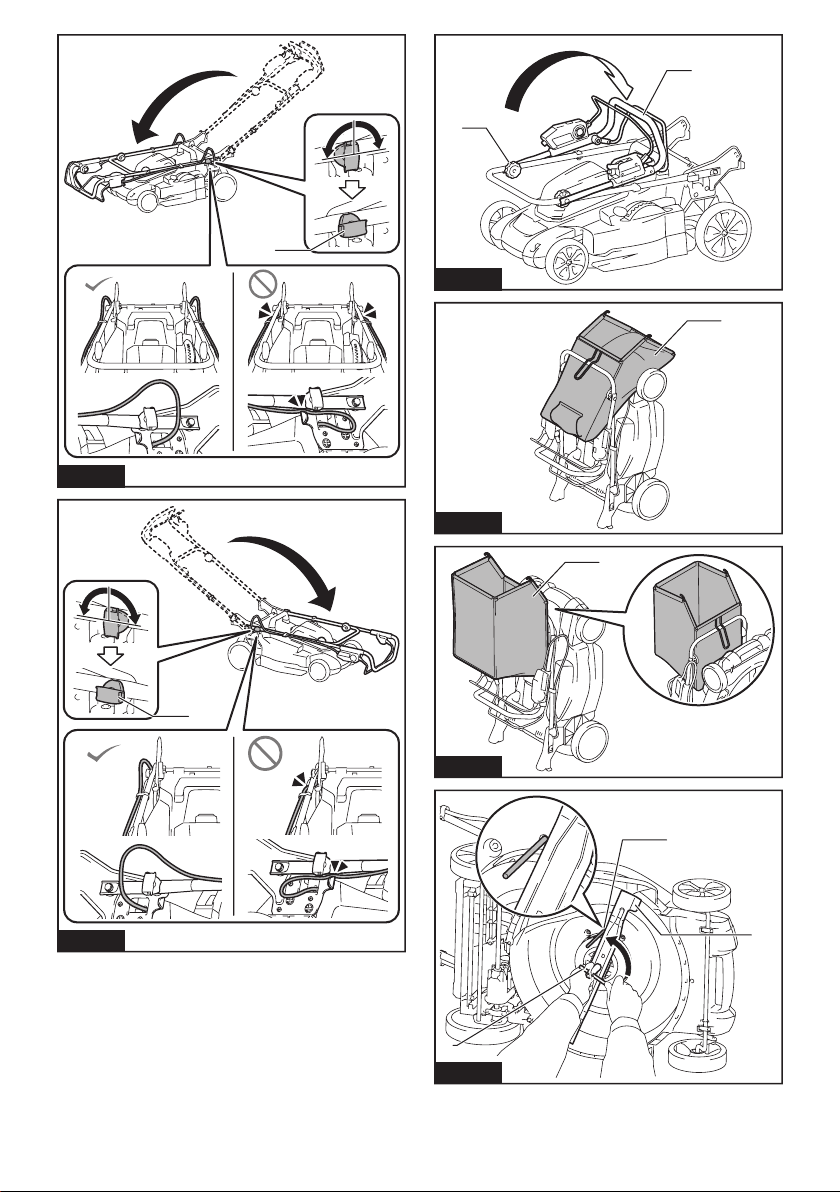
T h e d i s t a n c e b e t w e e n t h e t o o l a n d
m o w e r b l a d e u n d e r t h e m o w e r . M o w e r
b l a d e s c o n t i n u e t o r o t a t e a f t e r t h e m o t o r i s
s t o r i n g t h e m o w e r .
m aintenance.
El e c t r i c a l h a z a r d . C o n t a c t w i t h w a t e r c a n
c a u s e e l e c t r i c s h o c k .
Do n o t p o u r w a t e r .
Ni-MH
Li-ion
Du e t o t h e p r e s e n c e o f h a z a r d o u s c o m p o n e n t s i n t h e
e q u i p m e n t , w a s t e e l e c t r i c a l a n d e l e c t r o n i c e q u i p -
-
t i v e i m p a c t o n t h e e n v i r o n m e n t a n d h u m a n h e a l t h .
Do n o t d i s p o s e o f e l e c t r i c a l a n d e l e c t r o n i c
a p p l i a n c e s o r b a t t e r i e s w i t h h o u s e h o l d w a s t e !
In a c c o r d a n c e w i t h t h e Eu r o p e a n Di r e c t i v e o n
w a s t e e l e c t r i c a l a n d e l e c t r o n i c e q u i p m e n t a n d o n
a c c u m u l a t o r s a n d b a t t e r i e s a n d w a s t e a c c u m u -
l a t o r s a n d b a t t e r i e s , a s w e l l a s t h e i r a d a p t a t i o n t o
n a t i o n a l l a w , w a s t e e l e c t r i c a l e q u i p m e n t , b a t t e r -
i e s a n d a c c u m u l a t o r s s h o u l d b e s t o r e d s e p a -
f o r m u n i c i p a l w a s t e , o p e r a t i n g i n a c c o r d a n c e w i t h
t h e r e g u l a t i o n s o n e n v i r o n m e n t a l p r o t e c t i o n .
o u t w h e e l e d b i n p l a c e d o n t h e e q u i p m e n t .

11 ENGLISH
G u a r a n t e e d s o u n d p o w e r l e v e l a c c o r d i n g
t o EU O u t d o o r N o i s e Di r e c t i v e .
S o u n d p o w e r l e v e l a c c o r d i n g t o Au s t r a l i a
N S W N o i s e C o n t r o l R e g u l a t i o n .
Intended use
T h e m a c h i n e i s i n t e n d e d f o r l a w n m o w i n g .
Noise
-
i n g t o EN 6 03 3 5- 2- 77:
Model DLM480
S o u n d p r e s s u r e l e v e l ( L p A) : 84 d B ( A)
S o u n d p o w e r l e v e l ( L W A) : 92 d B ( A)
Model DLM481
S o u n d p r e s s u r e l e v e l ( L p A) : 84 d B ( A)
S o u n d p o w e r l e v e l ( L W A) : 92 d B ( A)
Model DLM538
S o u n d p r e s s u r e l e v e l ( L p A) : 85 d B ( A)
S o u n d p o w e r l e v e l ( L W A) : 96 d B ( A)
Model DLM539
S o u n d p r e s s u r e l e v e l ( L p A) : 85 d B ( A)
S o u n d p o w e r l e v e l ( L W A) : 96 d B ( A)
NOTE: T h e d e c l a r e d n o i s e e m i s s i o n v a l u e ( s ) h a s
b e e n m e a s u r e d i n a c c o r d a n c e w i t h a s t a n d a r d t e s t
another.
NOTE: T h e d e c l a r e d n o i s e e m i s s i o n v a l u e ( s )
exposure.
WARNING: W ear ear protection.
WARNING: The noise emission during actual
use of the poer tool can dier from the declared
value(s) depending on the ways in which the
tool is used especially what kind of workpiece is
processed.
WARNING: Be sure to identify safety mea-
sures to protect the operator that are based on an
estimation of exposure in the actual conditions of
use (taking account of all parts of the operating
cycle such as the times when the tool is switched
o and hen it is running idle in addition to the
trigger time).
Vibration
T h e v i b r a t i o n t o t a l v a l u e ( t r i - a x i a l v e c t o r s u m ) d e t e r -
m i n e d a c c o r d i n g t o EN 6 03 3 5- 2- 77:
Model DLM480
V i b r a t i o n e m i s s i o n ( a h) : 2.5 m / s 2o r l e s s
2
Model DLM481
V i b r a t i o n e m i s s i o n ( a h) : 2.5 m / s 2o r l e s s
2
Model DLM538
V i b r a t i o n e m i s s i o n ( a h) : 2.5 m / s 2o r l e s s
2
Model DLM539
V i b r a t i o n e m i s s i o n ( a h) : 2.5 m / s 2o r l e s s
2
NOTE: T h e d e c l a r e d v i b r a t i o n t o t a l v a l u e ( s ) h a s b e e n
m e a s u r e d i n a c c o r d a n c e w i t h a s t a n d a r d t e s t m e t h o d
NOTE:
WARNING: The vibration emission during
actual use of the poer tool can dier from the
declared value(s) depending on the ways in which
the tool is used especially what kind of workpiece
is processed.
WARNING: Be sure to identify safety mea-
sures to protect the operator that are based on an
estimation of exposure in the actual conditions of
use (taking account of all parts of the operating
cycle such as the times when the tool is switched
o and hen it is running idle in addition to the
trigger time).
EC Declaration of Conformity
For European countries only
t o t h i s i n s t r u c t i o n m a n u a l .
SAFETY W ARNINGS
General power tool safety warnings
WARNING: Read all safety warnings, instruc-
tions, illustrations and specications provided
with this power tool. F a i l u r e t o f o l l o w a l l i n s t r u c t i o n s
Save all warnings and instruc-
tions for future reference.
( c o r d l e s s ) p o w e r t o o l .
Cordless Lawn Mower Safety W arnings
1. Do not use the lawnmower in bad weather
conditions, especially when there is a risk of
lightning. T h i s d e c r e a s e s t h e r i s k o f b e i n g s t r u c k
2. Thoroughly inspect the area for wildlife where
the lawnmower is to be used.
3 . Thoroughly inspect the area where the lawn-
mower is to be used and remove all stones,
sticks, wires, bones, and other foreign objects.

12 ENGLISH
4 . Before using the lawnmower, always visually
inspect to see that the blade and the blade
assembly are not worn or damaged. W o r n o r
5. Check the grass catcher frequently for wear or
deterioration. A w o r n o r d a m a g e d g r a s s c a t c h e r
6 . Keep guards in place. Guards must be in work-
ing order and be properly mounted. A g u a r d
t h a t i s l o o s e , d a m a g e d , o r i s n o t f u n c t i o n i n g c o r -
7. Keep all cooling air inlets clear of debris.
-
8. W hile operating the lawnmower, always wear
non-slip and protective footwear. Do not oper-
ate the lawnmower when barefoot or wearing
open sandals.
t o t h e f e e t f r o m c o n t a c t w i t h t h e m o v i n g b l a d e .
9. W hile operating the lawnmower, always wear
long trousers. Ex p o s e d s k i n i n c r e a s e s t h e l i k e l i -
10. Do not operate the lawnmower in wet grass.
W alk, never run. T h i s r e d u c e s t h e r i s k o f s l i p p i n g
11. Do not operate the lawnmower on excessively
steep slopes. T h i s r e d u c e s t h e r i s k o f l o s s o f
12. W hen working on slopes, always be sure of
your footing, always work across the face
of slopes, never up or down and exercise
extreme caution when changing direction. T h i s
r e d u c e s t h e r i s k o f l o s s o f c o n t r o l , s l i p p i n g a n d
13 . Use extreme caution when reversing or pulling
the lawnmower towards you. Always be aware
of your surroundings. T h i s r e d u c e s t h e r i s k o f
t r i p p i n g d u r i n g o p e r a t i o n .
14 . Do not touch blades and other haz ardous
moving parts while they are still in motion. T h i s
15. W hen clearing jammed material or cleaning
the lawnmower, make sure all power switches
are o and the battery pack is disconnected.
SAVE THESE INSTRUCTIONS.
WARNING: DO NOT let comfort or familiarity
with product (gained from repeated use) replace
strict adherence to safety rules for the subject
product.
MISUSE or failure to follow the safety rules stated
in this instruction manual may cause serious
personal injury.
IMPORTANT SAFETY INSTRUCTIONS
WARNING: Read all safety warnings and
all instructions. F a i l u r e t o f o l l o w t h e w a r n i n g s a n d
Save all warnings and instruc-
tions for future reference.
Training
1. Read the instructions carefully. Be familiar
with the controls and the proper use of the
mower.
2. Never allow children or people unfamiliar with
these instructions to use the mower. Local
regulations can restrict the age of the operator.
3 . Never operate the mower while people, espe-
cially children, or pets are nearby.
4 . Keep in mind that the operator or user is
responsible for accidents or haz ards occurring
to other people or their property.
5. Children should be supervised to ensure that
they do not play with the mower.
6 . Physical condition - Do not operate mower
hile under the inuence of drugs, alcohol, or
any medication.
Preparation
1. W hile operating the mower, always wear sub-
stantial footwear and long trousers. Do not
operate the mower when barefoot or wearing
open sandals. Avoid wearing clothing or jew-
elry that is loose tting or that has hanging
cords or ties. They can be caught in moving
parts.
2. Before use, always visually inspect the mower
for damaged, missing or misplaced guards or
shields.
3 . Be sure the area is clear of other people before
mowing. Stop mower if anyone enters the area.
4 . Do not insert the lock key into mower until it is
ready to be used.
5. Always wear protective goggles to protect
your eyes from injury when using power tools.
The goggles must comply with ANSI Z 87.1 in
the USA, EN 166 in Europe, or AS/NZ S 1336
in Australia/New Z ealand. In Australia/New
Z ealand, it is legally required to wear a face
shield to protect your face, too.
It is an employer' s responsibility to enforce
the use of appropriate safety protective equip-
ments by the tool operators and by other per-
sons in the immediate working area.
6 . Check the blades or blade bolts carefully for
cracks or damage before operation. Replace
cracked or damaged blades or blade bolts
immediately.

13 ENGLISH
7. Remove foreign matters such as rocks, wire,
bottles, bones and large sticks from the work
area before mowing to prevent personal injury
or damage to the mower.
8. Objects struck by the mower blade can cause
severe injuries to persons. The lawn should
always be carefully examined and cleared of
all objects prior to each mowing.
9. W atch for holes, ruts, bumps, rocks, or other
hidden objects. U n e v e n t e r r a i n c o u l d c a u s e a s l i p
a n d f a l l a c c i d e n t . T a l l g r a s s c a n h i d e o b s t a c l e s .
10. Use personal protective equipment. Always
wear eye protection. P r o t e c t i v e e q u i p m e n t s u c h
h e a r i n g p r o t e c t i o n u s e d f o r a p p r o p r i a t e c o n d i t i o n s
Operation
1. Do not overreach. Keep the balance at all
times. Always be sure of the footing on slopes.
W alk, never run.
2. Stop the mower and remove the lock key, and
make sure that all moving parts have come to
a complete stop:
- whenever you leave the mower,
- before clearing blockages or unclogging chute,
- before checking, cleaning or working on the mower,
- after striking a foreign object. Inspect the
mower for damage and make repairs before
restarting and operating the mower,
- whenever the mower starts vibrating abnormally.
3 .
Never operate the mower with defective guards
or shields, or without safety devices, for exam-
ple deectors and/or grass basket, in place.
4 .
Avoid using the mower in bad weather conditions
especially when there is a risk of lightning.
5. W ear eye protection and stout shoes at all
times while operating the mower.
6 . Operate the mower only in daylight or in good
articial light.
7. Switch on the mower carefully according to
instructions and with feet well away from the
blade(s).
8. Take care against injury to feet and hands from
the mower blades.
9. Always ensure that the ventilation openings
are kept clear of debris.
10. Mow across the face of slopes, never up and
down. Exercise extreme caution when chang-
ing direction on slopes. Do not mow exces-
sively steep slopes.
11. Use extreme caution when reversing or pulling
the mower towards you.
12. Stop the blade(s) if the mower has to be tilted
for transportation when crossing surfaces
other than grass, and when transporting the
mower to and from the area to be used.
13 . Do not tilt the mower when switching on the
motor, except if the mower has to be tilted
for starting. In this case, do not tilt it more
than absolutely necessary and lift only the
part, which is away from the operator. Always
ensure that both hands are in the operating
position before returning the mower to the
ground.
14 . Do not put hands or feet near or under rotating
parts. Keep clear of the discharge opening at
all times.
15. Do not transport the mower while the mower is
turned on.
16 . Avoid operating the mower in wet grass.
17. Alays keep a rm hold on the handle.
18. Don' t grasp the exposed cutting blades or
cutting edges when picking up or holding the
mower.
19. Keep hands and feet away from rotating
blades. Caution - Blades coast after the mower
is sitched o.
20. Stop operation immediately if you notice
anything unusual. Sitch o the moer and
remove the lock key. Then inspect the mower.
21. Never attempt to make cutting height adjust-
ments while mower is running if the mower
has cutting height adjustment feature.
22. Release switch lever and wait for blade rota-
tion to stop before crossing driveways, walks,
roads, and any gravel-covered areas. Also
remove the lock key if you leave the mower,
reach to pick up or remove something out of
your way, or for any other reason that may
distract you from what you are doing.
23 . If the mower strikes a foreign object, follow
these steps:
- Stop the mower, release the switch lever and
wait until the blade comes to a complete stop.
- Remove the lock key and the battery
cartridge.
- Thoroughly inspect the mower for any
damage.
- Replace the blade if it is damaged in any way.
Repair any damage before restarting and con-
tinuing to operate the mower.
24 . Do not start the mower when standing in front
of the discharge opening.
25. If the mower starts to vibrate abnormally
(check immediately)
- inspect for damage,
- replace or repair any damaged parts,
- check for and tighten any loose parts.
26 . Never direct discharged material toward
anyone. Avoid discharging material against a
wall or obstruction.
t o w a r d t h e o p e r a t o r . S t o p t h e b l a d e w h e n c r o s s i n g
g r a v e l s u r f a c e s .
27. Do not pull the mower backwards unless
absolutely necessary.
t o b a c k t h e m o w e r f r o m a f e n c e o r o t h e r s i m i l a r
o b s t r u c t i o n , l o o k d o w n a n d b e h i n d b e f o r e a n d
w h i l e m o v i n g b a c k w a r d s .
28. Shut the motor o and ait until the blade
comes to a complete stop before removing the
grass catcher. B e w a r e t h a t t h e b l a d e s c o a s t a f t e r
29. W hen you use the machine on muddy ground,
wet slope, or slippery place, pay attention to
your footing.
3 0. Do not submerge the machine into a puddle.
3 1. W hen operating the machine, pay attention to
piping and wiring.

14 ENGLISH
Maintenance and storage
1. Replace worn or damaged parts for safety.
Use only genuine replacement parts and
accessories.
2. Inspect and maintain the mower regularly.
3 . W hen not in use, store the mower out of the
reach of children.
4 . Keep all nuts, bolts, and screws tight to
be sure the equipment is in safe working
condition.
5. Check the grass basket frequently for wear or
deterioration. For storage, always make sure
the grass basket is empty. Replace a worn
grass basket with a new factory replacement
for safety.
6 . Use only the manufacturer genuine blades
specied in this manual.
7. Be careful during adjustment of the mower
to prevent entrapment of the ngers beteen
moving blades and xed parts of the moer.
8. Check the blade mounting bolt at frequent
intervals for proper tightness.
9. Always allow the mower to cool down before
storing.
10. W hen servicing the blades be aware that, even
though the poer source is sitched o, the
blades can still be moved.
11. Never remove or tamper with safety devices.
Check their proper operation regularly. Never
do anything to interfere with the intended
function of a safety device or to reduce the
protection provided by a safety device.
12. Do not leave the machine unattended outdoors
in the rain.
13 . W hen storing the machine, avoid direct sun-
light and rain, and store it in a place where it
does not get hot or humid.
Battery tool use and care
1. Recharge only ith the charger specied by
the manufacturer. A c h a r g e r t h a t i s s u i t a b l e f o r
2. Use poer tools only ith specically desig-
nated battery packs.
3 . W hen battery pack is not in use, keep it away
from other metal objects, like paper clips,
coins, keys, nails, screws or other small metal
objects, that can make a connection from one
terminal to another.-
4 . Under abusive conditions, liquid may be
ejected from the battery; avoid contact. If con-
tact accidentally occurs, ush ith ater. If
liquid contacts eyes, additionally seek medical
help.
i r r i t a t i o n o r b u r n s .
5. Do not use a battery pack or tool that is dam-
aged or modied.
6 . Do not expose a battery pack or tool to re or
excessive temperature.-
7. Follow all charging instructions and do not
charge the battery pack or tool outside the
temperature range specied in the instruc-
tions.
Electrical and battery safety
1. Do not dispose of the battery(ies) in a re.
p o s s i b l e s p e c i a l d i s p o s a l i n s t r u c t i o n s .
2. Do not open or mutilate the battery(ies).
s w a l l o w e d .
3 . Do not charge battery in rain, or in wet
locations.
4 . Do not charge the battery outdoors.
5. Do not handle charger, including charger plug,
and charger terminals with wet hands.
6 . Do not replace the battery in the rain.
7. Do not wet the terminal of battery with liquid
such as water, or submerge the battery. Do not
leave the battery in the rain, nor charge, use,
or store the battery in a damp or wet place. If
t h e t e r m i n a l g e t s w e t o r l i q u i d e n t e r s i n s i d e o f b a t -
8. After removing the battery from the machine or
charger, be sure to attach the battery cover to
the battery and store it in a dry place.
9. Do not replace the battery with wet hands.
10. Avoid dangerous environment. Don' t use the
machine in dump or wet locations or expose it
to rain. W a t e r e n t e r i n g t h e m a c h i n e w i l l i n c r e a s e
t h e r i s k o f e l e c t r i c s h o c k .
11. If the battery cartridge gets wet, drain the
water inside and then wipe it with a dry cloth.
Dry the battery cartridge completely in a dry
place before use.
Service
1. Have your poer tool serviced by a ualied
repair person using only identical replacement
parts.
t o o l i s m a i n t a i n e d .
2. Never service damaged battery packs. S e r v i c e
m a n u f a c t u r e r o r a u t h o r i z e d s e r v i c e p r o v i d e r s .
SAVE THESE INSTRUCTIONS.
WARNING: DO NOT let comfort or familiarity
with product (gained from repeated use) replace
strict adherence to safety rules for the subject
product.
MISUSE or failure to follow the safety rules stated
in this instruction manual may cause serious
personal injury.

15 ENGLISH
Important safety instructions for
battery cartridge
1.
Before using battery cartridge, read all instruc-
tions and cautionary markings on (1) battery char-
ger, (2) battery, and (3) product using battery.
2. Do not disassemble or tamper with the battery
cartridge.
o r e x p l o s i o n .
3 . If operating time has become excessively
shorter, stop operating immediately. It may
result in a risk of overheating, possible burns
and even an explosion.
4 .
If electrolyte gets into your eyes, rinse them out
with clear water and seek medical attention right
away. It may result in loss of your eyesight.
5. Do not short the battery cartridge:
( 1) Do not touch the terminals with any con-
ductive material.
( 2) Avoid storing battery cartridge in a con-
tainer with other metal objects such as
nails, coins, etc.
( 3 ) Do not expose battery cartridge to water
or rain.
A battery short can cause a large current
o, overheating, possible burns and even a
breakdown.
6 . Do not store and use the tool and battery car-
tridge in locations where the temperature may
reach or exceed 50 ° C (122 ° F).
7. Do not incinerate the battery cartridge even if
it is severely damaged or is completely worn
out. The battery cartridge can explode in a re.
8. Do not nail, cut, crush, throw, drop the battery
cartridge, or hit against a hard object to the
battery cartridge.
9. Do not use a damaged battery.
10.
The contained lithium-ion batteries are subject to
the Dangerous Goods Legislation requirements.
f o r w a r d i n g a g e n t s , s p e c i a l r e q u i r e m e n t o n p a c k -
a g i n g a n d l a b e l i n g m u s t b e o b s e r v e d .
F o r p r e p a r a t i o n o f t h e i t e m b e i n g s h i p p e d , c o n s u l t -
i n g a n e x p e r t f o r h a z a r d o u s m a t e r i a l i s r e q u i r e d .
n a t i o n a l r e g u l a t i o n s .
a r o u n d i n t h e p a c k a g i n g .
11. W hen disposing the battery cartridge, remove
it from the tool and dispose of it in a safe
place. Follow your local regulations relating to
disposal of battery.
12. Use the batteries only with the products
specied by Makita. In s t a l l i n g t h e b a t t e r i e s t o
-
13 . If the tool is not used for a long period of time,
the battery must be removed from the tool.
14 . During and after use, the battery cartridge may
take on heat which can cause burns or low
temperature burns. Pay attention to the han-
dling of hot battery cartridges.
15. Do not touch the terminal of the tool imme-
diately after use as it may get hot enough to
cause burns.
16 . Do not allow chips, dust, or soil stuck into the
terminals, holes, and grooves of the battery
cartridge.
-
17. Unless the tool supports the use near
high-voltage electrical power lines, do not use
the battery cartridge near high-voltage electri-
cal power lines.
18. Keep the battery away from children.
SAVE THESE INSTRUCTIONS.
CAUTION: Only use genuine Makita batteries.
U s e o f n o n - g e n u i n e M a k i t a b a t t e r i e s , o r b a t t e r i e s t h a t
c h a r g e r .
Tips for maintaining maximum
battery life
1. Charge the battery cartridge before completely
discharged. Always stop tool operation and
charge the battery cartridge when you notice
less tool power.
2. Never recharge a fully charged battery car-
tridge. Overcharging shortens the battery
service life.
3 . Charge the battery cartridge with room tem-
perature at 10 ° C - 40 ° C (50 ° F - 104 ° F). Let
a hot battery cartridge cool down before
charging it.
4 . W hen not using the battery cartridge, remove
it from the tool or the charger.
5. Charge the battery cartridge if you do not use
it for a long period (more than six months).
ASSEMBLY
WARNING: Always be sure that the lock key
and battery cartridge are removed before carrying
out any work on the mower. F a i l u r e t o r e m o v e t h e
-
WARNING: Never start the mower unless it is
completely assembled. O p e r a t i o n o f t h e m a c h i n e
Installing the handle
NOTICE: W hen installing the handles, be careful
not to pinch the cord between the handles. If t h e

16 ENGLISH
1. Al i g n t h e h o l e i n t h e l o w e r h a n d l e w i t h t h e h o l e
i n t h e u p p e r h a n d l e , t h e n i n s e r t t h e b o l t f r o m o u t s i d e ,
a n d t h e n t i g h t e n t h e t h u m b n u t f r o m i n s i d e . P e r f o r m t h e
s a m e p r o c e d u r e o n t h e o t h e r s i d e .
For DLM481/DLM539
Fig.1: 1. B o l t 2. T h u m b n u t 3. Low erhandle
4. U pperhandle
For DLM480/DLM538
Fig.2: 1. B o l t 2. T h u m b n u t 3. Low erhandle
4. U pperhandle
2. T u r n t h e k n o b 90° w h i l e p u l l i n g t h e k n o b o n t h e
l o w e r h a n d l e t o r e l e a s e t h e l o c k i n g p i n . P e r f o r m t h e
s a m e p r o c e d u r e o n t h e o t h e r s i d e . R a i s e t h e h a n d l e ,
a n d t h e n t u r n t h e k n o b o n b o t h s i d e s 90° . M a k e s u r e
Fig.3: 1.
NOTE: S u p p o r t i n g t h e h a n d l e m a k e s i t e a s i e r t o
r e l e a s e t h e l o c k i n g p i n w h e n p u l l i n g t h e k n o b .
Removing the mulching plug
1. O p e n t h e r e a r c o v e r .
Fig.4: 1. R e a r c o v e r
2.
Fig.5: 1. M u l c h i n g p l u g
Assembling the grass basket
1. P i c k u p t h e u p p e r c l i p o f t h e g r a s s b a s k e t .
Fig.6: 1. U p p e r c l i p
2. In s e r t t h e f r a m e i n t o t h e g r a s s b a s k e t a s f a r a s i t
w i l l g o w h i l e h o l d i n g t h e h a n d l e o f t h e f r a m e .
Fig.7: 1. H a n d l e
NOTICE: Do n o t i n s e r t t h e h a n d l e i n t o t h e g r a s s
b a s k e t . B e s u r e t o i n s e r t t h e f r a m e a l o n g t h e s t i t c h o f
t h e g r a s s b a s k e t .
3. M a k e s u r e t h a t t h e r e i s n o s a g g i n g o n t h e c o r n e r s
o f t h e g r a s s b a s k e t .
Fig.8
4. O p e n t h e u p p e r c l i p , a n d a t t a c h i t t o t h e f r a m e .
Fig.9
5.
f r a m e .
Fig.10: 1. C l i p
Installing or removing the grass basket
T o i n s t a l l t h e g r a s s b a s k e t , f o l l o w t h e s t e p s b e l o w .
1. O p e n t h e r e a r c o v e r .
Fig.11: 1. R e a r c o v e r
2. H o l d t h e h a n d l e o f t h e g r a s s b a s k e t , a n d t h e n
Fig.12: 1. G r a s s b a s k e t 2. H a n d l e 3. R o d
T o r e m o v e t h e g r a s s b a s k e t , o p e n t h e r e a r c o v e r , a n d
Attaching the mulching plug
1.
O p e n t h e r e a r c o v e r , a n d t h e n r e m o v e t h e g r a s s b a s k e t .
Fig.13: 1. R e a r c o v e r 2. G r a s s b a s k e t
2.
i n t o t h e h o l e s o n t h e m a c h i n e .
Fig.14: 1. M u l c h i n g p l u g 2. P r o t r u s i o n
FUNCTIONAL DESCRIPTION
Installing or removing battery cartridge
CAUTION: Alays sitch o the machine
before installing or removing of the battery
cartridge.
CAUTION: Hold the machine and the battery
cartridge rmly hen installing or removing bat-
tery cartridge. F a i l u r e t o h o l d t h e m a c h i n e a n d t h e
CAUTION: Make sure that you lock the battery
cover before use.
CAUTION: Always install the battery cartridge
fully until the red indicator cannot be seen. If n o t ,
CAUTION: Do not install the battery cartridge
forcibly.
CAUTION: Hold the battery cover rmly hen
installing or removing the battery cartridge.
NOTE:
To install the battery cartridge;
1.
Fig.15: 1. 2. L o c k i n g l e v e r
2.
s l o t o n t h e m a c h i n e , a n d t h e n s l i d e t h e c a r t r i d g e u n t i l i t
l o c k s i n p l a c e w i t h a l i t t l e c l i c k .
Fig.16: 1.
3.
a s f a r a s i t w i l l g o .
Fig.17: 1.
4.
l a t c h e d w i t h t h e l o c k i n g l e v e r .
To remove the battery cartridge;
1.
2.
w h i l e s l i d i n g t h e b u t t o n o n t h e f r o n t o f t h e c a r t r i d g e .
3.
4.

17 ENGLISH
Machine / battery protection system
-
l o w i n g c o n d i t i o n s :
Overload protection
t h e a p p l i c a t i o n t h a t c a u s e d t h e m a c h i n e t o b e c o m e
o v e r l o a d e d . T h e n t u r n t h e m a c h i n e o n t o r e s t a r t .
Overheat protection
c o o l b e f o r e t u r n i n g t h e m a c h i n e o n a g a i n .
Overdischarge protection
Protections against other causes
c o u l d d a m a g e t h e m a c h i n e a n d a l l o w s t h e m a c h i n e t o
t h e c a u s e s , w h e n t h e m a c h i n e h a s b e e n b r o u g h t t o a
r e s t a r t .
NOTICE: If the machine stops due to a cause
not described above, refer to the section for
troubleshooting.
Indicating the remaining battery
capacity
Fig.18: 1.
-
Indicating the remaining battery
capacity
Only for battery cartridges with the indicator
Fig.19: 1. In d i c a t o r l a m p s 2. C h e c k b u t t o n
-
l i g h t u p f o r a f e w s e c o n d s .
Indicator lamps Remaining
capacity
Lighted O Blinking
75% t o 100%
50% t o 75%
25% t o 50%
0% t o 25%
C h a r g e t h e
m a l f u n c t i o n e d .
NOTE: De p e n d i n g o n t h e c o n d i t i o n s o f u s e a n d t h e
NOTE:
Main power switch
WARNING: Alays turn o the main poer
switch when not in use.
Fig.20: 1. M a i n p o w e r l a m p 2. M a i n p o w e r s w i t c h
T o t u r n o n t h e m a c h i n e , p r e s s t h e m a i n p o w e r s w i t c h .
m a c h i n e , p r e s s t h e m a i n p o w e r s w i t c h a g a i n .
NOTE: If t h e m a i n p o w e r l a m p l i g h t s u p i n r e d o r
b l i n k s i n r e d o r g r e e n , r e f e r t o t h e i n s t r u c t i o n s f o r
NOTE:
f u n c t i o n . T o a v o i d u n i n t e n t i o n a l s t a r t u p , t h e m a i n
s w i t c h l e v e r a n d d r i v e l e v e r ( i f e q u i p p e d ) a r e n o t
p u l l e d f o r a c e r t a i n p e r i o d a f t e r t h e m a i n p o w e r s w i t c h
i s t u r n e d o n .

18 ENGLISH
Switch action
WARNING: Before installing the battery car-
tridge, always check to see that the switch lever
actuates properly and returns to the original posi-
tion when released. O p e r a t i n g t h e m a c h i n e w i t h a
NOTE: T h e m o w e r d o e s n o t s t a r t w i t h o u t p r e s s i n g t h e
s w i t c h b u t t o n e v e n t h e s w i t c h l e v e r i s p u l l e d .
NOTE:
In c r e a s e t h e m o w i n g h e i g h t i n t h i s c a s e .
For DLM481/DLM539
1.
2. P r e s s t h e m a i n p o w e r s w i t c h .
3.
d o w n t h e s w i t c h b u t t o n . R e l e a s e t h e s w i t c h b u t t o n a s
s o o n a s t h e m o t o r s t a r t s r u n n i n g .
Fig.21: 1. S w i t c h b u t t o n 2. S w i t c h l e v e r
4. W h i l e h o l d i n g t h e s w i t c h l e v e r , p u s h t h e d r i v e l e v e r
f o r w a r d a n d h o l d i t t o d r i v e t h e r e a r w h e e l s .
Fig.22: 1. Dr i v e l e v e r
NOTE:
t h e d r i v e l e v e r f o r w a r d a n d h o l d i t w i t h o u t p u l l i n g t h e
s w i t c h l e v e r .
5. R e l e a s e t h e d r i v e l e v e r a n d t h e s w i t c h l e v e r t o
s t o p t h e m a c h i n e .
For DLM480/DLM538
1.
2. P r e s s t h e m a i n p o w e r s w i t c h .
3.
d o w n t h e s w i t c h b u t t o n . R e l e a s e t h e s w i t c h b u t t o n a s
s o o n a s t h e m o t o r s t a r t s r u n n i n g .
Fig.23: 1. S w i t c h b u t t o n 2. S w i t c h l e v e r
4. R e l e a s e t h e s w i t c h l e v e r t o s t o p t h e m o t o r .
Adjusting the mowing height
WARNING: Never put your hand or leg under
the mower body when adjusting the mowing
height.
WARNING: Always make sure that the lever
ts in the groove properly before operation.
b e t w e e n 20 m m a n d 100 m m .
Fig.24: 1.
T h e t a b l e b e l o w s h o w s t h e r e l a t i o n s h i p b e t w e e n t h e
-
i n g h e i g h t .
Number Mowing height
120 m m
226 m m
33 2 m m
44 0 m m
54 9 m m
659 m m
770 m m
881 m m
992 m m
10 100 m m
H o l d t h e l o w e r h a n d l e w i t h o n e h a n d , a n d t h e n m o v e
Fig.25: 1. 2. L o w e r
handle
NOTE:
NOTE:-
Grass level indicator
G r a s s l e v e l i n d i c a t o r s h o w s t h e v o l u m e o f m o w e d
g r a s s . W h e n t h e g r a s s b a s k e t i s n o t f u l l , t h e i n d i c a t o r
Fig.26: 1. G r a s s l e v e l i n d i c a t o r
W h e n t h e g r a s s b a s k e t i s a l m o s t f u l l , t h e i n d i c a t o r d o e s
Fig.27: 1. G r a s s l e v e l i n d i c a t o r
NOTE: T h i s i n d i c a t o r i s a r o u g h g u i d e . De p e n d i n g o n
t h e c o n d i t i o n s o f i n s i d e o f t h e b a s k e t , t h i s i n d i c a t o r
Adjusting the handle height
1. H o l d t h e l o w e r h a n d l e , a n d t h e n t u r n t h e k n o b 90°
w h i l e p u l l i n g t h e k n o b o n t h e l o w e r h a n d l e t o r e l e a s e
t h e l o c k i n g p i n . P e r f o r m t h e s a m e p r o c e d u r e o n t h e
o t h e r s i d e .
Fig.28: 1. Low erhandle 2.
NOTE: S u p p o r t i n g t h e h a n d l e m a k e s i t e a s i e r t o
r e l e a s e t h e l o c k i n g p i n w h e n p u l l i n g t h e k n o b .
2.
k n o b o n b o t h s i d e s 90° . M a k e s u r e t h a t t h e k n o b s a r e
Fig.29: 1.

19 ENGLISH
Adjusting the traveling speed
For DLM481/DLM539
Fig.30: 1. S p e e d l e v e r
a n d t o i n c r e a s e t h e s p e e d , t u r n t h e l e v e r f o r w a r d .
Using mulching plug
t h e g r o u n d w i t h o u t g a t h e r i n g t h e c u t g r a s s i n t h e g r a s s
-
i n g p l u g , b e s u r e t o r e m o v e t h e g r a s s b a s k e t .
NOTICE: W hen using the machine with the
mulching plug, make sure that the total length of
grass after cutting is 30 mm or more, and the cut
length is 15 mm or less.
Fig.31: (1) 3 0 m m o r m o r e (2) 15 m m o r l e s s
Using the rear discharge
g r a s s t o t h e g r o u n d f r o m t h e r e a r s i d e o f t h e m a c h i n e
w i t h o u t g a t h e r i n g t h e c u t g r a s s i n t h e g r a s s b a s k e t .
-
c h a r g e , b e s u r e t o r e m o v e t h e g r a s s b a s k e t a n d m u l c h -
i n g p l u g , a n d c l o s e t h e r e a r c o v e r .
Electronic function
T h e m a c h i n e i s e q u i p p e d w i t h t h e e l e c t r o n i c f u n c t i o n s
•S o f t s t a r t a t d r i v i n g
T h e s o f t - s t a r t f u n c t i o n m i n i m i z e s s t a r t - u p s h o c k ,
•El e c t r i c b r a k e
T h i s m a c h i n e i s e q u i p p e d w i t h a n e l e c t r i c b r a k e .
t h e m o w e r b l a d e s a f t e r r e l e a s i n g t h e s w i t c h l e v e r ,
h a v e t h e m a c h i n e s e r v i c e d a t M a k i t a Au t h o r i z e d
S e r v i c e C e n t e r .
OPERATION
Mowing
WARNING: Before mowing, clear away sticks
and stones from mowing area. Furthermore, clear
away any weeds from mowing area in advance.
WARNING: Always wear the safety goggles or
safety glasses with side shields when operating
the mower.
CAUTION: If the cut grass or foreign object
blocks up inside of the mower body, be sure to
remove the lock key and battery cartridge and
wear gloves before removing the grass or foreign
object.
NOTICE: Use this machine for mowing lawn only.
Do not mow weeds with this machine.
Fig.32
m e t e r s p e r 10 s e c o n d s .
Fig.33
NOTE: W h e n c u t t i n g l o n g l a w n o r d e n s e l a w n , i f t h e
f o u n d a f t e r m o w i n g , o r d e c r e a s e o f t h e m o t o r s p e e d
i s f o u n d d u r i n g m o w i n g , d e c r e a s e t h e m o w i n g s p e e d
l o w e r t h a n r e c o m m e n d e d i n t h i s m a n u a l , o r r a i s e t h e
m o w i n g h e i g h t .
T h e c e n t e r l i n e s o f t h e f r o n t w h e e l s a r e g u i d e l i n e s t o
m o w i n g w i d t h . U s i n g t h e c e n t e r l i n e s a s g u i d e l i n e s ,
-
Fig.34: 1. M o w i n g w i d t h 2. O v e r l a p p i n g a r e a
3. C e n t e r l i n e
C h a n g e t h e m o w i n g d i r e c t i o n e a c h t i m e t o p r e v e n t t h e
Fig.35
p e r i o d i c a l c h e c k , b e s u r e t o s t o p t h e m o w e r t h e n
NOTICE: Using the mower with the grass basket
full prevents smooth blade rotation and places
an extra load on the motor, which may cause
breakdown.
Mowing long lawn
Fig.36
NOTE: M o w i n g l o n g l a w n t o s h o r t l e n g t h a l l a t o n c e
NOTE: If t h e u n e v e n n e s s i n t h e l e n g t h o f l a w n o r p o o r
s p e e d i s f o u n d d u r i n g m o w i n g , d e c r e a s e t h e m o w i n g
s p e e d , o r r a i s e t h e m o w i n g h e i g h t .
Emptying the grass basket
WARNING: To reduce a risk of accident, reg-
ularly check the grass basket for any damage or
weakened strength. Replace the grass basket if
necessary.
1.
R e l e a s e t h e s w i t c h l e v e r a n d d r i v e l e v e r ( f o r DL M 4 81/
DL M 53 9) , o r r e l e a s e t h e s w i t c h l e v e r ( f o r DL M 4 80/ DL M 53 8) .
2.
3. O p e n t h e r e a r c o v e r a n d t a k e o u t t h e g r a s s b a s k e t
Fig.37: 1. R e a r c o v e r 2. H a n d l e 3. G r a s s b a s k e t
4.

20 ENGLISH
MAINTENANCE
WARNING: Always be sure that the lock
key and battery cartridge are removed from the
mower before storing or carrying the mower or
attempting to perform inspection or maintenance.
WARNING: Always remove the lock key when
the mower is not in use. Store the lock key in a
safe place out of reach of children.
WARNING: W ear gloves when performing
inspection or maintenance.
WARNING: Always wear the safety goggles or
safety glasses with side shields when performing
inspection or maintenance.
NOTICE:
Never use gasoline, benz ine, thinner, alcohol
or the like. Discoloration, deformation or cracks may result.
T o m a i n t a i n p r o d u c t S AF ET Y a n d R EL IAB IL IT Y ,
Maintenance
1.
2. P u t t h e m o w e r o n i t s s i d e . C l e a n g r a s s c l i p p i n g s
a c c u m u l a t e d o n t h e u n d e r s i d e o f m o w e r d e c k .
3. P o u r w a t e r t o w a r d t h e b o t t o m o f t h e m a c h i n e t o
w h i c h t h e b l a d e i s a t t a c h e d .
NOTICE: Do not wash the machine with high
pressure water.
4. C h e c k a l l n u t s , b o l t s , s c r e w s , e t c . f o r t i g h t n e s s .
5.
In s p e c t m o v i n g p a r t s f o r d a m a g e , b r e a k a g e , a n d w e a r .
Da m a g e d o r m i s s i n g p a r t s s h o u l d b e r e p a i r e d o r r e p l a c e d .
6.
S t o r e t h e m o w e r i n a s a f e p l a c e o u t o f t h e r e a c h o f c h i l d r e n .
For DLM481/DLM539
NOTICE: Do not pour water to the area shown in
the gure.
a m a l f u n c t i o n o f t h e m a c h i n e .
Fig.38: 1. Ar e a w h e r e w a t e r s h o u l d n o t b e p o u r e d
For DLM481/DLM539
NOTICE:
Do not pour water on the machine while the
machine is in the upright position as shon in the gure.
t h e m o t o r u n i t , a n d c a u s e a m a l f u n c t i o n o f t h e m a c h i n e .
Fig.39
Carrying the mower
CAUTION:
Before carrying the mower, make sure
that the battery cartridge and lock key are removed.
l o w e r h o l d i n g p a r t a t t h e f r o n t o f t h e m a c h i n e w i t h t w o
Fig.40: 1. L o w e r h o l d i n g p a r t 2. R e a r g r i p
Storing
CAUTION: W hen putting the machine in the
upright position, place the machine on a at and
stable surface. If t h e m a c h i n e i s p l a c e d o n a n u n s t a -
Do n ' t s t o r e t h e m o w e r a n d c h a r g e r i n l o c a t i o n s w h e r e
1.
2. T u r n t h e k n o b 90° w h i l e p u l l i n g t h e k n o b o n t h e
l o w e r h a n d l e t o r e l e a s e t h e l o c k i n g p i n . P e r f o r m t h e
s a m e p r o c e d u r e o n t h e o t h e r s i d e , a n d t h e n f o l d t h e
handle.
Fig.41: 1.
NOTE: S u p p o r t i n g t h e h a n d l e m a k e s i t e a s i e r t o
r e l e a s e t h e l o c k i n g p i n w h e n p u l l i n g t h e k n o b .
3. T u r n t h e k n o b o n b o t h s i d e s 90° . M a k e s u r e t h a t
For DLM481/DLM539
Fig.42: 1.
For DLM480/DLM538
Fig.43: 1.
NOTICE: Be careful not to pinch the cords when
folding the handle.
4. L o o s e n t h e t h u m b n u t s o n b o t h s i d e s , a n d t h e n
Fig.44: 1. T h u m b n u t 2. U pperhandle
5. P l a c e t h e m a c h i n e i n t h e u p r i g h t p o s i t i o n .
NOTE: W h e n p u t t i n g t h e m o w e r i n t h e u p r i g h t p o s i -
6.
Fig.45: 1. G r a s s b a s k e t
Fig.46: 1. G r a s s b a s k e t
Removing or installing the mower
blade
WARNING: The blade coasts for a few sec-
onds after releasing the switch. Do not start any
operation until the blade comes to a complete
stop.
WARNING: Always remove the lock key and
battery cartridge when removing or installing the
blade. Failure to remove the lock key and battery
cartridge may cause a serious injury.
WARNING: Always wear gloves when han-
dling the blade.
Other manuals for DLM480
7
This manual suits for next models
3
Table of contents
Languages:
Other Makita Lawn Mower manuals

Makita
Makita DLM460 User manual

Makita
Makita DLM230 User manual

Makita
Makita XML03CM1 User manual

Makita
Makita ELM3311 User guide

Makita
Makita DLM480 User manual

Makita
Makita PLM4627N User manual

Makita
Makita BLM430 User manual

Makita
Makita DLM537 User manual

Makita
Makita RBE250 User manual

Makita
Makita PLM5121 User manual

Makita
Makita PLM4621 User guide

Makita
Makita LM003J User manual

Makita
Makita DLM462Z User manual

Makita
Makita PLM5600 User guide

Makita
Makita DLM530 User manual

Makita
Makita DLM465 User manual

Makita
Makita DLM462 User manual

Makita
Makita LM001C User manual

Makita
Makita LM001C User manual

Makita
Makita LM001G User manual