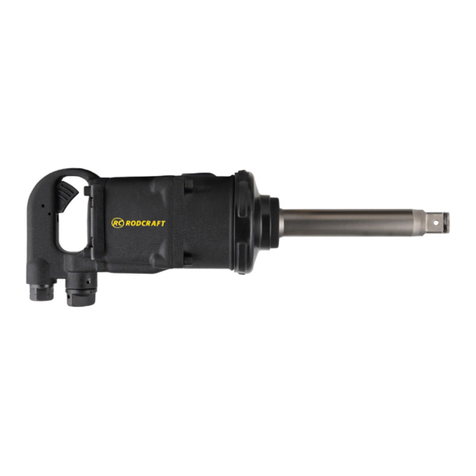
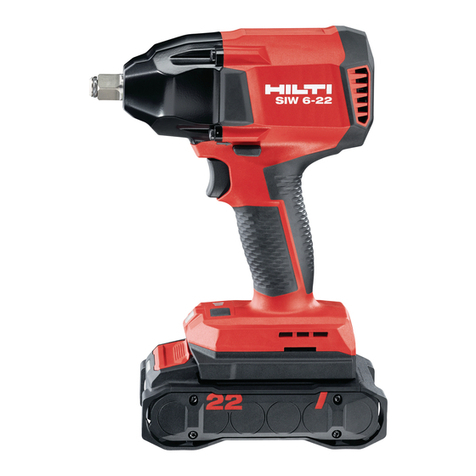
Mammooth MMT A170 703 User manual

MMT A170 703
ELECTRIC IMPACT WRENCH
WARNING! Read all safety warnings and all instructions. Failure to follow the
warnings and instructions may result in electric shock, fire and/or serious injury.

Safety instructions
1. General safety instructions for power tools
1). Job security
2). Electrical safety
3). Personal safety
Retain all safety notices and instructions for future use.
Warning! Read all safety warnings and instructions. Failure to follow the safety
instructions and instructions can result in electric shock, fire and / or serious injury.
The term “power tool” used in the safety instructions refers to mains-operated power tools
(with a power cord) and to battery-operated power tools (without a power cord).
a) Keep your work area clean and well-lit. Cluttered or unlit work areas can lead to
accidents.
b) Do not work with the power tool in an explosive environment in which there are
flammable liquids, gases or dust. Power tools generate sparks that can ignite the
dust or fumes.
c) Keep children and other people away while using the power tool. If you are
distracted, you can lose control of the device.
a) The power tool connector must match the socket. The plug must not be modified
in any way. Do not use adapter plugs with protective earthed power tools.
Unmodified plugs and matching sockets reduce the risk of electric shock.
b) Avoid body contact with earthed surfaces such as pipes, heaters, stoves and
refrigerators. There is an increased risk of electric shock if your body is grounded.
c) Keep power tools away from rain or moisture. Water getting into a power tool
increases the risk of electric shock.
d) Do not misuse the cable to carry the power tool, to hang it up or to pull the plug
from the socket. Keep the cord away from heat, oil, sharp edges, or moving parts of
the device. Damaged or tangled cables increase the risk of electric shock.
e) If you work with a power tool outdoors, only use extension cables that are also
suitable for outdoor use. Using an extension cord suitable for outdoor use will
reduce the risk of electric shock.
f) If operating the power tool in a damp environment cannot be avoided, use a residual
current circuit breaker. The use of a residual current circuit breaker reduces the risk
of an electric shock.
a) Be attentive, pay attention to what you are doing, and use your common sense
when working with a power tool. Do not use a power tool when you are tired or
under the influence of drugs, alcohol or medication. A moment of inattention while
using the power tool can result in serious injury.
b) Wear personal protective equipment and always protective goggles. Wearing
personal protective equipment, such as a dust mask, non-slip safety shoes, hard
hat or hearing protection, depending on the type and use of the power tool, reduces
the risk of injuries.
c) Avoid unintentional start-up. Make sure that the power tool is switched off before
you connect it to the power supply and / or the battery, pick it up or carry it.
Accidents can occur if you have your finger on the switch while carrying the power
tool or if you connect the device to the power supply when it is switched on.
2

d) Remove adjustment tools or wrenches before switching on the power tool. A tool or
wrench in a rotating part of the device can cause injuries.
e) Avoid abnormal posture. Make sure you have a secure stance and keep your
balance at all times. This gives you better control of the power tool in unexpected
situations.
f) Wear suitable clothing. Do not wear baggy clothes or jewelry. Keep your hair,
clothing and gloves away from moving parts. Loose clothing, jewelry or long hair
can be caught in moving parts.
g) If dust extraction and collection devices can be fitted, ensure that they are connect
ed and used correctly. Using a dust extractor can reduce dust hazards.
a) Do not overload the device. Use the power tool designed for your work. With the
right power tool, you can work better and more safely in the specified performance
range.
b) Do not use a power tool with a defective switch. A power tool that can no longer be
switched on or off is dangerous and must be repaired.
c) Pull the plug out of the socket and / or remove the battery before making device
settings, changing accessories or putting the device away. This precaution prevents
the power tool from starting accidentally.
d) Keep unused power tools out of the reach of children. Do not allow people to use
the device who are not familiar with it or who have not read these instructions.
Power tools are dangerous when used by inexperienced people.
e) Maintain power tools with care. Check whether moving parts are working properly
and not jamming, whether parts are broken or damaged in such a way that the
function of the power tool is impaired. Have damaged parts repaired before using
the device. Many accidents are caused by poorly maintained power tools.
f) Keep cutting tools sharp and clean. Carefully maintained cutting tools with sharp
cutting edges are less likely to jam and are easier to guide.
g) Use the power tool, accessories, tool bits etc. in accordance with these instruc
tions. Take into account the working conditions and the work to be performed. The
use of power tools for purposes other than those for which they are intended can
lead to dangerous situations.
3
4). Use and treatment of the power tool
5). Service
2. Residual Risks
Have your power tool repaired only by qualified specialists and only with original
spare parts. This ensures that the safety of the power tool is maintained.
Even if you operate this power tool properly, there are always residual risks. The
following dangers can arise in connection with the construction and design of this
power tool:
Warning! This power tool generates an electromagnetic field during operation.
This field can, under certain circumstances, affect active or passive medical
implants. To reduce the risk of serious or fatal injuries, we recommend people
with medical implants to consult their doctor and the manufacturer of the medical
implant before operating the machine!
Damage to health resulting from hand-arm vibrations if the power tool is used
over a long period of time or is not properly operated and maintained.

Device specific safety instructions
Technical data
• Hold the power tool by the insulated gripping surfaces when performing an
operation where the fastener may touch hidden wires or its own wire. Fasteners that
come in contact with a "live" wire can "electrify" exposed metal parts of the power
tool and cause an electric shock to the operator.
• Do not use the power tool with a damaged cord. Do not touch the damaged cable
and pull the power plug if the cable is damaged during work. Damaged cables
increase the risk of electric shock.
• Secure the workpiece. A workpiece held in place with clamping devices or a vice is
held more securely than with your hand.
• Wait until the power tool has come to a standstill before putting it down. The
accessory tool can get caught and lead to loss of control of the power tool.
The specified total vibration value and the specified noise emission values have been
measured according to a standardized test method and can be used to compare one
power tool with another. They can also be used for a preliminary assessment of
exposure.
4
Warning! Depending on how you use the power tool, the actual vibration values
may differ from those specified.
Take measures to protect yourself against vibration exposure. Try to keep the
exposure to vibrations and noise as low as possible. Examples of measures to
reduce vibration exposure are wearing gloves when using the tool, limiting
working hours and using accessories that are in good condition
Take into account the entire work process, including times when the power tool
is working without load or when it is switched off.
Suitable measures include regular maintenance and care of the power tool and
tool attachments, keeping your hands warm, regular breaks and good planning
of work processes.
Model
Voltage / Frequency
Power
Idle speed
Chuck size
Maximum torque (clockwise)
Maximum torque (counterclockwise)
Sound pressure level, LpA
Sound power level, LWA
Vibration,ah
Protection class
MMT A170 703
230 - 240 V~ (AC) / 50 Hz
450 W
3600 min-1
1/2" (13 mm)
100 N.m.
320 N.m.
89 dB (A), k=3dB
100 dB (A), k=3dB
9,74 m/s2, k=1,5 m/s2
II

Explanation of symbols
Description
Read these operating instructions carefully before using the electrical impact wrench.
Double insulation for added security.
The meaning of the crossed-out garbage can: Do not dispose of electrical devices in
the household waste, use the collection points in your community. Ask your local
authority about the location of the collection points, If electrical devices are disposed
of in an uncontrolled manner, dangerous substances can get into the groundwater and
thus into the food chain during weathering, or flora and fauna can be poisoned for
years. If you replace the device with a new one, the seller is legally obliged to accept
the old one for disposal at least free of charge
Warning for your caution.
Corresponds to the prescribed safety regulations
Wear protective goggles!
Wear hearing protection!
Wear a dust mask!
5
1
3
2
4
1. Tool holder
2. Soft grip
3. On / Off switch
4. Direction setting Key

Assembly and operation
Tool change
Operation
Functionality
Overloading the motor is not possible because the striking mechanism disengages
when the rated load is reached.
Pay attention to the mains voltage! The voltage of the power source must match the
information on the rating plate of the power tool. Power tools marked with 230 V can
only be operated with 230 V.
With the direction of rotation switch you can change the direction of rotation of the
power tool. However, this is not possible when the on / off switch is pressed.
Press the direction switch to the right as far as it will go.
Push the direction switch to the left as far as it will go.
To start up, press and hold the on / off switch.
To switch off, release the on / off switch.
You can continuously regulate the speed of the switched-on power tool, depending on
how far you press the on / off switch.
Light pressure on the on / off switch results in a low speed. The speed increases with
increasing pressure.
You can also use the speed preselection dial to preselect the required speed during
operation.
Keep the air slots and the motor housing as free of dust and dirt as possible.
Installation
Set the direction of rotation
1. Right run:
Switching on / off
Set the speed
Preselect speed
Maintenance
2. Left rotation:
Before starting any work on the power tool, pull the power plug out of the socket.
When inserting a socket, make sure that it is firmly seated on the tool holder. If the
socket is not firmly connected to the tool holder, it may loose again and can not work
properly.
Push the socket the square of the tool holder.
The tool holder with the tool is driven by an electric motor via a gearbox and hammer
mechanism.
The work process is divided into two phases: screwing and tightening (striking
mechanism in action).
The hammer mechanism kicks in as soon as the screw connection gets stuck and the
motor is loaded. The hammer mechanism converts the power of the motor into
uniform rotary impacts. When loosening screws or nuts, this process is reversed.
6

Wipe the device with a clean cloth or blow it out with compressed air at low pressure.
Excessive accumulation of metal dust can cause electricity to be conducted from the
internal parts to exposed metal parts!
If the power tool's power cord is damaged, it must be replaced with a specially
prepared power cord that is available from the customer service organization.
Only put the power tool on the nut / screw when it is switched off, otherwise the
rotating tool bits may slip off.
The torque depends on the duration of the impact. The maximum torque achieved
results from the sum of all individual torques achieved through impacts. The maximum
torque is reached after a stroke duration of 3-5 seconds. After this time, the tightening
torque only increases slightly. On the other hand, the gear housing may heat up
heavily.
Note: The consequences of excessive heating may cause high wear and tear on all
hammer mechanism parts and require high lubricant.
Screw connections with a hard, springy or soft seat
With a springy or soft seat, the maximum tightening torque is lower than with a hard
seat. A significantly longer impact time is also required.
Renewal of accessories
Worn or damaged accessories must be replaced immediately.
The following use cases result accordingly:
- A hard seat is provided for screw connections from metal to metal when using
washers. The maximum torque is reached after a relatively short impact time
(steep characteristic curve). Unnecessarily long striking times only damage the
machine.
- A Resilient fit is given for screw connections from metal to metal, but when using
spring washers, disc springs, studs or screws / nuts with a conical seat and when
using extensions.
- A soft fit is given for screwing of metal on wood, or use of lead or fiber washers
as a base.
If the torques achieved in a sequence of impacts are measured in the experiment and
transferred to a diagram, the curve of a torque curve is obtained. The height of the
curve corresponds to the maximum achievable torque, the steepness shows the time
in which this is achieved.
A torque curve depends on the following factors:
- Strength of the screws / nuts
- Type of base (washer, disc spring, seal)
- Strength of the material to be screwed
- Lubrication conditions on the screw connection
The impact duration must be determined for each required tightening torque. The
tightening torque actually achieved must always be checked with a torque wrench.
7
Work instructions

Use only sharp and undamaged accessories.
To remove the accessories, proceed as described in the relevant section.
To attach the accessories, proceed as described in the relevant section.
8
The product, its accessories and packaging must be disposed of separately for
environmentally friendly recycling
For EU countries only
Do not dispose of power tools with household waste. In accordance with European
Directive 2002/96 / EC for electrical and electronic scrap and the introduction to
national law, power tools that are no longer in use must be collected separately and
disposed of in an environmentally friendly manner.
Guide values for maximum screw tightening torques
Use the following table to determine the correct torque for different screw sizes.
Disposal
Screw Size
M 10 - M12
M 12 - M16
M 14 - M16
M 18 - M24
Torque
40 - 80 N.m.
100 - 200 N.m.
120 - 200 N.m.
200 - 350 N.m.

9
IT Dichiarazione di conformità CE SK Prehláŝenie o zhodě ES
DE EG - Konformitätseklärung SI ES izjava o skladnosti
FR Declaration de conformité CE HU CE-megfelőségi nyilatkozat
UK EC delaration of conformity RO Declaraţie de conformitate CE
CZ Prohláŝeni o shodě EU BA/HR EG – izjava o konformnosti
PL Deklaracja zgodności WE
Inter Cars S.A.
ul. Powsińska 64,
02-903 Warszawa
Poland
Warszawa 05.07.2021
IT Con la presente dichiariamo che l’articolo di seguito descritto, in base alla sua concezione e costruzione ed alla messa in
circolazione da parte della è conforme ai requisiti fondamentali di sicurezza e salute delle direttive CE.
DE Hiermit erklären wir, dass der nachfolgend beschriebene Artikel aufgrund seiner Konzipierung und Bauart sowie in
der von in Verkehr gebrachten Ausführung den einschlägigen grundlegenden Sicherheits-und
Gesundheitsanforderungen der EG- Richtlinien entspricht.
FR Avec la présente nous declarons que l’article décrit ci-après repond en matièrede conception et de construction ainsi que dans
son modèle commercialisé par la aux esigences fondamentales de sécurité et sanitaires et aux directives
communitaires applicable.
UK We herewith declare that the following product complies with the appropriate basic safety and health requirements of the EC
directives based on its design and type, as brought into circulation.
CZ Timto prohlašujeme že následovné popsane zboží svou koncepci a konstrukci rovněž i provedením, jenž bylo dáno do prodeje
společnosti, odpovidá přislušným základnímbezpečnostním a zdravotním požadavkům směrnic EU.
PL Niniejszym deklarujemi iż niżej określony artykul, w formie wprowadzonej na rynek przez, spelnia ze względu
na project I construcję podstawowe wymagania bezpieczeństwa pracy oraz ochrony zdrowia narzucane przez dyrektywy WE.
SK Týmto prehlasujeme že nasledovne popisovaný tovar na základe svojho návrhu a konštruckcie, ako aj prevedenia uvedeného
spoločnost’ou do prevádzky, in zdravstvenim zahtevam, ki so v skladnosti z EU smernicami.
SI S tem izjavljamo mi da je opisani proizvod na osnovi njegove nasnove in vrste konstrukcije kot tudi pri
prodajo spuščena izvebda odgovarja temelijnim varnostnim in zdravstvenim zahtevam, ki so v skladnosti z EU smernicami.
HU Ezennel nyilatkozunk hogy a következőkben leírt árucikk koncepciójában és kiviteli módjában valiant az által
forgalomba hozott kivitelében megfelel az EU rá vonatkozó alapvető biztonsági-es egészségvédelmi előirásainak.
RO Noi declaram de proprie raspundere ca articolul descris mai jos, pe baza concepţiei şi tipului sau constructiv sale, precum
şi al execuţiilor puse în circulaţie de, se conformeaza cerinţelor pentru securitatea muncii şi sanataţii ale
directivelor UE în materie.
BA/HR Ovim izjavljujemo da u slijedećem opisani proizvod na osnovu njegovog koncipiranja i načina gradnje kao i izlaganja izdanog
od odgovara jasmin, osnovnim sigurnosnim i zdravstvenim zahtjevima EG smjernica.
IT Prodotto
DE Produkttyp
FR Produit
UK Product
CZ Produktu
PL Produktu
SK Produktu
SI Proizvoda
HU Termek típusa
RO Termek típusa
BA/HR Termek típusa
IT Direttive CE
DE Anwendbare EG-
Richtlinien
FR Directives CE applicables
UK Applicable EC directives
CZ Směrnice EU
PL Dyrektywy WE
SK Aplikovatel’né smernice
EU
SI Uporabljene ES smernice
HU EU Műszaki Irányelvek
RO Directive UE applicabile
BA/HR EG – smjernice
IT Norme armonizzate
applicate
DE Angwandte harmonisierte
normen
FR Normes armonisées
applicable
UK Applicable harmonized
standards
CZ Aplikované harmonizačni
normy
PL Zastosowano
zharmonizowane normy
SK Použité harmonizované
normy
SI Uporabljani usklajeni
normativi
HU Alkalmazott harmonizált
szabványok
RO Norme armonizzate
aplicabile
BA/HR Primijenjene
harmonizirajuće norme
COD MMT A170 703
NAME Electric Impact Wrench
USE HOBBY / DOMESTIC
2006/42 / EC
2014/30 / EU
guaranteed by Inter Cars S.A. ul.
Powsińska 64, 02-903 Warszawa
EN 62841-1:2015+AC: 15
EN 62841-2-2:2014
EK9-BE-88:2014
EN 55014-1:2006/+A1:2009/+A2:2011
EN 55014-2:2015
EN 61000-3-2:2014
EN 61000-3-3:2013

Table of contents
Other Mammooth Impact Driver manuals


