Marabu StarLam 1600R Administrator Guide

Version G3 1.00 3-2010
StarLam 1600R Liquid Laminator
Operation & Instruction Manual

StarLam1600RUserManual
1
Important:
Please read and understand the operation manual completely. Follow all safety information described.

StarLam1600RUserManual
2
Introduction
Thank you for choosing the StarLam 1600R Liquid Laminator. The StarLam 1600R is a new generation
liquid laminator designed for post fabrication liquid lamination of posters, banners, vehicle graphics and
paper substrates. The StarLam 1600R used in combination with ClearShield liquid laminates will give
you the ability to quickly and easily protect your digital output. In addition, the StarLam is CE
approved to further ensure quality and durability
The StarLam 1600R utilizes air assisted oven drying to allow the application of liquid laminates in a
quick and efficient process. The other main advantage of the StarLam 1600R is consistency. The liquid
laminator allows a controlled wet film thickness to be applied so that square footage coverage and dried
film thickness can be controlled precisely. This ensures accurate lamination with lower production cost.
The StarLam is designed for production environments where ease of use and reliability are paramount.
Attention!
To ensure the safety of the operator and avoid damaging any electrical
components, please be sure to check the reliability of the earth protective ground of
the power receptacle.
■Please keep this instruction manual for reference in the future!
■Please follow the safety precautions and operational guide lines when operating
this machine!

StarLam1600RUserManual
3
Table of Contents
Operation Requirements ................................................................................. 4
Safety Precautions........................................................................................... 4
Machine Diagram ........................................................................................... 7
Technical Specifications ................................................................................. 9
Precautions Before Operating....................................................................... 10
Preparation Before Operation ....................................................................... 10
Operation Instructions................................................................................... 11
Troubleshooting ............................................................................................ 24
Warranty ....................................................................................................... 26
Maintenance.................................................................................................. 28
After Sale Service ......................................................................................... 28
Appendixes ................................................................................................... 29

StarLam1600RUserManual
4
OperationRequirements
■The machine should be used in temperature range of 15˚C (50˚F) - 40˚C (104˚F).
■Environmental relative humidity should be 30% - 70%. Avoid using the machine in places with high
temperature, humidity and dust.
■Don’t place the equipment in direct sunlight.
■Place the machine on a flat floor and properly level it. Never set it on an irregular floor to avoid
tipping over the machine, leading to personal damage or property loss..
SafetyPrecautions
Ensure that the machine is properly connected to an electrical ground.
The power cord should be connected in conformity with IEC 60245 regulations and in
compliance with local electrical code requirements. The phase line should be connected to live wire with
mark L. The neutral line shall be connected to zero line with mark N, and the protection conductor shall
be connected to protective earth with mark PE.
If an abnormal situation occurs and you need to urgently stop the machine in process press the
emergency stop switch!
This machine is equipped with a heating and drying system. When operating the heating and
drying system do not place your hands or any other body part into the heating area. The heat generated
can scald and burn the skin. Use caution when operating the heating and drying system of the machine.
When operating and using the machine be careful not to block either of the three fans on top of
the heater panel. This can damage the heating unit and potentially damage the heater box.

StarLam1600RUserManual
5
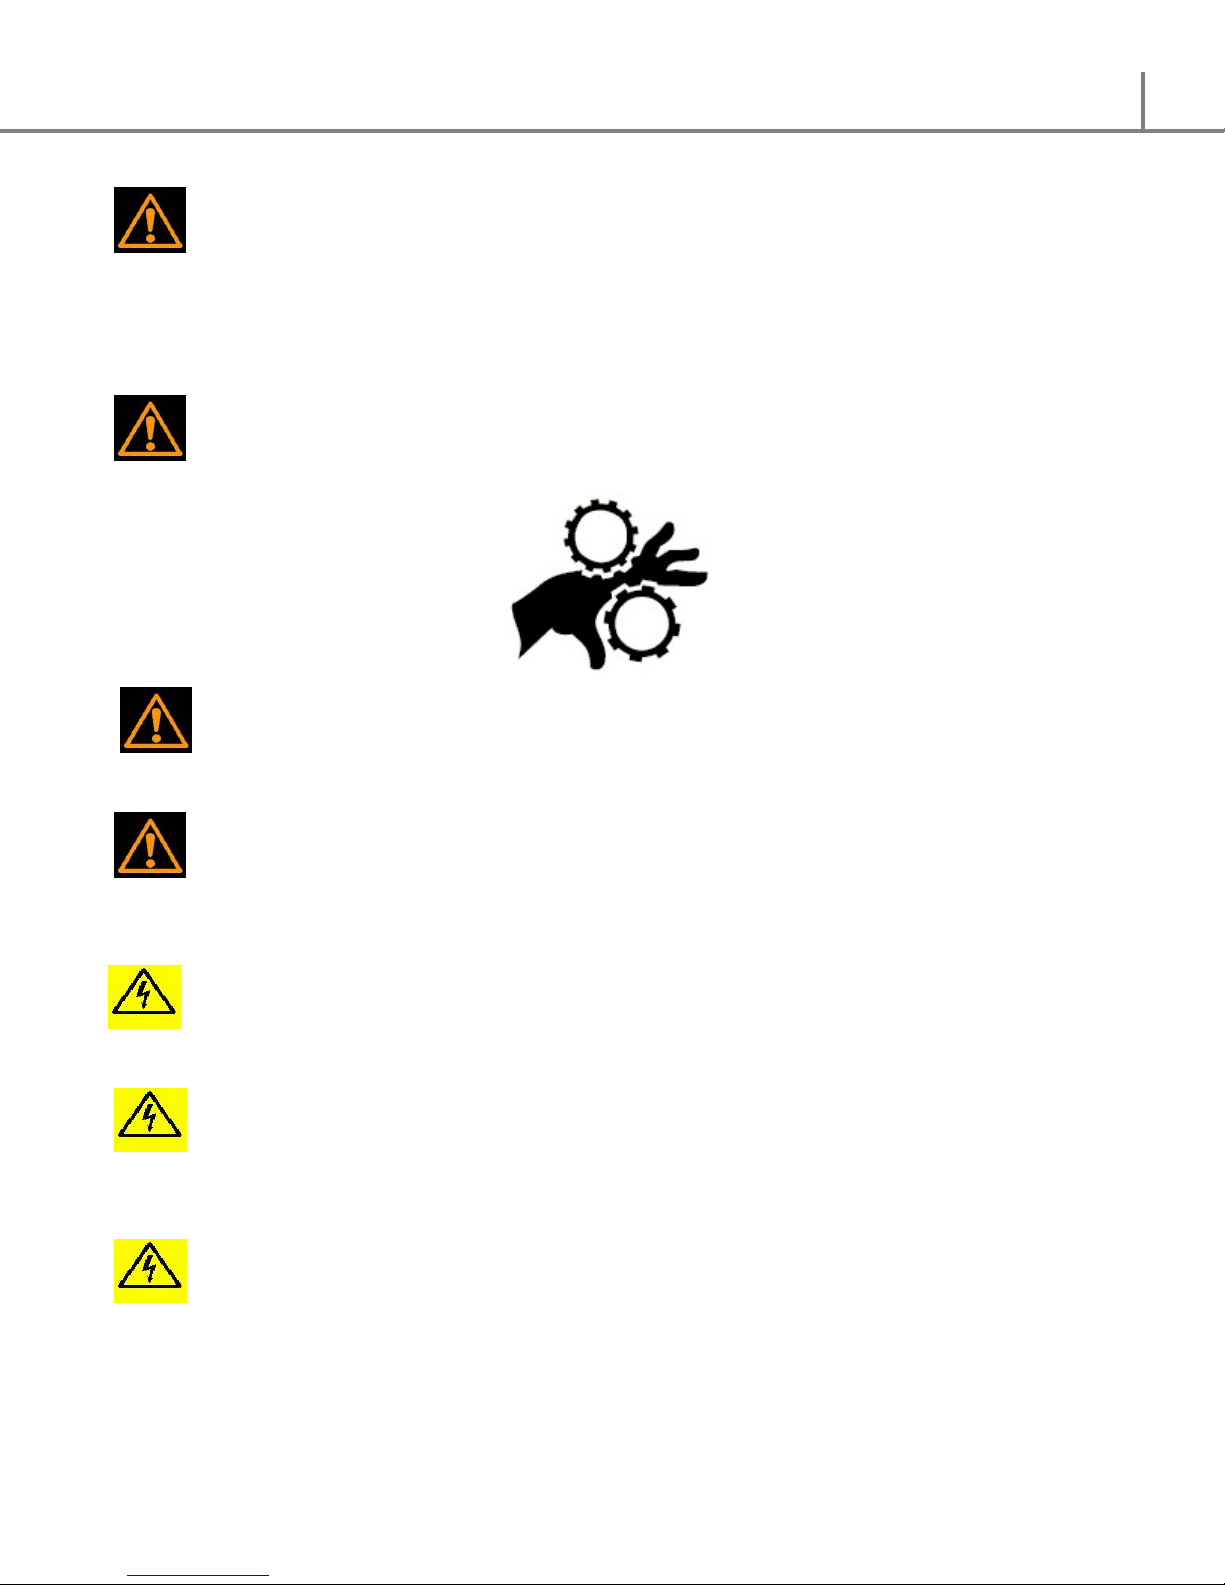
Be careful when wearing a necktie, necklace, wristband or long hair when operating the
machine. Care should be taking to bind loose clothing, secure jewelry and manage hair so as not to get
rolled up and bound in the machine. Serious injuries can occur if proper precautions are not taken. Do
not insert any material that is not intended for use with the machine. This can lead to unnecessary
damage of the equipment.
Raise the heating box lightly when lifting the heating box. Do not place hands onto the guide
roll, racks, or side of machine to avoid hand injury.
The left and right box doors can be removed after opening. If the doors need opening take care
to lift and remove them to avoid dropping them.
Use only water based liquid laminate. Using certain solvent based flammable liquids may
increase the chance of a fire or explosion. Please use caution to select and use a liquid laminate
compatible with this equipment.
The machines power source shall be connected to a sufficient proper safety breaker with
nominal current rating. Breaker operating current shall be no less than 40 Amps.
If the laminator needs service, only authorized personnel should open the electrical boxes. A
qualified professional or the manufacturer shall be asked to take responsibility for the maintenance and
repair.
Switch off the main power supply when performing maintenance to the equipment. When it is
necessary to open the electrical apparatus box the main power supply to the machine should be shut off.
This includes the main power supply line. Maintenance to the machine while in a live electrical working
environment should not be allowed. Do not touch the circuit controlling part in the electrical control
box.

StarLam1600RUserManual
6
Only authorized personnel should open the machine’s electric control box. This electric control
box is equipped with a key lock and key. A designated person in charge should keep the key.
Switch off the power to the external power line when not using the machine for long periods of
time.

StarLam1600RUserManual
7
MachineDiagram
1. Left Side Main Frame Box 8. Positioning Axles for 14. Front Guide Roll 21. Connector For Cleaning
Hose.
2. Heater Box Heating Box. 15. Laminate Drain Trough 24. Door Hinge
3. Liquid Reservoir Bottle Support 9. Emergency Stop Switch 16. Feed Roller Bar 25. Cooling Fan Bank 1
4. Liquid Reservoir Bottle 10. Operating Switch Panel 17. Roll Clutch Assembly 26. Forward Reverse Que
5. Fan Shield 11. Upper Protection Plate 18. Cleaning Trough 27. Power Supply Switch
6. Liquid Nozzle Fixture 12. Cross Girder 19. Caster
28. Hi-Amp Switch
29. Power Cord
30. Take up Roller Bar
31. Cooling Fan Bank 2
7. Right Side Main Frame Box 13. Liquid Metering Rod 20. Leveling Foot

StarLam1600RUserManual
8
1. Power Light ( White ) 7. Fan Switch
2. Working Indicator Light ( Green) 8. Temperature Adjusting Knob
3. Fault Indicator Light (Red) 9. Temperature Control Knob
4. Temperature Display Screen 10. Cleaning Pump Switch
5. Speed Adjustment Knob 11. Cleaning Pump Indicator Light
6. Motor Switch

StarLam1600RUserManual
9
TechnicalSpecifications
Maximum Laminating width 1600mm (63inches)
Maximum laminating length 300m (984 feet)
Temperature adjusting range 80-140˚C (176-284˚F)
Speed adjusting range 300-1000mm/min
(11.82inches-3.28 feet/per per minute)
Input power 240 VAC rated / 208 VAC Minimum
Nominal input power 9600W @ 240VAC / 7200W @ 208 VAC
Nominal input current 40A @ 240 VAC / 36.4A @ VAC
Rated Input Frequency 60Hz
Preheating time 5 minutes
Altitude <1000m (<3280.8 Feet)
Ambient operating temperatures 15˚C (59˚F )- 40˚C (104˚F)
Ambient operating humidity 30% - 70%
Protection type equipment Class I
Protection grade of control equipment IP5X
Contour dimension (length x width x height) 2030 x 706 x 1250mm (6.6ft. x 2.3ft. x 4.1ft.)
Net weight SL 1600R machine 256Kg (784.8 Lbs)
Weight in transport SL 1600R machine 440Kg (970 Lbs)
▲Noise of machine is rated at < 60db
Type of fuse: R015 (Φ10.3 x 38)
Fuse for heating box 32A x 2
Fuse for air drying fans 4A
Fuse for machine electric 2A
Fuse for transformer 1A
Fuse for heating box’s fan 1A

StarLam1600RUserManual
10
PrecautionsBeforeOperating
■Please read the instruction manual carefully before operating this machine.
■Be sure that the power supply system is in compliance with the requirements of this machine
before operating. Failure to do so may cause damage from abnormal heat or electrical circuit
failure.
■The width of the area to be coated shall not be more than the maximum laminating width.
■Make sure the liquid reservoir bottle is installed in the correct position and the liquid
dispensing nozzle is in the closed position.
Make sure that the protective earth wire is reliably connected to the machine and to
protective earth ground.
Prepa
r
ationBeforeOperation
•Load liquid laminate into the liquid reservoir bottle and then screw on the reservoir cover.
•Place the liquid reservoir bottle onto the support for the bottle. Use the liquid piping to
reliably connect the liquid reservoir bottle to the liquid dispensing nozzle.
•Put the rolled substrate to be coated onto the appropriate paper cylinder core.

StarLam1600RUserManual
11
OperationInstructions
Roll to Roll Lamination Instructions:
1. Core Holding Rod
2. Webbing / Rolled Media
3. Core
4. Core support Mandrel
5. Clutch discs
6. Lock Collar Tightening Bolts
7. Lock Collar
1. Load the media on the laminator.
a. Rotate the jacket of the core roller that is on the same side of the
machine as the main control console so that the core roller can be
slightly lifted and rotated outward and away from the machine. It may be
necessary to rotate the shaft collar lock into the unlocked position first.

StarLam1600RUserManual
12
b. Slide the printed roll of substrate to be coated onto the core holding rod.
Pay close attention to make sure the face of the material to be coated
is on the outside face of the roll to be coated. The open flap should be
on the outside and facing upwards. (Please see Figure 8)
2. Repeat step 1 to load an empty take up core on the front of the machine. Rotate
the core slightly once in place to lock it into position.

StarLam1600RUserManual
13
3. Lift the heating box assembly and gently lean it against its mainstays located on
the two sides of the machine body boxes (as shown in figure 9).
Figure 9
4. Feed the media through the laminator according to Figure 11.
a. Leave a 1.8 meter long blank leader at the front of the printed material to
be coated and a 1.5 meter long blank at the end of the printed roll media.
This will ensure consistent coating of the printed area.
b. Straighten up the material to be coated (webbing) and stretch it tightly.
c. Use adhesive tape to stick the leading edge of the media to the empty
paper core on the opposite side of the machine from the main control
console.

StarLam1600RUserManual
14
Figure 11
▲To ensure even film thickness and proper coating please stretch the material tightly and
evenly.
5. The substrate must be spooled onto strait and without variance from side to side.
6. Switch the main power supply to the on position. Next, switch the machine power
to the on position so that the power light illuminates. The fan in the heating box
should also begin rotation.
7. Switch the power for the electric motor on so that the roll of printed media moves
forward slightly. Continue this movement until the webbing is stretched evenly
and tightly. Once this is achieved immediately stop the rotation of the machine.
▲When the front end of the webbing moves forward the printed portion does not move pass
the metering rod to avoid incompletion of the lamination run.
8. Make sure the heating box is in the raised position. Adjust the heater setting knob
on the main control console to the desired temperature position. Switch on the
heating power switch. The machine will begin preheating. At this moment it is
necessary to wait a few minutes for the heater to preheat.
9. Adjust the fluid control valves on the liquid reservoir bottle and the nozzle end so
that liquid is injected onto the webbing (material to be coated). The nozzle should
be adjusted to be in the center of the area to be coated.

StarLam1600RUserManual
15
10. When the heater box has reached the preset working conditions the working ready
light will illuminate indicating that lamination process may begin.
11. Gently lower the heating box down and onto the heater door stop guides.
12. Switch on the machine cooling fans. Adjust the motor drive speed to the
appropriate position. This starts the lamination process.
Upon laminating long rolled material:
•According to the requirements of the lamination job be sure to pay close attention to
when more liquid laminate should be added to the liquid laminate reservoir.
•The external diameter of the drive roller will continually increase along with the
process of liquid laminating. The linear speed may also increase as the diameter of roll
increases. Keep in mind to adjust the settings properly to decrease linear speed as
required thus insuring optimal lamination effect.
13. If an urgent situation arises and it is needed to stop the machine immediately
simply press down on the available emergency stop button located at the top and
on either side of the machine.
14. Once the liquid lamination process is finished switch off the motor speed switch,
the heater power switch and cooling fan switch.
▲Do not switch off the main power supply switch if it is within 5 minutes after ending the
liquid lamination process. This can damage the heater if it is not allowed to cool properly
after being used.
15. Rotate the locking sleeve/jacket to the take up core roller (drive roller) so that the
core holder rod can be lifted up and out of the machine gently. The coated and
rolled material on the paper core can be removed at this point.
16. Immediately clean the liquid metering rod, liquid trough to avoid drying and
hardening of the liquid laminate.
a. Loosen the metering rod retaining bolts on both side of the liquid
metering rod, and take it out and clean it immediately. For precise and
perfect cleaning use a pressure washer to remove built up coating and
any contaminates.
b. Remove fixed bolts on both sides of the liquid trough (this bolt is of a
special purpose during machine transportation and is not required to use
again once removed.

StarLam1600RUserManual
16
The StarLam 1600R liquid laminator uses a peristaltic pump. A peristaltic pump
is a type of positive displacement pump used for pumping a variety of fluids. The fluid is
contained within a flexible tube fitted inside a circular pump casing (though linear
peristaltic pumps have been made). A rotor with a number of "rollers", "shoes" or
"wipers" attached to the external circumference compresses the flexible tube. As the rotor
turns, the part of tube under compression closes (or "occludes") thus forcing the fluid to
be pumped to move through the tube. Additionally, as the tube opens to its natural state
after the passing of the cam ("restitution" or "resilience") fluid flow is induced to the
pump.
The StarLam incorporates a bi-directional type peristaltic pump with a variable
speed capability allowing extreme versatility with different liquids and also aids in
cleaning out the laminate fluid lines. The pumping circuit allows for the fluid to remain in
the fluid lines and never contact and impeller or "freezable" pump part.
The Laminate pump is in the inside of the machine opposite the main control
housing.

StarLam1600RUserManual
17
The StarLam peristaltic pump is composed of 6 main parts. The parts are as follows:
1 Pump housing
2 Pump tube
3 Plastic washer
4 Pump rollers
5 Pump cover
6 Thumb Screws
The Peristaltic pump roller assembly is as follows:
To remove the pump tube for replacement.

StarLam1600RUserManual
18

StarLam1600RUserManual
19
1 Pump Switch Forward
2 Pump Switch Reverse
3 Pump Switch Off
4 Pump Speed Control
5 Cleaning Pump On/Off Switch
6 Cleaning Pump Power Indicator
Lamp
Table of contents