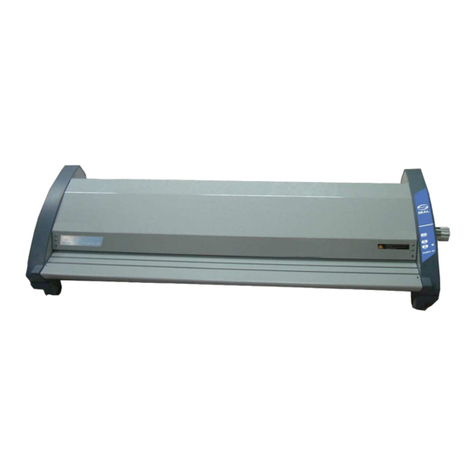
Titanium OfficeProfessional Plus A3 User manual


2
Manuale d’uso pag 03
Operating Instructions pag 12
Mode d’emploi pag 22
Manual de instrucciones pag 31
Sicherheitsanweisungen pag 40
Veiligheidsinstructies pag 49

59
IT-CH
3
Plastificatrice OfficeProfessional Plus A3

4
Importanti indicazioni di sicurezza.............................................................05
Indicazioni importanti ....................................................................................06
Esclusione di responsabilità ........................................................................ 06
Impiego conforme agli usi previsti ............................................................06
Caratteristiche di prestazione ................................................................... 06
Elementi di comando ..................................................................................... 07
Plasticazione a freddo.................................................................................. 08
Plasticazione a caldo ................................................................................... 09
Rimozione di inceppamenti da pouches ............................................... 10
Cura e pulizia..................................................................................................... 10
Risoluzioni problemi/guasti ...................................................................... ..11
Nota sullo smaltimento ................................................................................ 11

1 Importanti indicazioni di sicurezza
5
Il risultato adabile della plasticatrice richiede l'osservanza di quanto segue:
- Leggere attentamente le presenti istruzioni ed osservarle scrupolosamente durante l'utilizzo
dell’apparecchio.
- Conservare le istruzioni per l’uso anche come riferimento futuro.
- Usare l'apparecchio solo in ambienti d'ucio asciutti, chiusi e ben ventilati.
- Poggiare l'apparecchio su una supercie piana ed utilizzarlo solo se in posizione orizzontale.
- Non utilizzare l'apparecchio in prossimità di superci surriscaldate o in ambiente umido; proteggere la
plasticatrice dai raggi solari diretti e da ambienti fortemente polverosi.
- Assicurarsi che l'interruttore di rete sia in posizione“OFF“ prima di collegare la plasticatrice alla rete
elettrica.
- Per motivi di sicurezza è necessario assicurare il libero accesso di presa elettrica e porta di alimentazione
dell’apparecchio in modo da poter scollegare rapidamente, in caso d'emergenza, l'alimentazione elettrica
- Spegnere immediatamente l'apparecchio nel caso si avvertisse un odore intenso proveniente
dall'apparecchio.
- Spegnere l'apparecchio se non lo si utilizza.
- In caso di inutilizzo dell'apparecchio, staccare la spina di alimentazione.
- Evitare di danneggiare la spina di alimentazione o il cavo di rete. Non attorcigliare, piegare o poggiare
mai il cavo di rete su superci calde. In caso di spina o cavo di alimentazione danneggiati, non mettere
in funzione l'apparecchio.
- Non aerrare mai la spina di alimentazione con mani umide.
- Tenere lontano dall’apparecchio lembi di abbigliamento, cravatte, gioielli, capelli lunghi o altri oggetti
liberi. Pericolo di lesioni!
- Tenere lontano i bambini dall'area di lavoro dell'apparecchio.
- Tenere lontano gli animali dall’apparecchio.
- Utilizzare solo pellicole di plasticazione esplicitamente previste per l'apparecchio (vedi Caratteristiche
di prestazione). La scelta di pellicole di plasticazione troppo grandi può causare intasamenti da pellicola.
- Evitare durante la plasticazione a caldo l'uso di pellicole di plasticazione previste invece per la
plasticazione a freddo. In caso contrario l'apparecchio, la pellicola di plasticazione ed il documento
saranno danneggiati.
- Non tagliare le pellicole di plasticazione nel tentativo di adattarne le dimensioni. Gli spigoli di taglio
risultanti possono infatti causare un’intasamento da pellicola.
- Non utilizzare pellicole di plasticazione sporche; se sporche occorre, prima dell'uso, pulirle con un panno
morbido e leggermente umido.
- Non è consentita la plasticazione di oggetti metallici.
- Evitare di plasticare materiali sensibili al calore come ad es. carta termica per fax.
- In caso di plasticazione di documenti umidi i risultati sarannoinsoddisfacenti.
- La pausa da osservare tra le singole operazioni di plasticazione deveessere di minimo 15 secondi.
- Dopo l’utilizzo lasciare rareddare l'apparecchio per almeno 30 minuti.
- Trasportare l’apparecchio solo se lasciato precedentemente rareddare.
- Evitare il contatto con parti dell'apparecchio surriscaldate. Pericolo diustioni! Prestare attenzione altresì
durante il maneggio della pellicola plasticata in quanto potrebbe risultare molto calda.

2 Indicazioni importanti
6
Tessere e documenti possono perdere la loro validità in caso di plasticazione, visto che non è
spesso più possibile vericarne la rispettiva autenticità.
- In caso di cessione della plasticatrice ad altre persone, accludere sempre il presente manuale di istruzioni
per l'uso.
- In caso di plasticazione di materiali molto morbidi (come ad es. tovagliolidi carta) o di piccolo formato, al
ne di escludere possibili intasamenti, si consiglia di introdurre insieme al documento da plasticare un
foglio di carta piegato. La parte piegata va in tal caso introdotta per prima nell'apertura della plasticatrice.
3 Esclusione di responsabilità
Non si assume nessuna garanzia per l'esattezza delle informazioni che fanno riferimento alle caratteristiche
tecniche ed alla relativa documentazione. Il prodotto descritto in questa documentazione come
anche gli accessori eventualmente necessari, sono soggetti a continue migliorie e sviluppi. Pertanto ci
riserviamo il diritto di modicare in qualsiasi momento e senza preavviso alcuno componenti, accessori,
speciche tecniche e la presente documentazione.
4 Impiego conforme agli usi previsti
Con questa plasticatrice è possibile plasticare a caldo o a freddo immagini, schede, documenti, carta e simili.
Qualsiasi altro impiego è da ritenersi non conforme alle disposizioni. Non sono ammesse modiche o
variazioni arbitrarie.
5 Caratteristiche di prestazione
Protezione e valorizzazione dei vostri documenti.
Plasticazione di fotograe, documenti, graci ecc. no al formato A3 .
• Una spia LED visualizza lo stato di esercizio
• Spegnimento automatico in caso di surriscaldamento
• Ottimo sistema di riscaldamento contro la formazione di strie e bolle
• Tempo di riscaldamento di soli ca. 2 - 5 minuti
• Tempo di raffreddamento a temperatura ambiente ca. 30 minuti
• Spessore della pellicola: min. 80mic, max. 17mic
• Sistema di plastificazione: Tecnica Hot Roller, 4 rulli a caldo
• Max. larghezza di plastificazione: 330 mm
• Max. spessore di plastificazione: 0,6 mm
• Velocità di plastificazione: 430 mm/min
Tensione di alimentazione: 220-240 Volt / 50 Hz
Assorbimento: max. 800 W, 3,48 A
Dimensioni (L x P x H): 476 x 190 x 123 mm
Peso: ca. 4,2 kg

6 Elementi di comando
7
1 Fessura di uscita
2 Interruttore di rete
3 Pannello di comando
4 Fessura di inserimento
5 Spia LED
1
2
3
4
5
Pannello di comando
6 Spia per plasticazione a freddo/a caldo e per spessore della pellicola selezionata
7 Tasto di retromarcia
8 Tasto per plasticazione a freddo/a caldo e per impostazione dello spessore della pellicola
9 Tasto ON/OFF

7 Plastificazione a freddo
8
1. Collegare il cavo di alimentazione ad una presa di corrente standard facilmente accessibile.
Attenzione: Vericare che il valore della tensione riportato sull’apparecchio coincida con quello della rete
elettrica (220-240 V / 50 Hz).
2. Inserire l’interruttore di rete presente sul retro dell’apparecchio.
3. Per accendere l’apparecchio, sorare il tasto ON/OFF sul pannello di comando. Il motorino dei rulli di
trasporto si mette in moto. 4. Premere se occorre ripetutamente il tasto per plasticazione a freddo/a caldo
e impostare lo spessore della pellicola nché sul pannello di comando non risulta accessa la spia COLD. La
spia LED si accende in blu in modo permanente non appena l’apparecchio risulta essere pronto all’esercizio.
Attenzione: Avendo impiegato la plasticatrice poco prima per compiere la plasticazione a caldo, si renderà
necessario fare rareddare la plasticatrice. Il tempo di rareddamento dura no a 30 minuti. Durante la fase
di rareddamento la spia LED lampeggia in rosso.
5. Inserire il documento che si intende lavorare nella pellicola di plasticazione in modo da lasciare su tutti i
lati una distanza di circa 3 - 5 mm dal bordo della pellicola.
6. Introdurre quindi la pellicola di plasticazione insieme al foglio da lavorare nella fessura di inserimento
della plasticatrice. Inserire per primo il lato chiuso della pellicola. La procedura di plasticazione si
svolge automaticamente.
Nota: Per evitare che la pellicola di plasticazione si pieghi, non inserire mai per primo il lato aperto della
pellicola di plastica-zione nella fessura di inserimento. Nota: Non utilizzando l’apparecchio per oltre 30
minuti, questo si spegne automaticamente. Per inserire di nuovo l’apparecchio, sorare il tasto ON/OFF sul
pannello di comando.
7. Una volta conclusa la procedura di plasticazione, per spegnere l’apparecchio sorare il tasto ON/OFF sul
pannello di comando. Disinserire l’interruttore di rete presente sul retro dell’apparecchio. Estrarre quindi
anche la spina di alimentazione, in particolare non utilizzando l’apparecchio per un periodo prolungato.

9
9 Plastificazione a caldo
1. Collegare il cavo di alimentazione ad una presa di corrente standard facilmente accessibile.
Attenzione: vericare che il valore della tensione riportato sull’apparecchio coincida con quello della rete
elettrica (220-240 V / 50 Hz).
2. Inserire l’interruttore di rete presente sul retro dell’apparecchio.
3. Per accendere l’apparecchio, sorare il tasto ON/OFF sul pannello di comando. Il motorino dei rulli di trasporto
si metterà in moto.
4. Selezionare lo spessore della pouch: se occorre, premere ripetutamente il tasto per plasticazione
a freddo/a caldo e impostare lo spessore della pouch nché sul pannello di comando non
risulterà accessa la spia COLD. La spia LED lampeggia in rosso durante la fase di riscaldamento (ca. 2 - 5 minuti),
mentre rimane accesa in modo permanente in blu non appena l’apparecchio raggiunge la giusta
temperatura e risulta quindi essere pronto all’uso.
Attenzione: qualora si sia plasticato un documento utilizzando pouch di maggiorn spessore a quella che si
intende utilizzare sarà necessario fare rareddare la plasticatrice. Il tempo di rareddamento dura no
a 30 minuti. Durante la fase di rareddamento la spia LED lampeggia in rosso.
5. Inserire il documento che si intende lavorare nella pouch in modo da lasciare su tutti i lati una distanza
di circa 3 - 5 mm dal bordo della pellicola.
Attenzione: utilizzare esclusivamente pellicole di plasticazione a caldo!
Attenzione: osservare lo spessore della pellicola massimo consentito (vedi Caratteristiche di prestazione)!
6. Introdurre quindi la pouch insieme al foglio da lavorare nella fessura di inserimento della plasticatrice.
Inserire per primo il lato chiuso della pouch. La pouch è introdotta automaticamente e saldata.
Nota: per evitare che la pouch si pieghi, non inserire mai per primo il lato aperto della pouch nella fessura
di inserimento. Attenzione: Ll pellicola in uscita dalla plasticatrice potrebbe risultare molto calda e molle.
Maneggiare quindi con cautela il prodotto plasticato.
Nota: per spianare il prodotto plasticato è possibile pressarlo con un libro o con un altro oggetto piano e
pesante.
Nota: in caso di non utilizzo della plasticatrice per oltre 30 minuti, questa si spegnerà automaticamente.
Per utilizzare nuovamente l’apparecchio, sorare il tasto ON/OFF sul pannello di comando.
7. Una volta conclusa la procedura di plasticazione, per spegnere l’apparecchio sorare il tasto ON/OFF sul
pannello di comando. Spegnere l’interruttore di rete presente sul retro dell’apparecchio. Estrarre la spina di
alimentazione, se si pensa di non utilizzare la plasticatrice per un periodo di tempo prolungato.

10
10 Rimozione di inceppamenti da pouches
La plasticatrice è dotata di funzione di retromarcia per consentire la rapida rimozione di eventuali
documenti inceppati.
1. Con pellicola bloccata, azionare il tasto di retromarcia
2. La pellicola incastrata si stacca fuoriuscendo sul davanti dalla fessura di inserimento.
3. Fatto questo, sarà probabilmente necessario pulire l'apparecchio più volte seguendo quanto riportato al
paragrafo “Cura e pulizia“.
4. Nel caso di frequenti inceppamenti o nel caso in cui non si riesca a rimuovere la pouch inceppata , si prega
di rivolgersi al rivenditore presso cui si è stata acquistata la plasticatrice.
11 Cura e pulizia
Incrostazioni e residui di adesivo sui rulli di trasporto possono inuire sul risultato di plasticazione.
Eettuare quindi periodicamente una pulizia dei rulli di trasporto dopo l'utilizzo.
A tal scopo, introdurre un foglio di carta ripiegato nella fessura di inserimento. I residui di adesivo vengono
asportati dal foglio di carta in uscita. Ripetere più volte tale procedura. Staccare sempre la spina di
alimentazione prima di inumidire l'apparecchio per pulirlo esternamente. Pulire se necessario l'involucro con
un panno inumidito in sapone neutro ed acqua pulita. Non utilizzare solventi o detergenti corrosivi.

11
12 Eliminazione dei guasti
13 Note sullo smaltimento
12 Risoluzione problemi/guasti
Questo simbolo (il bidone sbarrato) indica che l'utilizzatore nale è tenuto a smaltire il presente
prodotto alla ne della rispettiva durata utile attraverso un sistema di recupero o di raccolta
dierenziata. Il simbolo è valido soltanto per gli stati del SEE (SEE = Spazio Economico Europeo che
comprende gli stati membro dell'Unione Europea oltre agli stati Islanda, Liechtenstein e Norvegia).

59
GB-IE-CY
12
Laminator OfficeProfessional Plus A3

13
Important Safety Information ..................................................................14
Important Information................................................................................ 15
Exemption From Liability ...........................................................................15
Intended Use....................................................................................................15
Features ............................................................................................................15
Operating Elements .....................................................................................16
Cold Laminating.............................................................................................17
Hot Laminating...............................................................................................18
Clearing Foil Jams .........................................................................................19
Cleaning and Servicing................................................................................19
Troubleshooting ............................................................................................20
Disposal ............................................................................................................20

1 Important Safety Information
14
Please observe the following information to ensure reliable operation of the laminator:
- Read this manual thoroughly and observe the instructions and information in it when operating the device.
- Keep the operating manual in a safe place for future reference.
-The device may only be operated indoors in dry rooms which are well ventilated.
- The device must be set down on a level surface and may only be used when horizontal.
- Do not use the device in the vicinity of hot surfaces or in damp environments and protect it from direct
sunlight and dusty conditions.
- Ensure that the power switch is in the "OFF" position before connecting the laminator to the mains power
supply.
- The mains power socket and power connection on the device must be freely accessible for reasons of safety,
namely to enable the power supply to be disconnected quickly in an emergency!
- Switch the device o immediately if a strong smell comes from it.
- Switch the device o when it is not being used.
- Disconnect the power plug when the device is not in use.
- Prevent damage to the power plug and power cable. Never twist or kink the power cable nor set it down
on hot surfaces. Do not operate the device if the power cable or power plug is damaged.
- Never take hold of the power plug with damp hands.
- Keep loose clothing, ties, jewellery, long hair and other loose objects away from the device. Risk of injury!
- Children must not be allowed in the vicinity of the device when it is ready to operate.
- Ensure no pets can get near the device.
- Always use the lamination foil pockets recommended for the device (refer to "Features"). Using lamination
foil which is too large could lead to the unit jamming.
- Do not use foil pockets intended for cold lamination for hot lamination. This could damage the device, foil
pockets and document.
- Never cut lamination foil to size. The resulting cut edges could cause the lamination foil to jam.
- Never use foil pockets which are soiled. Clean them beforehand, if necessary, using a soft, slightly
damp cloth.
- Metallic objects cannot be laminated.
- Do not laminate heat sensitive materials, such as thermal paper, in thedevice.
- Lamination of moist documents produces poor results.
- Maintain a pause of at least 15 seconds between each laminationprocess.
- Allow the device to cool down for at least 30 minutes after use.
- Only transport the device when it is in a cool state.
- Never touch hot parts of the device. Risk of burns! Handle the foilpockets just laminated with due care
and attention. They are very hot!

2 Important Information
15
-ID cards and documents could loses their validity if they are laminatedbecause the ocial status of the
document can no longer be validated.
-If you transfer the laminator to others, always hand over this operatingmanual with it.
-If very soft material (such as serviettes) or very small size material is tobe laminated, we recommend i
nserting a folded sheet of paper in the foilpocket too, to prevent the possibility of the document being
laminatedfrom jamming. The folded edge of the sheet must be inserted into thelaminator rst.
3 Exemption From Liability
We cannot guarantee that the information which relates to the technical properties of the product or to the
product itself contained in this document is correct. The product and its accessories described in this
document are sub-ject to constant improvement and further development. For this reason, we reserve t
he right to modify components, accessories, technical specications and related documentation of the p
roduct described herein at any time with-out notice.
4 Intended use
This laminator can be used for the hot or cold lamination of photos, card, documents, paper etc. Any other
use is considered unintended use. Unau-thorised modications or reconstructions are not permitted.
5 Features
Protection and renement of your documents. Lamination of photos, documents, graphics etc. up to the
sizes A3.
The device operates using 4 heating rollers (A 2048, A 3048) or 2 heating rollers has a fast warm-up phase and
laminates without carriers.
•An LED strip indicates the operating status
•Automatic switch-off in the event of overheating
•High quality heating system prevents smudging and blistering
•Warm-up phase of approx. 2 minutes (8μm setting), max. 5 minutes(other settings)
•Cool down phase to room temperature, approx. 30 minutes
•Foil thickness using: min. 80 μm, max. 175 μm
•Foil thickness using: min. 80 μm, max. 250 μm
Laminating system Hot roller technology, 4 heating rollers
Maximum laminating width: 330 mm
Maximum lamination thickness: 0.6 mm
Laminating speed: 430 mm/min
Power supply: 220-240 Volt / 50 Hz
Rated input power: Max. 800 W, 3.48 A
Dimensions (L x W x H): 476 x 190 x 123 mm
Weight: approx. 4.2 kg

6 Operating Elements
16
1 Laminator discharge
2 Power switch
3 Operating panel
4 Laminator infeed
5 LED strip
1
2
3
4
5
6 Indicators for cold/hot laminating and selected foil thickness
7 Reverse button
8 Button for selecting cold/hot laminating and foil thickness
9 On/O button

7 Cold Laminating
17
1. Connect the power cable to an easily accessible, standard electrical socket.
Attention: Check that the voltage specications of the machine correspond to that of your power supply
network (220 - 240 V / 50 Hz).
2. Switch on the power switch on the rear side of the device.
3. Press the On/O button on the operating panel to switch the device on. The drive motor for the transport
rollers starts up.
4. Press the button for selecting cold/hot laminating and foil thickness, several times if
necessary, until the COLD LED lights up in the operatingpanel. The LED strip lights up blue, continually, when
the device is ready for use. Attention: If you have just nished using the laminator for hot laminat-
ing, you must let the laminator cool down. The equipment takes about 30 minutes to cool down. The LED
strip ashes red during the cool down phase.
5. Insert the document to be laminated in the foil pocket so
that there is a margin of approx. 3-5 mm to the edge of the foil on all sides.
6. Insert the foil pocket containing
the document in the laminator's infeed slot. Insert the ready closed side of the foil in rst. The laminating pro-
cess occurs automatically.
Note: To prevent the foil pocket from creasing, never feed the open side of the laminating pocket rst in the
infeed slot of the laminator. Note: If the device remains unused for 30 minutes, it switches o automatically.
Press the On/O button on the operating panel to switch the device on again.
7. When you have nished your laminating tasks, press the On/O button on the operating panel to switch
the device o. Switch o the power switch on the rear side of the device. Also disconnect the power plug,
particularly when the device will remain out of operation for a longer period.

18
9 Hot laminating
1. Connect the power cable to an easily accessible, standard electrical socket.
Attention: Check that the voltage specications of the machine correspond to that of your power supply
network (220 - 240 V / 50 Hz).
2. Switch on the power switch on the rear side of the device.
3. Press the On/O button on the operating panel to switch the device on. The drive motor for the transport
rollers starts up.
4. Select the foil thickness: Press the button for selecting cold/hot laminating and foil thickness, several times
if necessary, until the LED beside the relevant foil thickness lights up in the operating panel. The LED strip
ashes red during the warm-up phase (approx.. 2 minutes (80 μm setting), approx. 5 minutes (other settings)).
The LED strip lights up blue continually when the correct temperature is reached and the device is ready for
use.
Attention: If you have laminated larger foil thicknesses at higher temperatures beforehand, you must let the l
aminator cool down. The cool down phase can take up to 30 minutes.
The LED strip ashes red during the cool down phase.
5. Insert the document to be laminated in the foil pocket so that there is a margin of approx. 3 - 5 mm to the
edge of the foil on all sides.
Attention: Only use hot laminating foils!
Attention: Observe the permissible foil thicknesses (refer to Features)!
6. Insert the foil pocket containing the document in the laminator's infeed slot. Insert the ready closed side
of the foil in rst. The foil pocket, with the document inside, is automatically drawn in and sealed.
Note: To prevent the foil pocket from creasing, never feed the open side of the laminating pocket rst in the
infeed slot of the laminator.
Attention: The foil is very hot and soft when ejected following lamination. Therefore, handle the laminated
product with extreme care.
Note: To atten the laminated product, place a book or similar heavy, at object, on it.
Note: If the device remains unused for 30 minutes, it switches o automatically. Press the On/O button on
the operating panel to switch the device on again.
7. When you have nished your laminating tasks, press the On/O button on the operating panel to switch
the device o. Switch o the power switch on the rear side of the device. Also disconnect the power plug,
particularly when the device will remain out of operation for a longer pe-riod.

19
10 Clearing Foil Jams
The laminator is provided with a reversing function in order to clear foil jams quickly.
1. If the foil jams, press the Reverse button.
2. The jammed foil is released and is fed out at the laminator infeed slot.
3. It will probably be necessary to then clean the unit several times as de-scribed in the Section
"Cleaning and Servicing".
4. If foil jams occur repeatedly or jammed foil cannot be removed from the laminator, please contact
the sales outlet where you purchased the de-vice (refer to Guarantee).
11 Cleaning and Servicing
Deposits and residual adhesive on the transport rollers can inuence the results of the laminating process.
Therefore, the transport rollers must be cleaned regularly after use:
To do this, insert a folded piece of paper in the infeed slot. Residual adhe-sive is removed and taken up by
the paper when ejected. Repeat the pro-cess several times.
Disconnect the power plug before starting to clean the unit with a damp cloth. If necessary, the housing
can be cleaned using a cloth moistened with clean water with a little mild soap applied. Never use any
solvents or aggres-sive cleaning agents.

20
12 Eliminazione dei guasti
13 Disposal
12 Troubleshooting
12 Eliminazione dei guasti
This symbol (crossed out waste bin) indicates that the product must be returned to an authorised r
ecycling centre or collection point when it has reached the end of its service life. This symbol only
applies in member states of the EEA (EEA = European Economic Area, which is comprised of the
member states of the EU plus Norway, Iceland and Liechtenstein).
Table of contents
Languages:
Other Titanium Laminator manuals
